

Table of Contents
The process can seem daunting for users who have encountered issues with the macOS Sonoma beta and wish to revert to macOS Ventura. However, with the proper steps and precautions, it is possible to uninstall the beta version and return to a stable operating system.
Here’s a detailed guide on how to uninstall macOS Sonoma and reinstall macOS Ventura:

Step 1: Backup Your Mac (If Possible)
Before proceeding with the uninstallation process, it is crucial to back up your Mac. This ensures that your important files and data are safe in case of any unforeseen issues during the process. If you haven’t backed up your Mac, consider sticking with macOS Sonoma for the time being to avoid potential data loss.
Step 2: Shut Down and Restart Your Mac
Start by shutting down your Mac completely. Once it is powered off, restart it by pressing and holding the power button.
Press the power button on Intel Macs and then hold down the Command-R keys simultaneously.
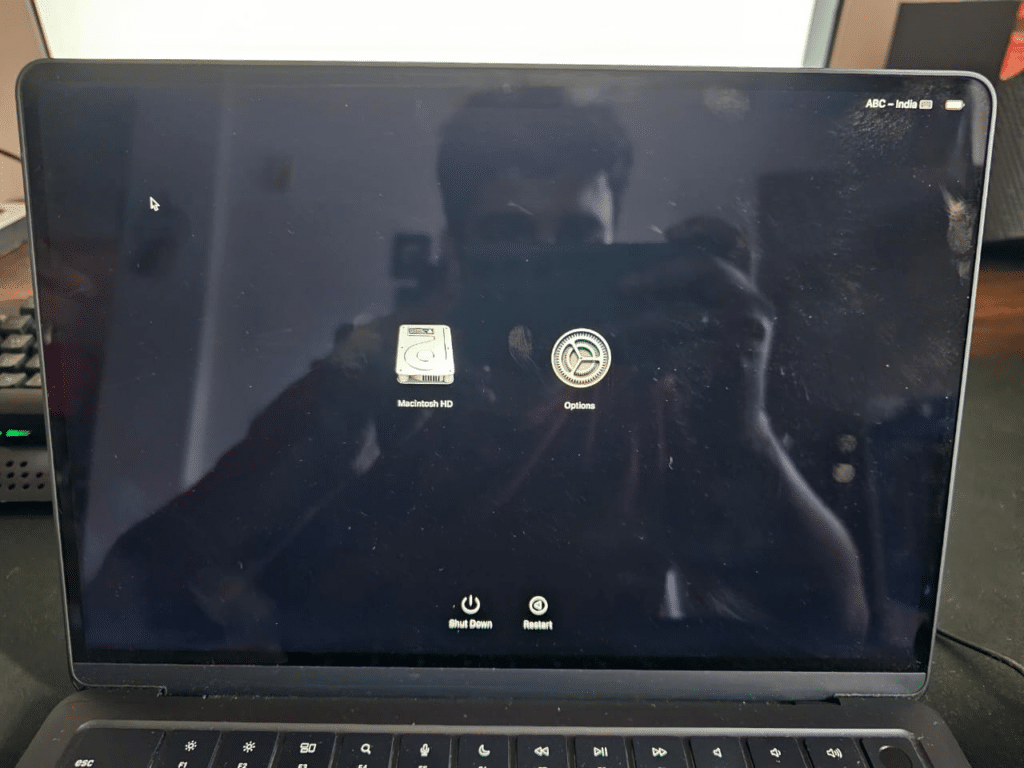
Step 3: Enter Recovery Mode
As your Mac restarts and a screen will appear. Select the “Options” menu and click “Continue” to enter recovery mode.
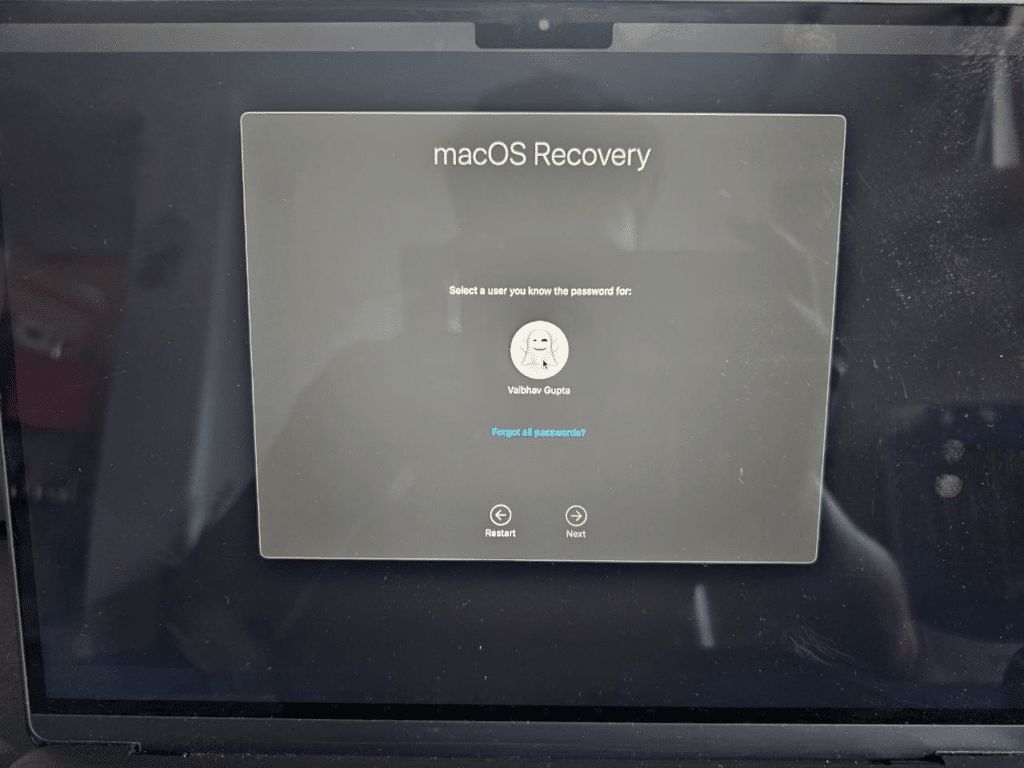
Step 4: Erase Your Mac
In recovery mode, you’ll be prompted to enter the password for your user account. After entering the password, choose the option to reinstall macOS when prompted. Instead of proceeding with the reinstallation, click “Disk Utility” and then “Continue.”
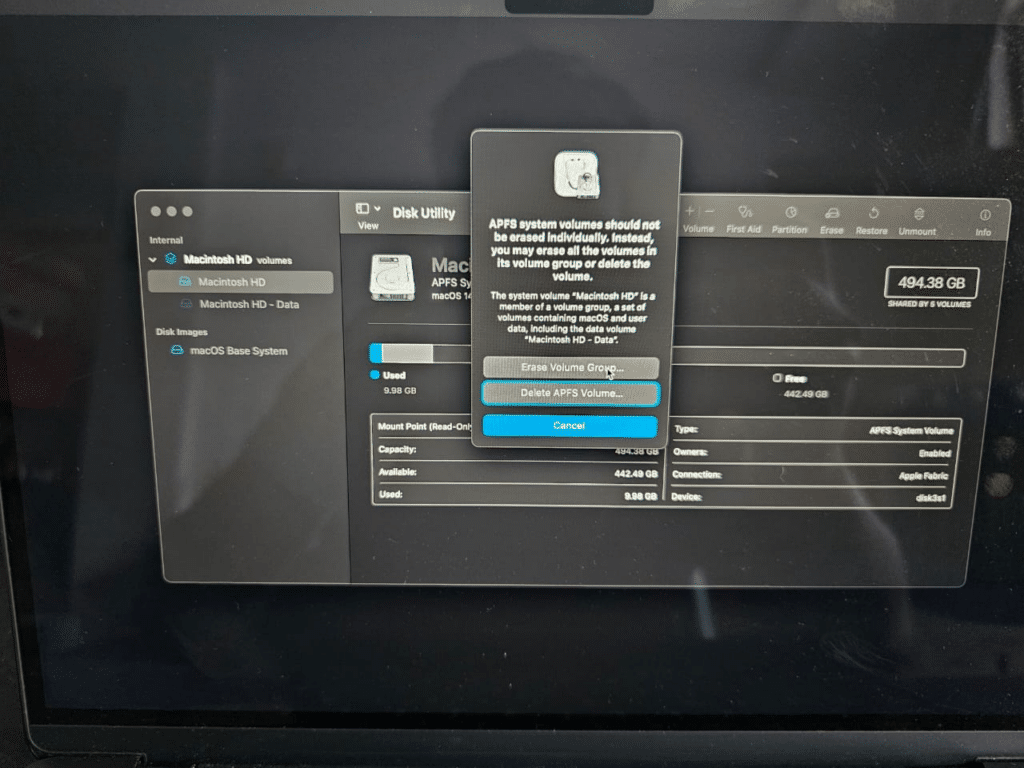
Within Disk Utility, select the topmost level of the displayed hard drive and click “Erase.” Provide a name for your Mac and click the newly appeared “Erase” button. Confirm your decision twice to proceed with erasing your Mac’s disk.
Step 5: Connect to a Wi-Fi Network
When prompted, select a Wi-Fi network that your Mac can connect to. This is necessary for downloading macOS Ventura during the reinstallation process.
Step 6: Reinstall macOS Ventura
After connecting to a Wi-Fi network, macOS Ventura will begin downloading. Be aware that this download is approximately 12 GB, so depending on your internet connection; it may take some time. The process could range from several minutes to a couple of hours.
Step 7: Exit Recovery Mode
Once macOS Ventura has finished downloading and installing, your Mac will be ready to exit recovery mode. Click “Exit to Recovery Mode” to proceed.
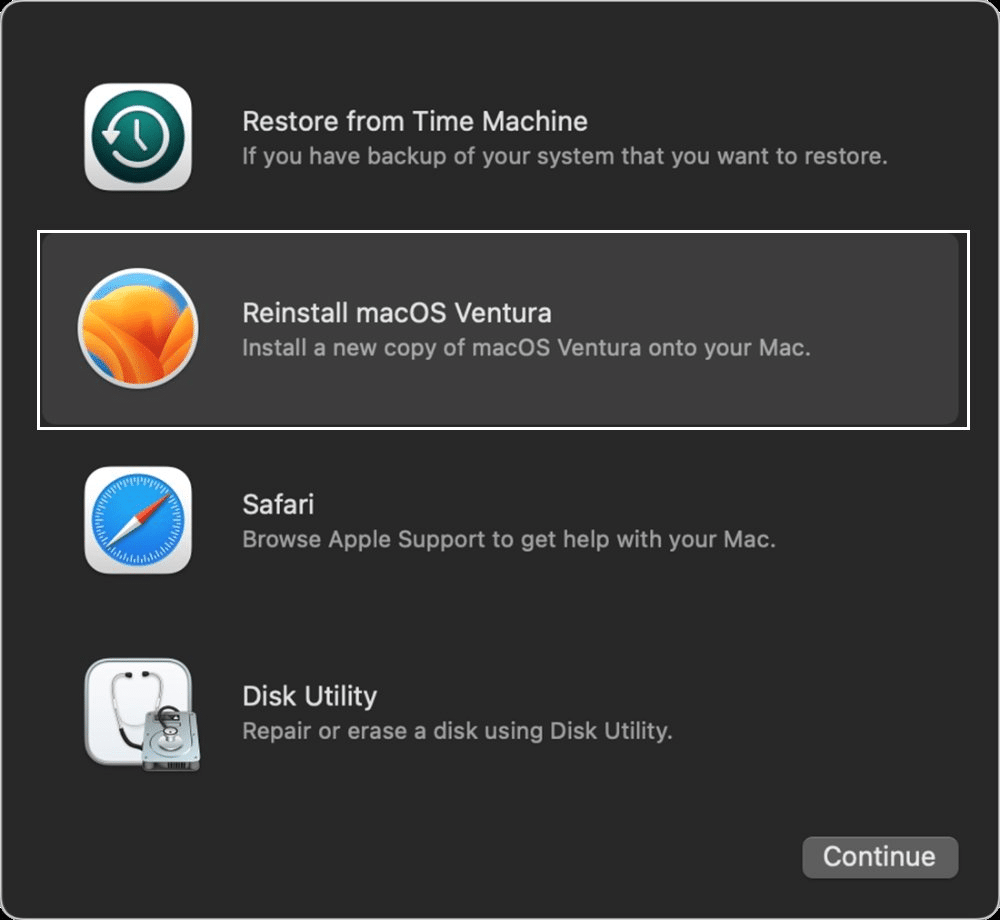
Step 8: Reinstall macOS Ventura
After exiting recovery mode, select “Reinstall macOS Ventura” from the options presented. Follow the on-screen instructions to complete the reinstallation process.
It’s important to note that reinstalling macOS Ventura will require time and potentially significant data usage. Therefore, ensure you have a stable internet connection and enough capacity.
Following these steps, uninstall macOS Sonoma beta and return to macOS Ventura. Remember to exercise caution and back up your important data to minimize potential data loss.


