Table of Contents
Are you searching for the best way to back up your Mac? Do you prefer to back up your Mac without an external hard drive and instead use a cloud service like iCloud or Dropbox? We offer several solutions to help you back up your Mac efficiently.
Backing up your Mac is a crucial task that we often overlook. A reliable backup can help prevent data loss and protect your files and documents in case of accidents.
In this article, we provide various methods to back up your Mac computer, including local backups and remote backups using cloud storage services.
In this guide, we will consider Apple tools such as iCloud or software similar to Time Machine.

How To Back Up A Mac Or MacBook
There are various ways to back up a Mac, but if you had to select one as the best, which would it be?
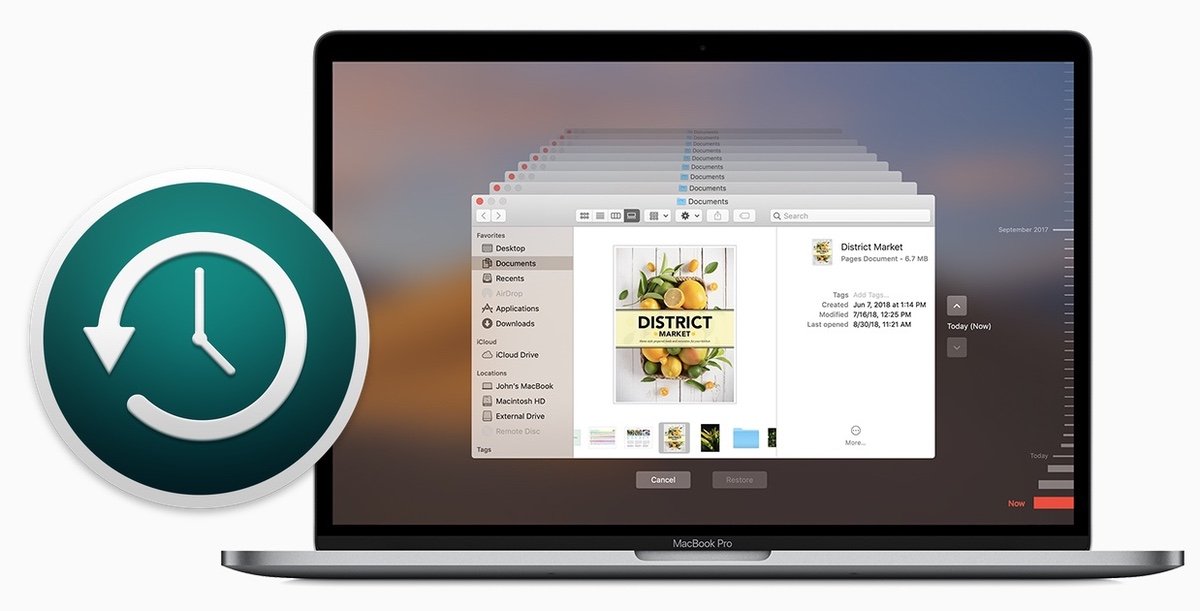
The most straightforward and budget-friendly option is to utilize Apple’s built-in backup software, Time Machine, which is free. However, you will require an external hard drive, which can be obtained at reasonable prices nowadays.
But can we consider Time Machine as the ultimate backup solution for a Mac? To ensure maximum file protection, it is recommended to utilize multiple backup methods simultaneously.
Here are the various backup options for a Mac:
Option 1. Time Machine
To back up your Mac with Time Machine, you will need an external hard drive with enough space to store your backup. Here are the steps to follow:
- Connect your external hard drive to your Mac.
- When prompted, select “Use as Backup Disk” to start the setup process for Time Machine.
- If you aren’t prompted, go to System Preferences > Time Machine > Select Backup Disk and choose your external hard drive.
- Check the box next to “Encrypt Backup Disk” if you want to password-protect your backup.
- Time Machine will automatically start backing up your files, including your entire system, settings, and applications.
- To check on the progress of your backup, click on the Time Machine icon in the menu bar.
- You can manually start a backup by clicking “Backup Now” in the Time Machine preferences.
- Once your initial backup is complete, Time Machine will continue to back up your files hourly, daily, and weekly.
It is important to note that if you ever need to restore your Mac from a Time Machine backup, you can do so by booting your Mac in Recovery mode and selecting “Restore from Time Machine Backup.” Read this guide: How to Restore Mac from a Time Machine Backup, or watch the video tutorial.
Option 2. Use a backup program to clone your hard drive
There are alternatives to Time Machines that you may prefer for several reasons. We recommend you take a look at the best software to make backups, among which are: Acronis, ChronoSync, Carbon Copy Cloner, Carbonite, Paragon Hardisk Manager or SuperDuper.
To back up a Mac using Acronis Cyber Protect Home Office, follow these steps:
- Download and install Acronis Cyber Protect Home Office on your Mac.
- Open the application and click on “Backup” in the left sidebar.
- Choose “Entire Mac” as the backup source.
- Choose a destination for your backup. You can select an external hard drive, cloud storage service, or network location.
- Select a backup scheme. Acronis Cyber Protect Home Office allows you to choose from full or incremental backup options.
- Customize your backup settings. You can set up a schedule for regular backups and choose whether to encrypt your backup or not.
- Click on “Back up now” to start the backup process.
Once the backup is complete, you can restore your Mac to the same or a new device using Acronis Cyber Protect Home Office.
Option 3: iCloud
To back up your Mac with iCloud, you must have an iCloud account and enough storage space to store your backup. Here are the steps to back up your Mac with iCloud:
- Click on the Apple menu in the top-left corner of your screen and select “System Preferences.”
- Click on “Apple ID” and sign in with your Apple ID and password.
- Click on “iCloud” in the System Preferences window.
- Make sure that “iCloud Drive” and “Photos” are turned on.
- Click on “Options” next to “iCloud Drive.“
- Make sure that “Desktop & Documents Folders” is turned on if you want to back up your files from those folders.
- Click on “Back Up Now” to start the backup process.
Note that the first backup may take a while, depending on the amount of data you have on your Mac and the speed of your internet connection. Subsequent backups will be faster as only the changes since the last backup will be uploaded to iCloud. Also, remember that iCloud backups only include specific data like photos, documents, and settings, but not everything on your Mac.
Another advantage is that backing up to iCloud means you don’t need an external drive.
It’s important to remember that while the other backup options we’ve discussed can easily transfer a clone of your old Mac, including all applications and settings, iCloud does not offer this capability.
Although iCloud does not allow for creating a clone of your old Mac on a new Mac, it does provide access to all data stored in iCloud, and it allows for the easy reinstallation of previously downloaded apps from the Mac App Store by simply accessing the list of purchased items after connecting to iCloud.
Option 4: Dropbox, Google Drive, or another cloud storage service
There are many alternatives to iCloud if you want to sync and share your files. You may already be using Dropbox, Google Drive, or Microsoft OneDrive.
To back up your Mac with Dropbox, you can follow these steps:
- Download and install Dropbox on your Mac if you haven’t already. You can download Dropbox from the Dropbox website.
- Once installed, sign in to your Dropbox account. You can create one for free if you don’t have a Dropbox account.
- Open the Dropbox preferences by clicking the Dropbox icon in the menu bar and selecting “Preferences.”
- Click on the “Backup” tab in the preferences window.
- Click the “Start” button to back up your files to Dropbox. Dropbox will back up your Desktop, Documents, and Downloads folders by default.
- You can add or remove folders from the backup by clicking the “Change” button and selecting the folders you want to include or exclude.
- You can also exclude certain file types by clicking the “Exclude” button and entering the extensions you want to exclude.
- Once you’ve configured the backup settings, Dropbox will automatically back up your files to the cloud. You can check the backup status by clicking on the Dropbox icon in the menu bar.
Note: Dropbox provides automatic backups only for the files stored within the Dropbox folder. You will need to manually move files outside of that folder into your Dropbox folder to ensure they get backed up.
Option 5: External backup
The above options allow synchronizing and sharing files between multiple devices while keeping them secure in the cloud to prevent data loss during a computer failure.
For more dedicated backup solutions, Carbonite is an online backup service that can safeguard your website. While it requires a fee, there is a free trial period of 15 days.
One of the main benefits of utilizing a cloud backup service is that it provides remote backup storage. This means that even if your Mac and its Time Machine backup are destroyed in a natural disaster or accident, you will still have access to all your data from a secure location.
In case of a Mac crash, loss, or theft, data recovery is possible with a cloud backup, provided you have internet access.


