Table of Contents
Let’s look at several ways to boot Windows 11 in Safe Mode. In this guide, we will mainly discuss the 5 easiest ways to get into Safe Mode in Windows 11.
Booting Windows 11 in Safe Mode, as with Windows 10, can cause some difficulties for users. The usual F8 keypress during the boot process (as was the case in previous versions of Windows operating systems) may no longer trigger troubleshooting mode and the Startup menu in Safe Mode.
How to Boot Windows 11 in Safe Mode
For Windows 11, there are several ways to boot the system in Safe Mode. Some are pretty simple and understandable, while others are more suitable for experienced users. Also, special console commands can be used in the terminal, scripts, and batch files to conveniently start Safe Mode.
1. Restart to Safe Mode from the Start menu
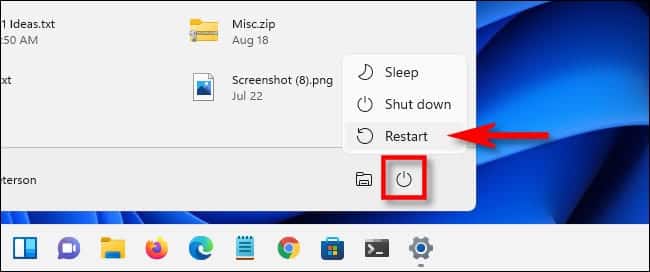
The easiest way to reboot the system in Safe Mode is available through the power button on the Start menu. Open the Start menu, click the power button (in the lower right corner), hold down Shift the key, and click the Restart link.
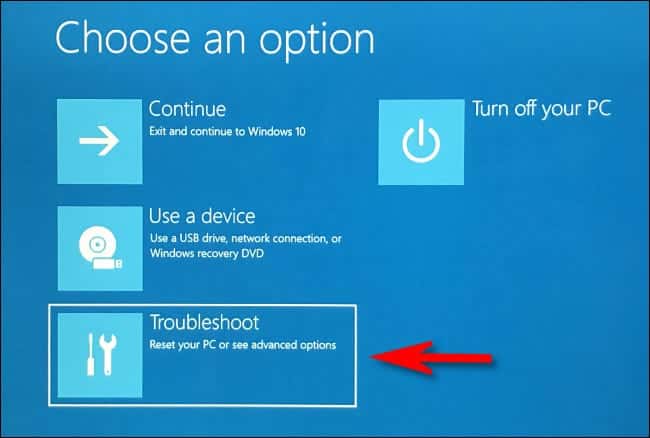
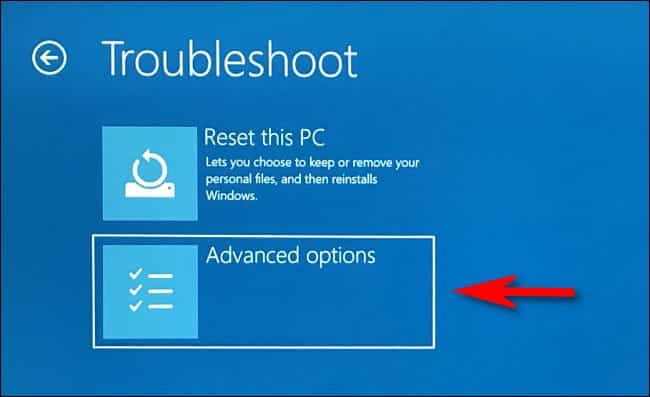
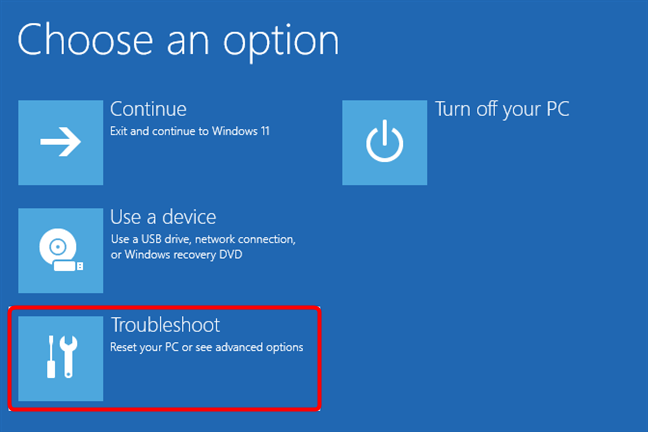
After that, the computer will restart, and the Advanced Settings screen will appear during the boot of the operating system. On this screen, select Troubleshoot > Advanced Options > Startup Settings > Restart.
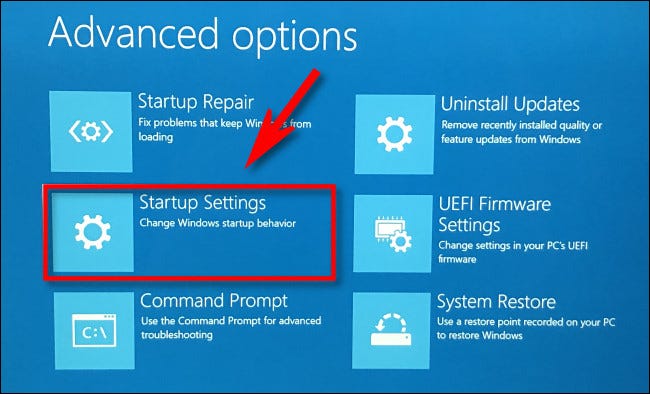
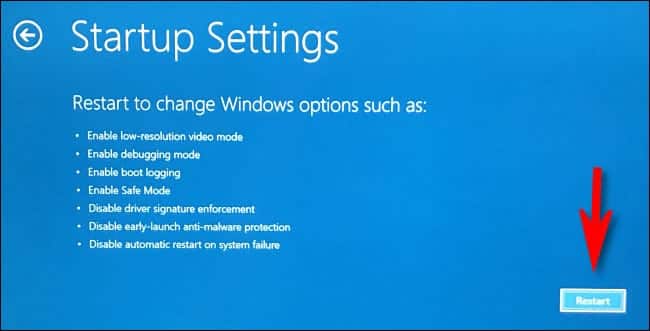
After rebooting, the Boot Options screen opens. In it, you can choose one of three options for booting Windows 11 in Safe Mode:
- Enable Safe Mode is the recommended setting.
- Enable Safe Mode with Networking – Safe Mode with networking and Internet access.
- Enable Safe Mode with Command Prompt Support – Command Line Only Mode (cmd.exe).
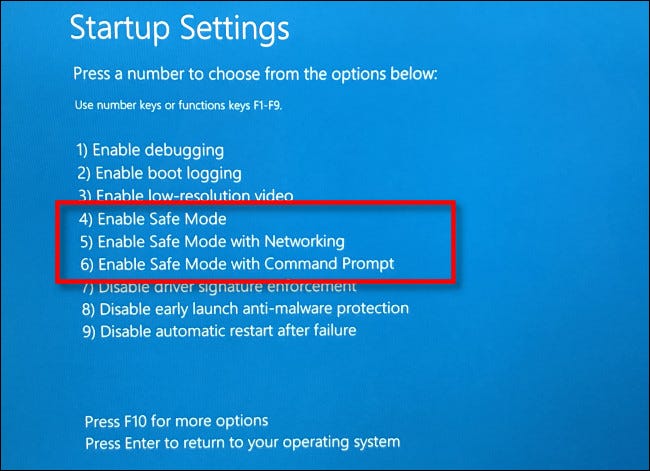
Press the corresponding numeric (4, 5, or 6) or function (F4, F5, or F6) keys on the keyboard to select the desired option.
2. Change System Boot Settings
You can boot Windows 11 into Safe Mode through the System Configuration settings. To access these settings, in the search menu or search bar on the Start menu, type msconfig. In the search results, open the System Configuration application.
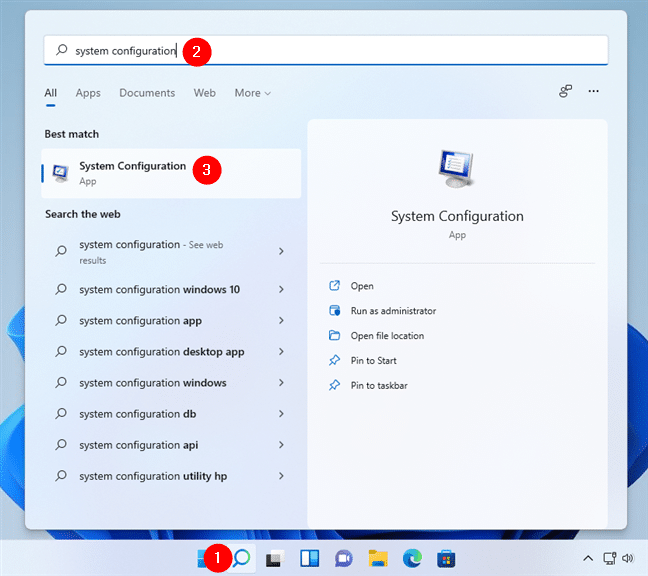
Go to the Boot tab, check the Safe Mode option, and click OK.
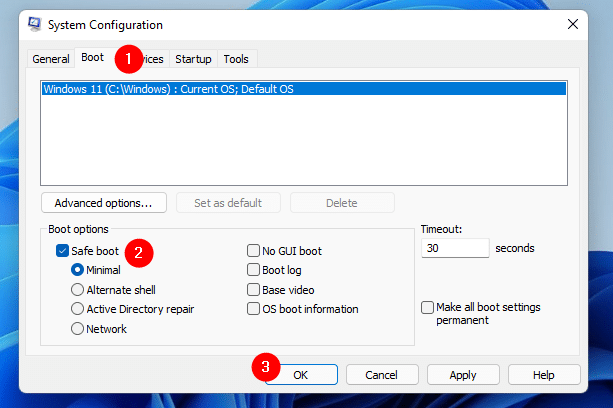
You will be prompted to restart Windows 11 in Safe Mode. Click Restart to start Safe Mode or Exit without rebooting if you want to reboot later. In any case, all subsequent operating system boots will be performed in Safe Mode.

To cancel the system startup in Safe Mode, repeat the above steps and disable the Safe Mode option. The next time you reboot, the system will boot normally.
3. Use of Third-Party Programs
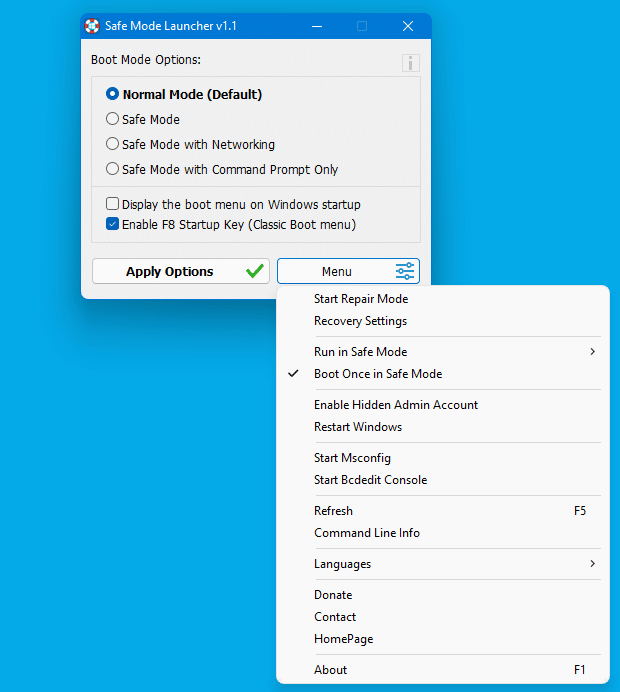
To restart Windows 11 in Safe Mode, you can use various programs and utilities from third-party developers. One such program is Safe Mode Launcher.
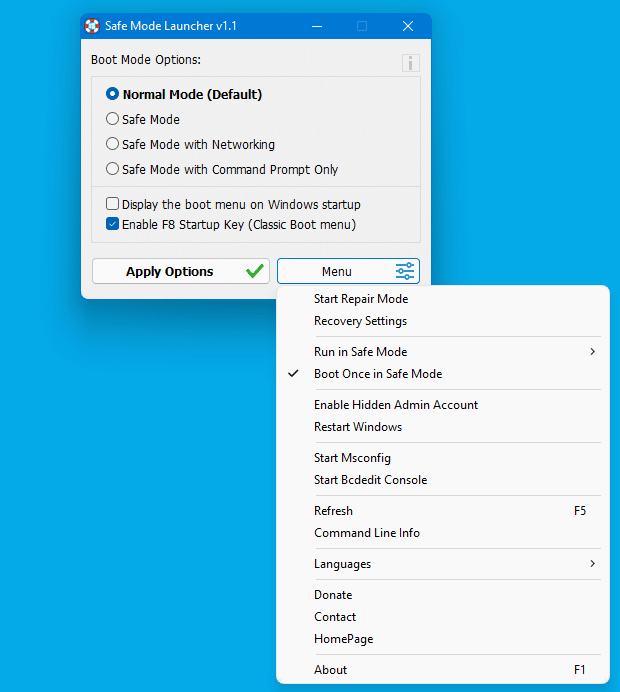
Safe Mode Launcher is a free portable program with which you can reboot the operating system into Safe Mode in a couple of clicks.
Download and unzip the archive with the program, and then run the SafeMode_x64.exe file. In the program window, check Safe Mode and click Apply Settings. Confirm the reboot, and the system will reboot in Safe Mode.
4. Use the Command Line or PowerShell
You can use the command prompt or Windows PowerShell to start in Safe Mode. These methods are intended for advanced users and system administrators, so we will not describe them in detail.
Run a command prompt (cmd.exe) or Windows PowerShell as an administrator. To do this, you can use their search in the Start menu and select the option to run as Administrator. You can read this guide: How to “Run as Administrator” an application on Windows: 3 Easy Methods
Or, right-click the Start menu and select Windows Terminal (Administrator) or Windows PowerShell (Administrator).
When the Command Prompt or PowerShell window is open, type the following command:
shutdown /r /o
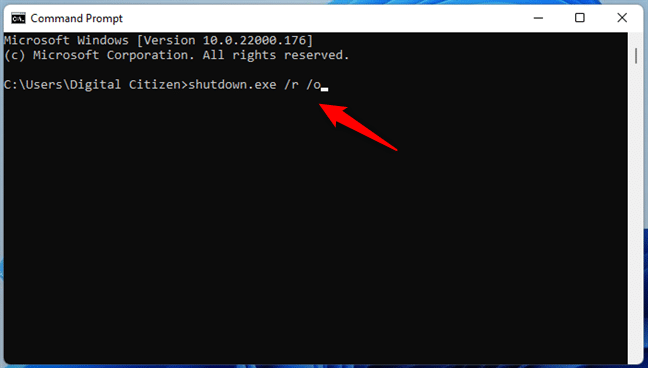
Your system will automatically reboot (don’t forget to close programs and save all data).
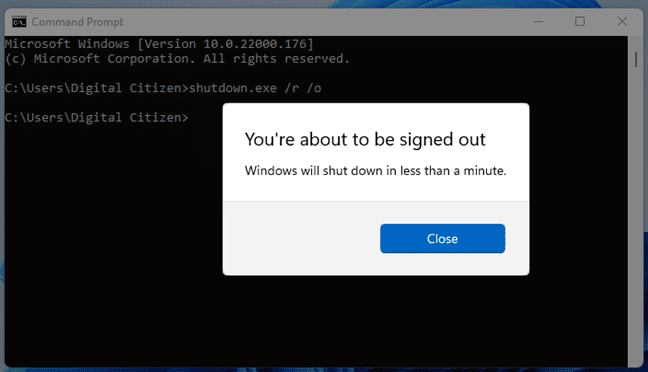
Then, at boot time, a screen with options will appear. Select Troubleshoot > Advanced Options > Startup Settings > Restart. Next, press the appropriate keys to select the desired option.
5. How to Return the Classic F8 menu during Boot
If necessary, you can return the classic boot menu when you press the F8 key during system boot. This menu is invoked and works almost as in Windows 7 and Windows XP. Let’s look at two ways to do this.
5.1. Using the Command Line or PowerShell
Run a command prompt (cmd.exe) or Windows PowerShell as an administrator, and then type the following command:
bcdedit /set {default} bootmenupolicy legacyAfter entering the command, the boot selection mode will turn on after pressing the F8 key before starting the system, as happened in Windows 7 and earlier Microsoft operating systems.
To return to Windows 11 standard boot mode, start a command prompt or PowerShell and type:
bcdedit /deletevalue {default} safeboot5.2. Using Safe Mode Launcher
Download and unzip the safe Mode Launcher archive and run the SafeMode_x64.exe file.
Check the Enable F8 startup key box in the program window and click Apply Settings.
Conclusion:
I hope this guide on How to Boot Windows 11 in Safe Mode was easy. If you face any issues, please comment down below.


