
Table of Contents
A clean macOS installation can be a good solution if your Mac is running slow, experiencing errors, or if you want to start fresh. This process involves erasing everything on your Mac’s hard drive or SSD and reinstalling macOS from scratch. In this guide, we will take you through the steps required to perform a clean installation of macOS, ensuring that your Mac is restored to its optimal performance. This guide will show you how to clean macOS installation, whether using a MacBook, iMac, or Mac Mini.
Want to perform a clean installation of macOS Monterey (or any version) on your Mac? Here’s how to download and install a new copy of Apple’s operating system versions for laptops and desktops (Monterey, Catalina, Mojave, High Sierra, El Capitan, or Yosemite).
The new version of Apple’s macOS Monterey operating system is already official since October 25, 2021, so you can proceed with the installation if you have a compatible computer.
There are many advantages provided by the new system, related to FaceTime, the renewed design of the Safari browser, and new features associated with its interface with functions of ‘Universal Control‘ and ‘Shortcuts.’
Should you do a simple system update, or is it better to do a new and clean installation? This article explains how to perform a clean installation of macOS, the recommendation if you do not want to drag duplicate files or background processes.
Professionals emphasize that it is a more advantageous option in cases where the Mac has become slower or behaves strangely, hanging with the execution of specific applications or slowing down the performance of certain tasks.
Antivirus software is often used when we suspect our computer has a virus or malware. However, there is an ongoing debate about whether Macs can be affected by viruses and malware that disrupt the operating system. Here is a guide: How to Detect and Remove Viruses or Malware on MAC
Let’s start by showing step by step how to do it for the latest versions of macOS (Monterey at the time of writing) before showing how to install a clean copy of an older version such as Catalina, High Sierra, Sierra, El Capitan, Mojave, Yosemite or some previous version of OS X.
What tools do I need?
Before you begin, you should know two ways to perform a clean installation on macOS. The traditional way was to make a bootable copy of the macOS installer on a flash drive and then format your drive before installing the boot copy on your Mac.
An even more straightforward method allows you to use macOS Recovery to reinstall the Mac operating system from the web. It’s something we’ll also look at throughout the article.
A word of warning, if you want to perform a clean installation of macOS Monterey or Catalina and you’re already running any of them, the process is different than previous versions of macOS. You will now find two volumes to remove: Macintosh HD-Data and Macintosh HD. We’ll explain what you need to do about it.
How to do a clean installation of macOS using a bootable USB
Before you begin, you’ll need the following:
- A removable USB flash drive of at least 15 GB or more to save the installer file of our chosen macOS version. We will delete it from the system, so we recommend you ensure you have no valuable data.
- Administrator privileges for Mac
- Make a backup so that in case something goes wrong, you can go back to a previous version of the system. Use this guide: How to Backup a Mac in Simple Steps.
Regarding backups, you probably don’t want to recover a Time Machine backup if you don’t want to copy all the settings and preferences associated with your previous system.
Alternatively, you can sync all your documents and desktop to iCloud instead of running a full backup, but make sure everything you need is in the cloud and keep in mind that you may lose system settings and app installation.
Are you ready? Let’s get started.
Step 1: Format the External Drive
We will re-download the installer file of our chosen macOS version and store it on a USB stick or external drive. Your Pendrive must be formatted as a macOS Extended volume with a GUID partition table. Here is a guide: How to Format an SSD to APFS Format: Solving “This Disk Doesn’t Use the GUID Partition Table Schema.” Error
Here’s how to format your USB drive correctly:
- Plug in the USB drive
- Go to Applications> Utilities
- Open System Disk Utility
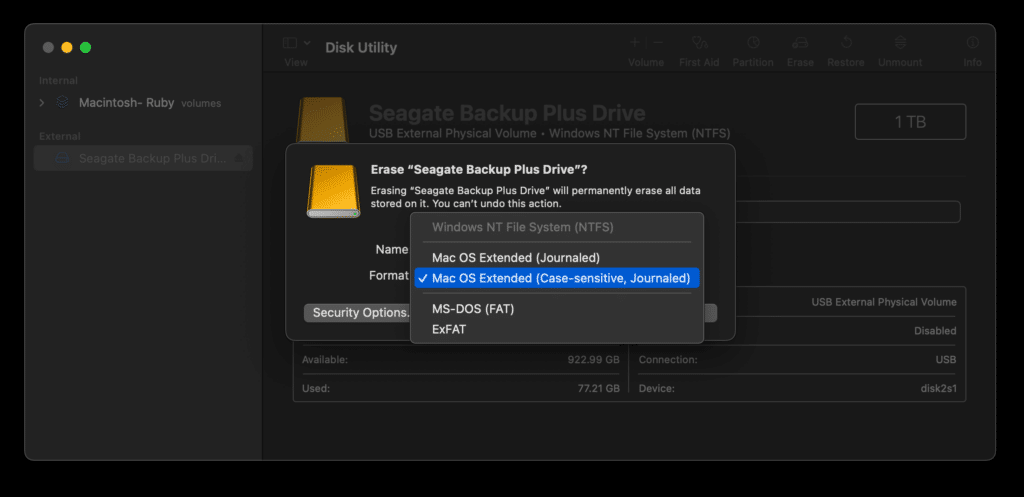
- Select the drive and click Erase. (The disk name should be ‘Unnamed‘ if the following Terminal commands work, so rename if necessary.)
- Select macOS Extended (Journaled) as the format type.
- Choose the GUID partition map from the schema options. (Ignore if this option is not available)
- Click Erase.
- Disk Utility will create the partition and configure the drive (it may take time).
- Click Done, and you’ll have it.
Step 2a: Get the macOS Monterey installation file
If you’re reinstalling the latest version of macOS or installing a new version, the next step is relatively easy. However, the process for getting the installer will be different.
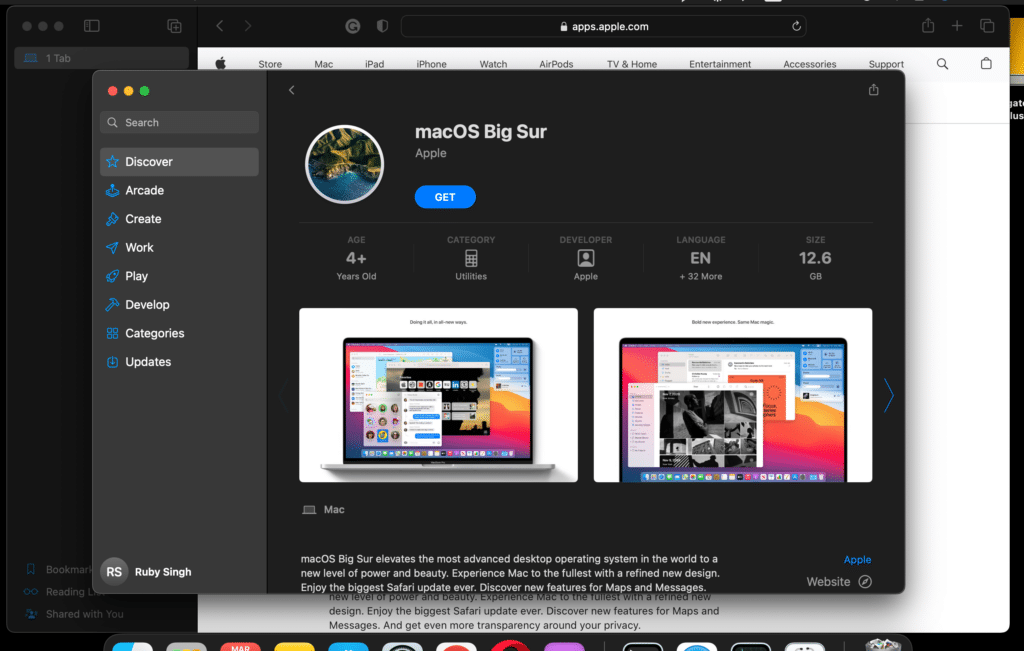
Suppose you are running Mojave and want to perform a clean installation of macOS Catalina. In that case, you can download the installation package through ‘System Preferences,‘ the same will apply if you are running Catalina and want to perform a clean installation of Big Sur (once it starts):
- Open System Preferences.
- Choose ‘Software Update.’
- Download the macOS files.
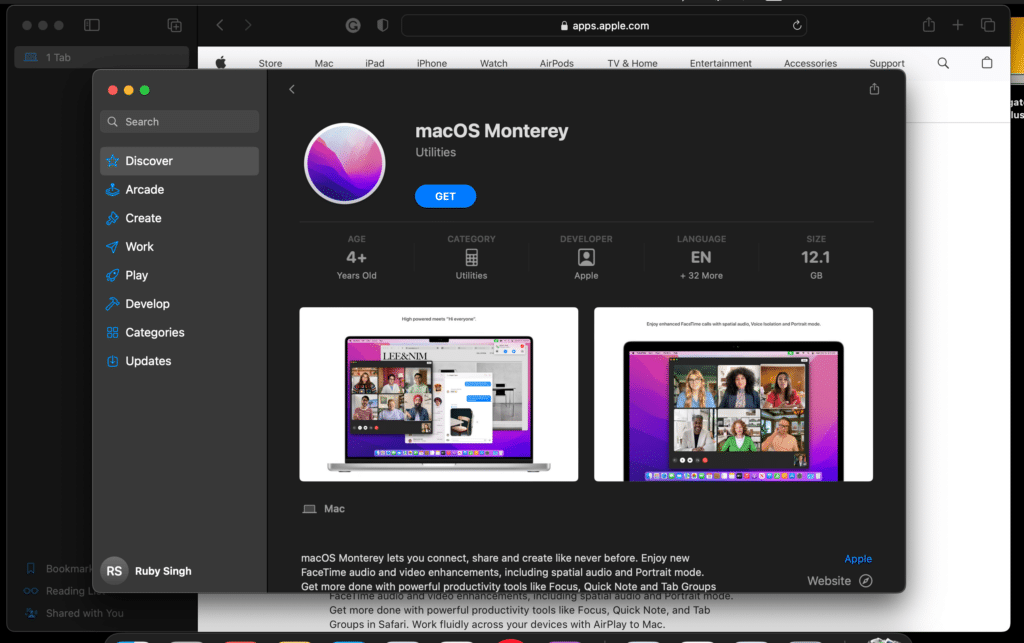
If you want to install Monterey or Catalina and are already running the operating system, the best way to access the installer is through the Mac App Store. Here’s a direct link, but alternatively, open the Mac App Store and search for Monterey.
NOTE: Use Safari browser to search for macOS Versions
Once you’ve located Monterey on the Mac App Store, follow these instructions:
- Tap ‘Download or Get‘ (depending on the version of the Mac App Store you’re using).
- You may receive a warning message now that this computer’s macOS version is installed. Would you like to continue?’ Click Continue.
- Enter your Apple ID and password.
- The Monterey installation files will begin downloading.
The installation file will have several GB (Mojave had 5.7 GB, for example), so the download may take a while.
- When the macOS installer has finished downloading, the installer will start automatically, but we don’t want to use it yet, so don’t click start the installation yet.
- Press Command-Q to exit the installer.
- Look for the installer file (it will be located in your Applications folder, or you can search for it using Spotlight (command ‘space and start typing Catalina or Big Sur, depending on your case).
If you want to install Monterey or Catalina, you can skip the next step, where we’ll show you how to dig up the installer file for an older version of macOS or macOS X.
Step 2b: Get the installation file for an older version of macOS
NOTE: Use Safari browser to search for macOS Versions
For older versions of macOS and Mac OS X, getting the installation file is a little harder: Apple doesn’t offer downloads of outdated operating system versions through the regular store. Searching for the name, you won’t find what you want.
Depending on the version of macOS you’re running, installers for some macOS versions can be found in the ‘Purchased‘ section of the App Store.
Try signing in to the Mac App Store with the Apple ID you used and click ‘Purchased’ in the menu bar at the top. Scan the list of apps you’ve purchased or downloaded for free and find the name of your chosen version. Click download.
There are a few reasons why it may not work for you:
- If you’ve already installed Mojave or Catalina on your Mac, you won’t be able to easily search for older versions of macOS from the Mac App Store.
- You won’t find the version of macOS your Mac shipped with in the ‘Purchased’ section of the App Store.
- You won’t find macOS versions in the purchased section if you’ve never installed that version.
Fortunately, getting some macOS versions is still possible if you run a newer version than Sierra.
- You can get macOS Mojave through this link.
- Download High Sierra here.
- Sierra is here.
- El Capitan can be downloaded from this link.
- Yosemite is available here.
As in the previous step, once you have downloaded the installer, do not run it. Close the installer if it opens.
Step 3: Create a bootable USB disk
Next, we must create a bootable Pendrive to install a new copy of macOS on your Mac from the USB. Let’s create the boot drive with Terminal, which you can open by pressing ‘Command + Spacebar’ and typing ‘Terminal.’
Connect the removable drive to your Mac and ensure it has the same name you named after you created it.
Create a bootable USB disk with Terminal
Open the ‘Terminal‘ app on your Mac using the Command + Spacebar key combination and type the word Terminal.
Now copy and paste the following text into the Terminal (command line):
NOTE: Replace /techrechard with your /USB volume name
Ventura
sudo /Applications/Install\ macOS\ Ventura.app/Contents/Resources/createinstallmedia --volume /Volumes/techrechard
Monterey
sudo /Applications/Install\ macOS\ Monterey.app/Contents/Resources/createinstallmedia --volume /Volumes/techrechard
Big Sur
sudo /Applications/Install\ macOS\ Big\ Sur.app/Contents/Resources/createinstallmedia --volume /Volumes/techrechard
Catalina
sudo /Applications/Install\ macOS\ Catalina.app/Contents/Resources/createinstallmedia --volume /Volumes/techrechard
Mojave
sudo /Applications/Install\ macOS\ Mojave.app/Contents/Resources/createinstallmedia --volume /Volumes/techrechard
High Sierra
sudo /Applications/Install\ macOS\ High\ Sierra.app/Contents/Resources/createinstallmedia --volume /Volumes
El Capitan
sudo /Applications/Install\ OS\ X\ El\ Capitan.app/Contents/Resources/createinstallmedia --volume /Volumes/techrechard --applicationpath /Applications/Install\ OS\ X\ El\ Capitan.app
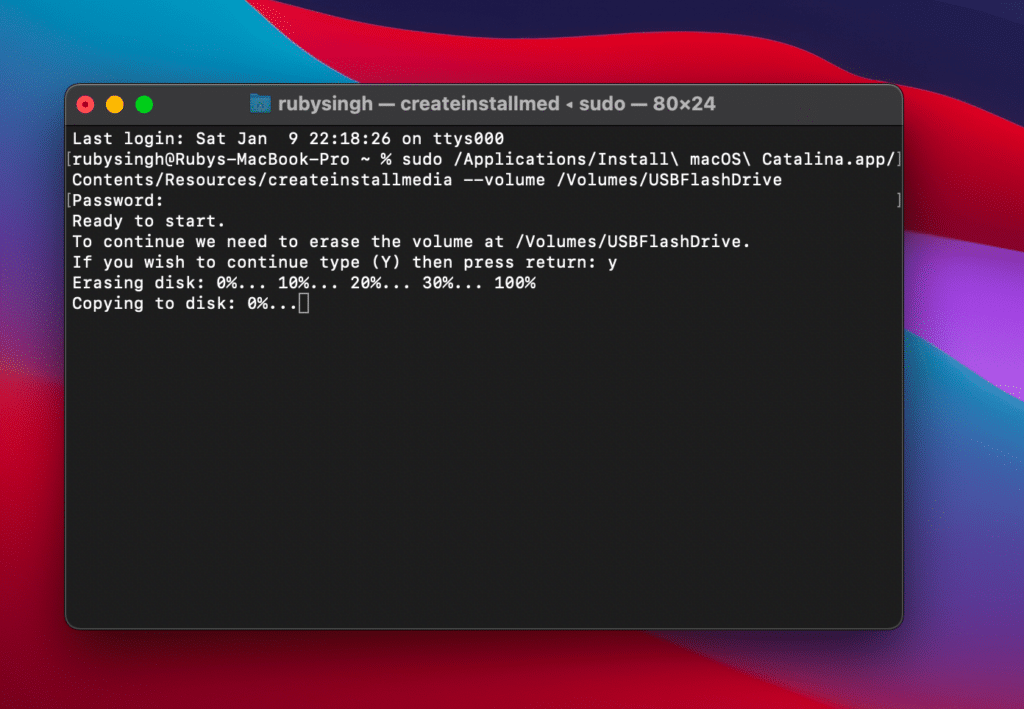
Press ‘Enter‘
Enter your password (you won’t see it appear). When the boot drive is ready, you’ll see the word Done. It may take some time. Be patient.
You can also use this guide: How to Create macOS Mojave Bootable Installer for Clean Installation: 2 Easy Steps (MAC only)
How to Create an Installation Bootable Drive for macOS 12 Monterey
Step 4: Clean your Mac and install macOS
We are now ready to install the copy of macOS from the installation drive on our Mac. If you want to perform a new installation (and completely erase your Mac), it’s time to reformat your Mac’s startup drive.
Here’s how to do a new macOS installation:
For Macs with Apple silicon:
You’ll need to connect the bootable installer to a compatible Mac connected to the internet. Although the installer won’t download macOS from the internet, it requires an internet connection to obtain firmware and other Mac-specific information. Next, turn on the Mac and hold the power button until the startup options window appears, displaying your bootable volumes. From here, select the volume that contains the bootable installer and click “Continue” to proceed with the installation instructions provided onscreen.
For Macs with an Intel processor:
Connect the bootable installer to a compatible Mac connected to the internet. Again, the installer won’t download macOS from the internet but requires an internet connection to obtain firmware and other Mac-specific information. Turn on your Mac and immediately hold down the Option (Alt) key until a dark screen shows your bootable volumes. Release the Option key and select the volume that contains the bootable installer. Then, click the onscreen arrow or press Return to proceed.
If you encounter any issues starting up from the bootable installer, ensure that the Startup Security Utility is configured to allow booting from external or removable media. You’ll be prompted to choose your language before selecting “Install macOS” or “Install OS X” from the utility window. Finally, click “Continue” and follow the onscreen instructions to complete the installation.
Once the installation is complete, you can restore apps and settings from your backup or manually download them.
Here is a complete video tutorial:


