

Table of Contents
Do you need help getting your data from Zendesk to Tableau, finding it cumbersome to manage multiple data pipelines, and are tired of waiting for IT or Engineering to address your reporting needs? Look no further! With the Tableau Connector for Zendesk, you can bid farewell to all the hassles and wasted time.
This hands-on integration tutorial will show you how to set up code-free Zendesk Tableau Integration in just a few clicks. No more waiting – the Zendesk Tableau Connector automatically syncs your data, ensuring it’s readily available for analysis whenever needed. Set up seamless data integration and empower yourself to create insightful visualizations without delays. Let’s start now!
Why Create Zendesk Reports in Tableau
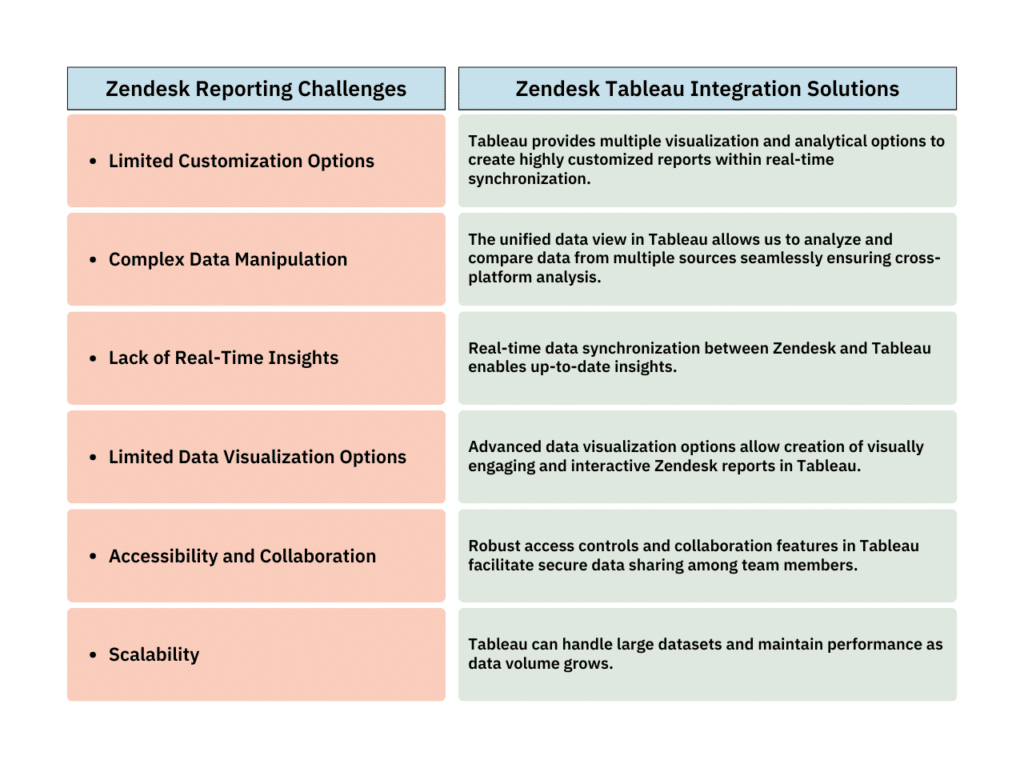
Zendesk is a cloud-based help desk software that enables personalized customer support, serving as a single source of truth for support teams to track, prioritize, and efficiently resolve customer issues, enhancing satisfaction and loyalty. While Zendesk provides a strong customer support platform, its reporting features may have limitations for in-depth analysis. Conversely, Tableau aims to transform unstructured data into dynamic and interactive visuals. Through Zendesk Tableau integration, businesses can explore Tableau’s intuitive drag-and-drop interface and advanced analytical tools to obtain helpful facts into their data via customizable dashboards and reports.
Zendesk reports in Tableau give organizations an overall view of customer support performance. Rather than siloed reporting, where data from different systems are isolated, integrating Zendesk with Tableau brings together relevant datasets from multiple sources. This comprehensive approach allows for a unified view of customer interactions across various channels, including email, chat, phone, and social media. Stakeholders can better understand customer behavior and preferences, identify common pain points, and accurately measure customer satisfaction.
Zendesk Tableau integration enables data updates automation and eliminates manual data manipulation. As new customer support data is generated in Zendesk, it seamlessly syncs with Tableau, ensuring that reports and visualizations are always up-to-date. This actual time information availability empowers support teams to respond quickly to changing customer needs and emerging trends. As a result, promptly decision-making becomes possible as you can drill into data and explore different dimensions, asking ad-hoc questions without waiting for IT or Engineering assistance.
What is Tableau Connector for Zendesk
The Tableau Connector for Zendesk by Alpha Serve is an innovative integration app that bridges Zendesk’s customer support data with Tableau’s data visualization capabilities, enabling organizations to access and analyze their Zendesk data in Tableau’s robust analytics environment. It allows users to handle substantial amounts of data and is optimized for high performance at scale, providing a smooth experience even with huge data volumes. It has robust permission settings and access management for data security, ensuring that only authorized users can access and share data.
With Tableau Zendesk connector, users can overcome the limitations of native Zendesk reporting and analytics capabilities. The Tableau Zendesk connector allows the export of various tables and fields, including custom fields, ensuring all relevant data is accessible for analysis. It enables the export of different Zendesk Support data, including information related to tickets, ticket metrics, agents, users, satisfaction ratings, comments, organizations, and more. Users can also export Zendesk Sell data, such as leads, contacts, deals, users, orders, products, etc.
A notable feature of the connector is its dynamically generated Entity Relationship Diagram, which visually represents the data source’s structure, simplifying data exploration and understanding of relationships between different entities. Also, advanced filtering options allow users to easily manage data selection, exporting only the necessary and relevant information. The connector generates search queries automatically, but users have the flexibility to modify them manually as needed.
How to Connect Zendesk to Tableau
Performing Zendesk Tableau integration with user-friendly Tableau Connector for Zendesk is a transparent process that involves three no-frills steps, making it accessible to users with no technical backgrounds. Here’s a detailed guide to establishing the integration:
Install Tableau Connector for Zendesk
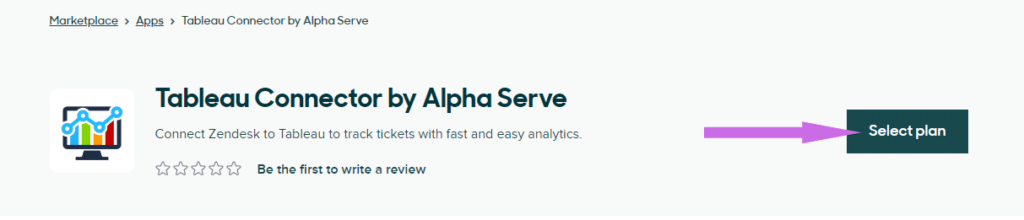
Go to the Zendesk marketplace page of the Tableau Connector for Zendesk and click on the Select plan button.
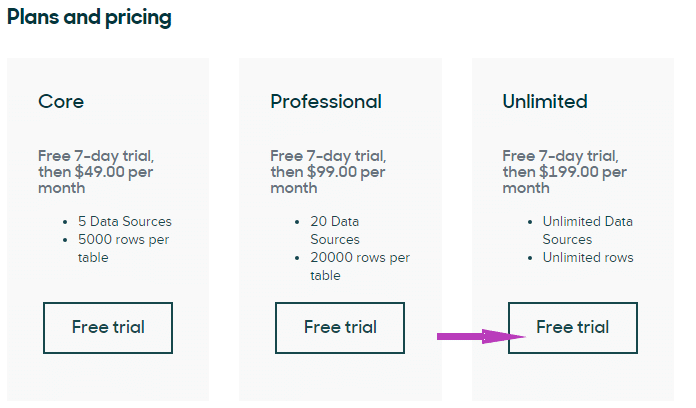
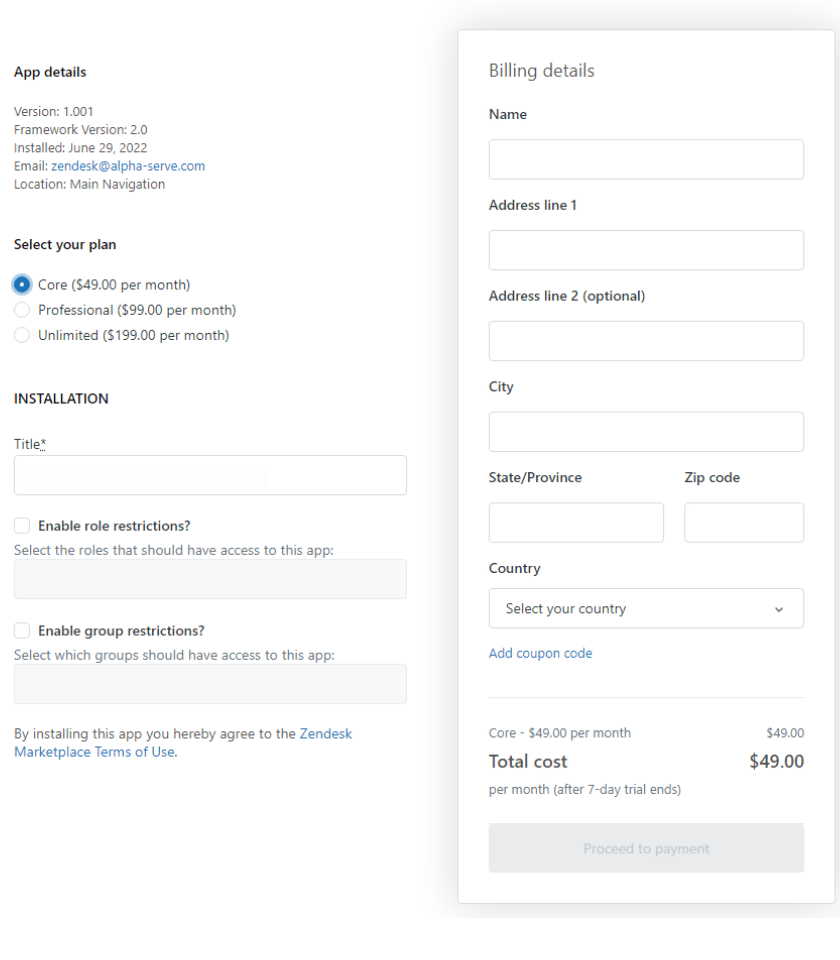
Choose your desired plan and click the “Free trial” button.
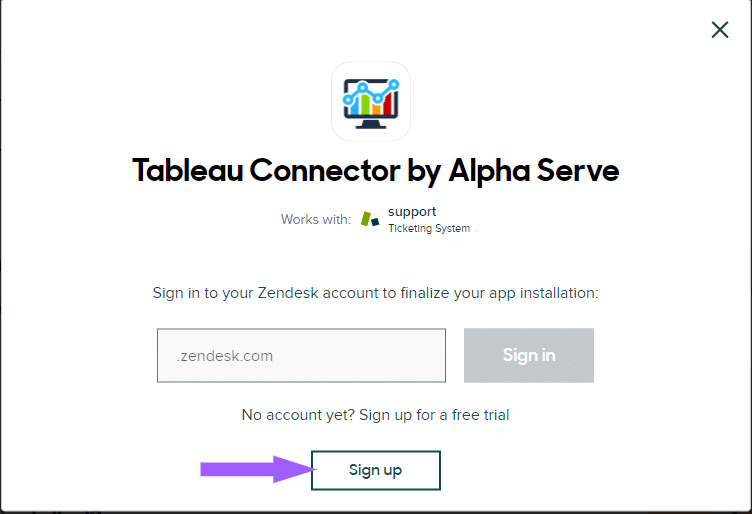
If prompted, select your Zendesk account from the list and click the “Sign up” button.
Select your preferred plan, provide your billing details, and click “Proceed to payment.”
Complete the payment process. Once done, you will be redirected back to your Zendesk Admin Center.
Configure Tableau Zendesk Connector
Before importing data from Zendesk into Tableau, you need permission from your Zendesk administrator to access the Tableau Connector for the Zendesk app. If you don’t have this access, contact your Zendesk Administrator to grant you the necessary permissions.
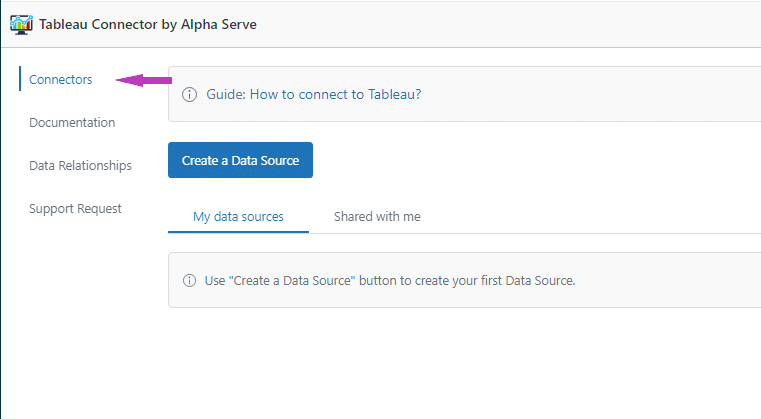
To export Zendesk data into Tableau, you must create a data source first. To access the Tableau Connector for the Zendesk app, click its icon in the Navigation menu and select “Connectors” tab.
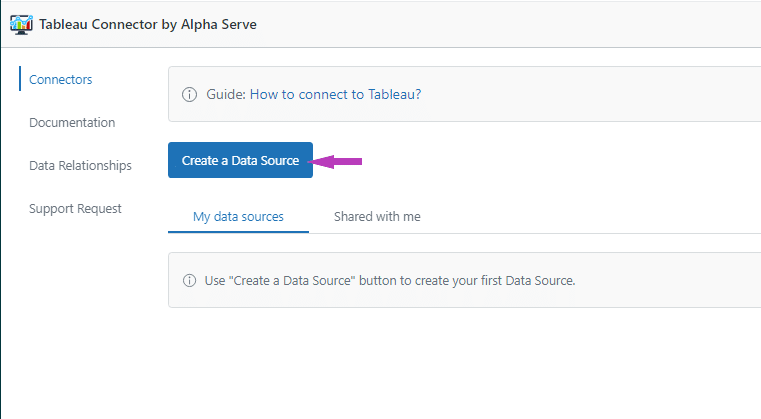
Then, click on the “Create a Data Source” button on the opened page.
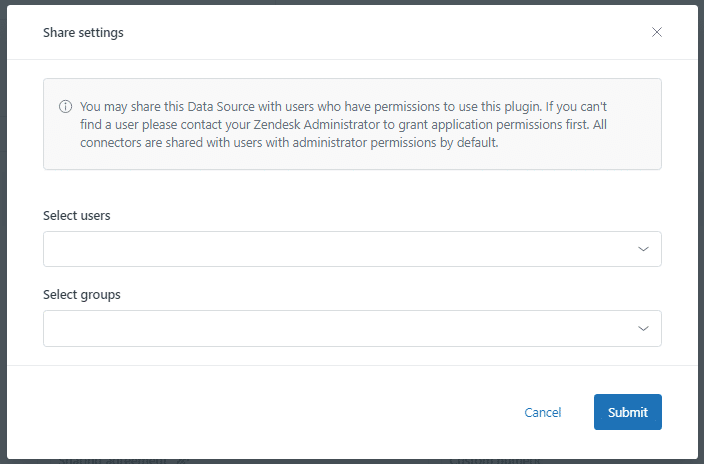
Fill in the data source name, and description, set access to this data source using sharing settings, and click “Submit” to confirm changes.
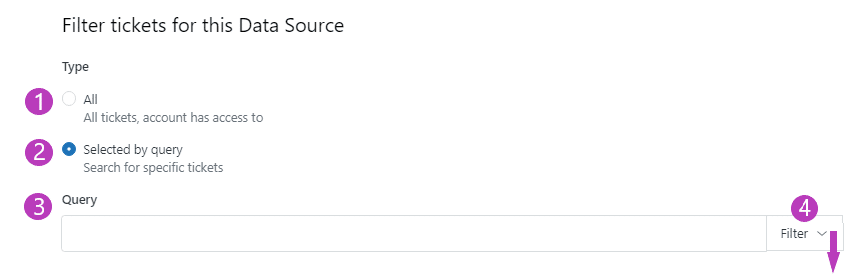
In the “Filter tickets” section, you have several options to customize the ticket export:
- You can export “All” existing tickets.
- “Select by query” to create a personalized request to filter the data.
- Create a custom search “Query” using keywords and common search operators provided by Zendesk.
- Narrow down your export by applying a predefined “Filter” option. You can filter tickets by Status, Type, Tag, Assignee, etc.
Select Zendesk Data for Export to Tableau
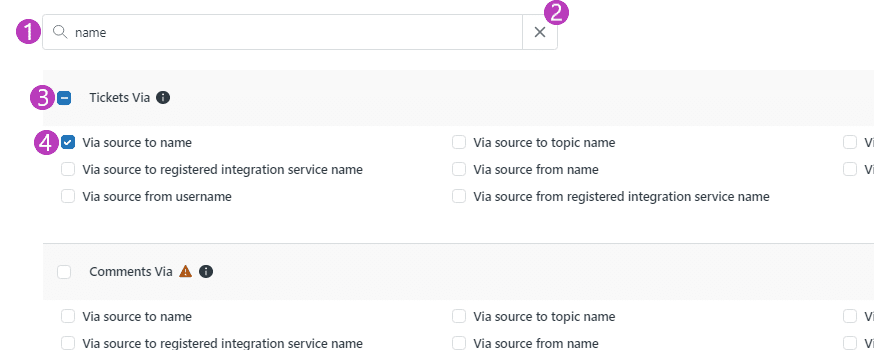
In the “Select Fields” section, customize the fields for the report:
- Use the “Search field” to find specific fields matching your search.
- Clear the search field as needed.
- Toggle the checkbox for the “Entity” to select all or none of the fields in the subsection. Expand subsections for further customization.
- Toggle checkboxes for each “Field” to include or exclude them from the export based on your Zendesk reporting needs.
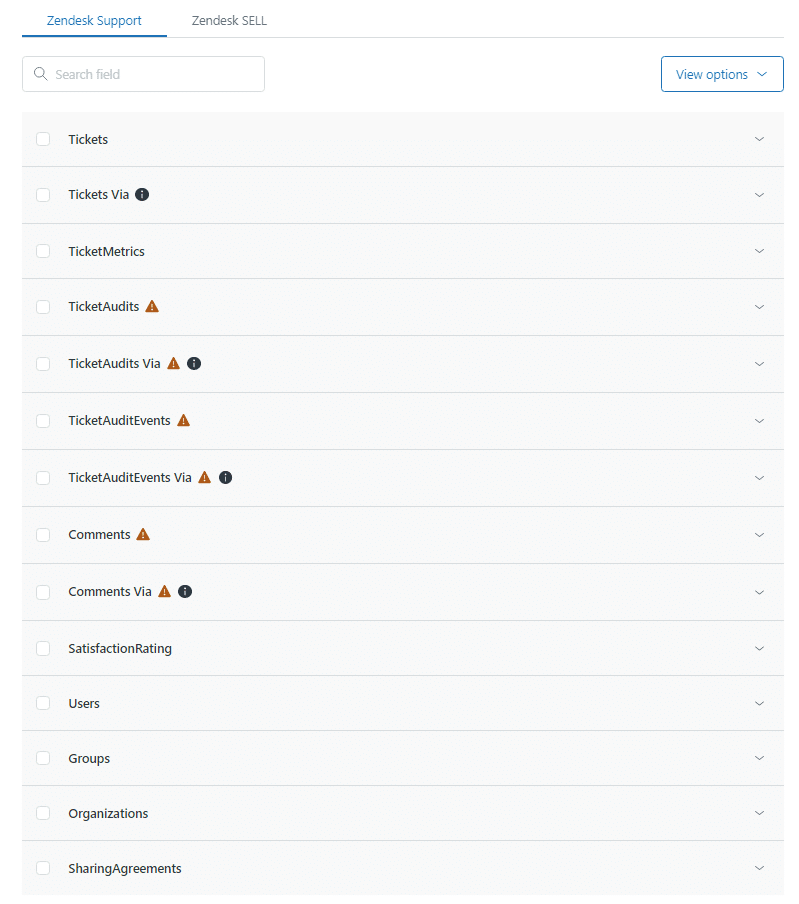
The Zendesk Support tables currently available for export include Tickets, Tickets Via, Ticket Metrics, Ticket Audits, Ticket Audits Via, Ticket Audit Events Via, Comments, Comments Via, Satisfaction Rating, Sharing Agreement, Users, Groups, and Organizations.
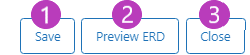
In the “Apply” section:
- Click “Save” to save the data source.
- Click “Preview ERD” to open the ERD schema preview popup, which provides an overview of the relationship between tables.
- Click “Close” to exit the data source creation page. Please note that any changes you’ve made will not be saved if you choose to close without saving.
Import Zendesk Data into Tableau
In the Connectors tab, find the data source created in the previous step, find the copy icon next to it, and copy the OData Feed URL generated by the app.

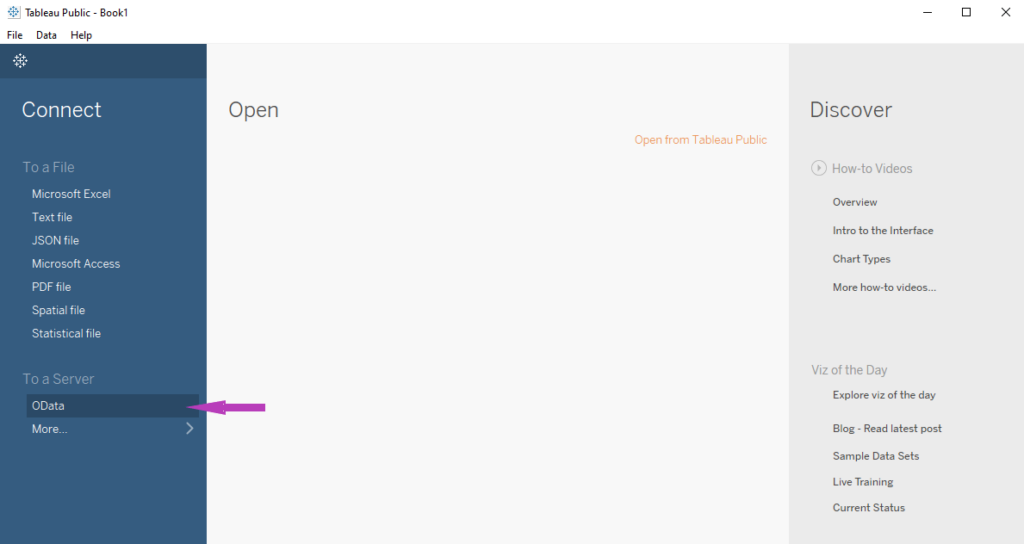
Launch Tableau and go to Connect > Get Data > OData, then paste the copied URL.
After that, you should fill in the form:
- Server: Paste the copied feed URL.
- Authentication: Username and Password.
- Username: Enter your email address.
- Password: Use the API token.
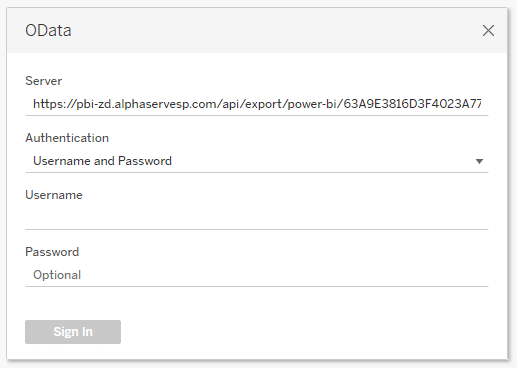
Click “Sign In” to finish the authorization process and wait for the query to complete. If there is a large amount of data to import, it may take some time.
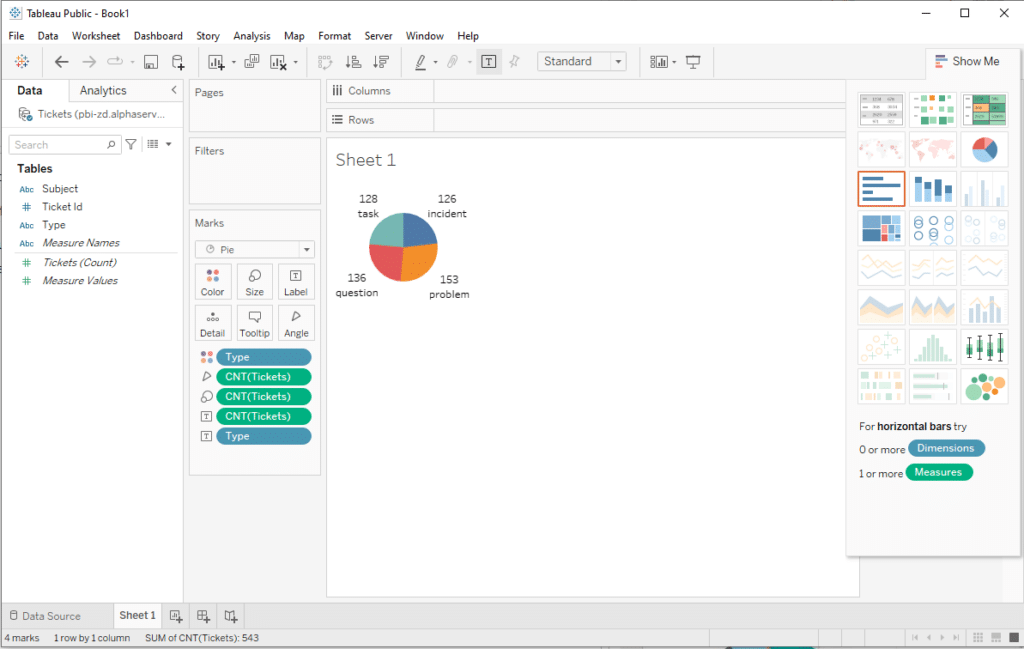
After successfully importing Zendesk data, you can start building your visualizations in Tableau. Just switch to Sheet 1, choose the visualization type, and select the data you want to see on the graph.
Note! You can also export the Zendesk Sell data to Tableau. Zendesk Sell tables and fields are available during Data Source creation under the Zendesk SELL tab.
Conclusion
The Tableau Connector for Zendesk by Alpha Serve provides a hassle-free solution for swiftly exporting Zendesk Support and Zendesk Sell data to Tableau without cumbersome data pipeline management. This tutorial offers a code-free approach for seamless Tableau Zendesk integration, eliminating wait times for IT or Engineering. Automatic data export ensures data availability for quick analysis, enabling timely creation of insightful visualizations in Tableau. Embrace this efficient integration for streamlined Zendesk reporting and analysis, saving valuable time and boosting productivity.


