

Table of Contents
The macOS Dock is a prominent UI element that provides quick access to apps and folders. While Apple doesn’t publicly share much information about the Dock’s settings, there are several ways to customize its appearance and behavior. Here’s a guide on accessing and modifying these settings to optimize your macOS experience on macOS Ventura.
History of the Dock
The Dock has been integral to macOS since Apple acquired NeXT, Steve Jobs’ second company, in 1997. It introduced additional customization options, including hiding the Dock entirely.
Setting up Dock
To access the Dock settings, navigate to “System Preferences” in the Apple menu on the macOS menu bar. From there, select “Desktop & Dock.” The preferences related to the Dock can be found at the top of this panel.
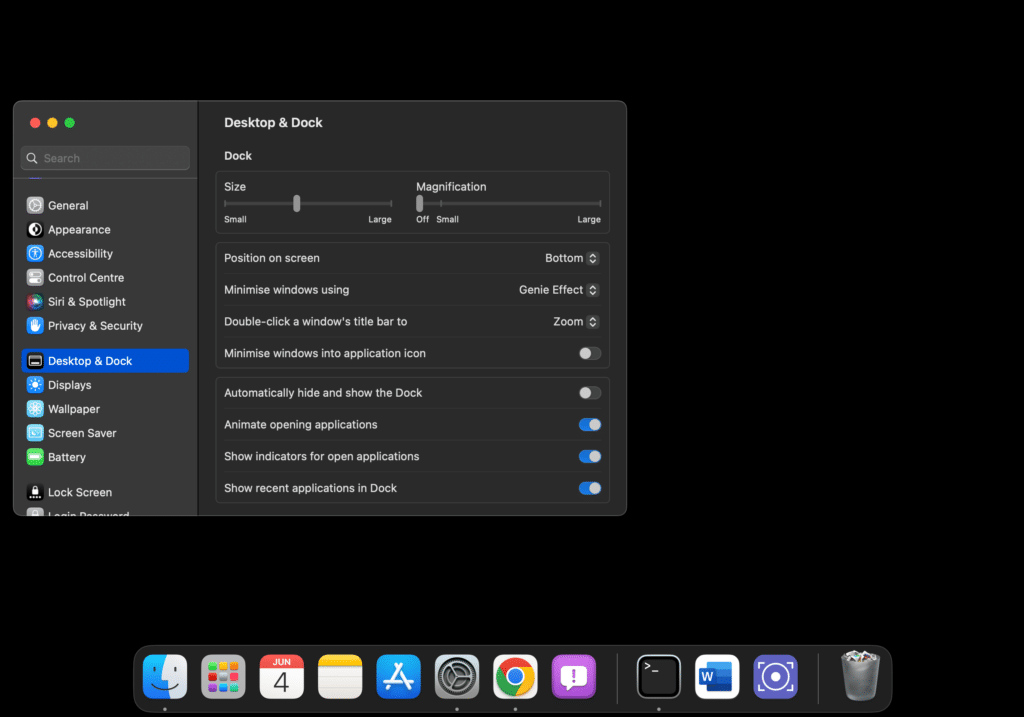
Adjusting Dock Size and Magnification
You’ll find two sliders at the top of the “Desktop & Dock” panel. The first controls the size of the Dock, while the second determines the magnification level when hovering the cursor over the icons. Adjust these settings to achieve your desired appearance and functionality.

Changing Dock Position
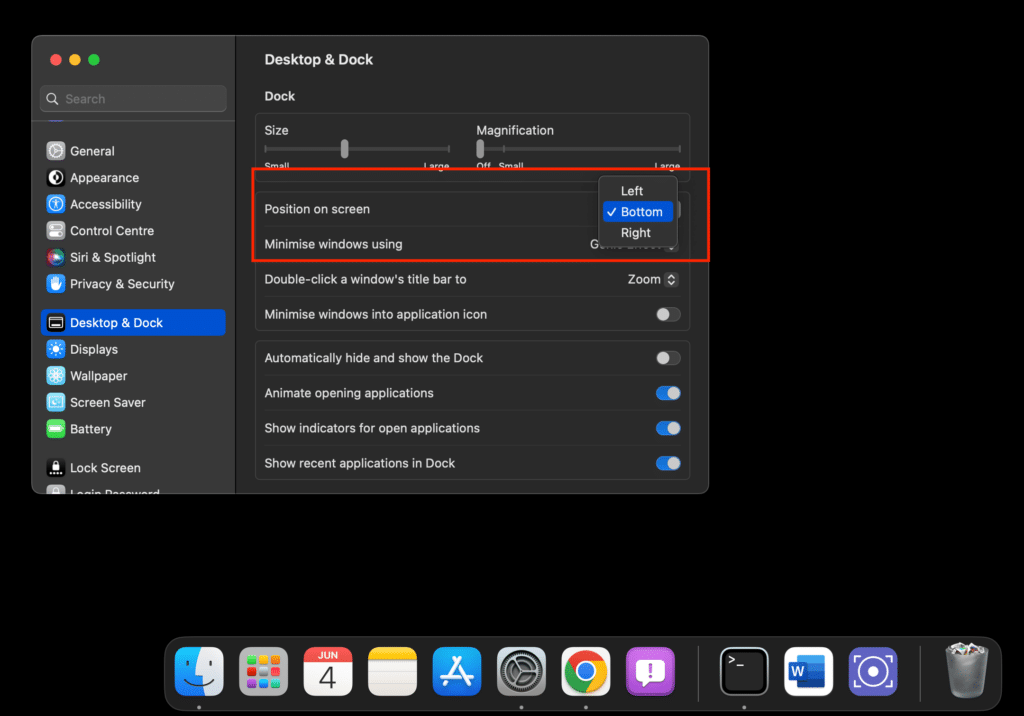
The “Position on screen” pop-up menu lets you change the Dock’s location. You can choose from three options: “Left,” “Bottom” (default), or “Right.” Select the position that suits your preferences.
Customizing Window Minimization
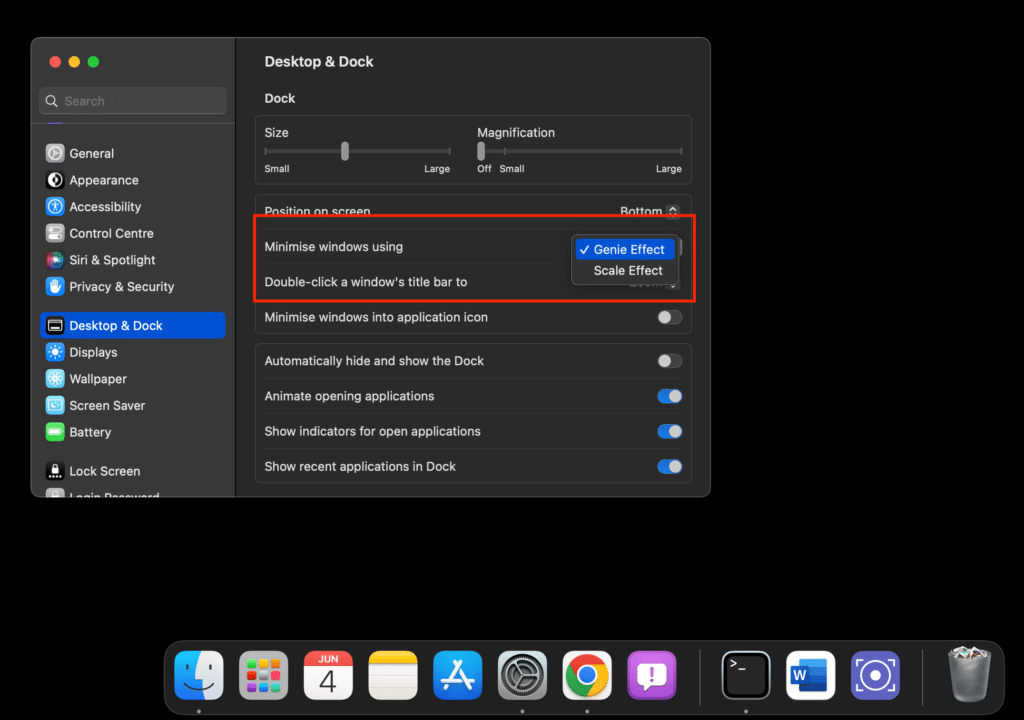
Under “Minimize Windows Using,” you can choose between two animation options: “Genie” or “Scale.” When clicking the yellow minimization buttons, this setting determines how Finder windows shrink into the Dock.
Further Window Behavior Customization
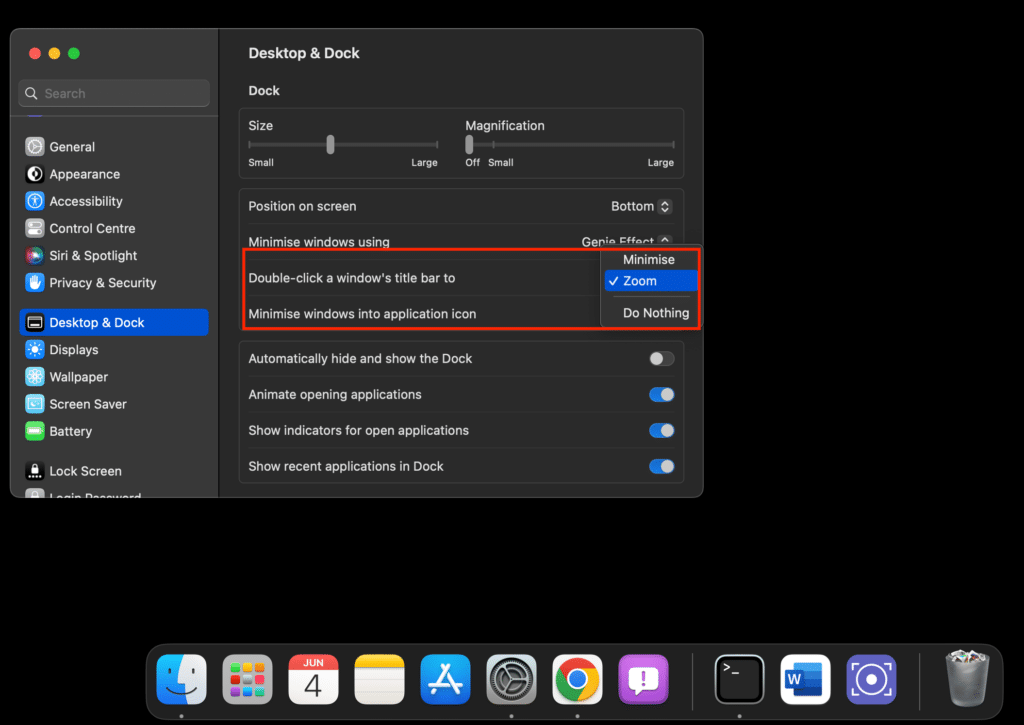
The “Double-click a window’s title bar to” option allows you to define the action when double-clicking a window’s title bar. You can disable this feature or maximize or minimize the window, depending on your preference.
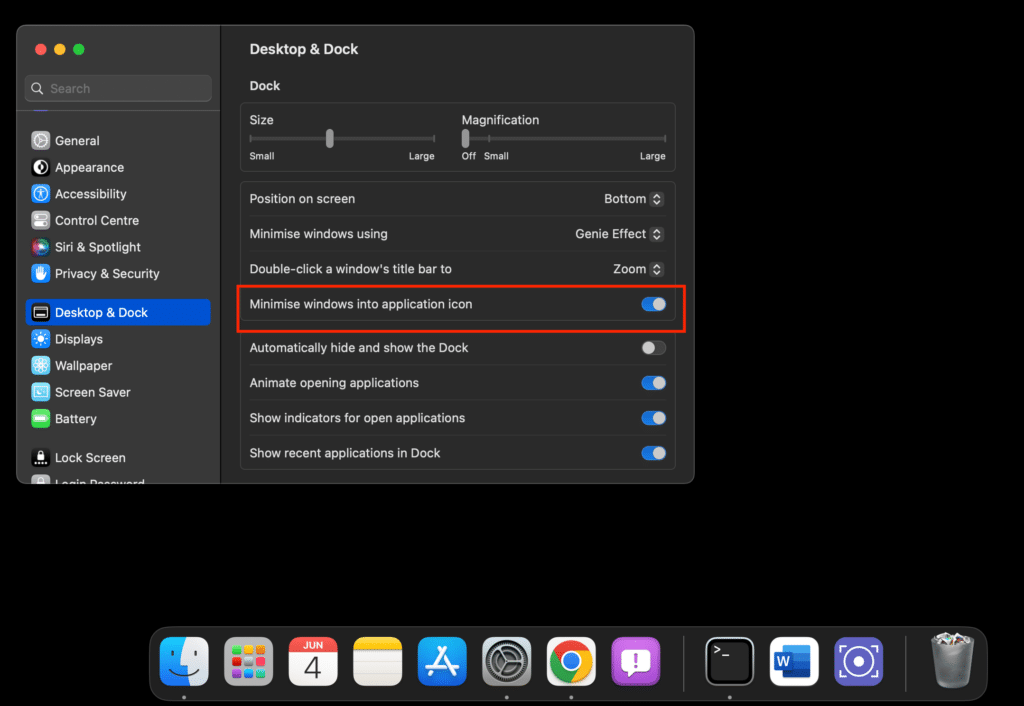
Managing Window Minimization to App Icon
Enabling the “Minimize window into application icon” allows the Finder to shrink a window and add it to its pop-up menu when clicking the yellow Minimize Window button. You can access the zoomed-out window by pressing the Control key or right-clicking the app icon in the Dock.
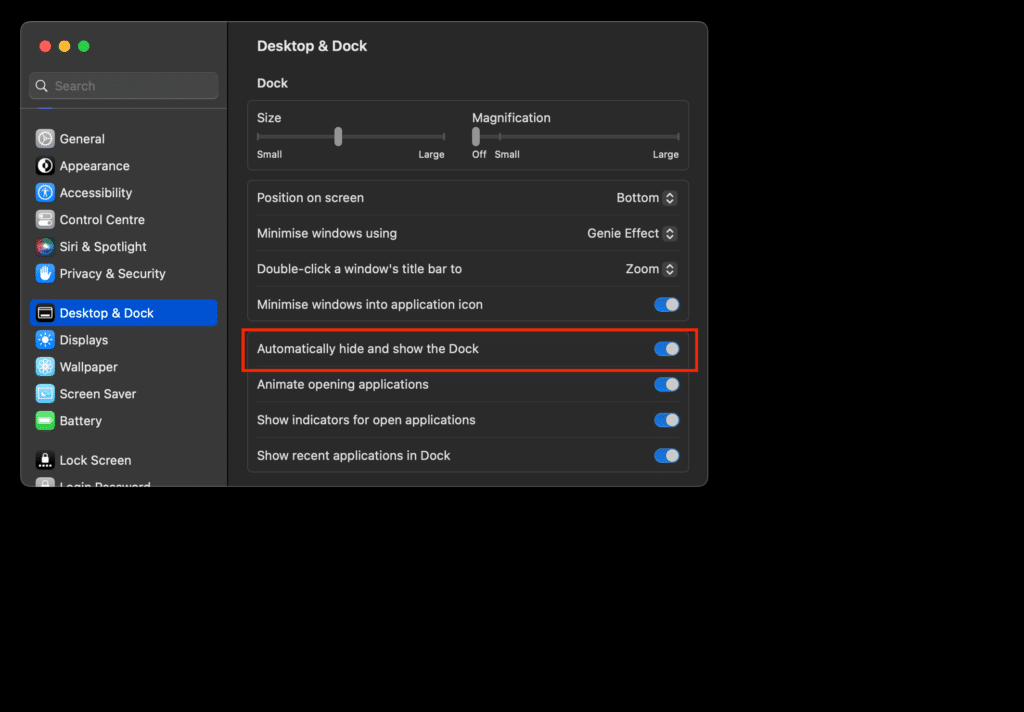
Automatic Hiding and Unhiding of the Dock
If the Dock interferes with your screen space, you can enable “Automatically hide and show the Dock.” This option hides the Dock by default but reveals it when you hover the mouse over the edge of the screen where it is positioned.
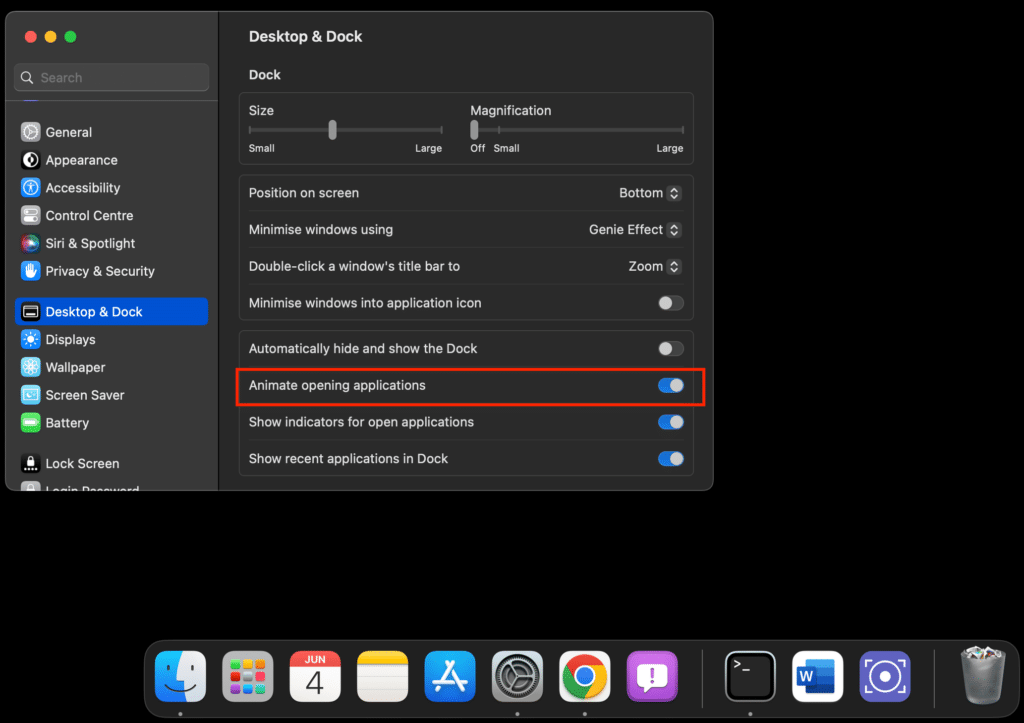
Customizing App Launch Animation
“Animate opening applications” controls whether the app icons bounce in the Dock upon launching. Disabling this option can result in a faster response time.
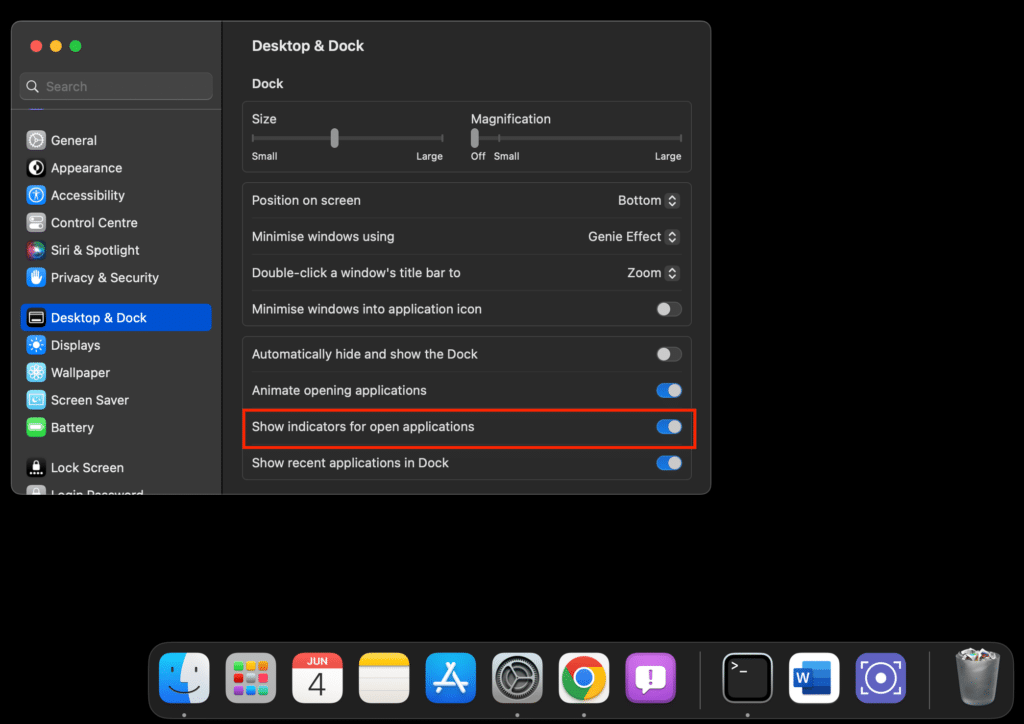
Displaying Indicators for Open Apps
Enabling “Show indicators for open applications” causes the Dock to display a small dot beneath running app icons. This visual indicator helps identify active apps at a glance.
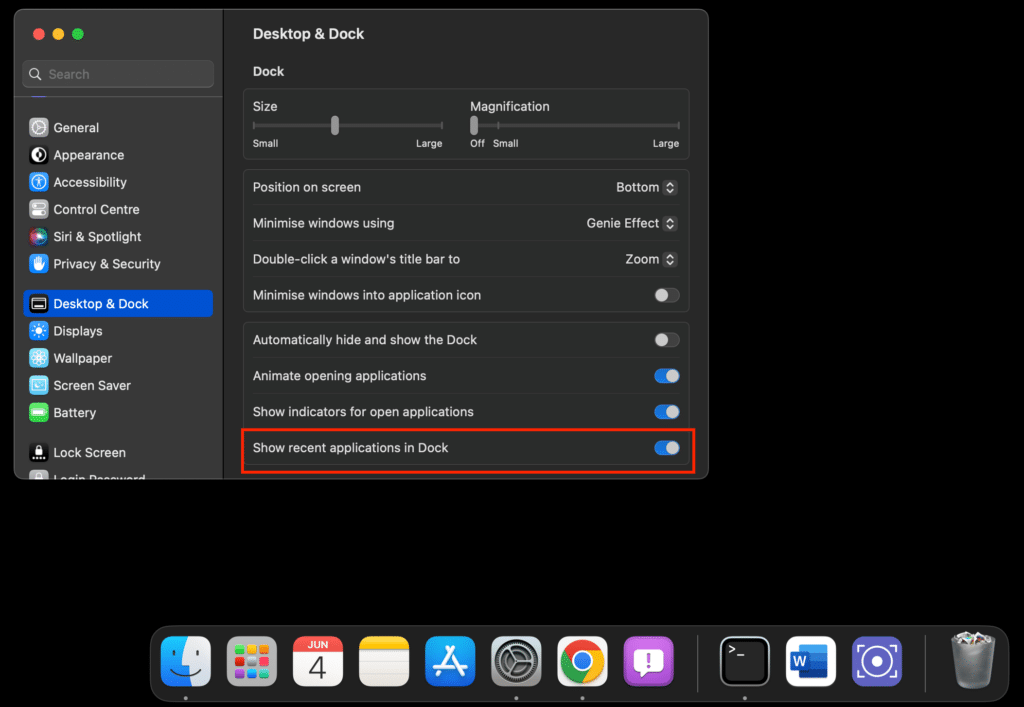
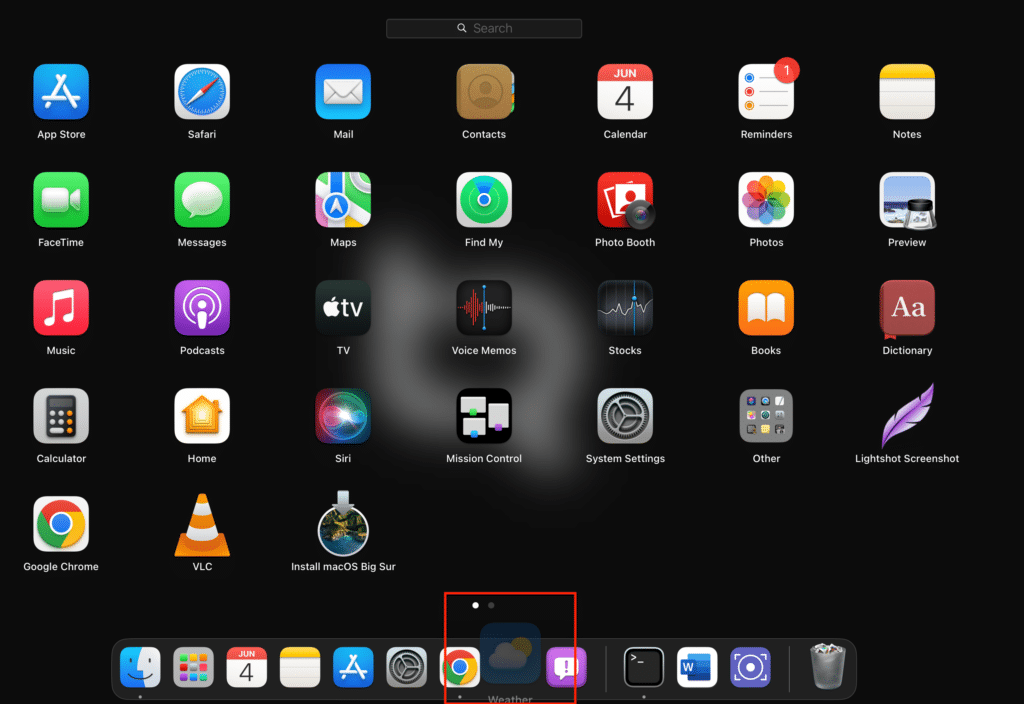
Showing Recent Apps in the Dock
The “Show recent applications in Dock” feature adds a section on the right side displaying recently used apps, even if they are closed.
Adding and Removing Items from the Dock
To add an app to the Dock, drag it from anywhere in the Finder and drop it onto it. Conversely, to remove an item, press and hold it, then drag it out of the Dock until a small delete icon appears.
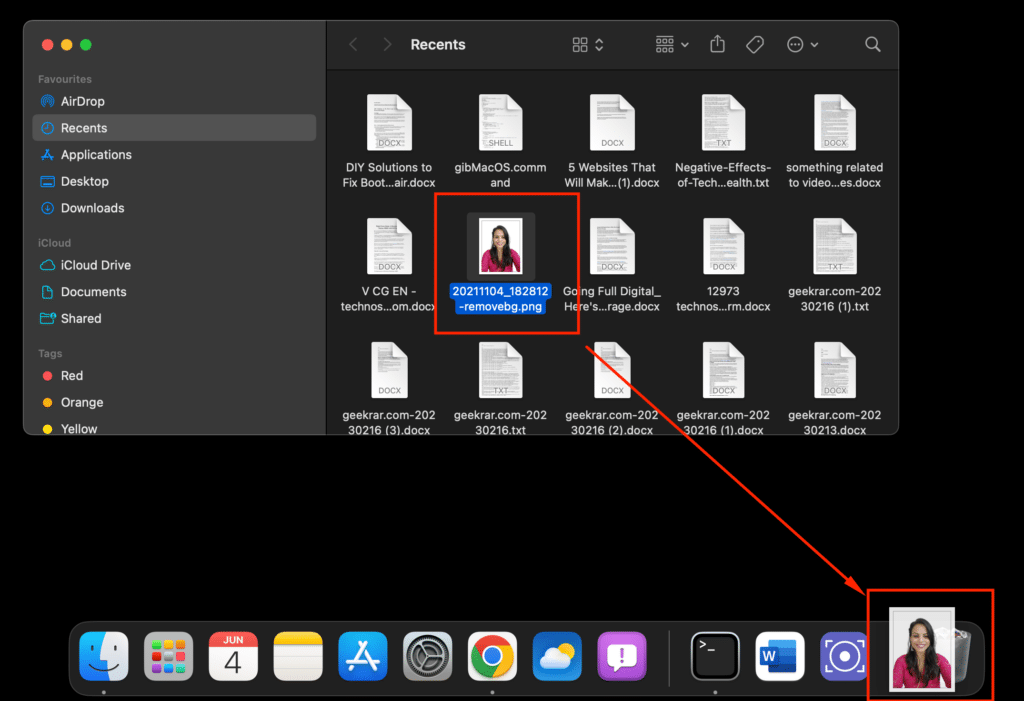
Adding Files and Folders
Drag files or folders to the Dock, specifically to the right of the separator. Documents and folders are stored to the right of the separator, while the Trash remains in the far right corner of the Dock.
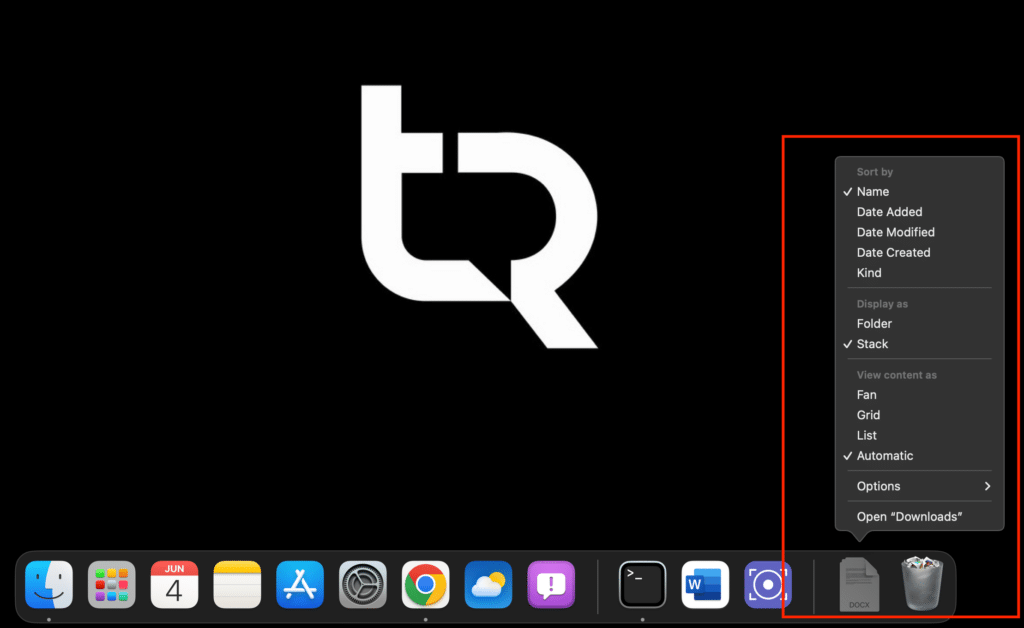
Customizing Folders
Once you’ve added folders to the Dock, Control-click or right-click on them to open a pop-up menu for customization; you can change sorting options, display the folder as a stack, and modify how the contents are viewed when clicking the item.
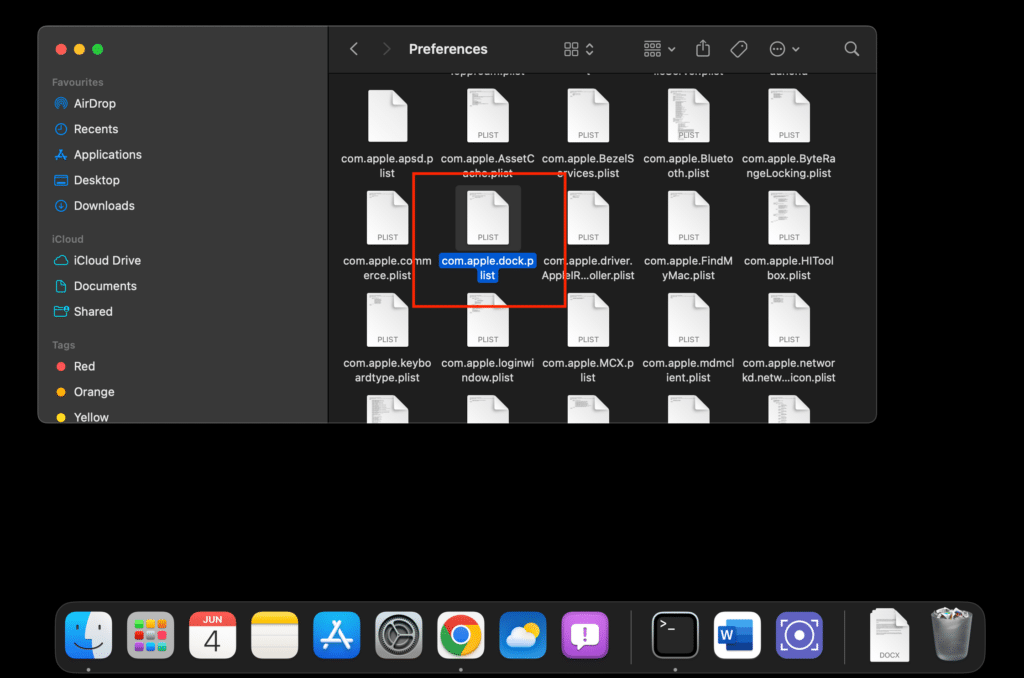
Understanding Dock Settings File
All Dock preferences are stored in an XML file named “com.apple.dock.plist” located at “/Users/~/Library/Preferences/.” While you can customize the Dock by editing this file, be cautious, as modifying critical settings or file structure may prevent the Dock from functioning correctly.
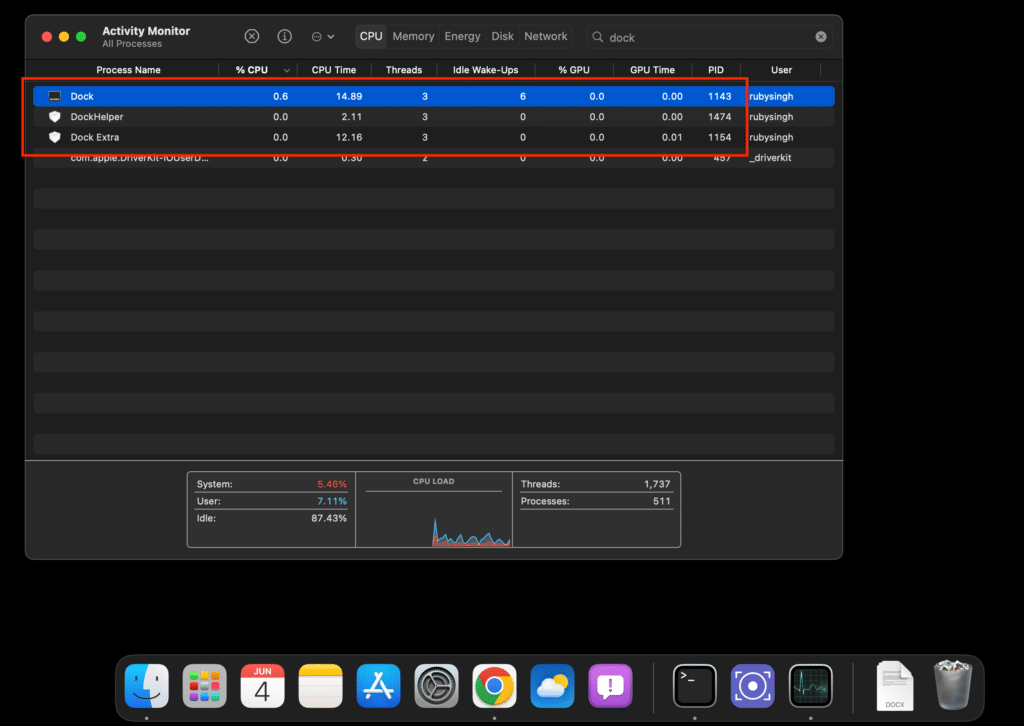
Restarting the Dock
You can use the macOS Activity Monitor or the Terminal to restart the Dock. In Activity Monitor, search for “Dock,” select the process, and click the Stop button. Alternatively, type “killall Dock” in the Terminal and hit Enter.
Potential Enhancements
Although Apple has recently made a few updates to the Dock’s functionality, several additions could enhance its usability. These include grouping apps, multiselecting apps for bulk deletion or reordering, a “Move To” option, and the ability to inspect and update apps via the App Store.
Customize Your Dock Experience
The macOS Dock offers numerous customization options, allowing you to tailor it to your liking. Explore the available settings and make adjustments to optimize your workflow and enhance your macOS experience.


