Table of Contents
In this article, we will learn How to install SteamOS on Virtualbox with a step-by-step guide.
Within a few days, the first lucky ones can already test SteamBox, a mini-computer based on the SteamOS system. Valve also released SteamOS for free, so even if you’re not a tester for a new gaming device, you can install software on your computer.

However, if you are unsure about the Linux SteamOS system and would prefer to test it in a secure environment, it is worth trying it out on a virtual machine first. Valve provides SteamOS in a ZIP file – we’ll show you how to convert the SteamOS installer to an ISO extension, and then how to install it on VirtualBox.
Before we get started, download SteamOS in the custom version. You can do this on our website by selecting the specified version when downloading. Once we have the downloaded ZIP file, it’s time to convert it to an ISO compatible with VirtualBox.
Attention! SteamOS is only compatible with NVIDIA graphics cards. Valve has already announced that support for AMD and Intel graphics cards will soon be added.
Download the Required Files to install SteamOS on Virtualbox.
- Download Virtualbox and install it on your system.
- Download Virtualbox Guest Addition File.
- Download SteamOS ISO Image file.
Setup your Virtual Machine to install SteamOS on Virtualbox
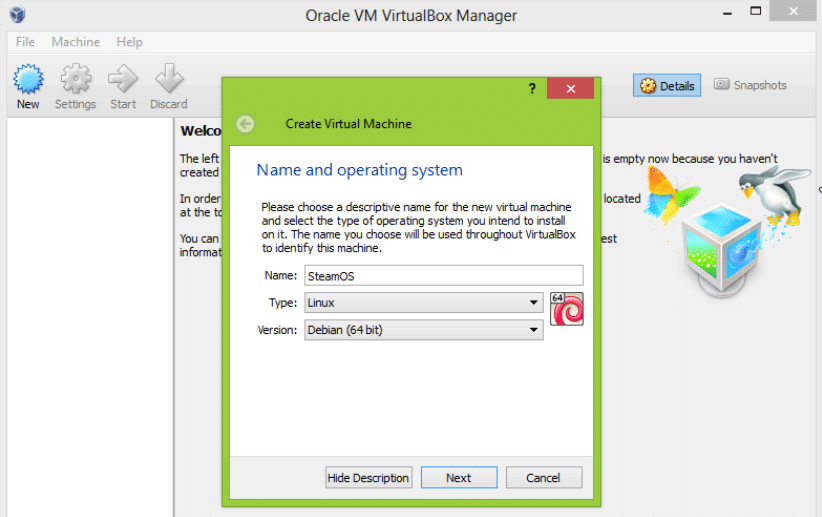
1. Launch VirtualBox and click “Create” to create a new virtual machine. Select the name of the machine (for example, SteamOS), select a type from the Linux list, and install the version in Debian (64-bit). Click Next.
2. In the next window, select the amount of RAM you want to allocate to the virtual machine. 1GB (1024MB) should be enough, but if you have a lot of RAM, you can give 2GB (2048MB). Click Next.
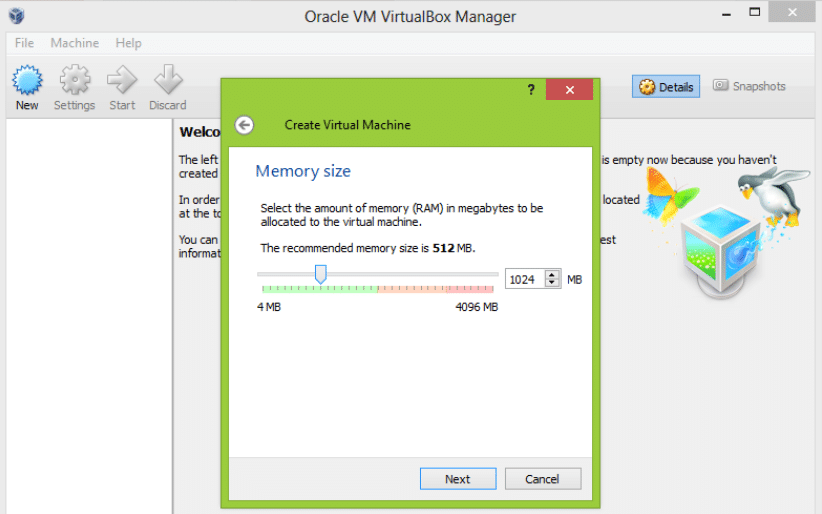
3. Then create a virtual hard disk. By default, this is 8 GB, which should be enough for basic tests (you can increase the capacity of the disk on request). Here we use the default settings, i.e. click “Create“, select the disk type as VDI, dynamic and confirm the creation of the virtual machine.
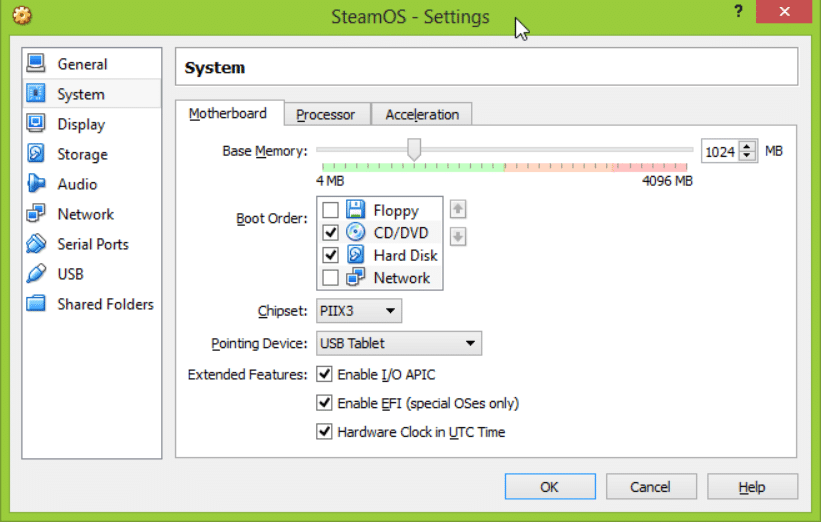
4. Right-click on the created computer, and then enter the settings using the “Settings” option. Click the Settings tab.
5. In the Settings tab, deselect the “Floppy” checkbox in the “Boot Order” field. Below is the list of elements in the “Advanced features” section, select “Enable EFI (special OS only)“.
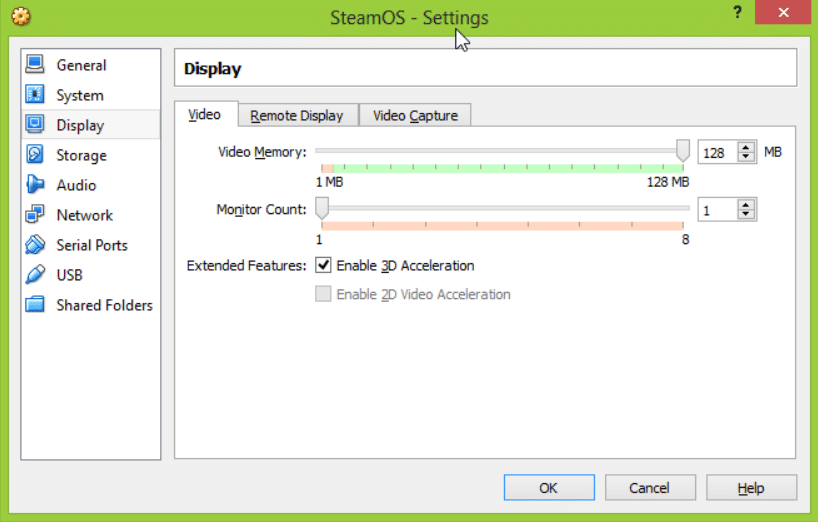
6. Click the Display tab. Set the video memory slider to the maximum value or 128 MB. In the Advanced Features section, select Enable 3D Acceleration.
7. It’s time to install the created ISO image. Click the Storage tab. The list includes a “Controller: IDE” section, which will display an icon with a CD and the word “Empty”. Select it, and then click the disk icon on the right edge of the window.
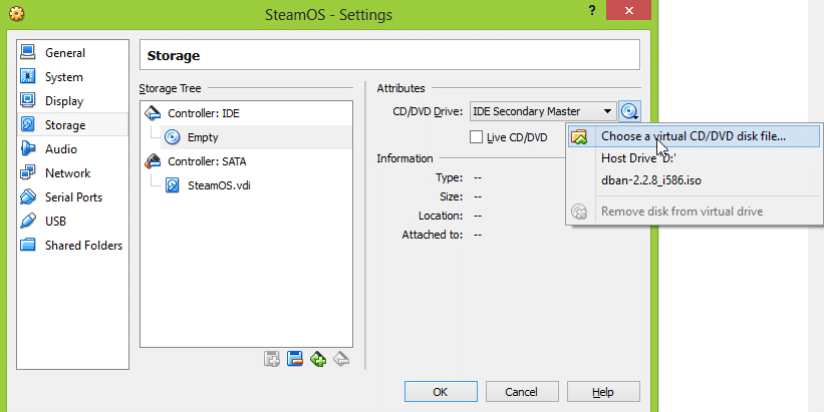
Select the option “Select Virtual CD/DVD…“. Confirm that you have changed all the settings by clicking OK.
8. Select the SteamOS virtual machine from the list and click Run. Wait a minute to launch the SteamOS installer. Select “Automatic installation (WILL ERASE DISK!)” and wait for the system to be installed.
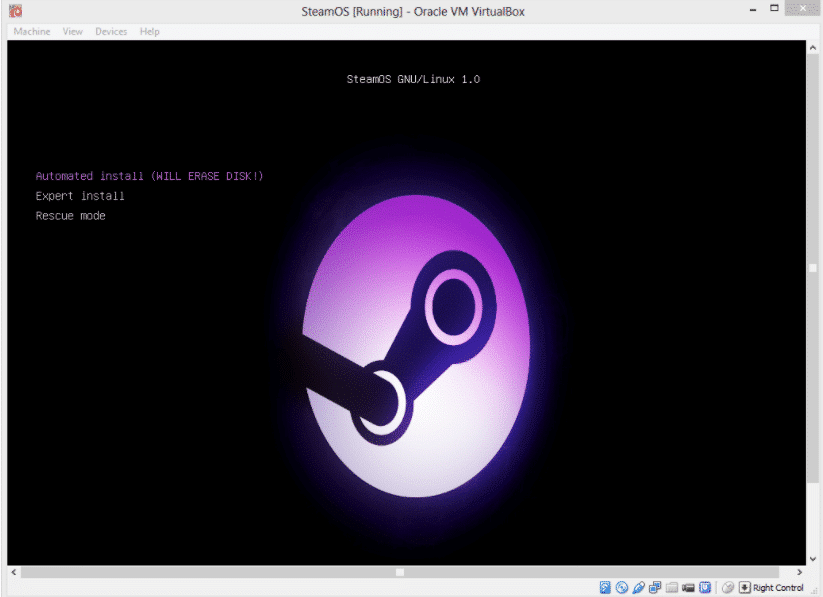
If, for some reason, you don’t see the screen as seen in the image and instead see the gray text screen, all you need to do is enter commands to load GRUB:
FS0:\EFI\BOOT\BOOTX640
The installation will start and an overview of what is being installed is displayed. You may wish to have a seat and stay close so that you can quickly intervene when this step of the installation process has been completed.
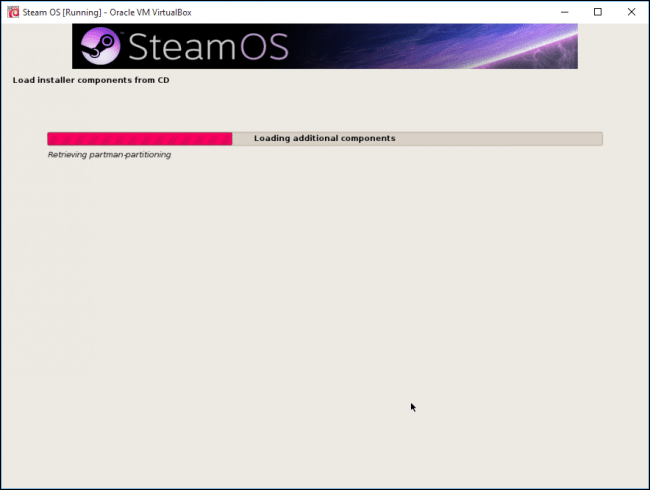
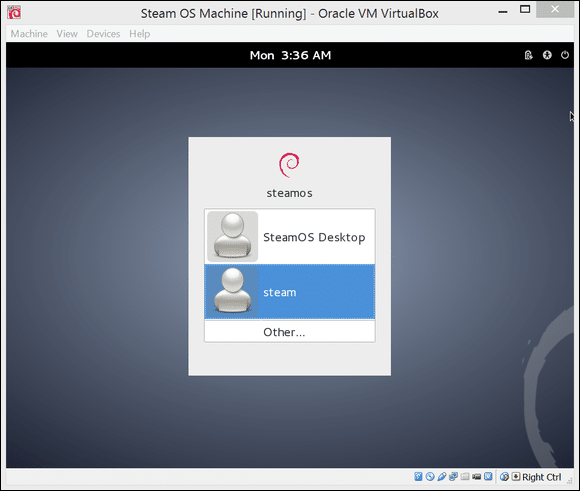
Once the installation is complete, we can re-enter the virtual machine settings and on the “Storage” tab, delete the ISO file using the installer so that the reinstallation does not start each time the virtual machine is turned on. After restarting, we have to go to a system that we can log in to (login: par/password: par) and select the graphical interface (GNOME desktop environment or SteamOS Big Picture mode).
(Optional) Installing VirtualBox Guest Add-ons
You should set the so-called one if there are problems with the resolution or graphics. Other additions for VirtualBox. To do this, we must turn on the virtual machine and select the second option with a note “(Recovery)” during startup.
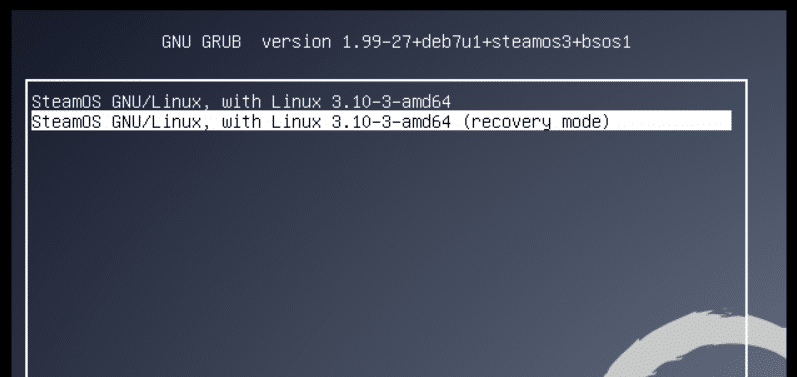
Once we go into text recovery mode, go to the “Devices” tab and select the option “Insert guest extra CD…“. Then, in recovery mode, enter the following commands, confirming each line by pressing “Enter“:
mount/dev/cdrom/media/cdrom
sh/media/cdrom/VBoxLinuxAdditions.run
Wait for the guest add-ons to install the required drivers, and then restart the virtual machine by typing the command:
shutdown now -r
And its ready! After rebooting, SteamOS is ready to use and you can check all its parameters.
Things to keep in mind:
After you have rebooted your system into the Recovery Mode, you will need to uninstall the NVIDIA driver package that comes with it using these simple steps:
apt-get purge “.*nvidia.*”
Yep, it’s as exciting as it sounds. Type “y” and press ‘enter’ to confirm.
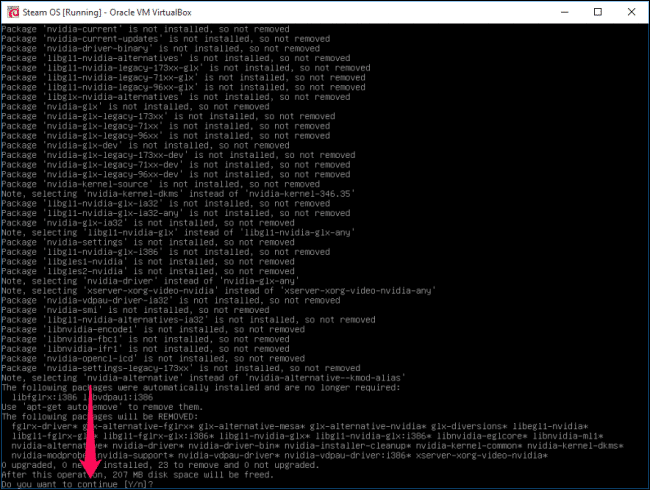
After the screen scrolls down again and you finally get back to a command line where you can enter text, you will need to enter this string in order to generate a new configuration file:
dpkg-reconfigure xserver-xorg
Conclusion:
I hope this guide on How to install SteamOS on Virtualbox was easy. If you face any issues, please comment below.