

Table of Contents
In this article, we will learn How to Install Linux on Windows 11 using WSL 2. In the new version of Windows 11, Microsoft developers have simplified the mechanism for installing WSL components. You can install the Windows subsystem for Linux, the virtual machine platform, the WSL kernel, and the Linux distribution with one command.

What Linux distributions can be installed on Windows 11:
- Debian
- Kali Linux Rolling
- OpenSUSE Leap 42
- SUSE Linux Enterprise Server v12
- Ubuntu 16.04 LTS
- Ubuntu 18.04 LTS
- Ubuntu 20.04 LTS
How to Install Linux on Windows 11 using WSL 2: Step by Step Guide
- Run Command Prompt or Windows Terminal as administrator.
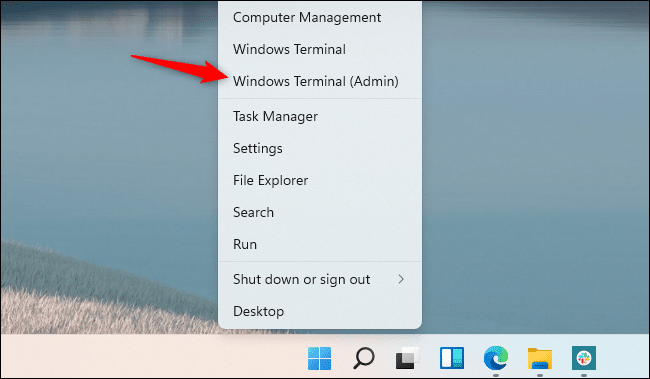
- Type the following command.
wsl --install
- Press Enter
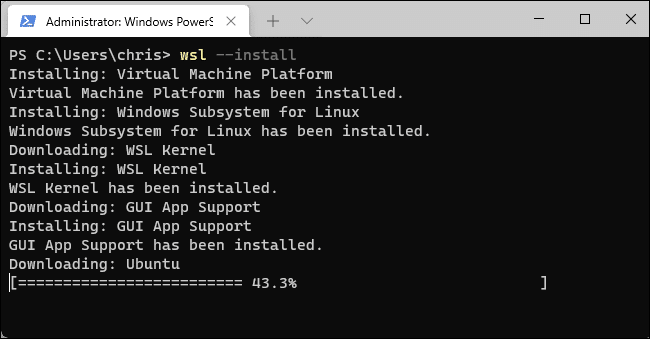
The –install command allows you to perform the following actions:
- Install additional WSL components
- Install the virtual machine platform.
- Download and install the WSL kernel.
- Download and install linux distribution (Ubuntu is installed by default)
When you have finished this procedure, restart your computer.
- After the reboot, the installation will continue and Ubuntu 20.04 LTS will be launched (this version is installed at the time of writing) with the subsequent initial configuration, where you will need to create a username and password.
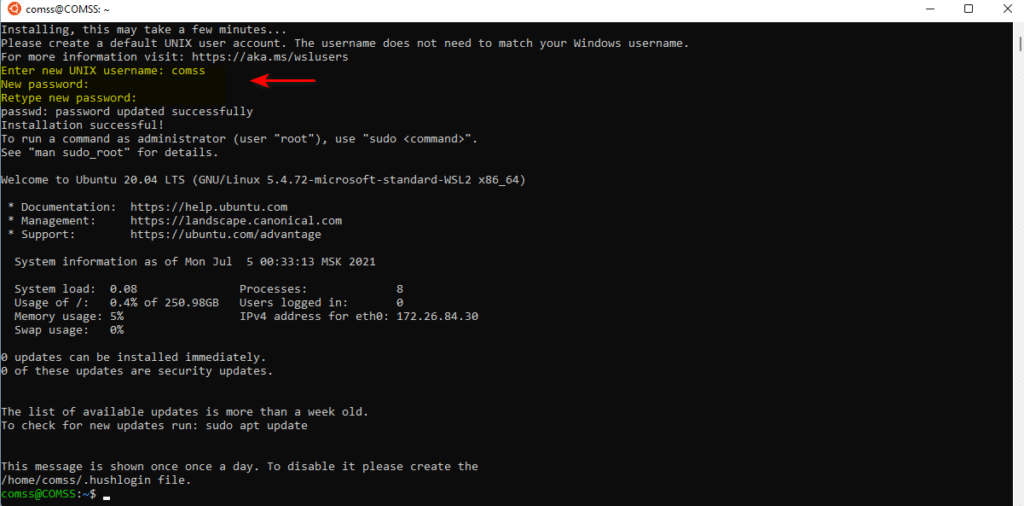
For each Installed Linux Distribution, a unique user name and password are created in the Windows environment. A unique account will be used to log in to a specific distribution. This account has the ability to take Linux administrator privileges.
Installing a Specific Linux Distribution of MS Windows 11 Using WSL2
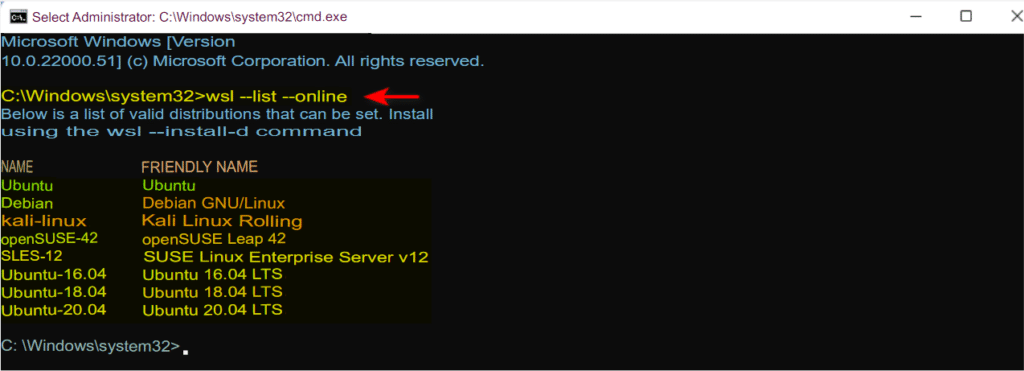
- Run Command Prompt or Windows Terminal as administrator.
- To get a list of available Linux distributions, type the following command.
wsl --list --online
- Press Enter
- After selecting the desired operating system, enter the command (the operating system can be selected different):
wsl --install -d Kali-Linux
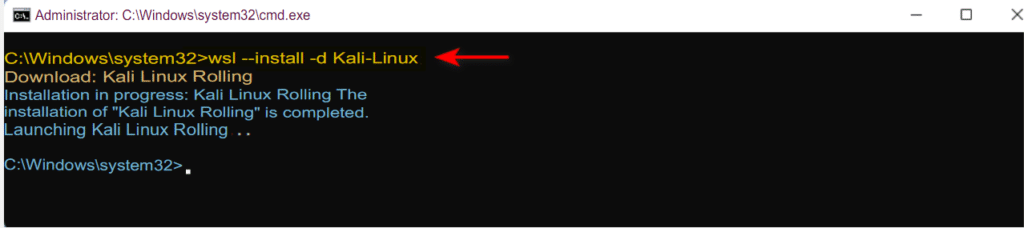
- When the installation is complete, the selected operating system starts.

Several ways to Run Linux on Windows 11
To subsequently run the installed Linux distribution, you can use one of the options:
- Open the Start menu > All applications and select, for example, Ubuntu
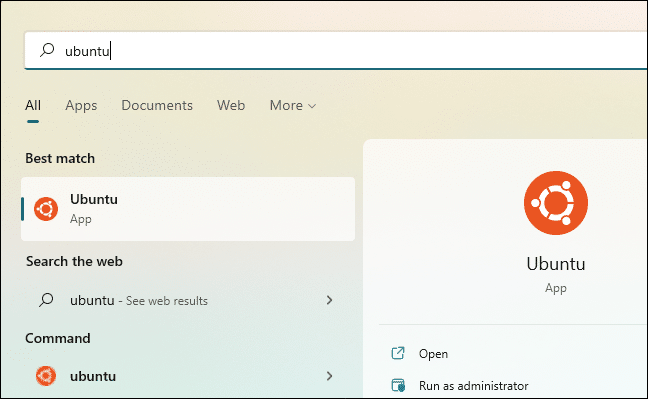
- At the command prompt or Windows Terminal, enter the name of the installed Linux system, for example, and press Enter
ubuntu

- At a command prompt or Windows Terminal, type . The default Linux distribution starts. If you have multiple distributions installed, type, for example, a command
wslwsl -d Kali-Linux
Uninstall Linux distributions and Disable Windows Subsystem for Linux
- Open MS Windows 11 Settings
- Go to Apps > Apps & Features
- Select the Linux distribution you want to remove, click on the icon on the right and select Uninstall
- If you want to disable Windows subsystem for Linux, open the Windows Components window, clear the checkbox, and restart the computer.
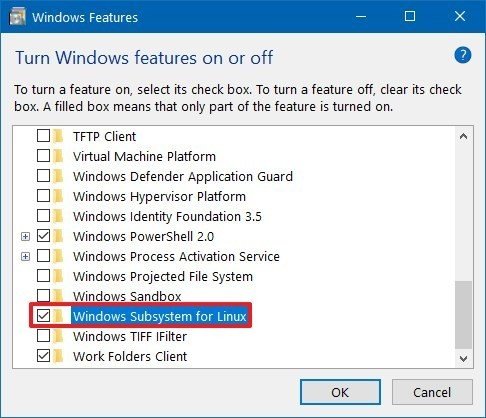
To open this window, you can use one of the options:
- Open MS Windows 11 Settings, select Apps > Optional features > Other Windows Features
- Open Control Panel > Windows Programs and Features
- in the Run window, type Optional Features
If the Windows Engine for Linux is not updated automatically (for example, it is possible to update only manually using the wsl –update command), you must enable the Windows Update option To receive updates for other Microsoft products when you update Windows.
Linux startup error may be caused by the BIOS or UEFI not having the virtualization support option enabled
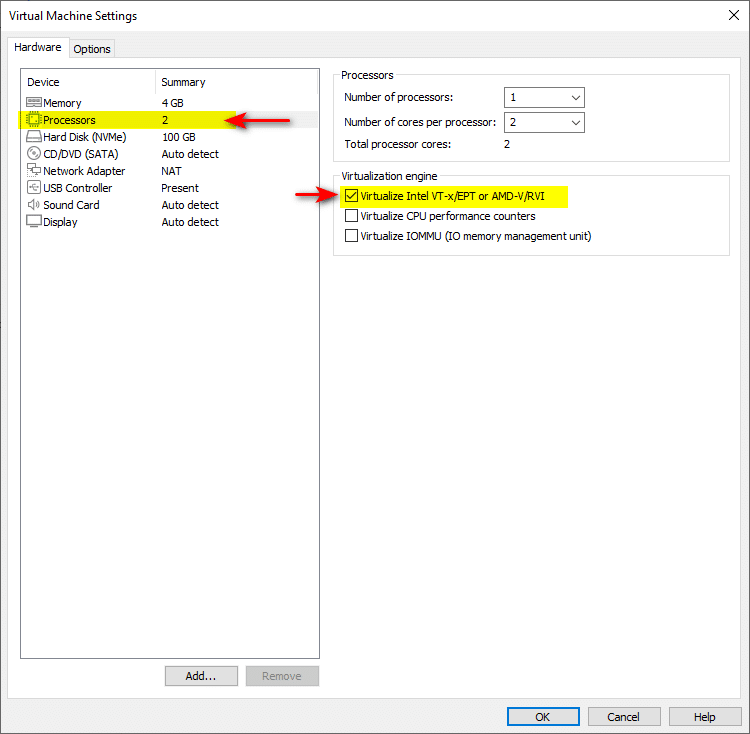
If you are running Windows Subsystem for Linux in a virtual environment, such as using the VMware Workstation platform, you must:
- Turn off Windows 11 guest
- Open Windows 11 Guest Settings
- In the Hardware section, select Processors and check the box next to Virtualize Intel VT-x/EPT or AMD-V/RVI
The above-mentioned are only 2 reasons why there may be problems with the correct operation of the WSL. Other reasons will be considered in the future.
Conclusion: How to Install Linux on Windows 11 using WSL 2
I hope this guide on How to Install Linux on Windows 11 using WSL 2 was helpful. If you face any issues, please comment below. Here are some other Windows 11 guides.


