

Table of Contents
In this article, we will learn How to install macOS Sonoma on Virtualbox on Windows PC. All the required download files will be shared below in this article.
If you are a MAC user and want to install macOS Sonoma on Virtual Machine, you can use this guide: How to install macOS Sonoma on Virtual Machine on MAC using UTM
Installing macOS Sonoma on VirtualBox on a Windows PC allows you to experience the power and versatility of Apple’s operating system without owning a Mac. Whether you’re an app developer looking to test your software on macOS or simply curious about exploring the Mac ecosystem, this guide will walk you through the step-by-step process of setting up macOS Sonoma on VirtualBox, a popular virtualization platform for Windows.
We previously installed macOS Sonoma on VMWare as well. If you want to read that guide, visit here: How To Install macOS Sonoma on VMWare on Windows PC: 23 Easy Steps
By the end of this tutorial, you’ll have a functional macOS Sonoma virtual machine running smoothly on your Windows PC, ready for you to explore and enjoy. So, let’s get started and bring the Mac experience to your fingertips, even on a Windows machine!
Things Required to Install macOS Sonoma on VirtualBox on Windows PC
- Enable virtualization of your Windows 11 PC. Here is a guide you can use: How to Enable Virtualization in Windows 11? Easy Guide
- Download and Install Virtualbox on your Windows PC: Use this guide: Download Oracle VM VirtualBox & Install on Windows
- Download and Install Virtualbox Extension Pack
- Download macOS Sonoma ISO File
You can also go through our guide: macOS Sonoma: Top 10 Bugs and Their Fixes
Step-by-Step Guide
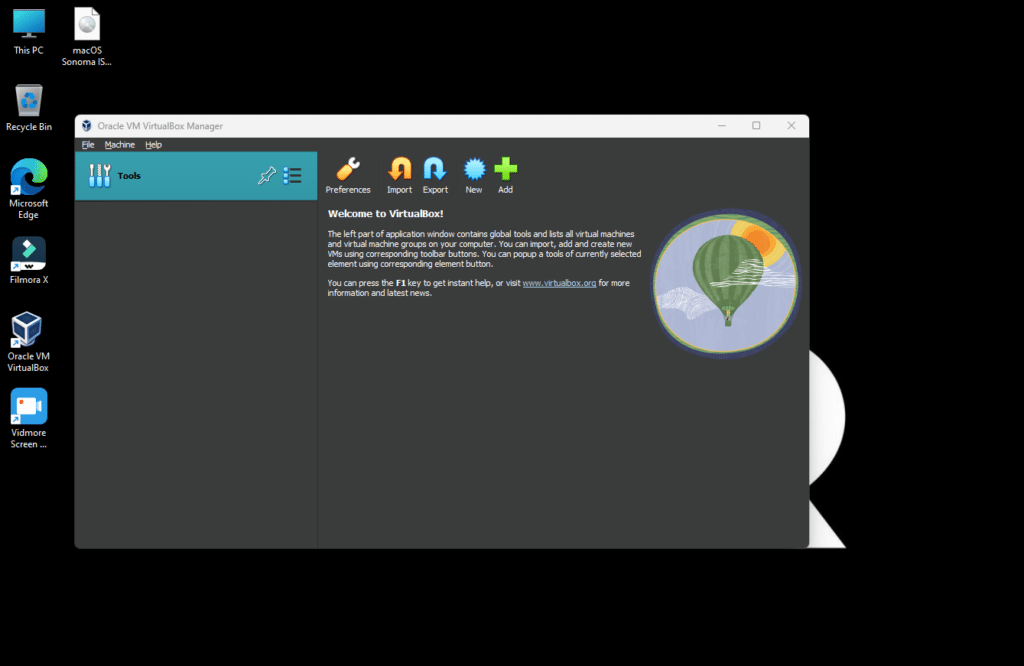
1. Once you have completed the steps mentioned above. Open your Virtualbox and click New.

2. Click Expert Mode


3. Enter the name of your virtual machine (In my case, its: macOS Sonoma)

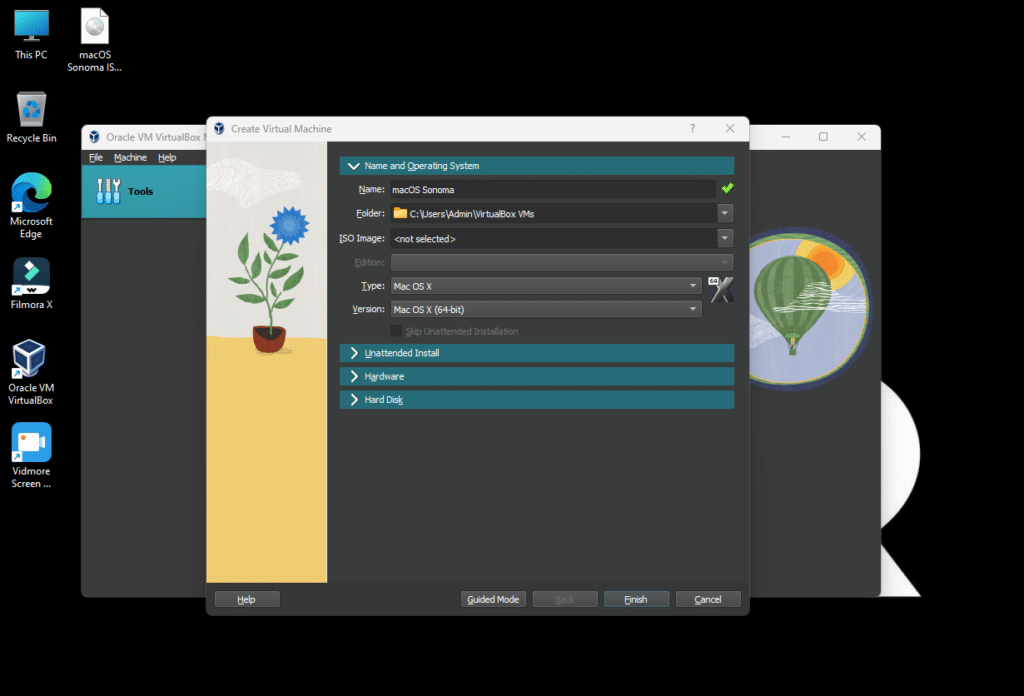
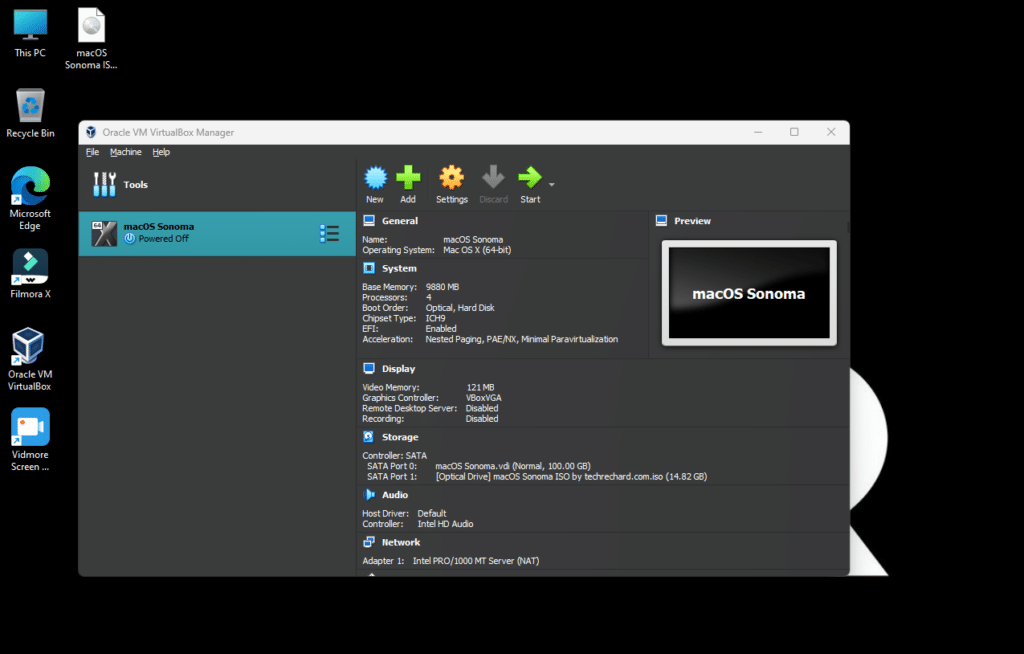
4. Click on Hard Disk and increase the HDD to 100 GB.


5. Click Finish when done.

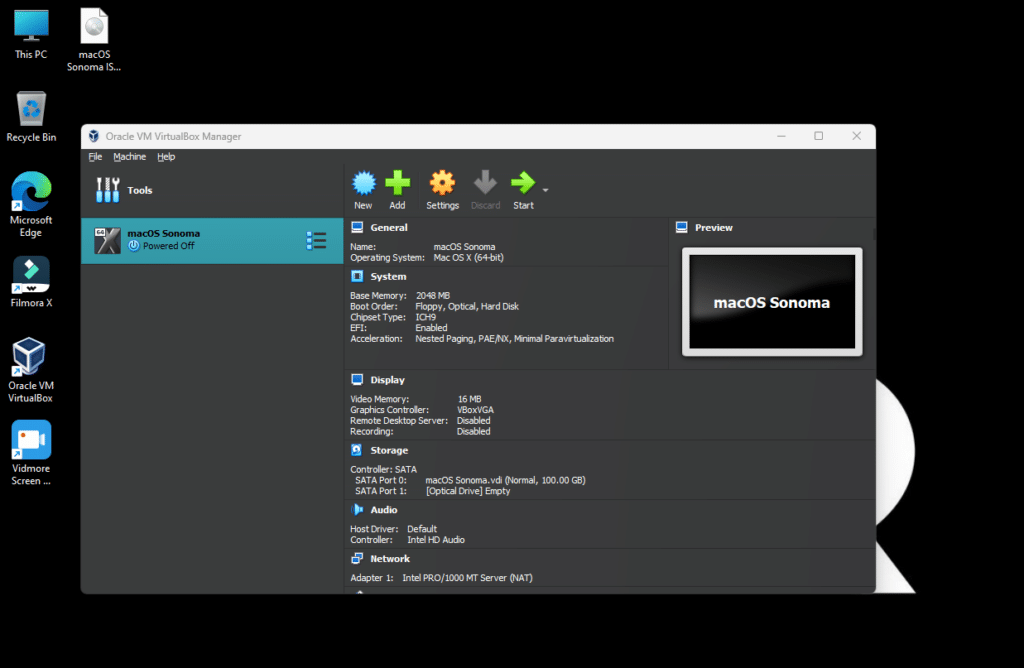
6. Now, click on Settings.

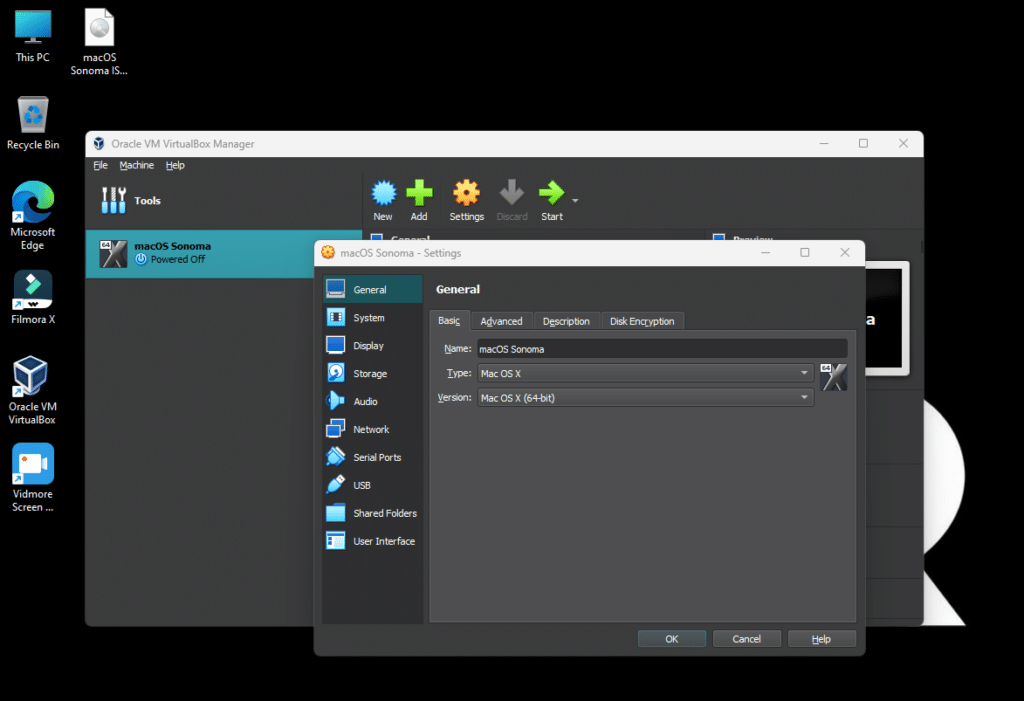
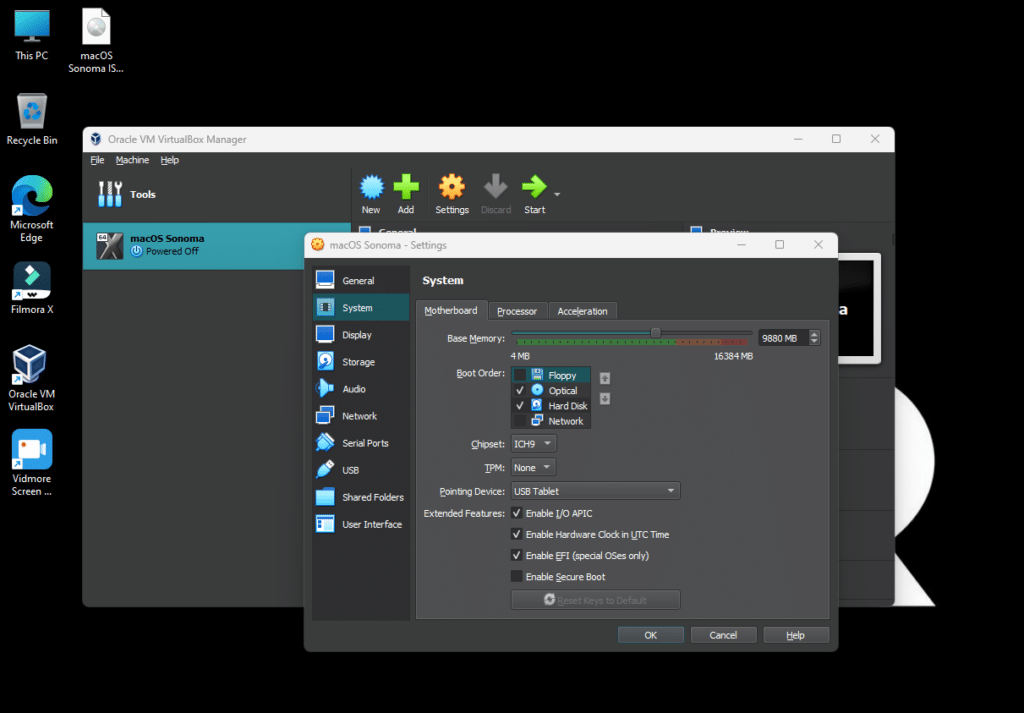
7. Go to System and increase your Base Memory to the highest green limit.

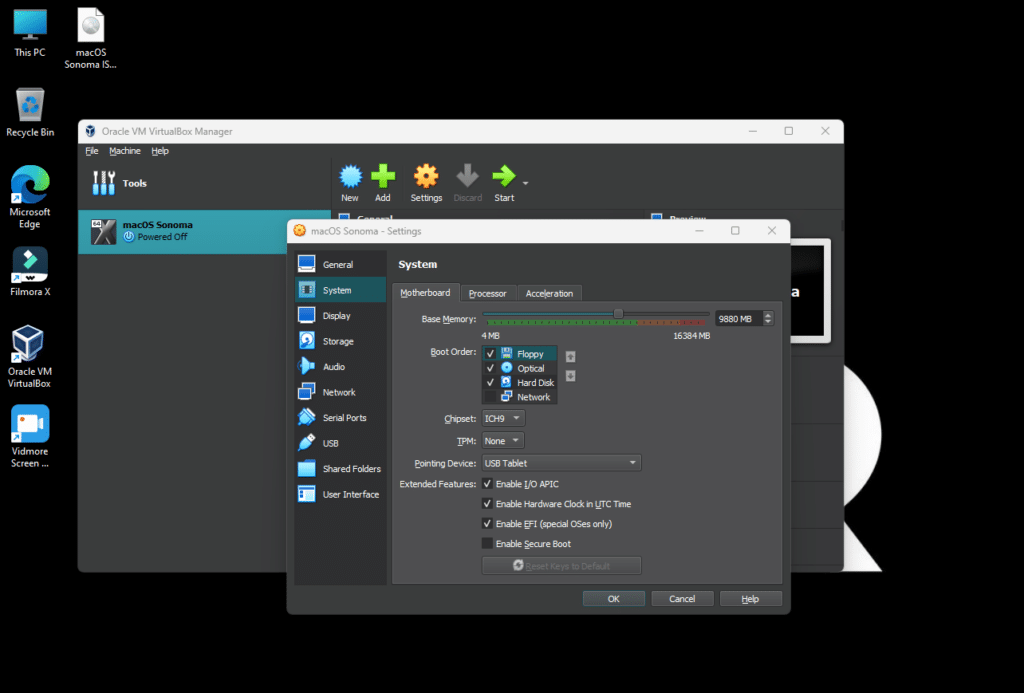
8. Uncheck the Floppy Disk.

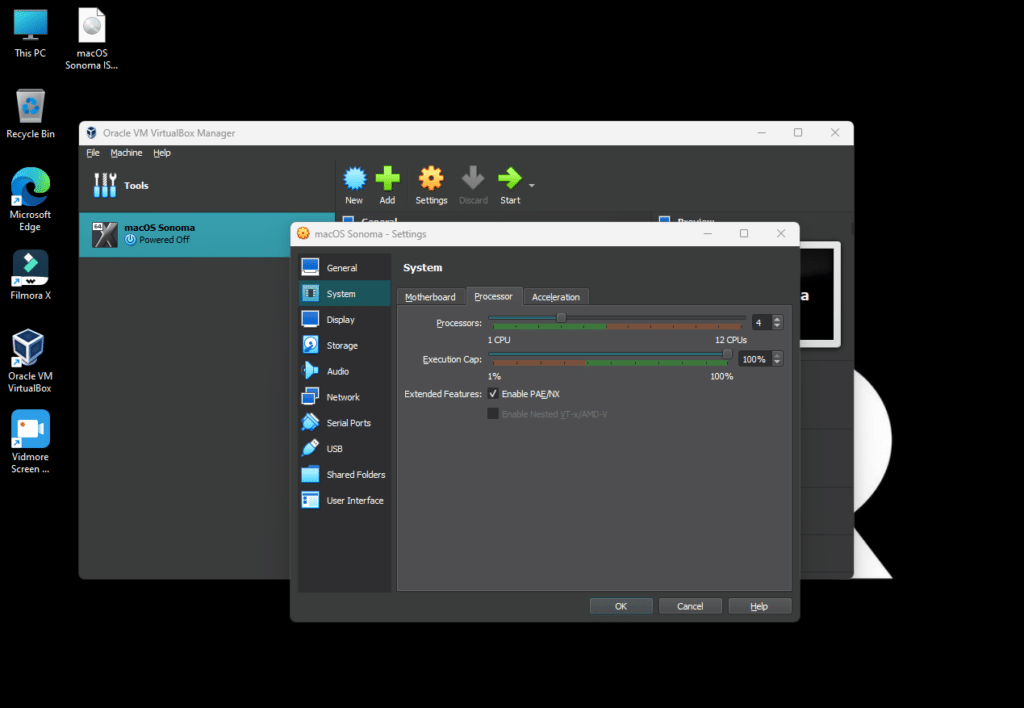
9. Go to the Processor tab and increase your number of processors to 4.

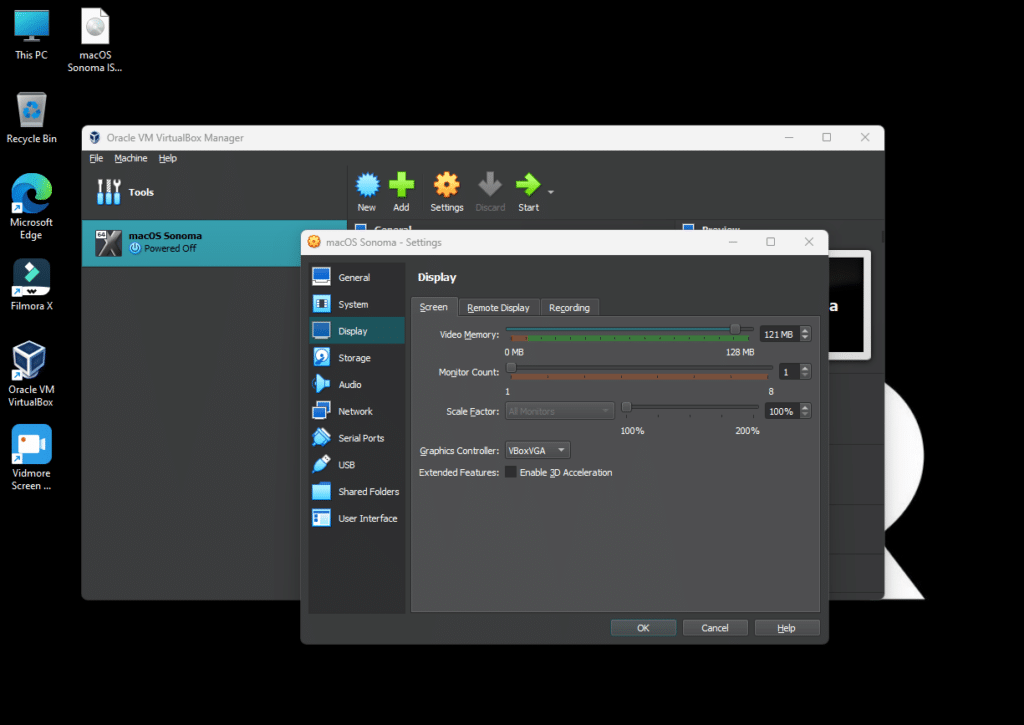
10. Go to Display and increase your Video Memory to the highest green limit.

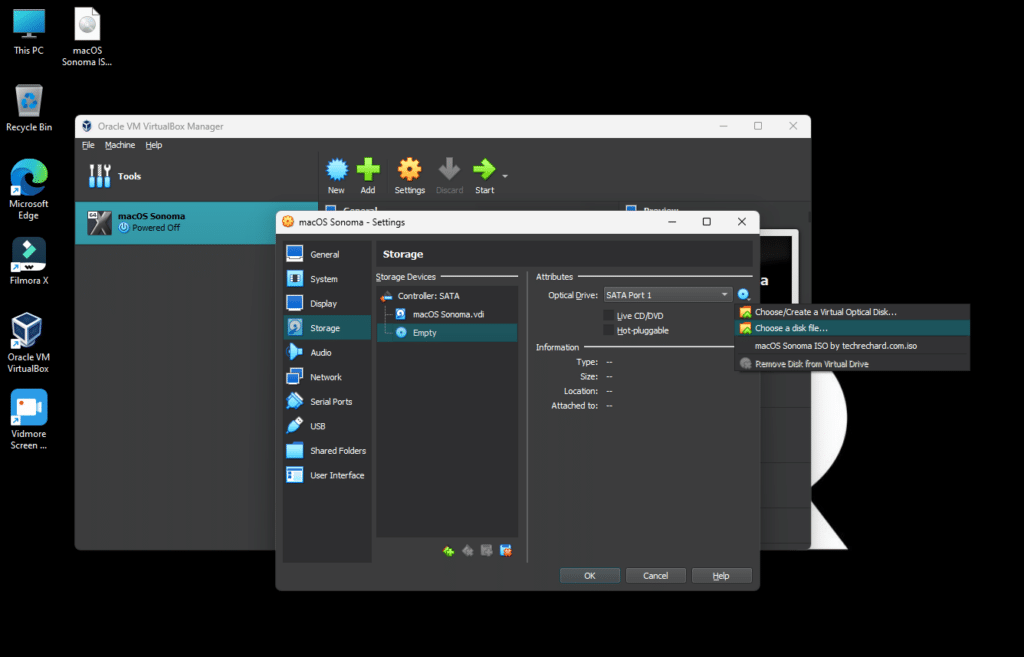
11. Go to Storage, click on Empty, and then click the Disk icon on the extreme right. Click Choose a disk file.

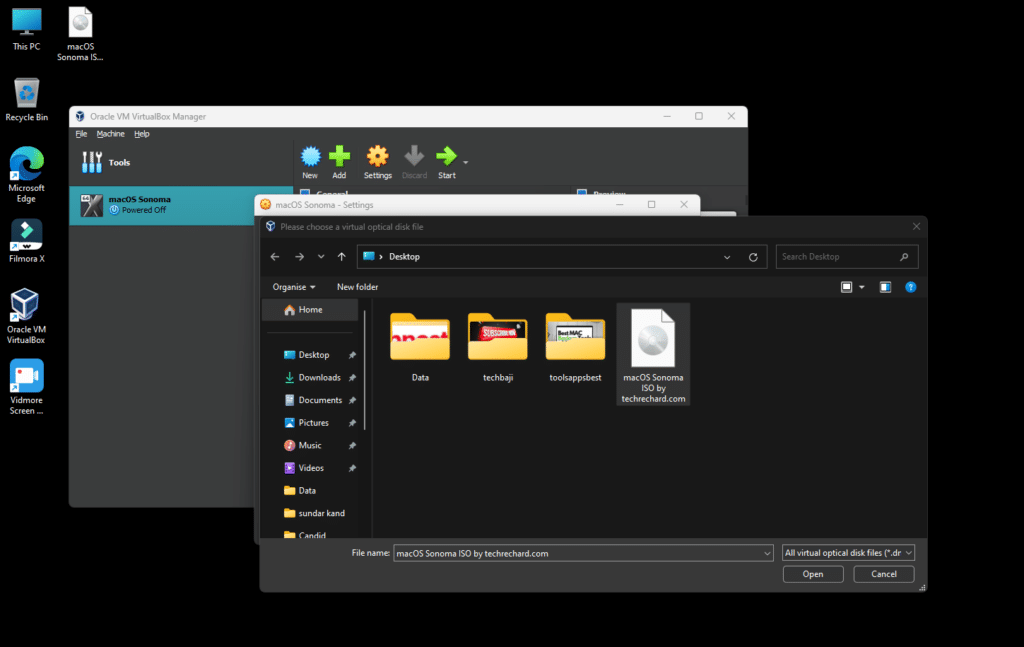
12. Select the macOS Sonoma ISO file you downloaded above and click Open.

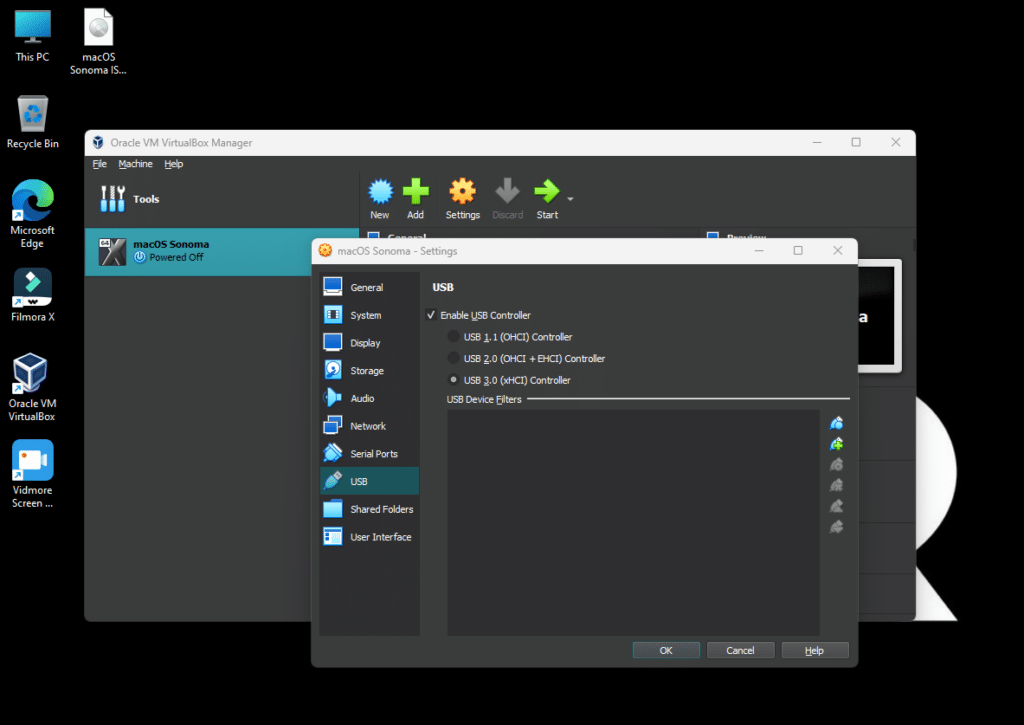
13. Go to USB, select USB 3.0 (xHCI) Controller, and click Ok.
14. Close the Virtual Machine.

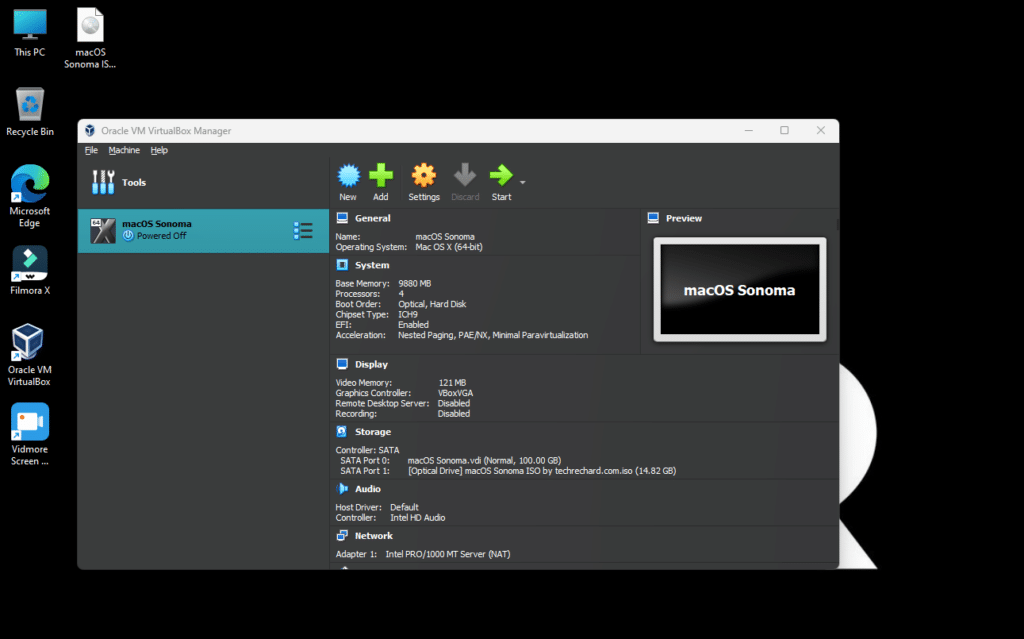
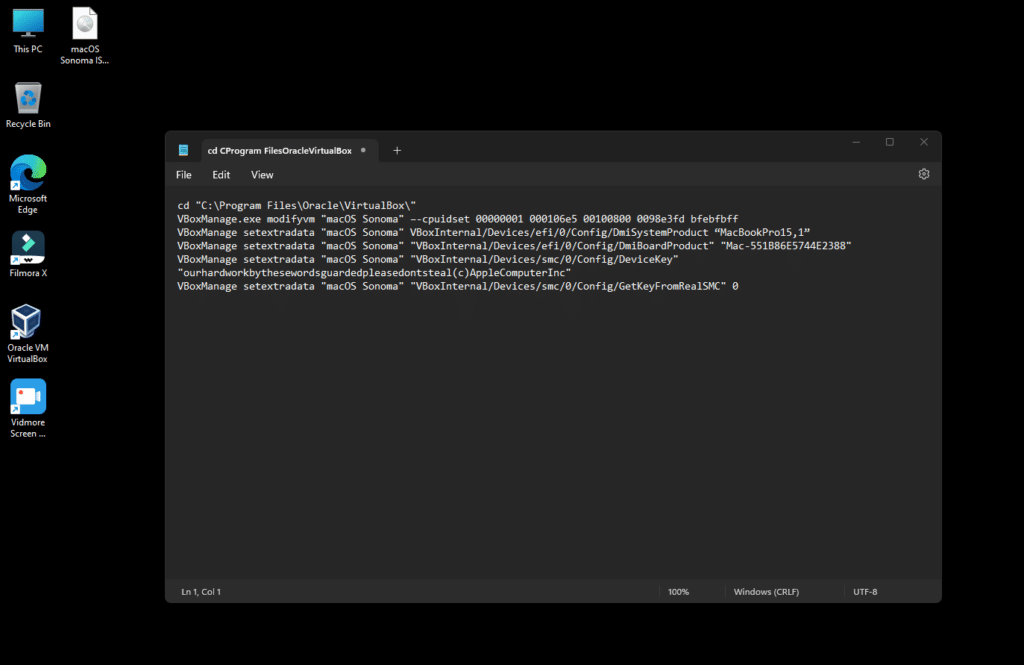
15. Open this file and copy the codes in your notepad.

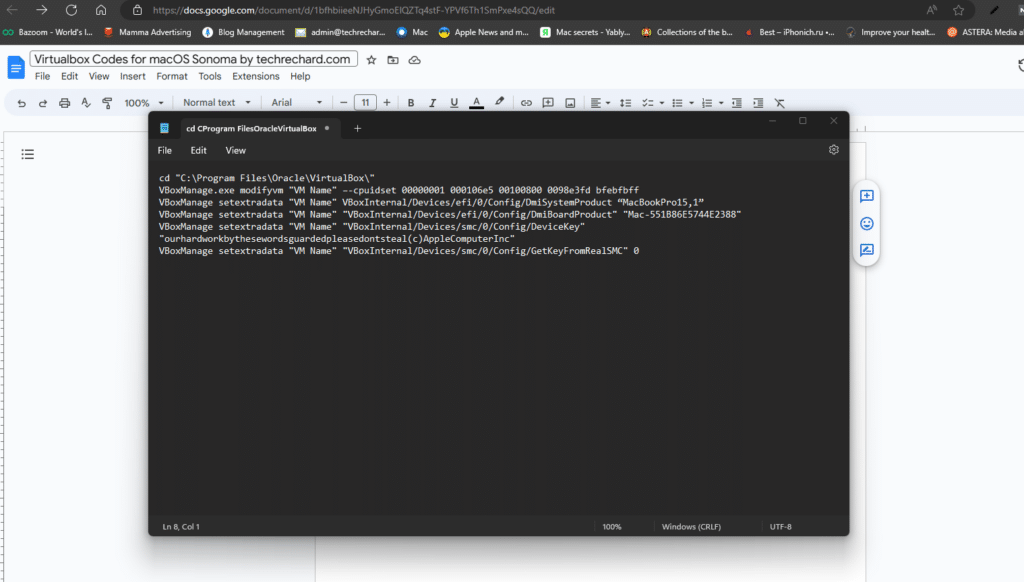
16. Click on Edit and then click Replace.

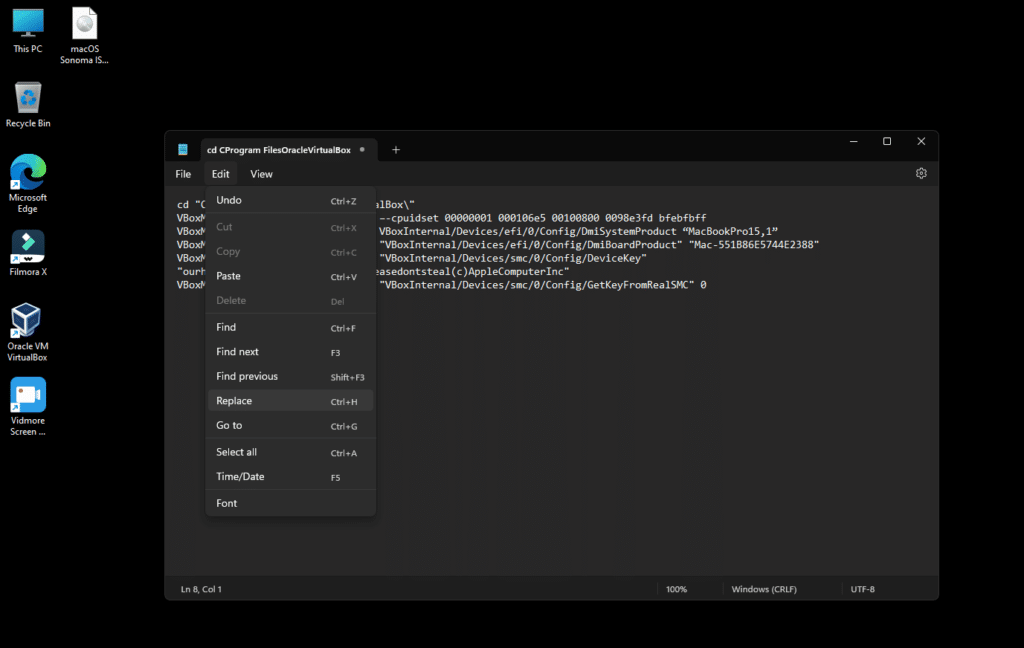
17. Replace the VM Name with the name of your Virtual Machine (In my case, it’s macOS Sonoma).

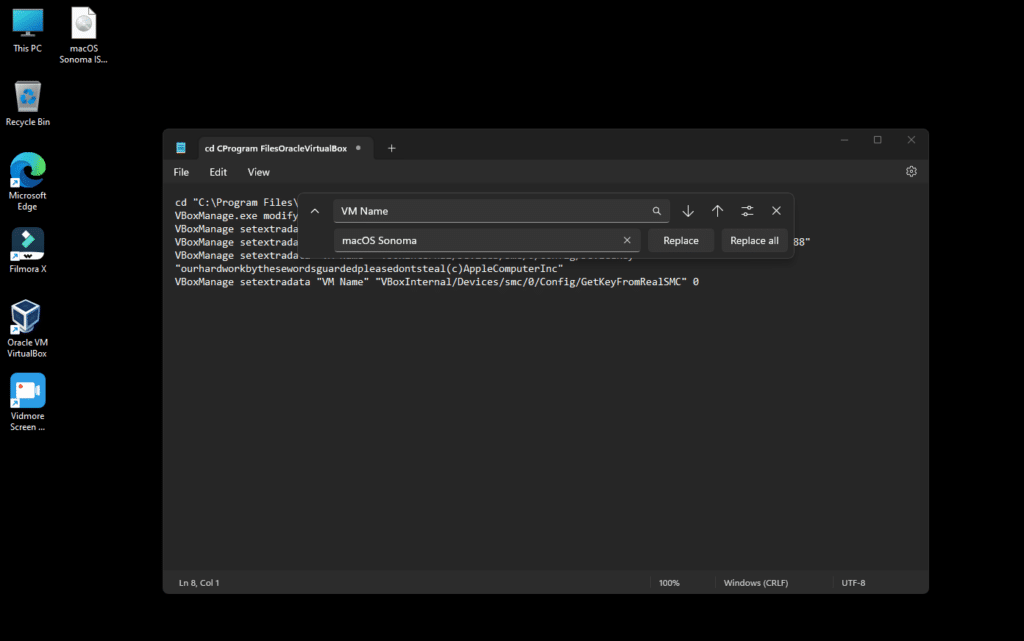
18. Click Replace All.

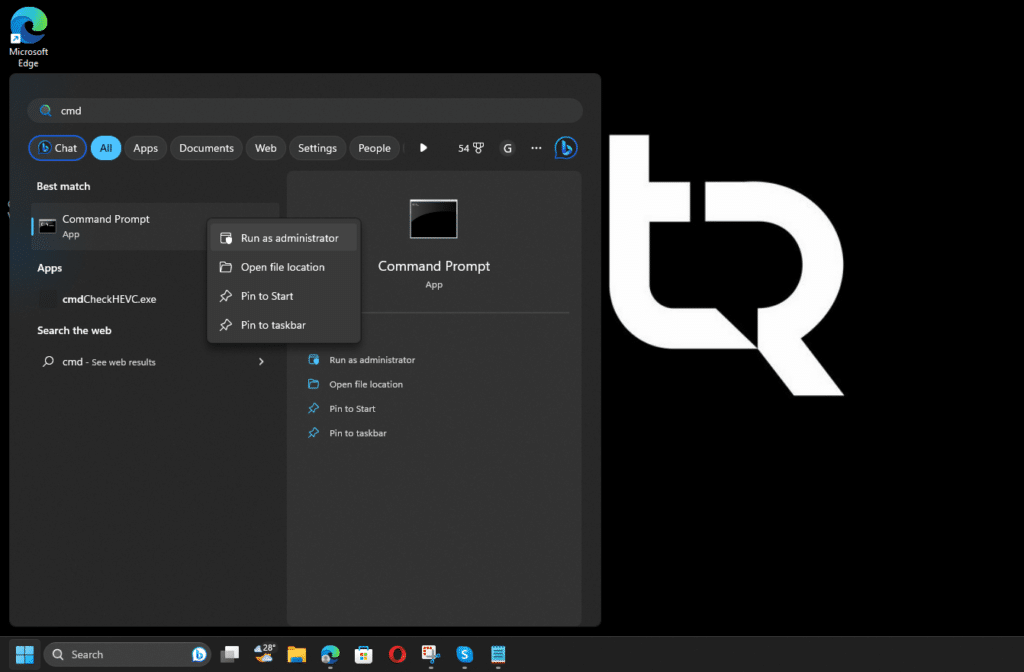
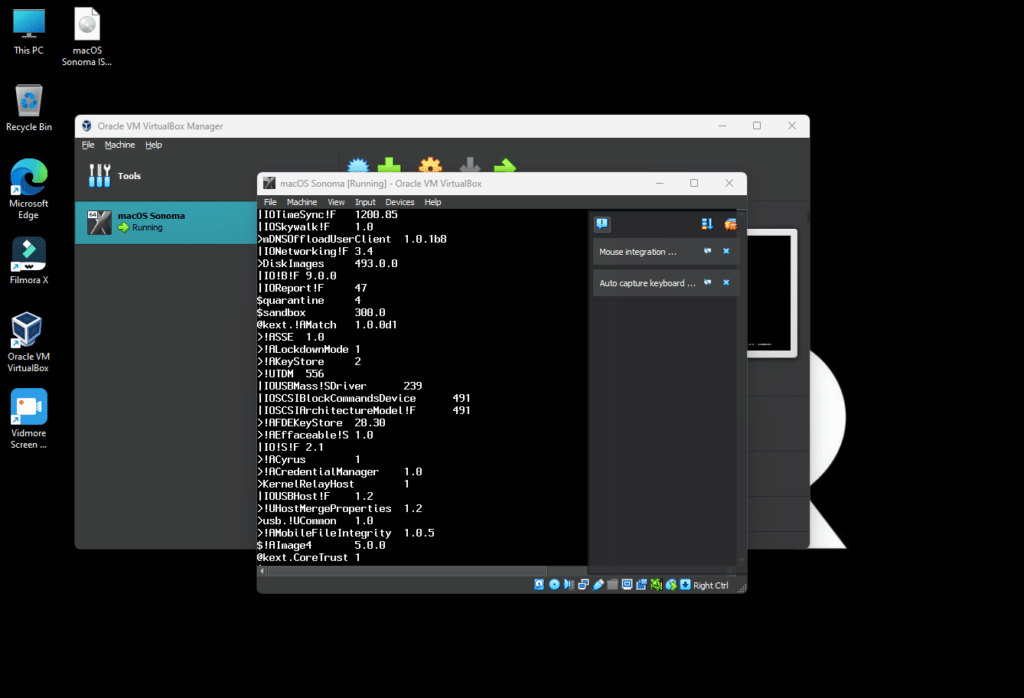
19. Click on Start, search for CMD, right-click, and select Run As Administrator.
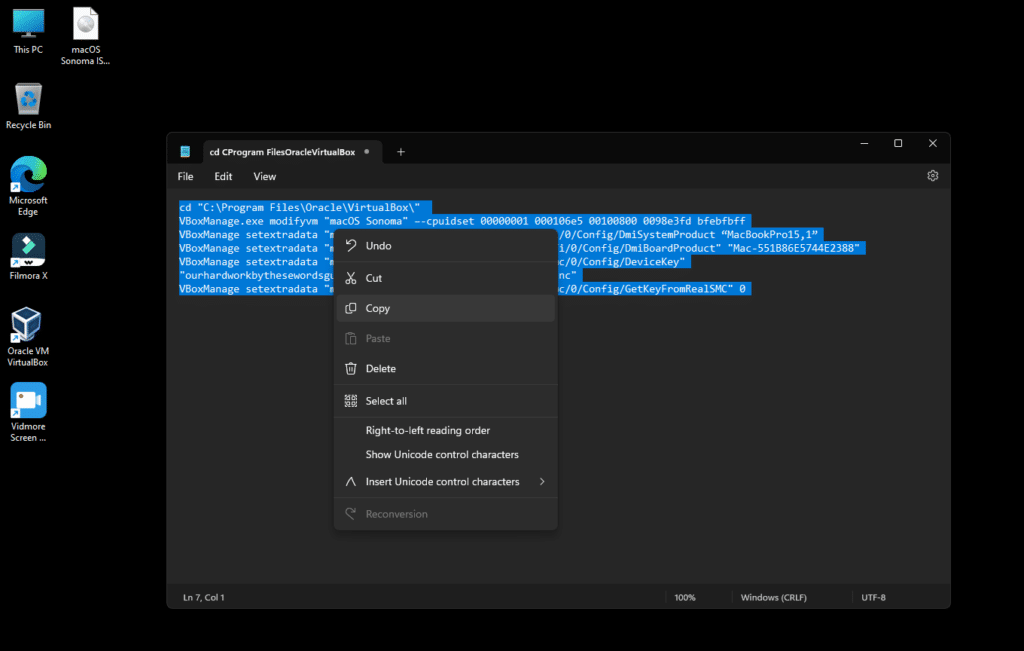
20. Copy all the codes from your notepad.

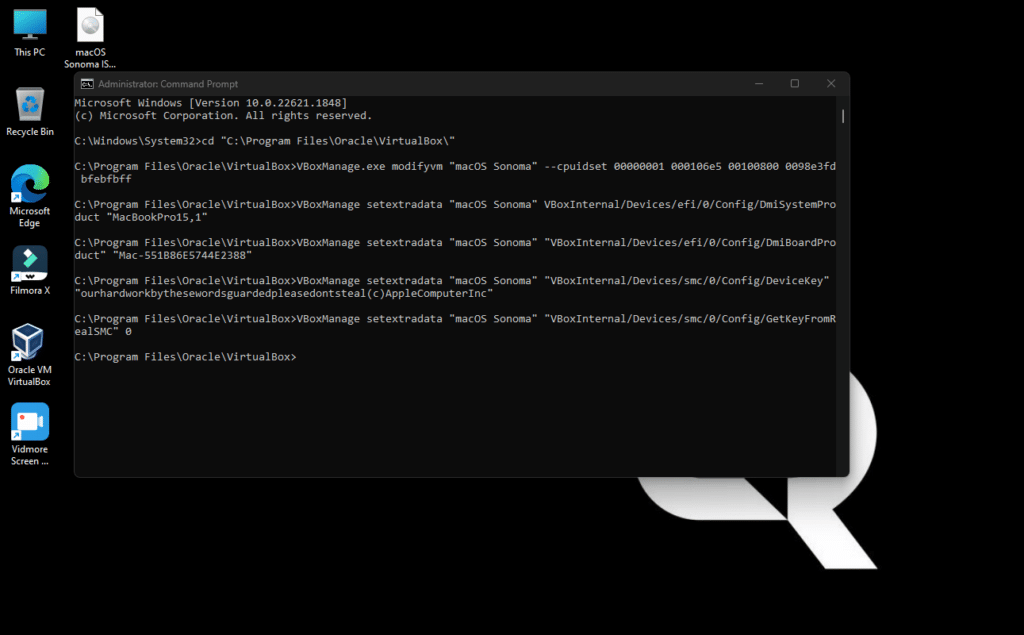
21. Go to the CMD and paste all the codes. You can use Ctrl+V to paste all at once. Ensure the screen looks like the screenshot below (without any errors).

22. Open Virtualbox again and click Start.

23. You will then see a set of codes running for about 90 seconds.
If you are stuck with errors, try changing your CPU processors to 1.

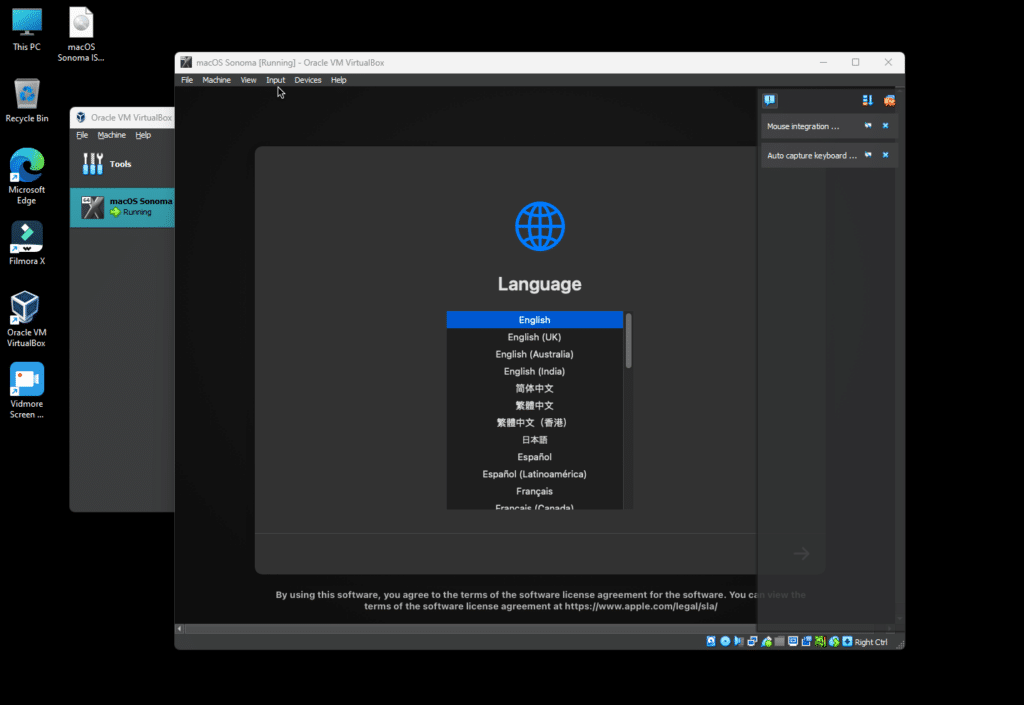
24. After around 90 seconds, you will see the below screen. Select English and click the Next arrow.

25. Click on Disk Utility and click Continue.

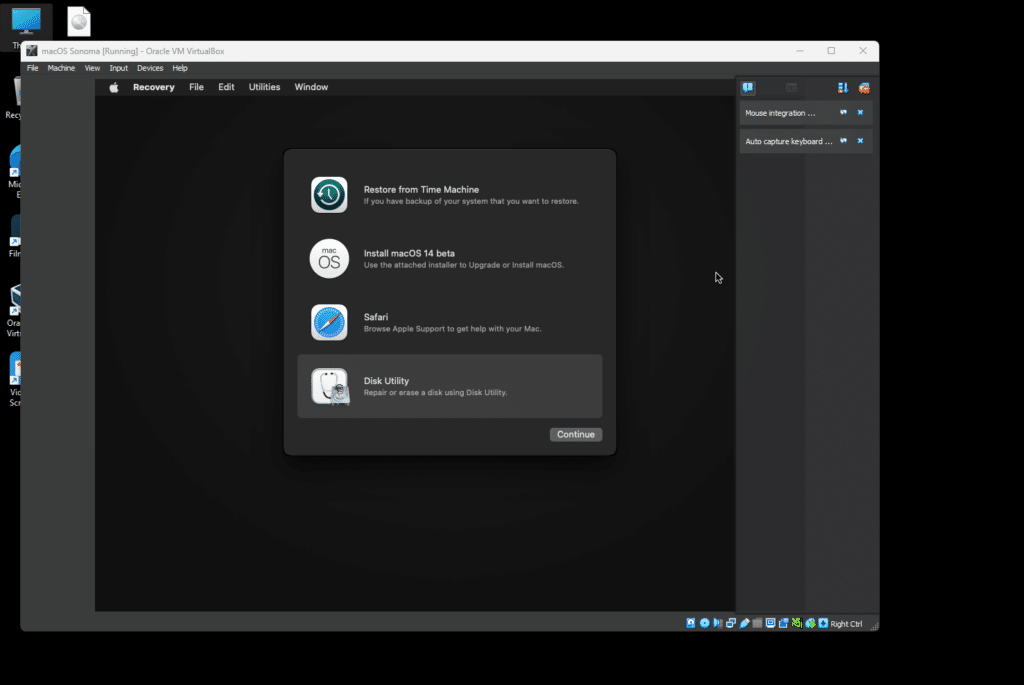
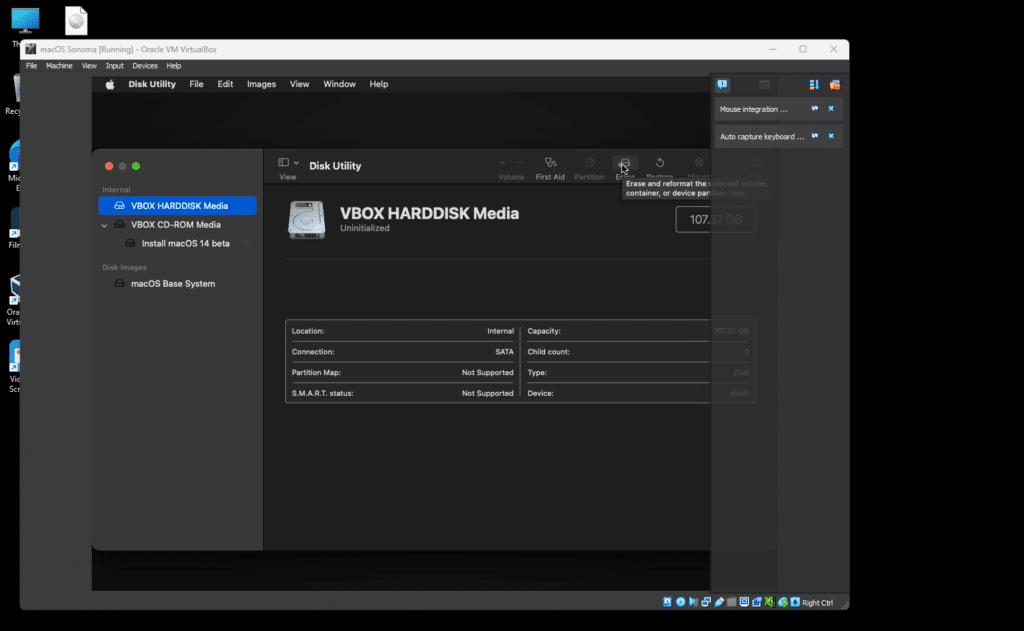
26. Click on VBOX HARDDISK Media and click Erase.

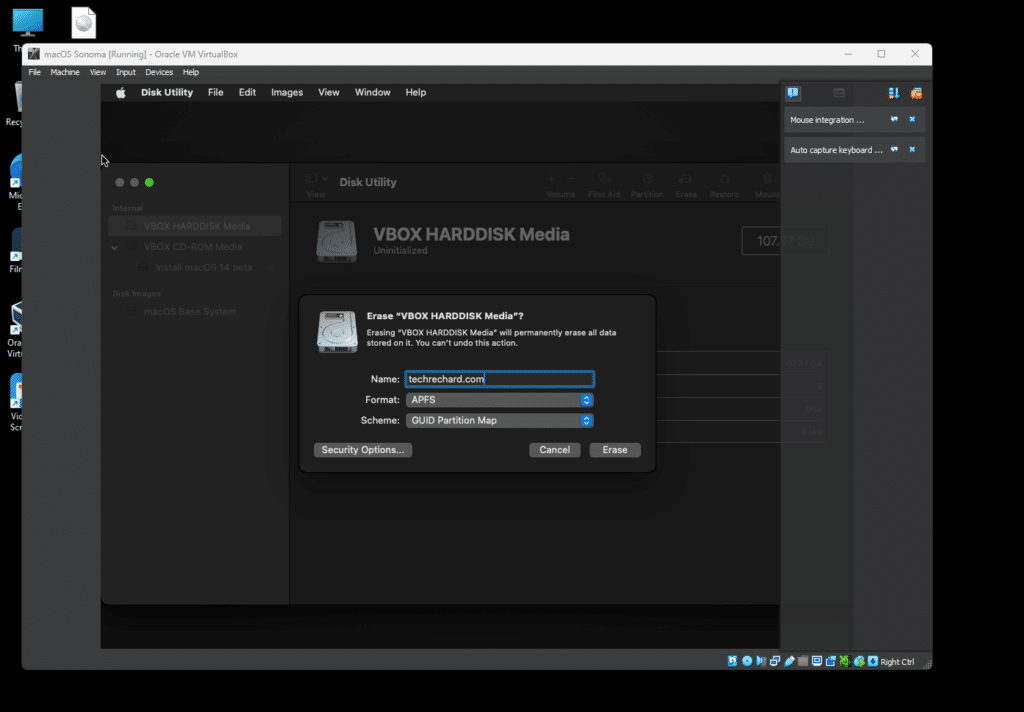
27. Enter the name of your hard disk (In my case, it’s techrechard.com). For the format, use AFPS, and for Schema, use GUID Partition Map.

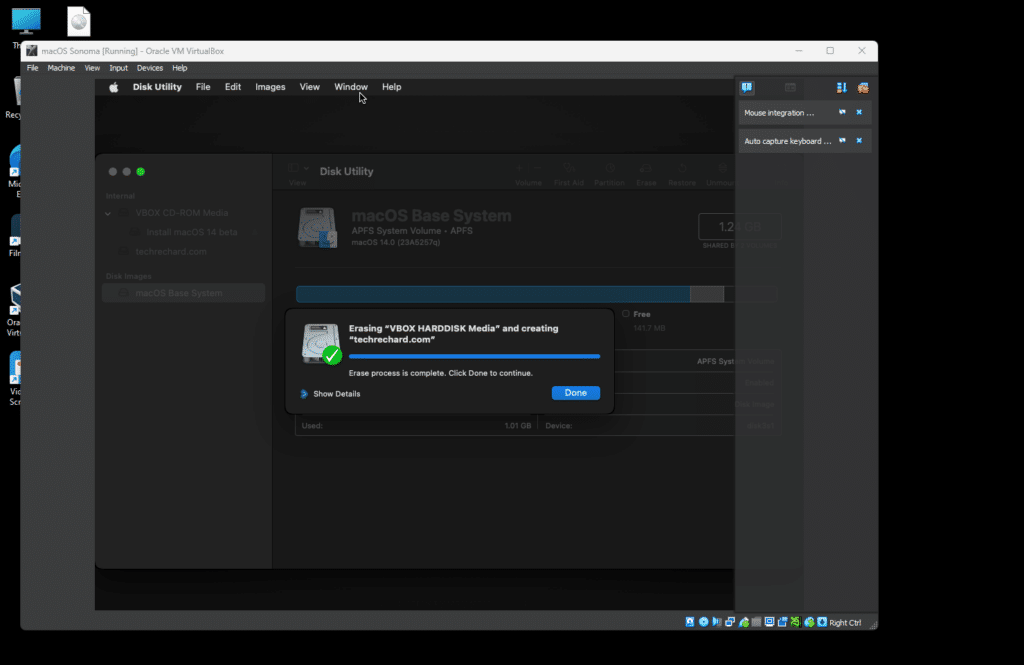
28. Click Erase and then click Done.
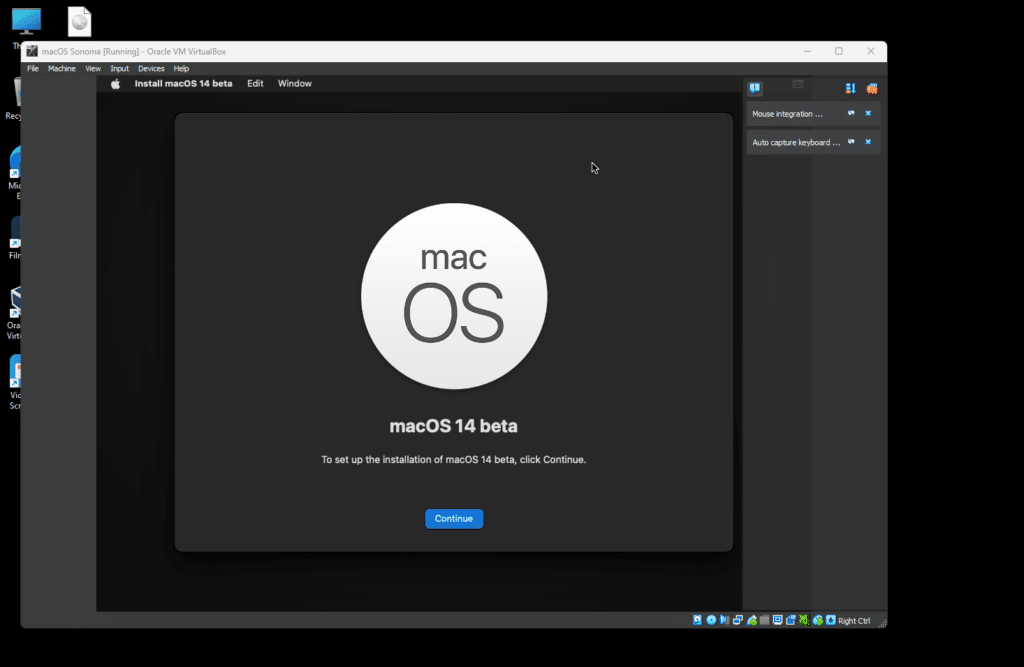
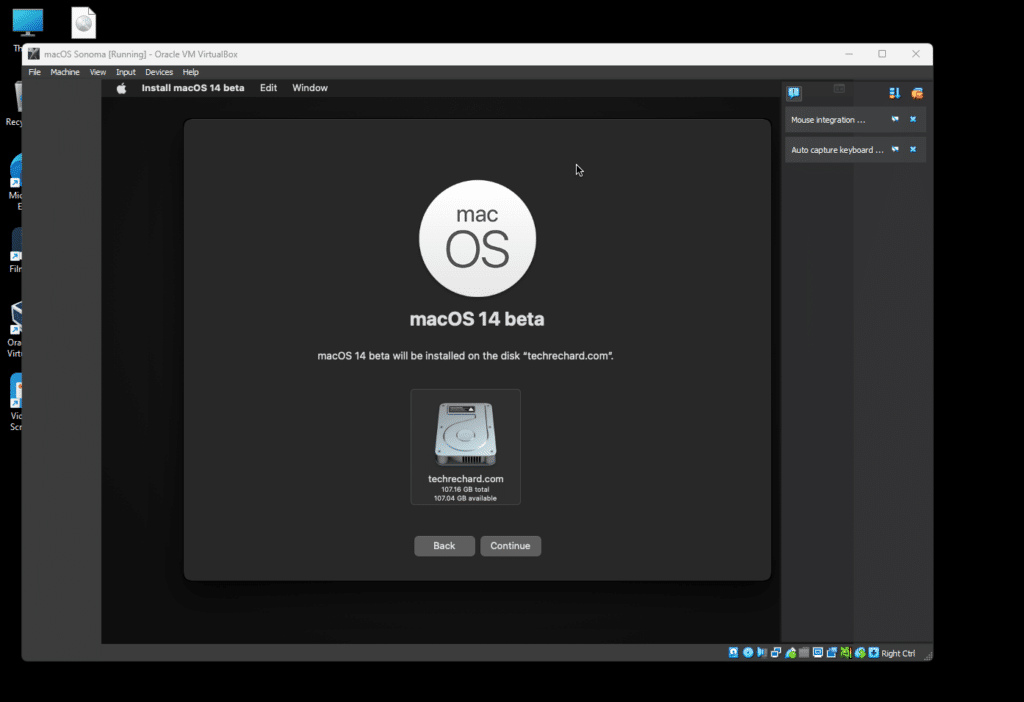
29. Close the Disk Utility, select Install macOS 14 beta, and click Continue.


30. Click Continue again.

31. Accept the terms and select the hard disk to install macOS Sonoma, and click Continue.

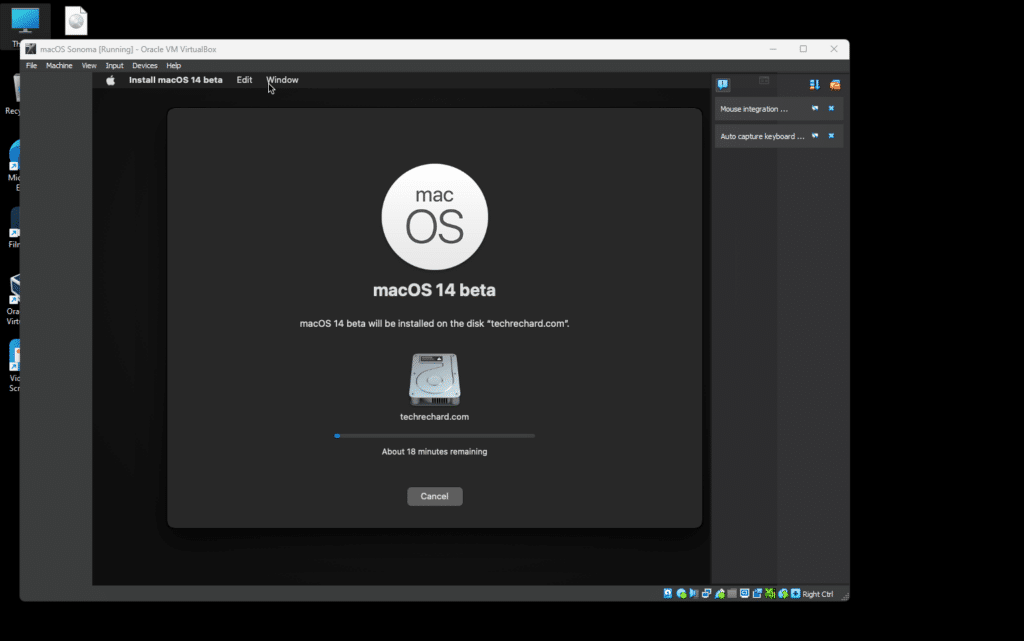
32. Now, you need to wait around 20-30 minutes to complete the installation of macOS Sonoma on Virtualbox.
After the process is complete, you can process with the basic setup of macOS Sonoma.
Frequently faced errors:
1. Failed to query SMC value from the host (VERR_INVALID_HANDLE).
Run this command in CMD:
VBoxManage.exe setextradata “VM name” “VBoxInternal/Devices/smc/0/Config/GetKeyFromRealSMC” 0
If this doesn’t work either, you can downgrade your Virtualbox, and it will work. You can find previous builds here: https://www.virtualbox.org/wiki/Download_Old_Builds_6_1
2. If you are stuck at Step 23 with a set of codes running.
Reduce your number of processors from 4 to 1 and restart your machine.
Video Tutorial:

Conclusion: Install macOS Sonoma on Virtualbox on Windows
Congratulations! You have successfully completed the installation of macOS Sonoma on VirtualBox, bringing the power and elegance of the Mac operating system to your Windows PC. Following the steps outlined in this guide, you can explore and utilize macOS Sonoma’s features, applications, and development tools within a virtual environment.
Remember, running macOS on non-Apple hardware is not officially supported, so using this setup for personal experimentation and learning is essential only. Keep your virtual machine updated with the latest security patches and updates Apple provides.
With macOS Sonoma running on VirtualBox, you can now delve into the world of macOS, discover its intuitive interface, and explore a vast array of applications exclusive to the Mac ecosystem. Whether you’re a developer testing software or simply curious about the Mac experience, this virtualized setup offers a convenient and accessible way to get hands-on with macOS Sonoma.
Enjoy your journey into the world of macOS Sonoma, and don’t hesitate to refer back to this guide or explore additional resources as you dive deeper into the capabilities of the Mac operating system.
For more macOS Sonoma Guides, use this link.