


Table of Contents
In this article, we will learn How to remove OneDrive from File Explorer in Windows 11. The OneDrive app comes preinstalled on The Windows 11 operating system and lets you store specific data in the cloud. But it has its drawbacks; pop-up notifications ask you to back up your data online or take up your PC’s memory, both RAM and space on your hard or SSD drive, which is all the more annoying if you don’t use it.
You can also read: Windows 11 Debloater Review: A Powerful Tool to Customize Windows 11
So if you don’t want to see OneDrive on your Windows 11 device, you should consider uninstalling it. Another thing to mention is that even if you get rid of the OneDrive app, some of its files will remain in your File Explorer. So if you want to remove it from your PC, including File Explorer, follow the steps below to altogether remove OneDrive from the list of programs and Windows Explorer 11.

Remove OneDrive from File Explorer using the Windows Settings app
Removing OneDrive from Windows 11 is as easy as any other program. Here’s how you can do it:
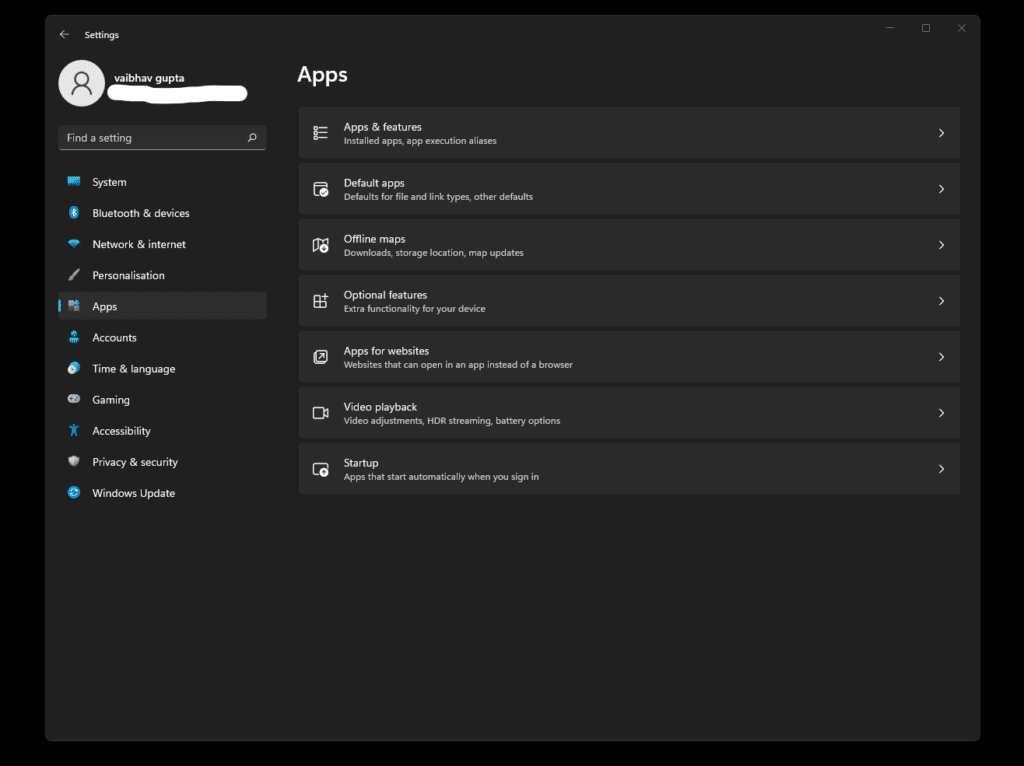
Step 1: Open the Windows Settings app go to Apps → Installed Apps.

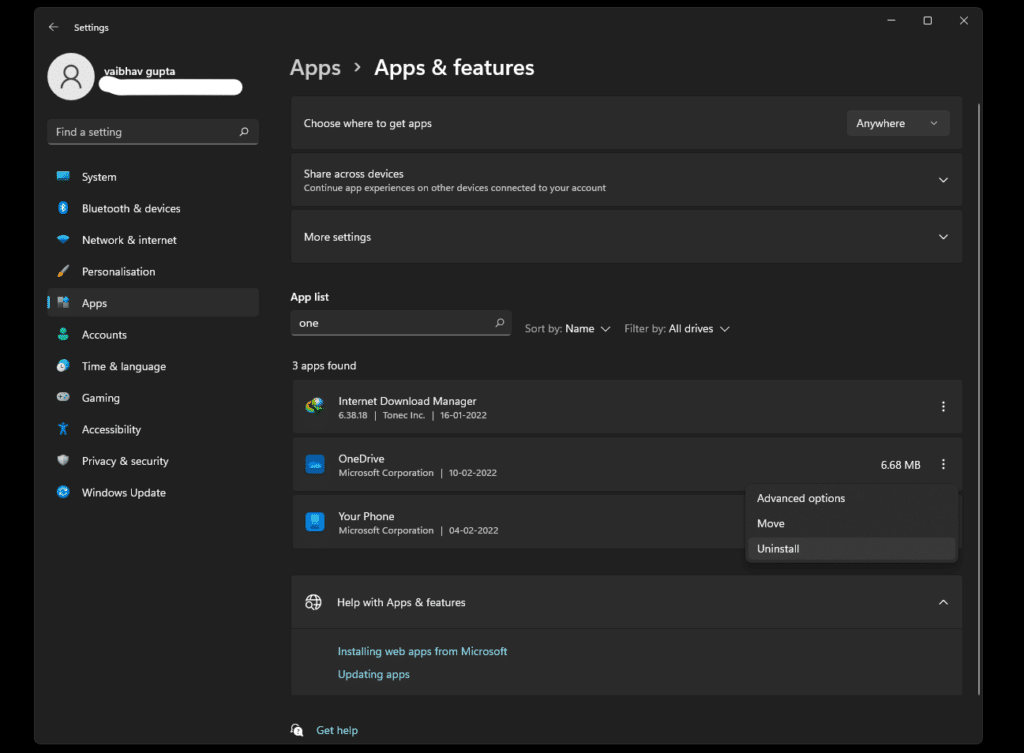
Step 2: In the list of installed apps, find “Microsoft OneDrive,” click on the menu (three dots) next to the app and select “Uninstall.”

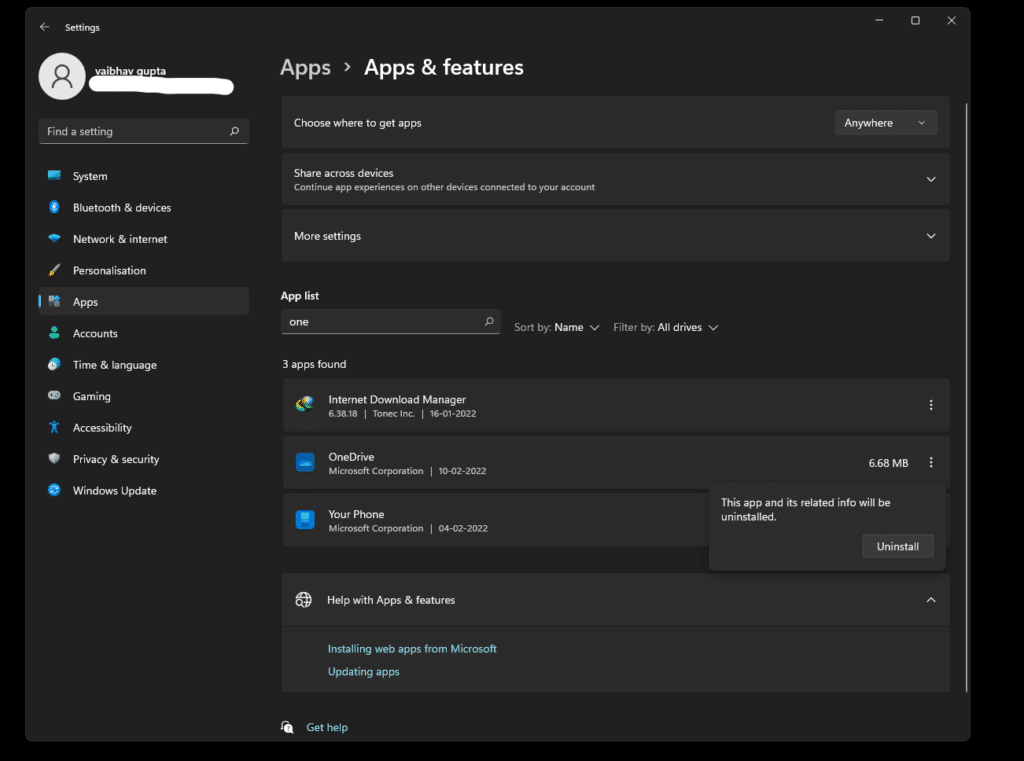
Step 3: You will see a notification that the app and its data will be deleted. Click the “Uninstall” button again to complete the action.

This method works great for users using a version of Windows Home. Therefore, if you are using a professional, corporate, or educational version of Windows, you also need to use the Group Policy Editor to achieve the goal.
All! The OneDrive app will be deleted in just a few seconds. Note: Even if you uninstall the OneDrive app, its folders (though empty) will remain in File Explorer. You can remove them altogether, either manually or by using the Group Policy Editor.
Delete OneDrive by using the Group Policy Editor
Group Policy Editor is a Windows tool that you can use to monitor and manage various aspects of your Windows account. To get rid of OneDrive by using the Group Policy Editor, follow these steps:
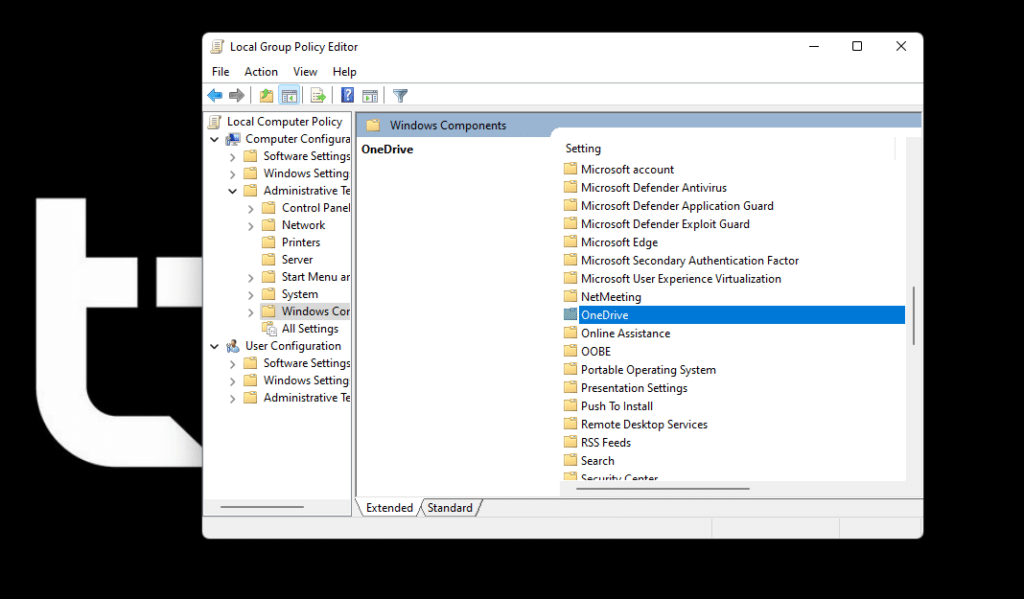
Step 1: Open the Group Policy Editor and navigate to the following path:

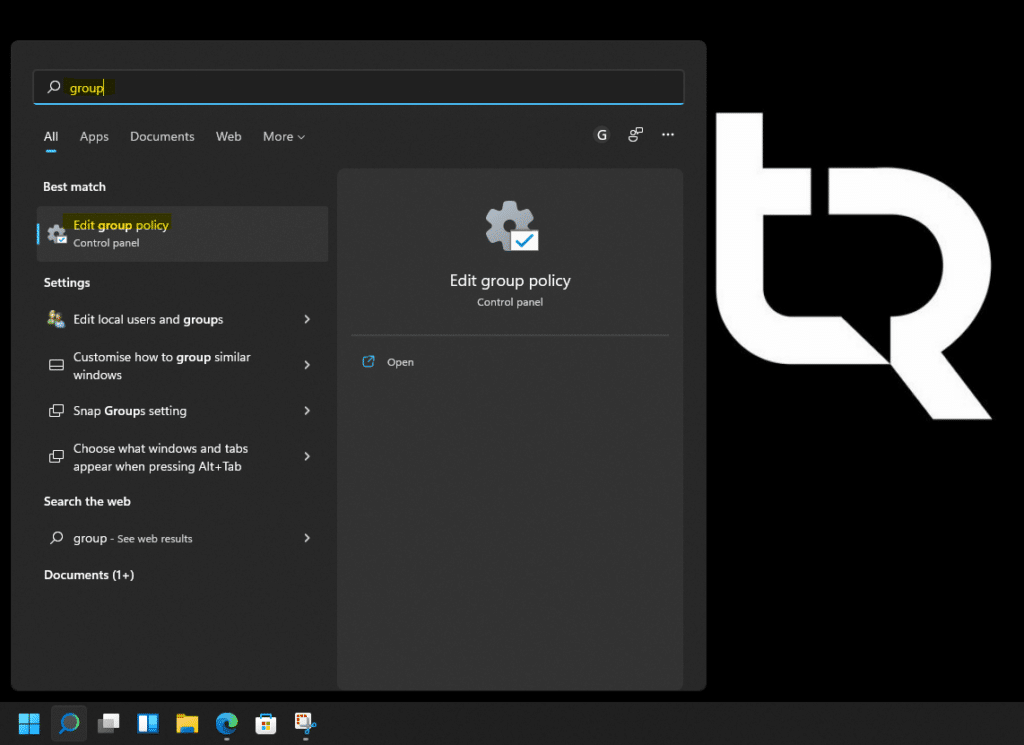
Computer Configuration → Administrative Templates → Windows Components → OneDrive.

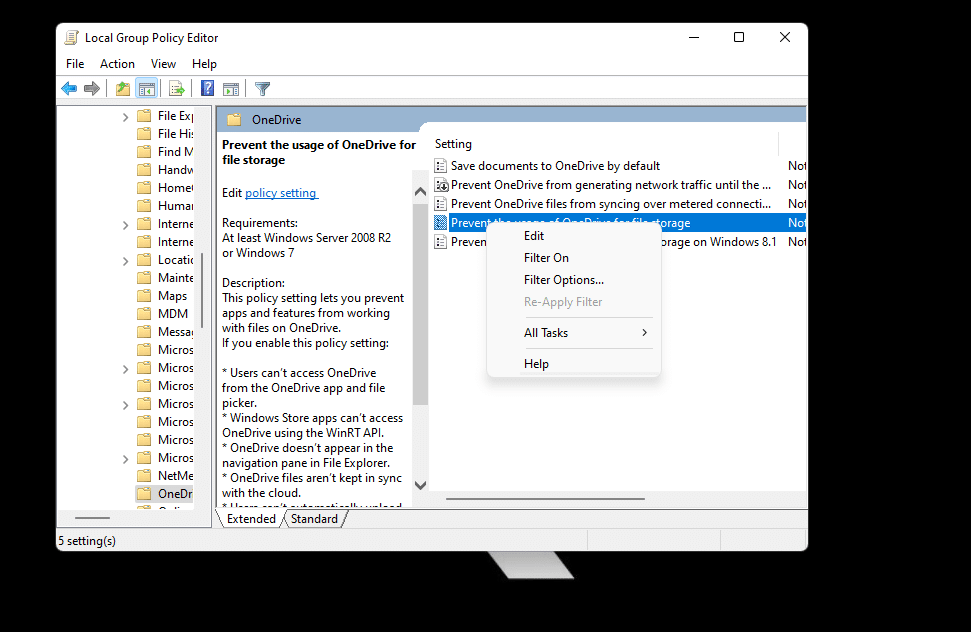
Step 2: Right-click the “Prevent the usage of OneDrive for file storage” policy setting in the right pane.

Step 3: Set it to “Enabled,” then click the “Apply” and “OK” buttons.

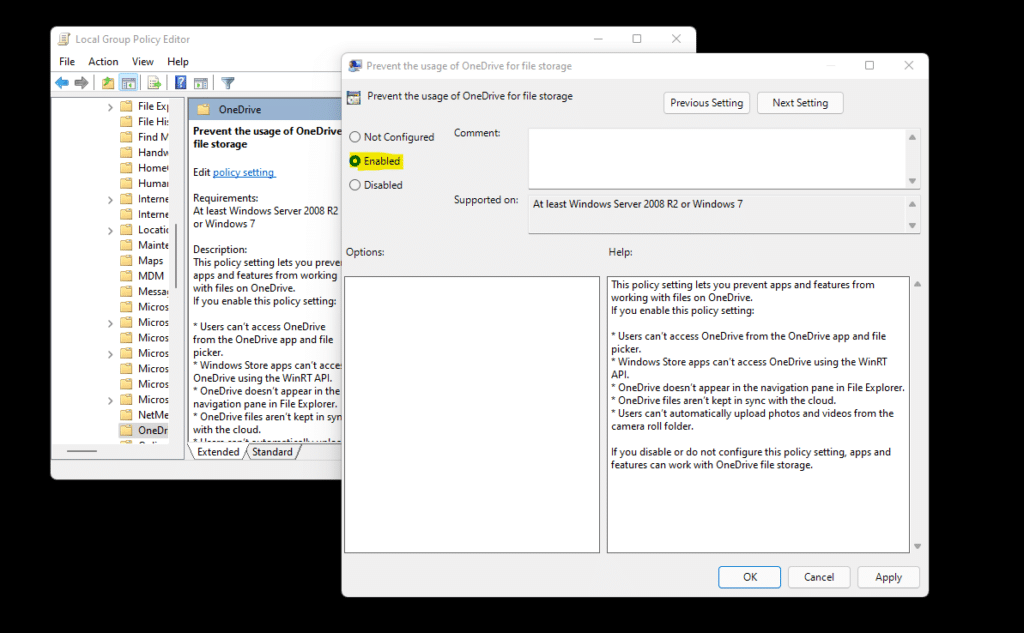
Once you’ve done that, the OneDrive app will be disabled on your PC. What’s more, it will also become unavailable in Windows 11 File Explorer, unlike a simple deletion.
Conclusion:
I hope this guide on How to remove OneDrive from File Explorer in Windows 11 was easy and helpful. Please share with us in the comments below why you decided to uninstall OneDrive.