
Table of Contents
Virtualization allows you to run different operating systems on your computer without affecting your primary system. With the arrival of macOS Monterey, many M1 or M2 Mac users might want to test it in a virtual environment.
This article will guide you through the process of installing macOS Monterey in a virtual machine on an M1 or M2 Mac using UTM.
Prerequisites
- M1 or M2 Mac with at least 8GB RAM and 64GB of free disk space.
- macOS Monterey IPSW file. (Download links are provided below)
- UTM software. (Download links are provided below)


Step-by-Step Guide
1. Download macOS Monterey IPSW and UTM
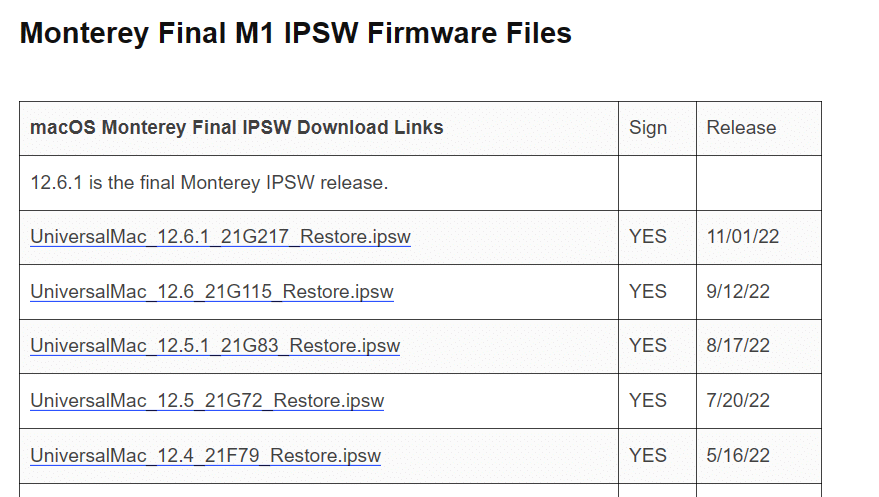
Download macOS Monterey IPSW file from our website archive. You can download any version as per your requirements. See the screenshot below for reference.

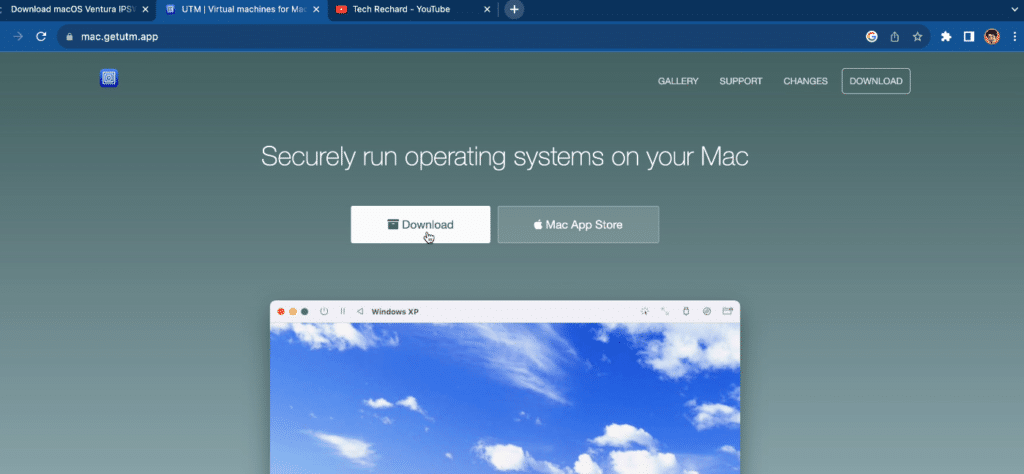
Download UTM for Mac from the official website.

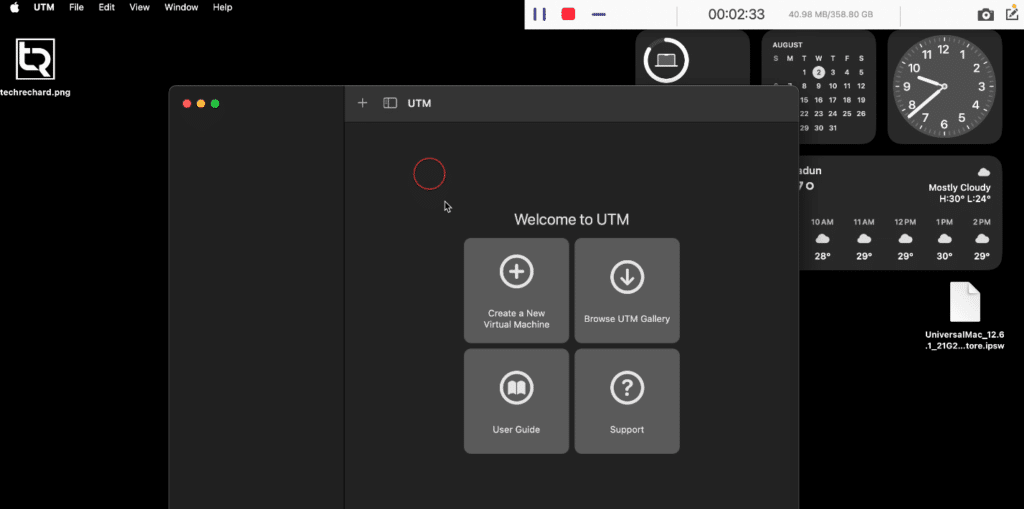
2. Install UTM
Open the downloaded UTM file (.DMG) and drag it to your /Applications folder. Once the application is installed, go to Launchpad, search for UTM, and click on it.

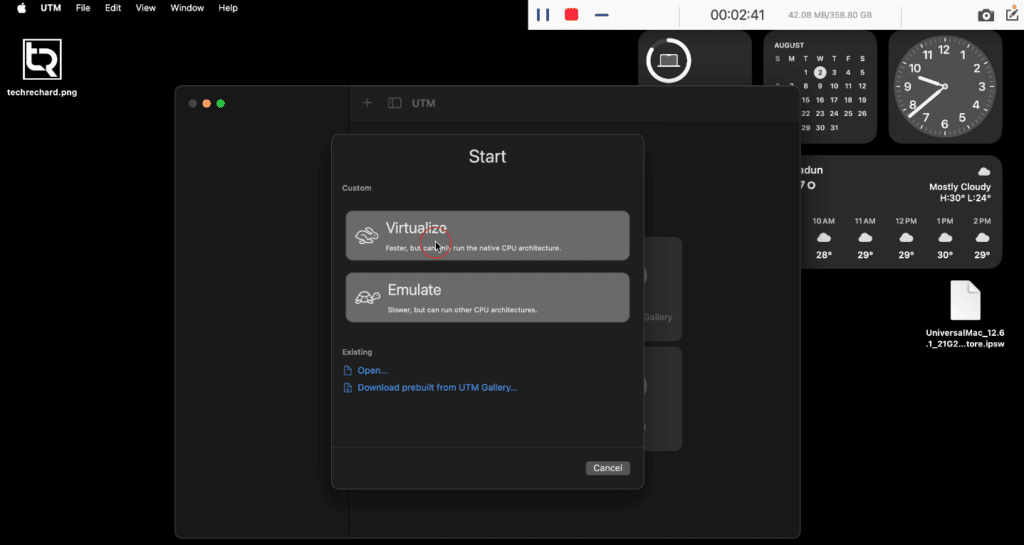
3. Create a New Virtual Machine
Click “Create a New Virtual Machine.”

Choose “Virtualize.”

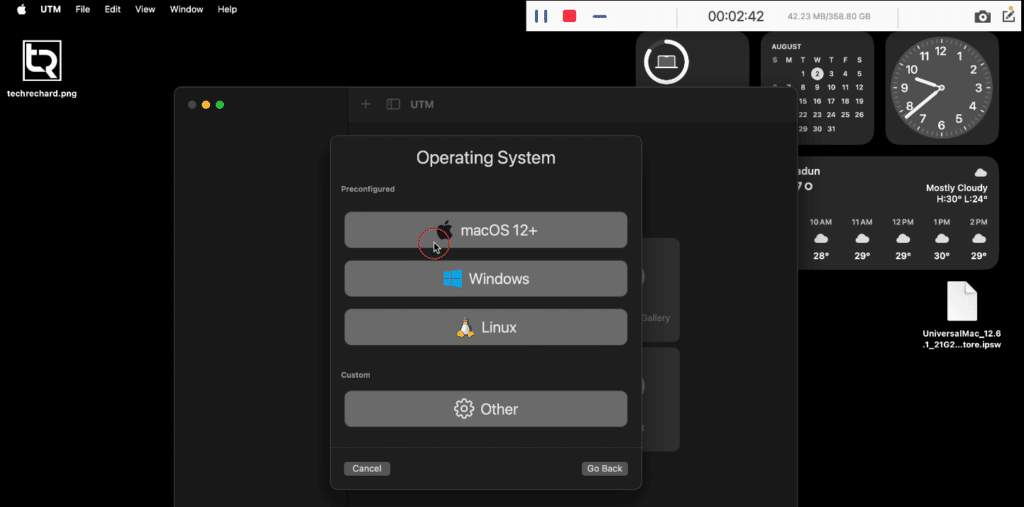
Select “MacOS 12+.”

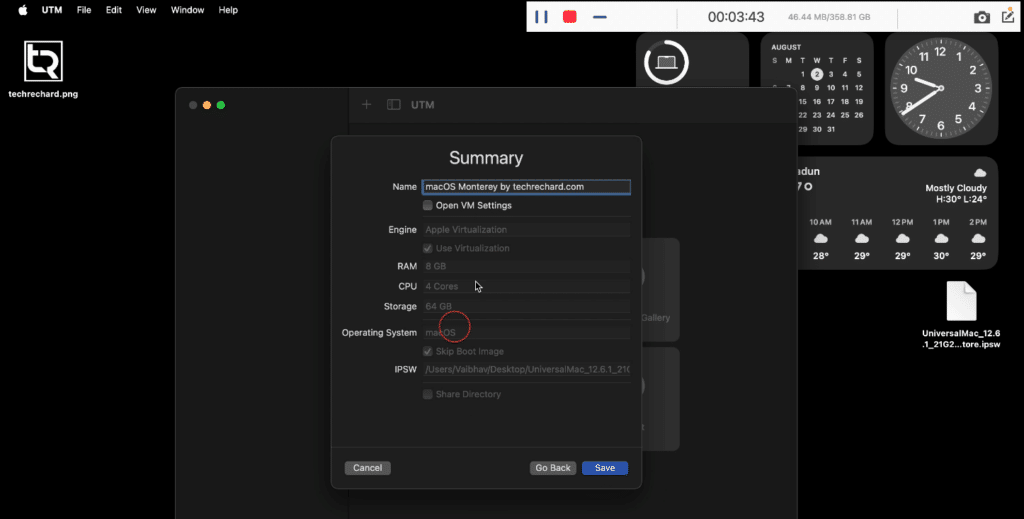
4. Configure the Virtual Machine
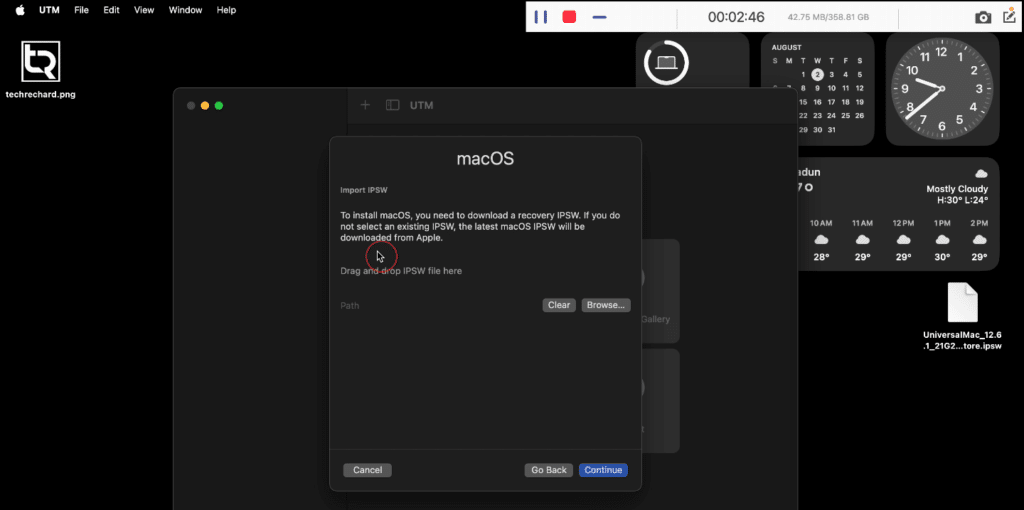
At the IPSW selection screen, click “Browse, ” select the macOS Monterey file, and then click “Open.”

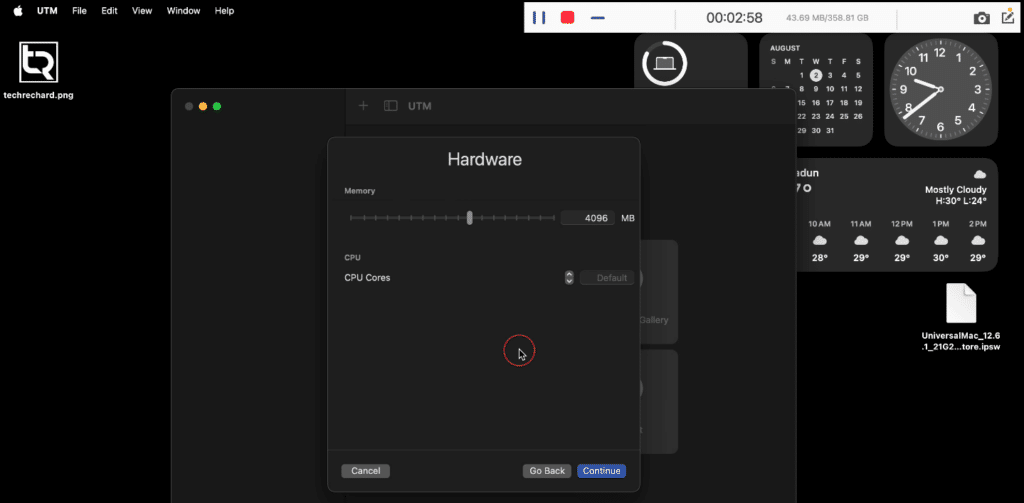
Allocate resources like RAM, CPU cores, and disk space (recommend 8GB RAM, 4 CPU cores, and 64GB of disk space).

Name the virtual machine something like “macOS Monterey by techrechard.com.”

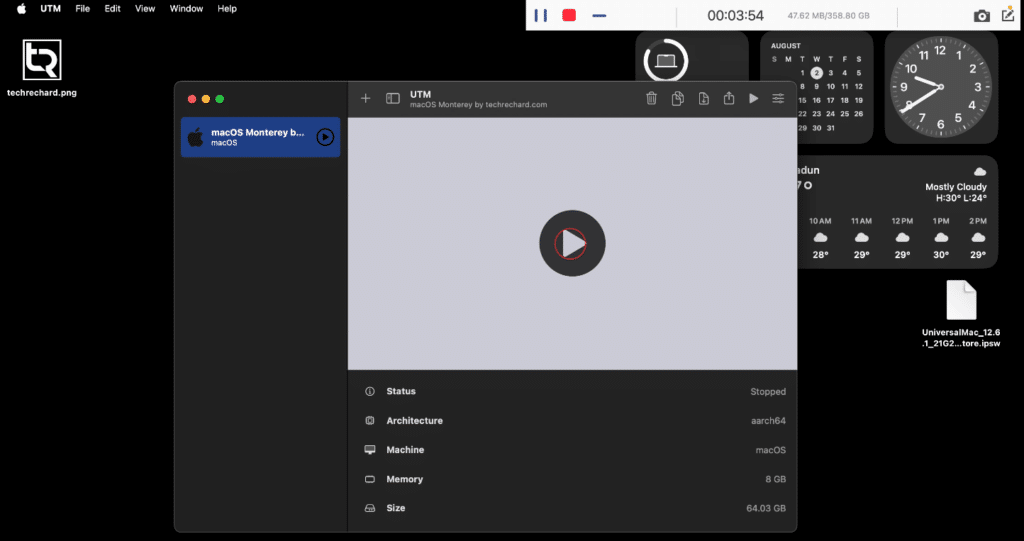
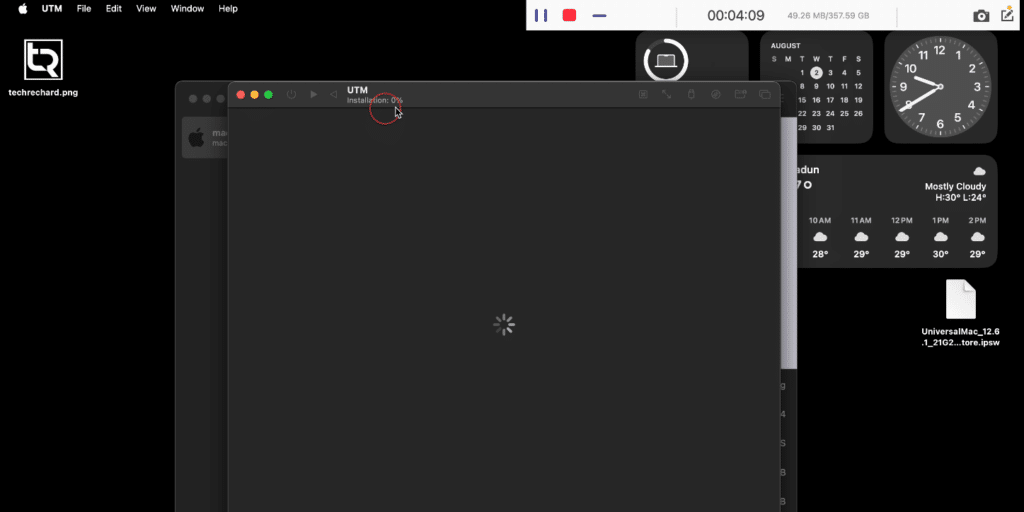
5. Start the Installation
Click the big play button to boot the VM.

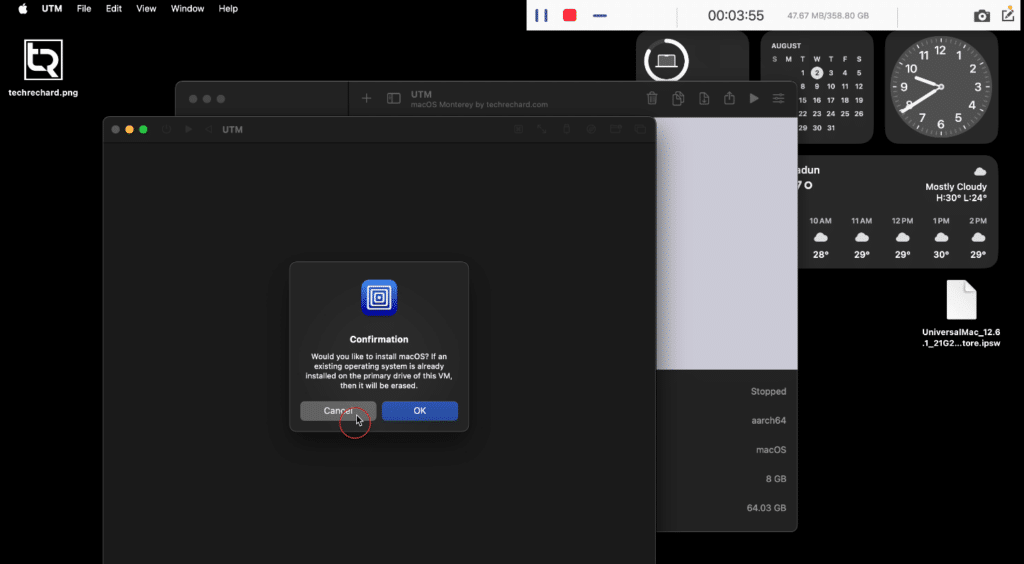
Confirm the use of the IPSW file for installation.

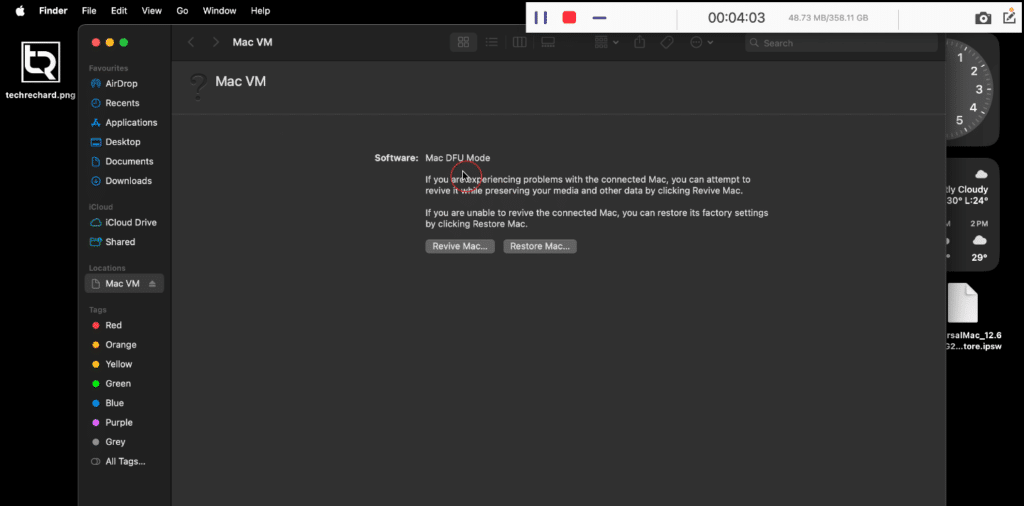
If you see the below screen (Mac DFU Mode), close this Windows and ignore this warning.

Let UTM install macOS Monterey in the VM. It may take some time, so be patient. The installation process will take around 3-4 minutes. So you can sit back and relax.

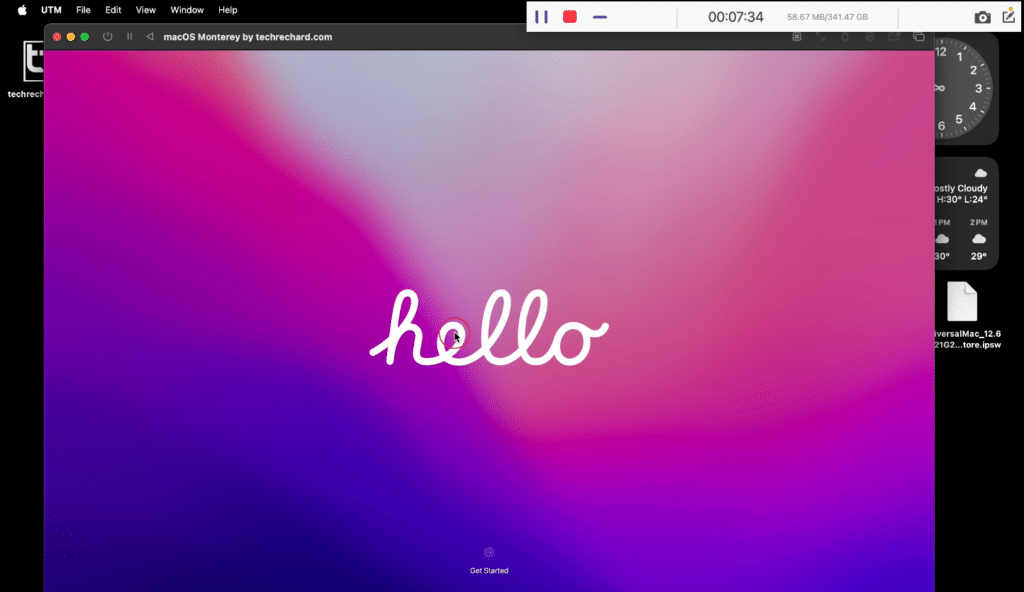
6. Set Up macOS Monterey
After installing macOS Monterey, it will boot into the welcome screen. Click on “Get Started.”

Select the Language of your choice.


Select your Country or Region and continue with the basic installation.


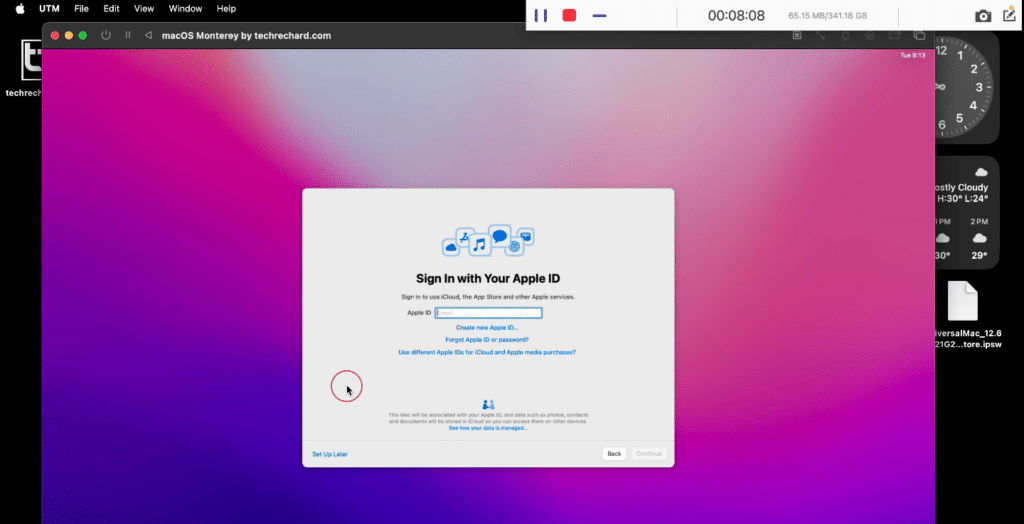
You can now sign in with your Apple ID. If you want to skip this for now, you can simply click Set up Later.

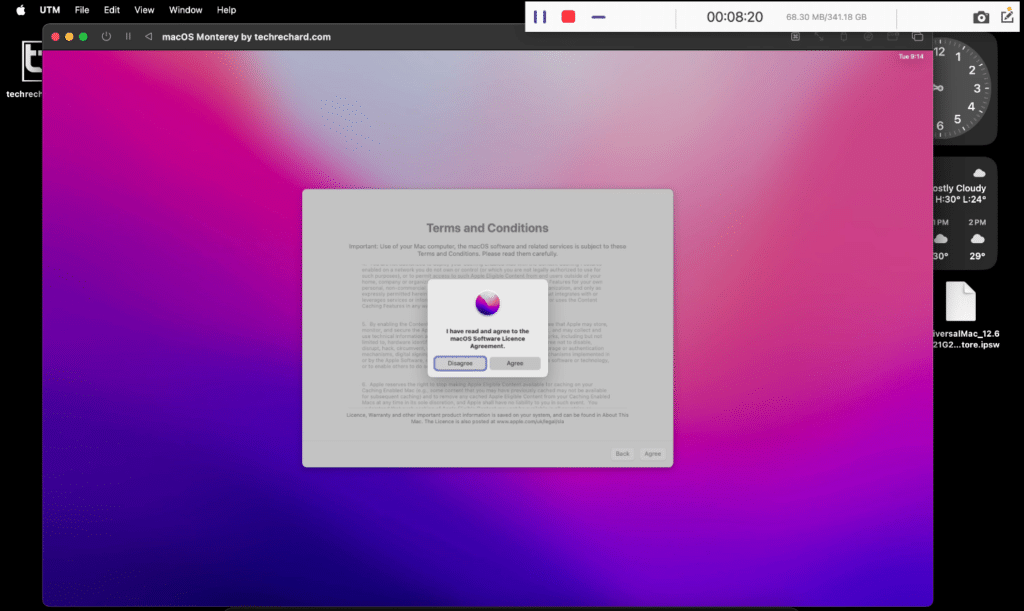
Accept the Terms and Conditions and continue.

Now, create your Computer Account by filling in your Full name, account name, and Password. Once done, click Continue.


Select your Time-zone by clicking on the location on the map and click Continue. Complete the other basic installation steps until you are on your macOS Ventura Desktop.


Tips and Troubleshooting
- Ensure your Mac has enough resources for smooth virtualization.
- If you encounter any issues during installation, refer to UTM’s official documentation or community forums for support.
- Virtual machines tend to run slower than native installations, so be patient.

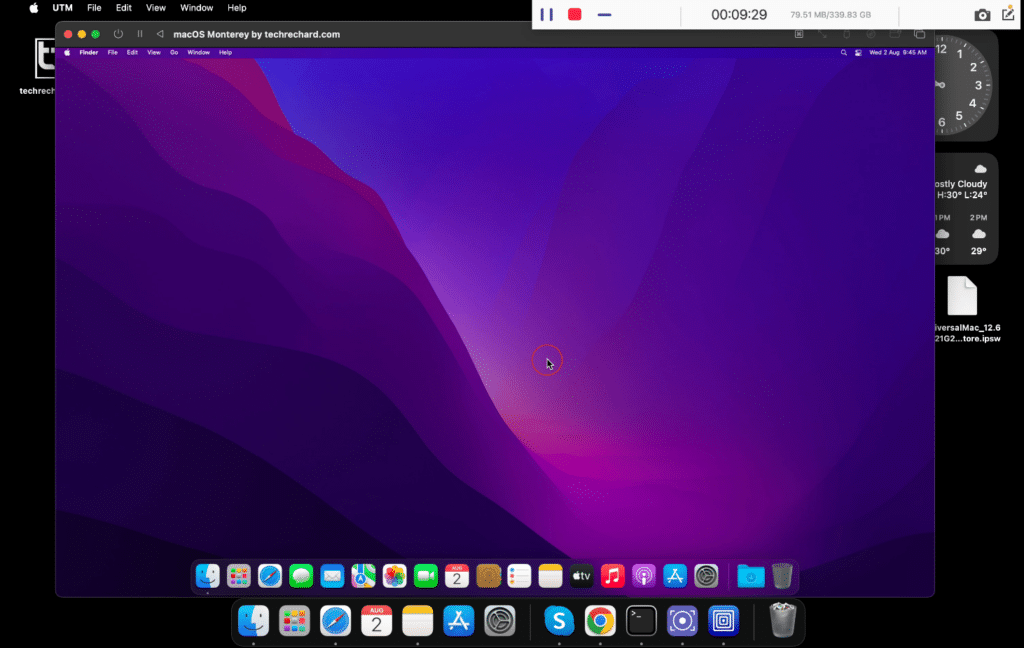
Once the installation process is complete, the virtual machine will boot into macOS Monterey. You’re now running macOS Monterey in a UTM virtual machine on your M1 or M2 Mac. The environment will function like a physical Mac, allowing you to update the system, install applications, and manage files exactly as you would on a traditional Mac system.
Enjoy exploring macOS Monterey within this virtualized environment!
Complete Video Tutorial
Conclusion
Installing macOS Monterey in a virtual machine on an M1 or M2 Mac with UTM is straightforward. It offers a safe way to explore macOS Monterey’s new features and capabilities without disturbing your main system. Always refer to official guides and documentation for the most accurate and up-to-date information. Happy virtualizing!
For more macOS Monterey-related guides, you can visit here.