

Table of Contents
RAM is one of the essential components of a PC, which is responsible for processing and storing intermediate data. Problems with this device can lead to various interruptions in the operation of the computer or laptop, have a significant impact on its performance.
Some of the common causes that cause RAM errors are dust contamination, damage, overheating, or incompatibility of modules. Without conducting special tests, it is difficult to understand whether there are any problems with RAM’s regular performance of its functions.
You can also read: BurnInTest — a program for testing the stability of the computer
Pay attention if you observe:
- problems with the image on your screen;
- interruptions during games;
- the screen turned blue;
- receive notifications about errors and so on – this is a sure sign of the need for diagnostics.
Of course, not always the presence of the listed “symptoms” indicates problems with RAM. But after conducting a check, you will find out in it whether the cause of the failures lies.
This guide walks you through standard and third-party diagnostic tools. You can also look at 6 Best PC Optimization Apps and Softwares.


Standard memory checker in Windows
By default, Windows has a tool that you can use to diagnose RAM. To run it, type the keyboard shortcut for the Run (Win+R) command → , type “mdsched“ in the “Open:” line, and press Ok or enter.


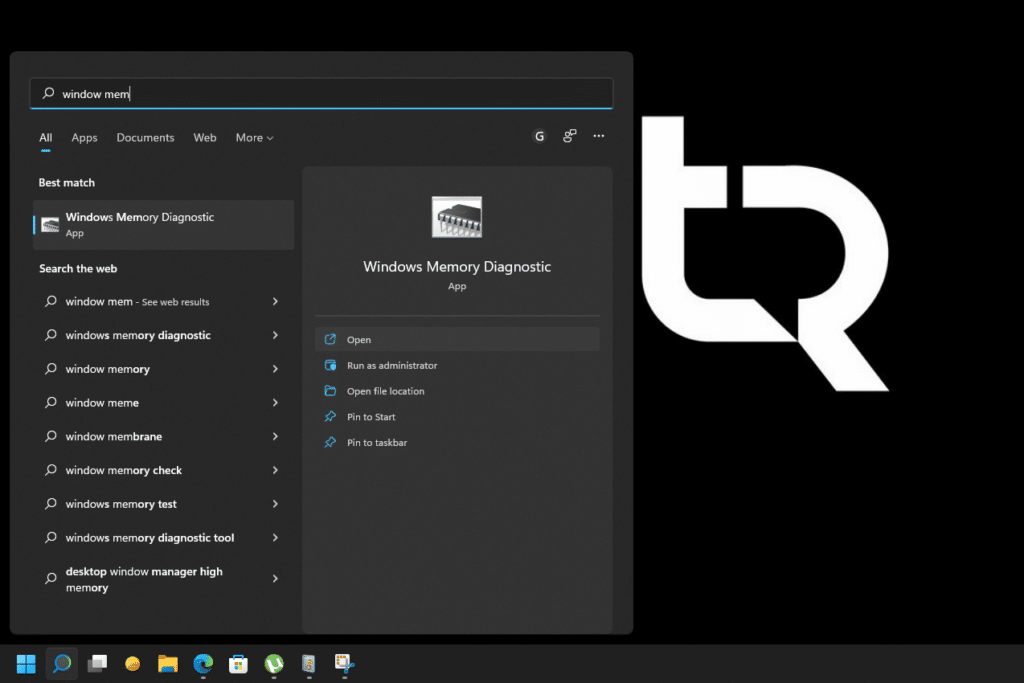
You can also find and run the application through Search. Click the search icon (in the form of a magnifying glass) located on the taskbar next to the Start button → start typing the name of the program “ Windows Memory Diagnostics…“. The system will perform a search and display the most relevant results for the query. Among the suggestions, select the Windows Memory Diagnostics app → Open.

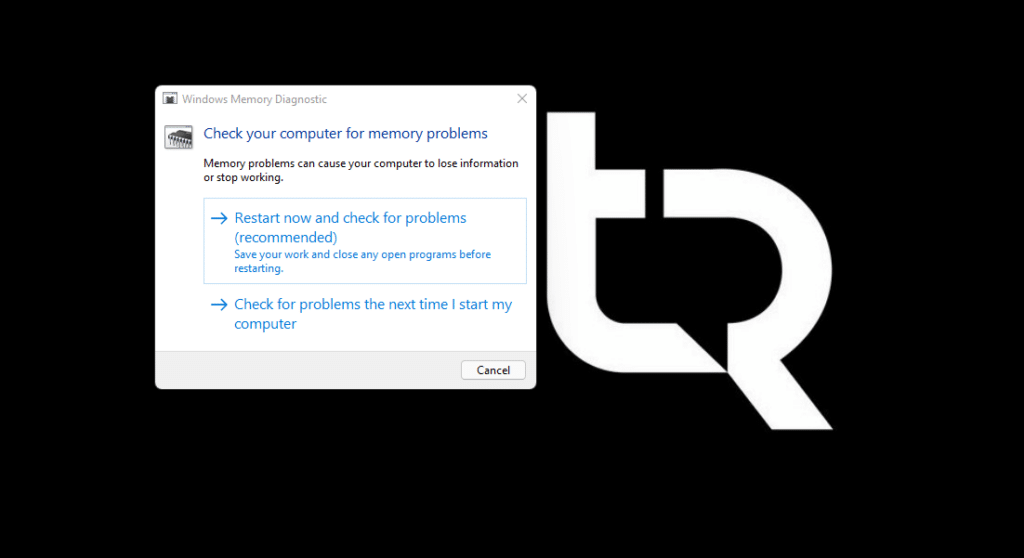
Before running the program, a message will appear asking you to choose when to restart your computer to start the scan. Select the recommended action and wait for the reboot.

The application is launched and scanned without loading the operating system. You will see a blue screen describing the progress of the test.


During the scan, you can change some of its settings. To do this, press the F1 key. Specifically, you can choose the type of scan, cache usage, and several passes.
A reboot will be performed when the scan is complete, and a normal logon will be performed. After a while, you will receive a notification with the results.
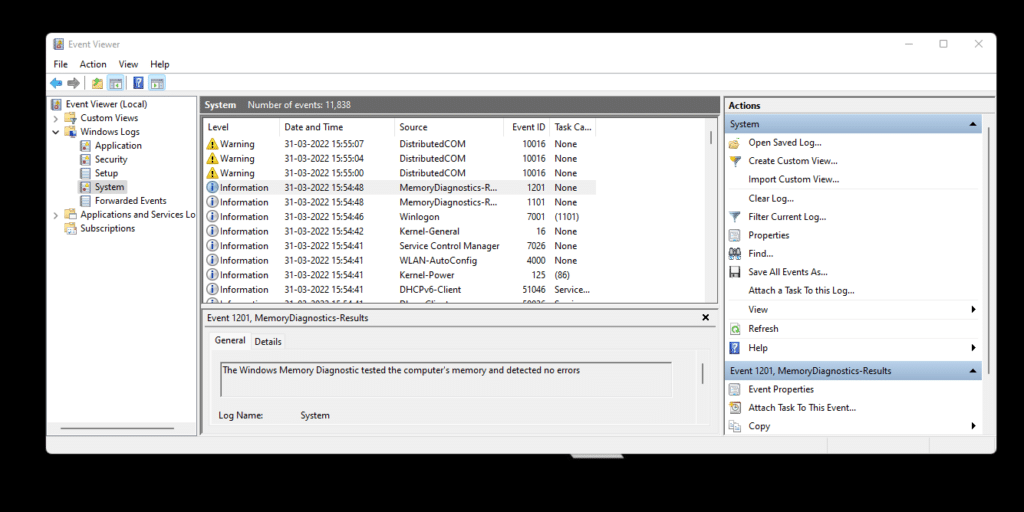
If, for some reason, you missed this message or it was not displayed on the screen, you can view the result using the built-in Windows Event Viewer. You can find and run it using the Search function. Start typing its name, and then select the app you want to open and tap Open.

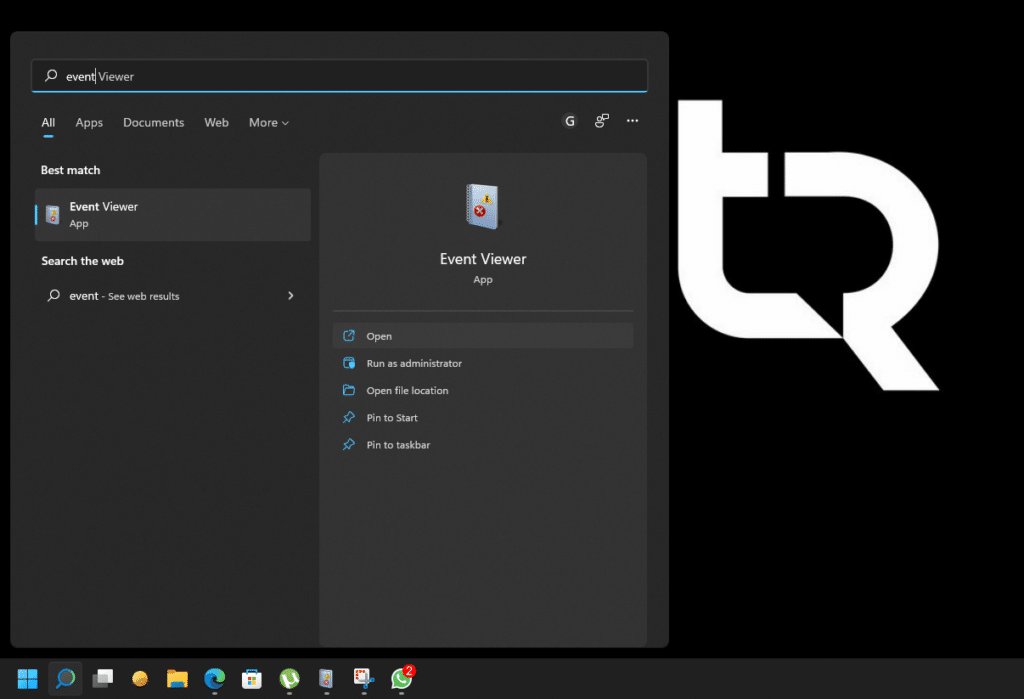
Under Event Viewer, select and expand the Windows Logs directory → System on the left. Among all the events, find the one related to the check (its source will be MemoryDiagnostics-Results). Double-click the details event to see the result.

Check with the free Memtest86+ diagnostic tool.
You can also read: How to check RAM on PC?
Memtest86+ is one of the most reliable and proven diagnostic tools. Moreover, it is free. It has established itself as an unofficial leader among other similar applications. You can download it on the official website at the following link.
All download links are located at the end of the page in the Download section.
In this instruction, we will run the program using a bootable flash drive, and therefore you need to download a file that has the signature:
Download – Auto-installer for USB Key (Win 7/8/10).


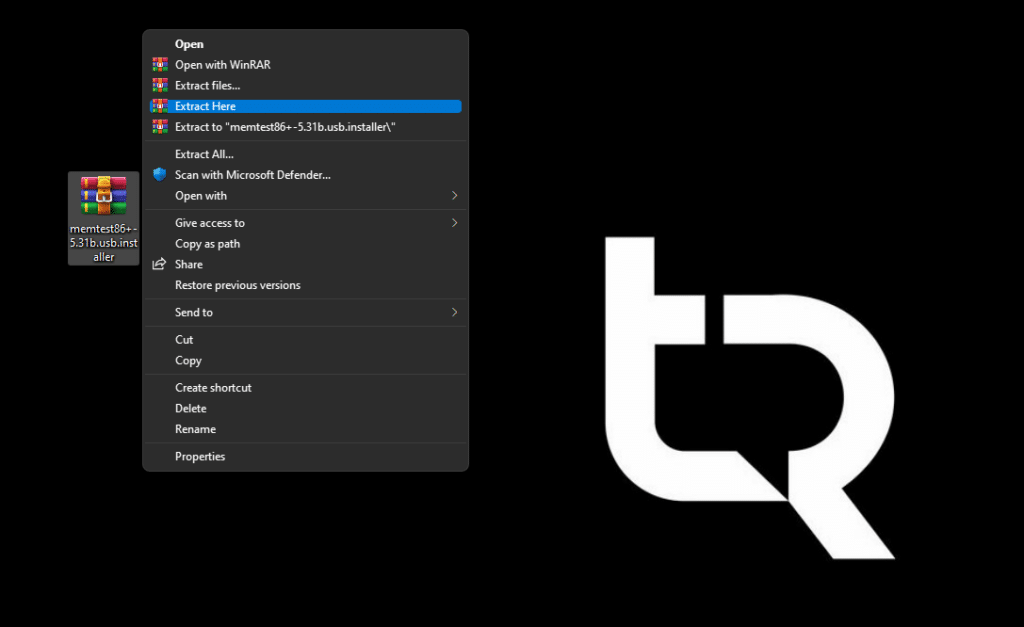
Unpack the downloaded archive and run the Memtest86+ USB Installer application.exe by double-clicking on it. You can use WinRAR to extract the files.

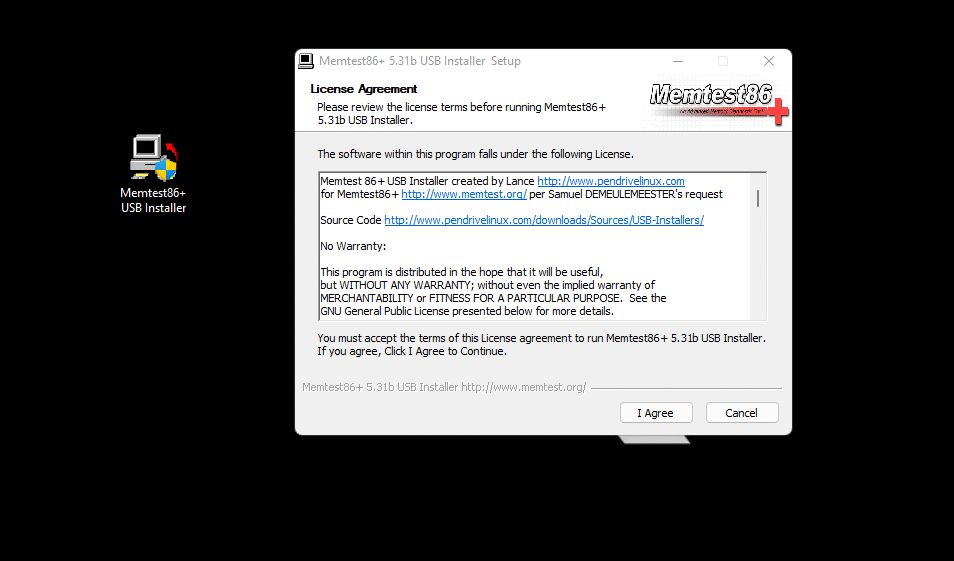
An installer window will appear on the screen, where you need to agree to the terms of the license agreement and click the “I Agree” button.

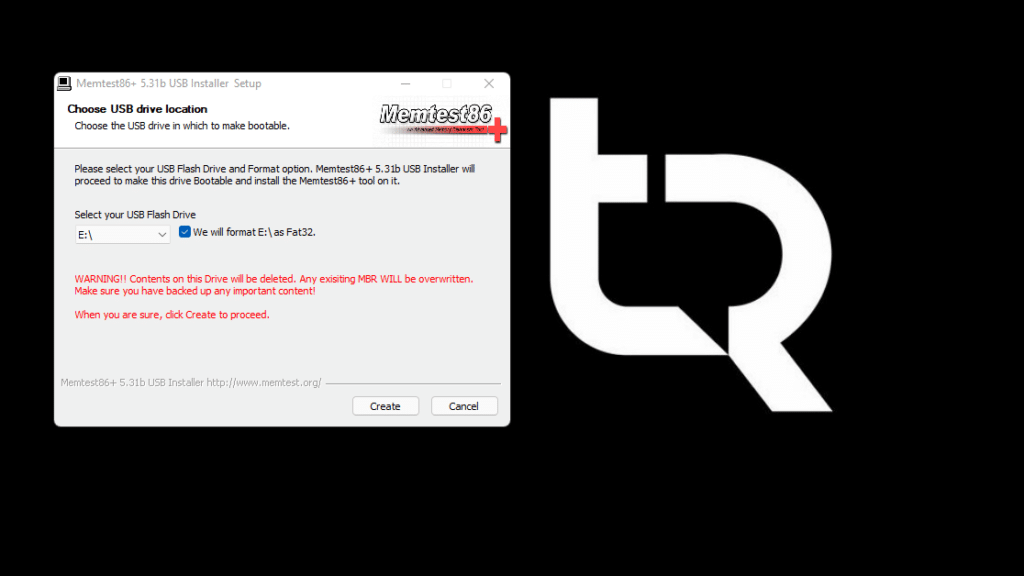
Next, you need to specify the path to the flash drive (if it was not determined automatically) and click the “Create“ button.
The screen will then display the progress of the installation. When prompted by the program, click the “Next” button.

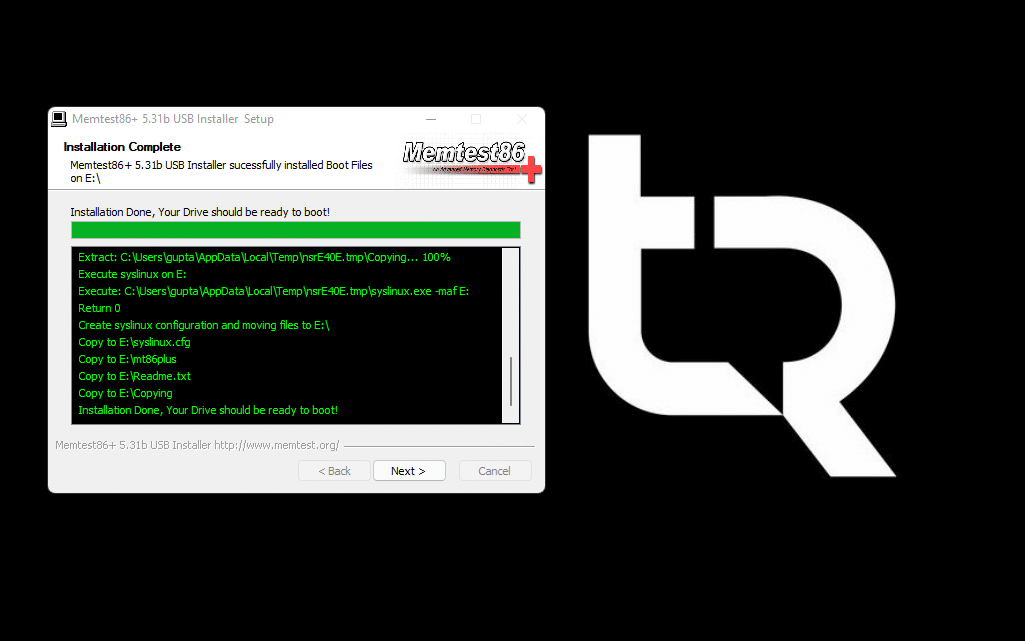
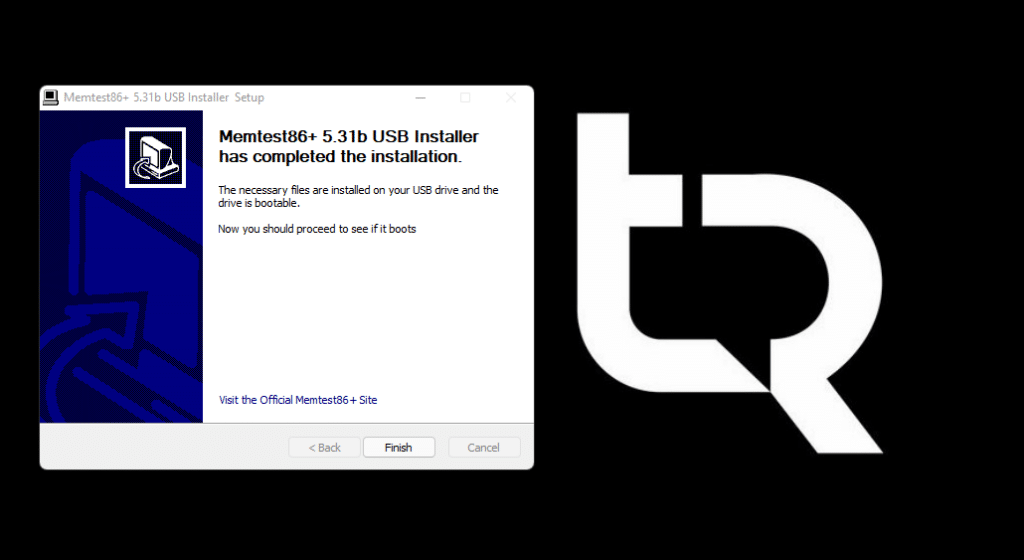
And then complete the installation by clicking Finish.

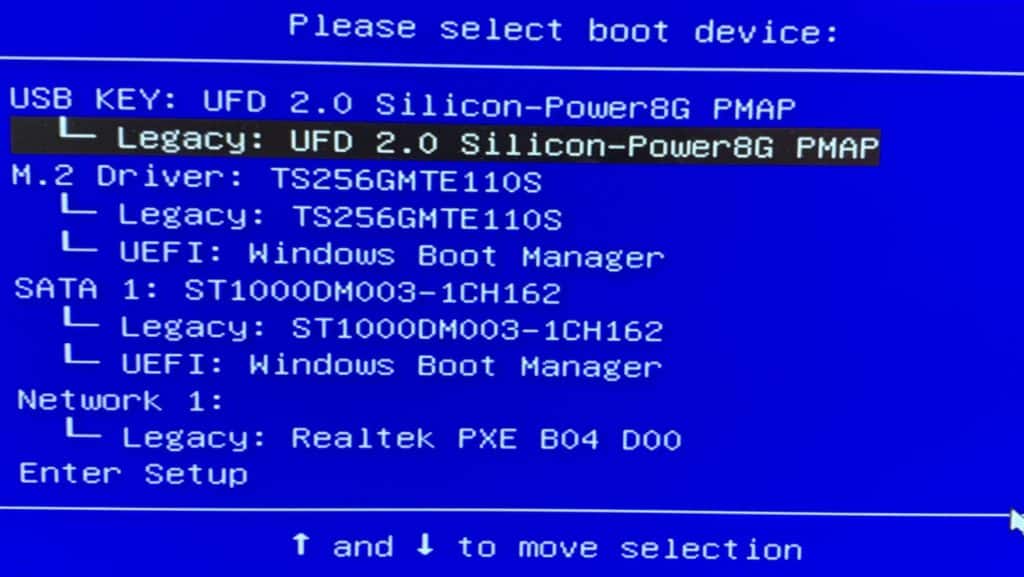
Reboot your device and log in to the Boot Menu or media boot priorities in the BIOS before booting.
For different models of computers and laptops, there are different ways to enter the BIOS and boot menu. To learn how to find the Boot Sequence or log in to the Boot Menu on your specific device, we recommend visiting the manufacturer’s website.
In some cases, the boot menu can be accessed before the OS boots by pressing F8, F11 or F12 (depending on the model of the motherboard used).
Select the USB flash drive you prepared earlier to download.

A RAM check will be run.
The duration of the check by the Program Memtest86+ was just over 30 minutes. During this time, 10 passes of the test were performed. You can track the scan’s progress in the Pass and Test sections.

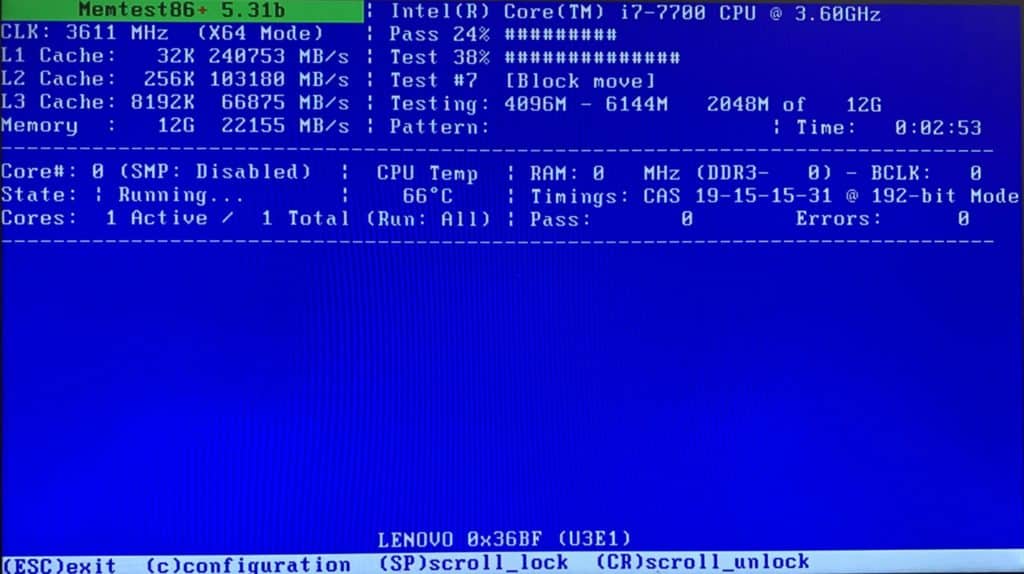
To get the most accurate results, each of the 10 stages of the test must be 100% complete.
It is possible to run other deeper tests. Press C and install the desired configurations.
The results are displayed as a message at the bottom of the screen.


To complete the scan, press ESC. A reboot will be performed, And Windows 11 will boot as usual.
Conclusion:
I hope this guide on How to Check RAM for Errors in Windows 11 was helpful. If you face any issues, please comment down below.