

Table of Contents
In this post, we’ll install macOS Mojave on VMware on Windows PC. Also, in our previous article: Install macOS Mojave on VirtualBox on Windows PC. If you are looking for an alternative to VMWare, you can check the above guide out.
Installing Mojave isn’t tricky but requires VMware Unlocker Patch Tool or macOS Unlocker for VMware. This VMware Unlocker Patch Tool for macOS Mojave will Patch VMware for making the macOS Mojave installation work. So we’ve provided the macOS VMware Patch Tool and installed it here.
Although Apple may not support manual installation, it is still feasible to use virtualization applications such as VMware. By utilizing this software, you can operate the entire system within Windows without the need to purchase an additional device or restart every time you want to run it, unlike with dual-booting. The procedure for installation is relatively simple with VMware. If you are familiar with or have prior experience using it, there is no need to be concerned. Just download the Mojave Image and VMware, install both, and you are good to go. As a result, you can generate a virtual machine (VM) and run Mojave after it has been installed. With that, you can enjoy installing and exploring Mac apps like Xcode.
Upon installation, you will have access to essential tools, including the internet adapter, USB controller, drag & drop functionality, and more. Additionally, you may have several inquiries, which will be addressed during the installation process. This article will guide you through the steps required to install macOS Mojave on VMware on your Windows PC. The process is well-documented with clear instructions and visuals to ensure that you are not alone. Let us begin by breaking down the steps for installing macOS Mojave on VMware on your Windows PC.


Install macOS Mojave on VMware on Windows PC
Apple has a long-standing practice of restricting new software or updates to older Apple devices. This has been the case for Macs for many years, and it remains so. However, when it comes to installing on a Windows PC, there are no such restrictions. This means that regardless of whether you have an old or new PC with any version and edition of Windows, you can download and install macOS Mojave on VMware on your Windows PC.
Let’s proceed with the installation of macOS Mojave on VMware on a Windows PC.
Download Necessary Files to Install macOS Mojave on VMware
Now, use this guide to to install macOS Unlocker For Vmware Patch Tool
Before you start, you’ll need to look for a few settings in your computer’s BIOS. When you boot into your computer BIOS, watch out if you’ve enabled Virtualization options (VTx). If you haven’t, go ahead and enable it. You can see this video tutorial:

Watch out if the Intel VT-x hardware acceleration options are enabled from the BIOS.
Related: Download macOS Mojave ISO For VMware & VirtualBox
Step 1: Install VMware Workstation on Windows
After downloading VMware Workstation/Player, it’s time to install it. From the VMware files, click setup.exe to launch the installation wizard. Proceed with ordinary installation steps, and you’re good to go.


When you finish the installation, click Finish on the wizard to close up. When installed, don’t launch it (Otherwise the next step won’t work).

Step 2: Install VMware Unlocker Patch Tool
Normally, there is no provision for selecting macOS during installation due to the fact that VMware does not support it, and it is prohibited. This is where the macOS Unlocker, also known as the VMware Unlocker Patch Tool, comes in handy. The VMware Unlocker Patch Tool has been designed to eliminate the restriction on macOS X (Server) and patch files to enable macOS to function on VMware Workstation or Player with ease.
Download VMware Unlocker Patch Tool for macOS
- Close VMware if it’s open and run the VMware Unlocker Patch Tool.
- Navigate to the VMware Unlocker Patch Tool files and right-click on win-install and Run as administrator. It will simply run commands in the command prompt to patch relevant files in VMware.


Step 3: Create a New Virtual Machine
Now it’s time to do a little configuration.
Open VMware Workstation Player. When you see the home page, click create a new virtual machine or press Ctrl + N.


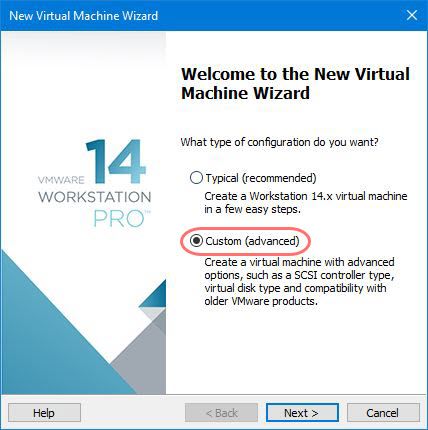
Select the Custom (advanced) option on the wizard creation and click Next.

Here you’ll see hardware compatibility and limitations for the virtual machine simply Next to it.

Now select I will install the operating system later and click Next.

For the operating system, choose Apple Mac OS X from OS selection, and for version, select the latest version (10.14) if available. If not, select the previous version (10.13). It will work too, then click Next.

Name the virtual machine whatever you would like to and specify the location where to store the virtual machine files, then Next.

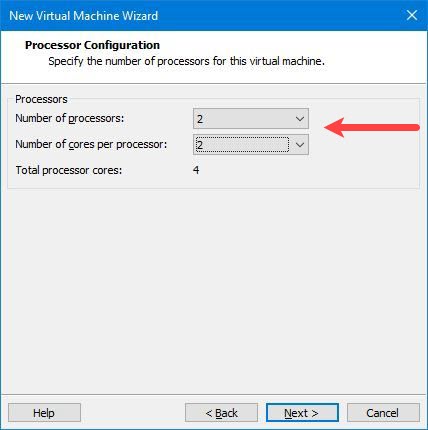
The processors are a significant part of a virtual machine, set up 50% – 75% of your system’s CPU.
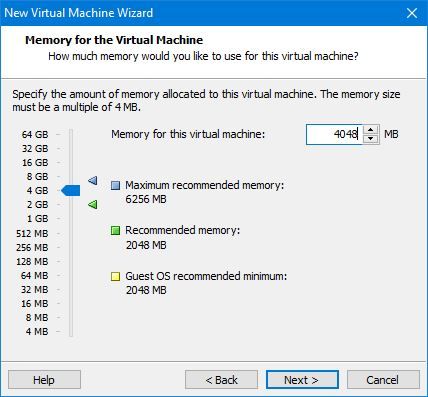
For memory, I’d like to set 4GB RAM for the virtual machine. That’s about 50% of my laptop memory. Make sure you set 50% – 65% of your system’s memory for the VM. I have 8GB of RAM in total, so I have used 4GB for the virtual machine.

By default, NAT will be selected. That’s okay, just Next.

On this page, you don’t have to make any changes, simply click Next.

Continue through the process and click Next.

In the disk selection, select Use an existing virtual hard disk and follow Next.

Next, browse the macOS Mojave Image (VMDK) that you downloaded, then click Next.

At last, you’ll have the summary of the virtual machine creation, if you wish to make changes, customize hardware to change one, and if everything seems ok, hit Finish.

Step 4: Insert VMware Code in the Virtual Machine file
When the virtual machine is configured, you must tweak this to insert code into the macOS VMX file. Now, navigate to macOS virtual machine files and open (macOS Mojave).vmx file with Notepad.


At this window, copy the code from below and paste it at the end then save it.
Smc.version = 0


Step 5: Install macOS Mojave on VMware Workstation
And you’re done with the configuration, and you’re ready to install macOS Mojave on VMware.
Navigate to the VMware Workstation and start the virtual machine with Power on this virtual machine.


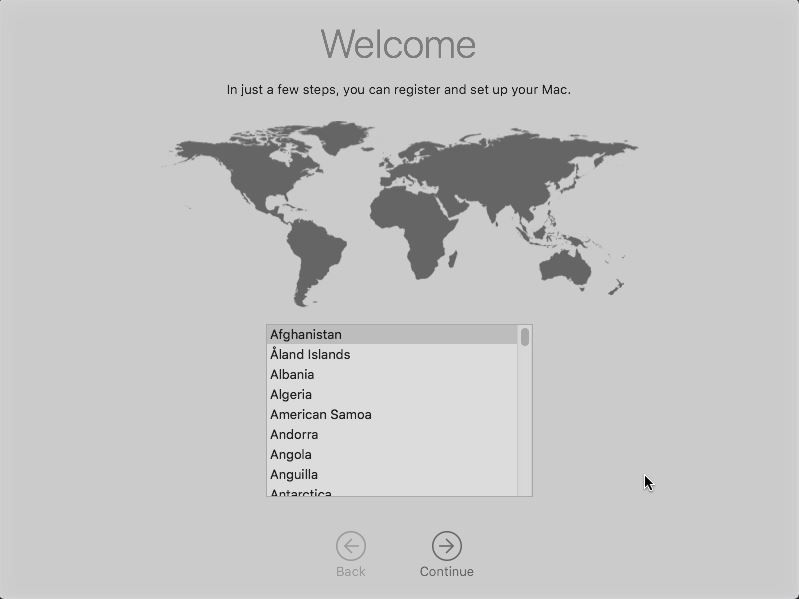
As it starts up, the Welcome screen will appear (It’ll take some time to boot, depending on your configuration). Select your location and Continue.
If you encounter some error that shows,” This virtual machine requires AVX2, but AVX is not present. This virtual machine cannot be powered on.” Here’s how to fix it in a moment: How to Fix This virtual machine requires AVX2 but AVX is not present

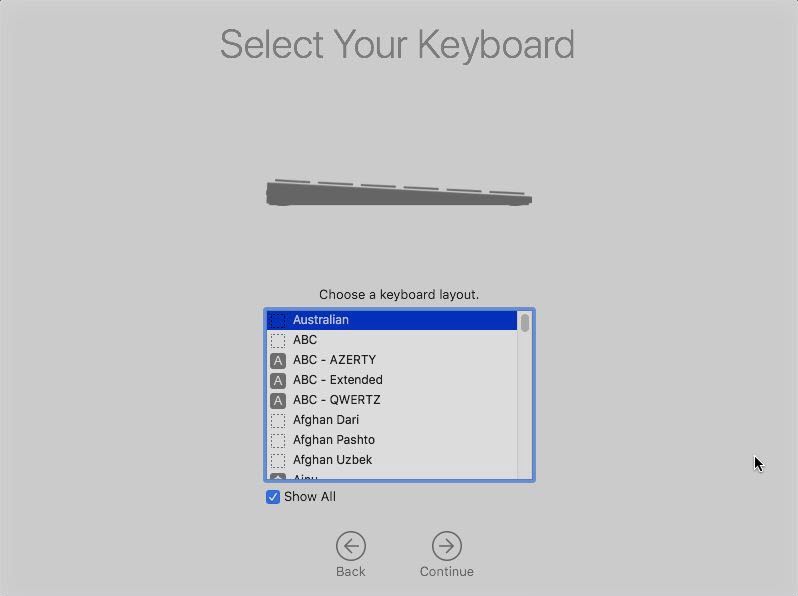
Next, select your keyboard. If it’s not there, click Show All to choose your keyboard from the list. When you’re done, click Continue.

Click Continue.


Yes, you have the option to transfer information from your Windows PC, but that’s not recommended since you’re not going to use this as your primary computer, don’t do that. When selected, click Continue.


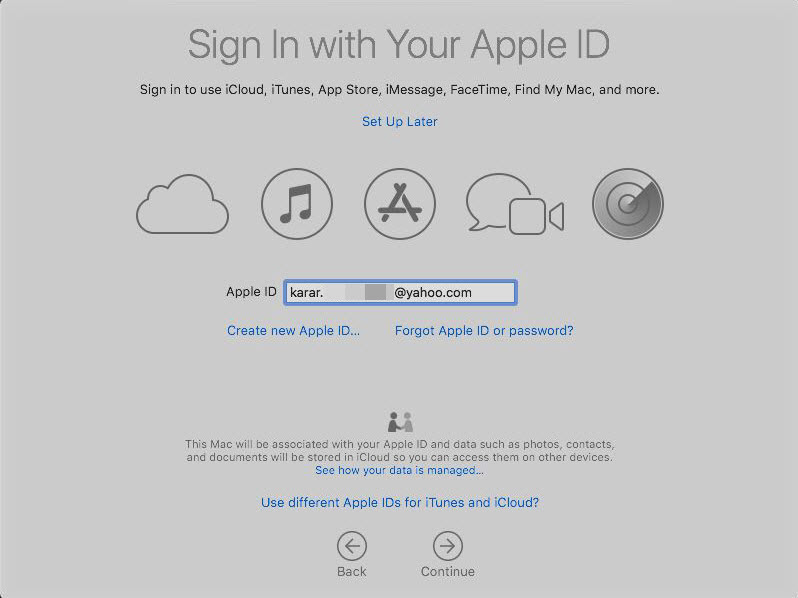
Sign in with your Apple ID if you have one. If you’re a newbie, click on the Create New Apple ID to create one. Alternatively, you can sign in later any way you want. Whatever you choose, Continue it when finished.
To make things work, the virtual machine is automatically connected to the internet as you configured.

To Agree to the Terms & Conditions, tap on Agree.


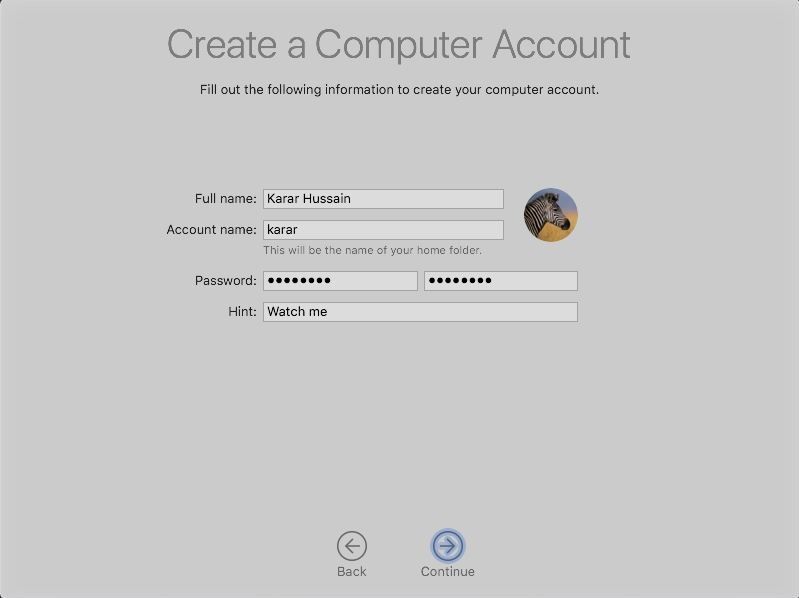
Apparently, you’ll need to create a local computer account, simply enter your details into the blanks and Continue.

The express setup will enable Maps – Location – Find my Mac and more. If you wish to customize and enable only those you want, you can do that. Just hit Customize settings to allow the services you want.

If you chose to customize settings, you’d be asked for every single service for enabling — At the first screen, you’ll be asked to enable location services, as here I don’t allow location services. Simply Continue.

Similarly, you’ll be asked for some essential services. You can easily choose to enable or disable it.
After you continue, you’ll witness the favorite part you were definitely waiting for. I guess you’d probably want to try the new look — Dark Mode. Otherwise, you could change it later. Just Continue.

Yay! Eventually, you’ve done it — You’re into macOS Mojave.
If you want, you can follow this guide: How to share folders on VirtualBox & Vmware? (Windows-MAC) Step by Step Guide


Install VMware Tools on Virtual Machine (VM)
When you’re done with the installation, you probably wanted a full screen instead of the black screen at your edges. Luckily, there’s a perfect tool for that — That will exceptionally provide extra valuable features such as full-screen resolution, sound, drag & drop, and more. The steps are here on how to do it.
Go to VM > Install VMware Tools and wait to pop up on the screen.
When you’re prompted to Install VMware tools, double-click on it.


On the Introduction page, click Continue. On the next screen, Continue to install for all users of this computer.
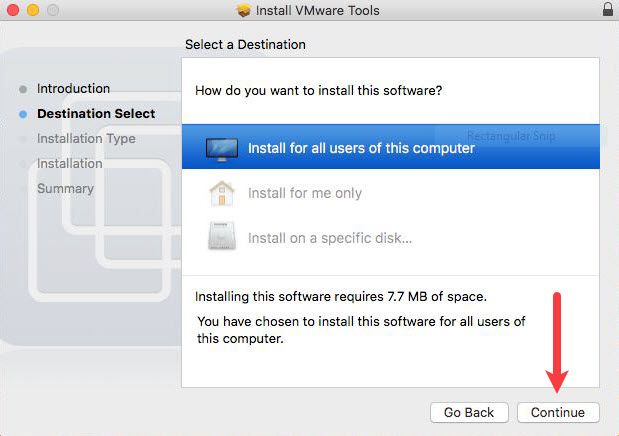

Hit Install to perform the installation on the currently available disk for all users.


In meantime, you may be asked for your account credentials; enter them correctly, and click Install.
When the installation is finished, click Restart to complete the installation.


When the macOS reboots completely, you should have perfect resolution covering the entire screen. Here is a glimpse.


If you see a System Extension Blocked error, you can fix this.


Navigate to Settings > Security & Privacy > On this page, watch out for “ System software from the developer was blocked….“ at the end and click Allow. This will let you install VMware Tools when you run.
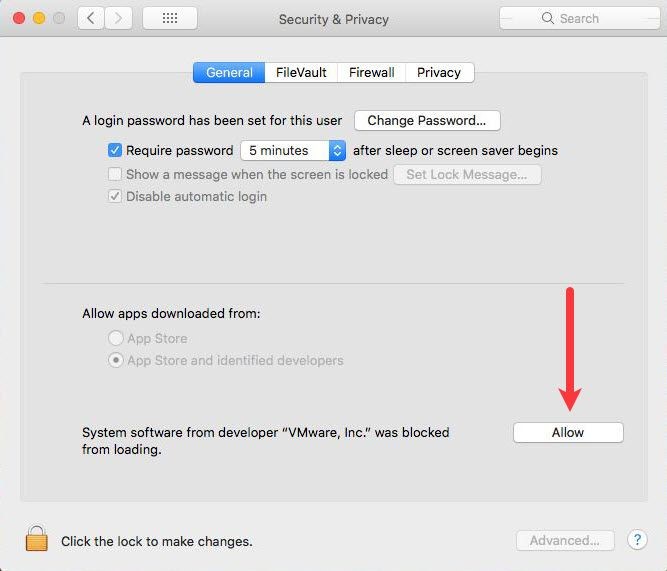

Once you allow, there won’t be any restrictions, repeat the VMware tools installation, and this time, it’ll likely work.
Finally, you’ll have macOS Mojave running perfectly on your Windows PC. Everything should work fine with sound, display, internet, and everything else.
If you want to update macOS, however, you can. Since the Mac is already enrolled in the Apple developer program, it will receive the newest updates. To update, head to Settings > Software Update > Click Update to begin downloading the update.


When the download is completed, you’ll be asked for a restart, click Restart, and the update will be installed once restarted.


And congrats! You have the latest macOS Mojave 10.14 beta three on your PC with its superb features.

Create a Snapshot of macOS Mojave (Optional)
Regarding backup in VMware, a snapshot is a tool you’d prefer. Bad times can come anytime, but you’ll be in big trouble if you aren’t ready for them. What’s a better idea than performing a backup before something happens wrong? That’s where snapshot comes in handy. Simply put, a snapshot is a useful VMware tool that creates a copy of the virtual machine files to back up and protect everything.
Perhaps the trick is simple if you would like to create a snapshot.
In VMware, go to VM > Snapshot > Take Snapshot.


Next, name the snapshot and add a description if you’d like to, then click Take Snapshot to begin the process.


It will create a snapshot of the virtual machine within a minute, wait!


Once the snapshot is created, you can find it in VM > Snapshot > “Snapshot Name” like I saved the snapshot by the name of New Snapshot, and for restore click on it.


By this snapshot, you’ve, just like the shield, doubled the life of your sweet macOS. This potential recovery option will be when the machine fails to boot or any other issues. Now you’re completely safe and guaranteed.

That’s pretty much all there is to it. So, you’re free to install apps or do whatever you’ve in mind. If you experience slow performance or wanted to boost, reserve 50 – 60% of your PC’s memory and CPU (Processors) for the virtual machine.
If you have problems and errors out here, you can check for solutions we’ve listed and answered.
Want to create a bootable installer, here’s how to do it quickly.
Well, that’s all about how you install macOS Mojave on VMware on your Windows PC. I hope your questions have been answered. If not, let me know in the comments.