
Table of Contents
In this article, we will learn how to install MacOS Mojave On VirtualBox On Windows Using ISO in an 8-Step Ultimate Guide. Also, in our previous article: Install macOS Mojave on VMware on Windows PC. If you are looking for an alternative to VirtualBox, you can check the above guide out.
Are you considering installing MacOS Mojave on VirtualBox using an ISO file on your Windows computer? Whether you need to perform a quick test or explore the MacOS environment, VirtualBox provides an ideal solution for running macOS on a Windows platform. Even if you’re a Windows user, you can easily install MacOS Mojave on VirtualBox by following simple steps. Check out our guide titled “Install MacOS Mojave On VirtualBox On Windows PC: 5 Easy Steps” which involves using a .vdmk file and boot file. Alternatively, you can follow our alternative guide for a more straightforward approach using an ISO file.
I am sure the process isn’t easy and works for everyone. You might face these common errors when installing MacOS X On VirtualBox On Windows- Here is a complete guide to help you fix those errors. Complete Guide To Fix VirtualBox Errors While Installing Mac OS X
It may be a bit more challenging, but it is certainly not impossible. You may have many questions, but rest assured that once you overcome the difficulties, you can install macOS Mojave with all its features on your Windows PC. Regardless of which version or edition of Windows you use, you can install macOS Mojave on VirtualBox using an ISO file and explore Mac applications such as Xcode. You don’t have to go through this process alone – in this article, I’ll guide you step-by-step on how to install macOS Mojave on VirtualBox on your Windows PC using an ISO file. Let’s get started!
Tested On LOW CONFIGURATION DESKTOP On 28th December 2020

How To Install MacOS Mojave On VirtualBox On Windows using ISO Updated on 27st March 2024
Here is a summary of what we are going to cover in this article:
- Download macOS Mojave ISO
- Install VirtualBox on Windows PC
- Install & Update VirtualBox Extension
- Create a New Virtual Machine & Customize it
- Run VirtualBox Code via Command Prompt
- Start your Virtual Machine
- Create macOS Mojave Bootable Disc
- Perform a Clean Installation of macOS Mojave
- How to share folders on VirtualBox & Vmware? (Windows-MAC) Step-by-Step Guide
NOTE:
Before we begin how to install macOS Mojave On VirtualBox On Windows using ISO, make sure Virtualization Technology (VT) is enabled on your Windows PC. Here is a guide you can use:

Step 1: Download The Required Files
All the needed files are linked in the article below.
- Download macOS Mojave ISO by Techrechard.com (Mediafire)
- VirtualBox Code by Techrechard.com (Mediafire)
- Virtualbox 6.1.10 Installation (Direct Link)
- Download Virtualbox Extension
Download the macOS Mojave ISO file from the provided link to proceed with the installation. If you haven’t downloaded it yet, get your hands on the ISO image before proceeding with the installation process. Following all the steps in this guide is crucial, as missing any of them may result in a failed installation. Be sure to read through all the steps carefully, as they are all essential for a successful installation.
Recommendation: Making a brand new drive on your Windows PC and putting MacOS Mojave onto another drive is highly recommended.
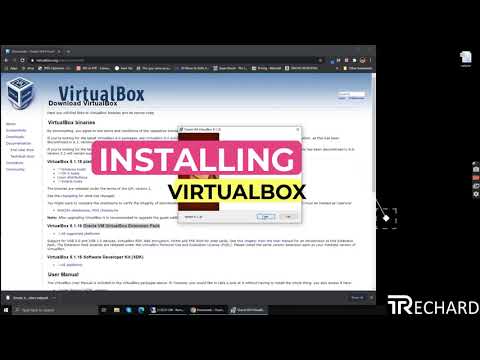
Step 2: Install VirtualBox On Windows PC
Download VirtualBox’s latest version and install it directly in your Windows program. The steps are pretty simple.
Step 3: Install & Update VirtualBox Extension
Go to the Virtualbox download page. Click Oracle VM VirtualBox Extension Package; click All supported platforms to get the latest version of Virtualbox Extension Package.


Download Virtualbox Extensions
As soon as you’ve downloaded the Extension package. Now, follow the steps mentioned in the video:
Step 4: Create A New Virtual Machine & Customize It.
Creating a virtual machine to install macOS Mojave is the same as creating a virtual machine for your Windows OS or Linux, but with a few minor alterations. In this informative article, I will show those modifications. Follow the steps below to create a new virtual machine for macOS Mojave using an ISO file.
1. Open your VirtualBox program and click on New.


2. Click on Expert Mode and then click CREATE.
- Add Virtual Machine Name.
- Virtual Machine Location (leave it default or choose a new drive).
- Type (Mac OS X).
- Model (Mac OS X 64-bit).
- Memory 4 GB (advocated 8 GB or greater ).
- Hard Disk: Create a Virtual Hark Disk now
- Click Create

![]NEW METHOD] Install MacOS Mojave On VirtualBox On Windows Using ISO: 8 Step Ultimate Guide](https://techrechard.com/wp-content/uploads/2020/12/image-56.png)

![]NEW METHOD] Install MacOS Mojave On VirtualBox On Windows Using ISO: 8 Step Ultimate Guide](https://techrechard.com/wp-content/uploads/2020/12/image-57.png)
3. It is time to edit the virtual system. Select macOS Mojave VM and Click Settings.
Go to System > Motherboard, and increase the Base Memory to 12281MB. However, you may use a little memory if your system does not possess this RAM.
Uncheck Floppy in the Boot Order section.
Below the Processor tab, increase the processor to 4 or greater.
In the Display window, increase the Video Memory to 128MB.
In the Storage segment, Click the Empty>DVD icon. Click select a disk. Choose the macOS Mojave ISO. Click on OK to close the macOS Mojave Settings window.

![]NEW METHOD] Install MacOS Mojave On VirtualBox On Windows Using ISO: 8 Step Ultimate Guide](https://techrechard.com/wp-content/uploads/2020/12/image-58.png)

![]NEW METHOD] Install MacOS Mojave On VirtualBox On Windows Using ISO: 8 Step Ultimate Guide](https://techrechard.com/wp-content/uploads/2020/12/image-59.png)
Step 5: Run VirtualBox Code Via Command Prompt
Once you’ve customized and created your virtual machine, it is time to run some codes to set up macOS Mojave on VirtualBox.
To begin with, open the VirtualBox code that you have downloaded above. If you have not downloaded it, use the link below.
Open this file using Notepad and replace the “VM Name” with your actual virtual machine name. See the image below for reference.

![]NEW METHOD] Install MacOS Mojave On VirtualBox On Windows Using ISO: 8 Step Ultimate Guide](https://techrechard.com/wp-content/uploads/2020/12/image-60.png)
If you would like to change your macOS Mojave display resolution initially, see this guide: fix macOS Mojave display resolution on VirtualBox.
Significant Note: We highly recommend Closing the VirtualBox app before implementing the code. If you do not do it, then your virtual machine may not run properly.

![]NEW METHOD] Install MacOS Mojave On VirtualBox On Windows Using ISO: 8 Step Ultimate Guide](https://techrechard.com/wp-content/uploads/2020/12/image-61.png)
Start the command prompt by pressing Windows+X in Windows 10 or press the Windows key and type CMD. Click on Run As Administrator and click on Yes.

![]NEW METHOD] Install MacOS Mojave On VirtualBox On Windows Using ISO: 8 Step Ultimate Guide](https://techrechard.com/wp-content/uploads/2020/12/image-62-1024x629.png)
Step 6: Start The Virtual Machine
1. Open the VirtualBox program, then click on the Start button again.

![]NEW METHOD] Install MacOS Mojave On VirtualBox On Windows Using ISO: 8 Step Ultimate Guide](https://techrechard.com/wp-content/uploads/2020/12/image-64.png)
2. Select the ISO image and click Start.

![]NEW METHOD] Install MacOS Mojave On VirtualBox On Windows Using ISO: 8 Step Ultimate Guide](https://techrechard.com/wp-content/uploads/2020/12/image-66.png)
7: Setting up macOS Mojave on Virtualbox
When you start your Virtual Machine, a series of codes will appear on the screen, but there is no need to be concerned about them. Wait for a few minutes, and you should soon see the Language window for macOS Mojave. Select your Language and click on the Proceed arrow.

![]NEW METHOD] Install MacOS Mojave On VirtualBox On Windows Using ISO: 8 Step Ultimate Guide](https://techrechard.com/wp-content/uploads/2020/12/image-67-1024x833.png)
If you are somehow stuck here, try executing one of the following commands on CMD-
VBoxManage modifyvm “YOUR MACHINE” –CPU-profile “Intel Xeon X5482 3.20GHz”
If you are still stuck on start/end random-seed, change the last line with!
VBoxManage modifyvm “YOUR MACHINE” –cpu-profile “Intel Xeon X5482 3.20GHz”
VBoxManage modifyvm “YOUR MACHINE” –CPU-profile “Intel Core i7-2635QM”
VBoxManage modifyvm “YOUR MACHINE” –CPU-profile “Intel Core i7-3960X”
VBoxManage modifyvm “YOUR MACHINE” –CPU-profile “Intel Core i5-3570”
VBoxManage modifyvm “YOUR MACHINE” –CPU-profile “Intel Core i7-5600U”
VBoxManage modifyvm “YOUR MACHINE” –cpu-profile “Intel Core i7-6700K”

![]NEW METHOD] Install MacOS Mojave On VirtualBox On Windows Using ISO: 8 Step Ultimate Guide](https://techrechard.com/wp-content/uploads/2020/12/Select-macOS-Mojave-Language-1024x846.png)
Click Disk Utility and click on Continue.
Select your VHD Disc and click on the pull-down button. Pick these options and click Erase.
- Title: Mojave Disc (You can type any name you desire )
- Format: APFS (In case you get an error, then choose Mac OS X Extended Journaled)
- Scheme: GUID Partition MAP
Now, close the Disk Utility window.


![]NEW METHOD] Install MacOS Mojave On VirtualBox On Windows Using ISO: 8 Step Ultimate Guide](https://techrechard.com/wp-content/uploads/2020/12/image-69-1024x828.png)
From macOS Utilities, click Install macOS and click on Continue.
Click Continue and Install macOS Mojave.


![]NEW METHOD] Install MacOS Mojave On VirtualBox On Windows Using ISO: 8 Step Ultimate Guide](https://techrechard.com/wp-content/uploads/2020/12/Install-macOS-Mojave-1024x774.png)
Agree on the macOS Mojave License arrangement.
Select macOS Mojave Disc and click on Install.
![]NEW METHOD] Install MacOS Mojave On VirtualBox On Windows Using ISO: 8 Step Ultimate Guide](https://techrechard.com/wp-content/uploads/2020/12/Agree-to-the-macOS-Mojave-License-agreement-1024x774-1.png)
Please be patient for three minutes as your Virtual Machine will restart. This will allow the macOS Mojave to be installed onto your disk. During this process, it is important not to take any action. After the restart, you will be prompted with a 30-minute installation window.
8: Perform A Clean Installation Of MacOS Mojave
When You’ve passed step 7, you will see the macOS Mojave window. You can proceed with the installation steps on macOS Mojave on Virtualbox.


Well done! You have successfully installed macOS Mojave on VirtualBox with the ISO image.
Repair Common Errors
The problem is seeing “[EB|#LOG:EXITBS: START] (AND present DATE/TIME).” Use the control below.
VBoxManage modifyvm “VM Title” –cpu-profile “Intel Xeon X5482 3.20GHz”
Please note that your issue might be different depending on your location. Please share your error in the comment section below, and we will try to fix it.
I am sure the process isn’t easy and works for everyone. You might face these common errors when installing MacOS X On VirtualBox On Windows- Here is a complete guide to help you fix those errors. Complete Guide To Fix VirtualBox Errors While Installing Mac OS X
Overview: How To Install macOS Mojave On VirtualBox On Windows using ISO
In conclusion, this guide ({NEW METHOD} How to Install macOS Mojave On VirtualBox On Windows using ISO) has provided you with a detailed pictorial representation of the step-by-step process for installing macOS Mojave on VirtualBox using an ISO file on Windows.
We are always eager to receive your feedback on this guide, as well as other articles published on Techrechard. Your thoughts and opinions are greatly appreciated.
Here is a complete video tutorial of this guide:
