

Table of Contents
In this article, we will learn how to Install macOS Mojave on VirtualBox on Windows PC in 5 easy steps. Also, in our previous article: Install macOS Mojave on VMware on Windows PC. If you are looking for an alternative to VirtualBox, you can check out the above guide.
Do you intend to install macOS Mojave on VirtualBox? VirtualBox is ideal for installing macOS, performing a quick test, or exploring the system. Even if you are a Windows user, you can install macOS Mojave on VirtualBox. Here’s what you should be aware of.
I am sure the process isn’t easy and works for everyone. You might face these common errors when installing MacOS X On VirtualBox On Windows- Here is a complete guide to help you fix those errors. Complete Guide To Fix VirtualBox Errors While Installing Mac OS X


Install macOS Mojave on VirtualBox on Windows PC
Considering this, we will set up a virtual environment to run macOS Mojave on VirtualBox installed on Windows. To create this virtual environment, you will require a virtualization program or application. VirtualBox and VMware are some great options available, but my preference is VirtualBox. This software is free of cost and offers exceptional virtualization capabilities, with all the essential features of a real system integrated into it. To begin the process, download and install VirtualBox. So, without further ado, let’s get started.
Step 1: Enable virtualization
Before we proceed, let’s understand the concept of virtualization. Virtualization is creating a virtual version of something, such as an operating system or CPU hardware. This is accomplished by creating a virtual machine (VM) that appears as a pop-up window within the virtualization environment. A virtual machine enables you to run an entire operating system on your current system, which functions like a physical system within a secure, isolated environment. In essence, you will have access to all the features of a real computer, including internet connectivity, sound, full-screen mode, drag-and-drop functionality, and much more.
Use this video tutorial to enable virtualization:

Step 2: Download the required files to Install macOS Mojave On VirtualBox
Before you start, you’ll need to download a few things.
- CodeforVirtualBox — To run and work macOS properly, you must patch the code in Command Prompt. Once the files are downloaded, extract them and move to the next step.
NOTE: In this guide, we are using the macOS Mojave VMDK file. Instead, you can also use the macOS Mojave ISO file.
When you do that, you can install macOS Mojave on VirtualBox on a Windows computer.
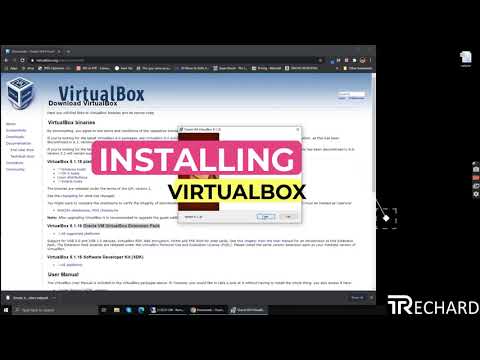
Step 3: Install VirtualBox on Windows
First and foremost, install VirtualBox using the file downloaded above and perform the installation wizard. When the installation is finished, click Finish to launch Oracle VM VirtualBox. You can use this video tutorial:
Step 4: Create a Virtual Machine on VirtualBox
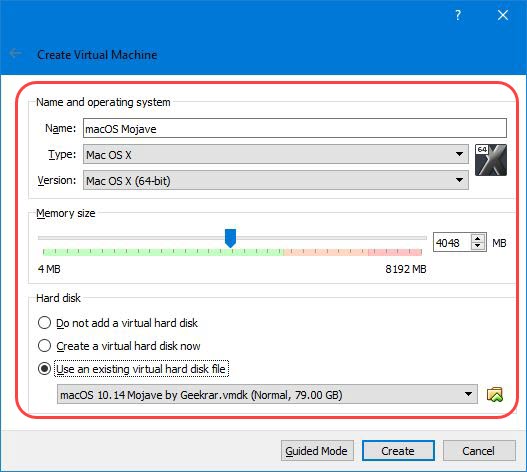
Open Virtualbox and click New. Click Expert Mode to expand the process into the window.


Now, name your virtual machine. It will automatically detect the OS type and version. Second, I prefer 3GB to 6GB ( 65% of your PC RAM). For the Hard Disk > Select Use an existing virtual hard disk file > Choose the downloaded macOS Mojave VMDk file.
When you’re done, it should look like the following: click Create.

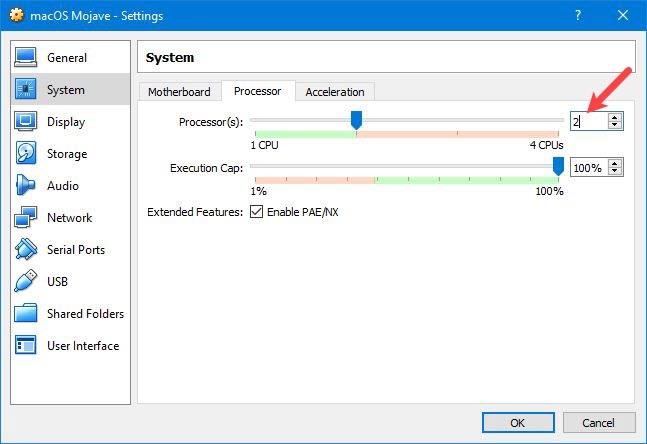
Next, click Settings above the Virtual Machine name to tweak some settings.


Now select System > Processor > Increase 1 CPU to 2 or more about (70% of CPU Core). Otherwise, the virtual machine may not boot properly.

After that, navigate to Display > Increase Video Memory to the end (128 MB) and click OK.

Step 5: Apply the Code on VirtualBox
Now that you’ve created the virtual machine, it’s time to apply custom tweaks for VirtualBox.
To do this, first of all, close VirtualBox. Next, open Notepad and copy-paste the below commands. Now, replace OS X Name with your virtual machine name.
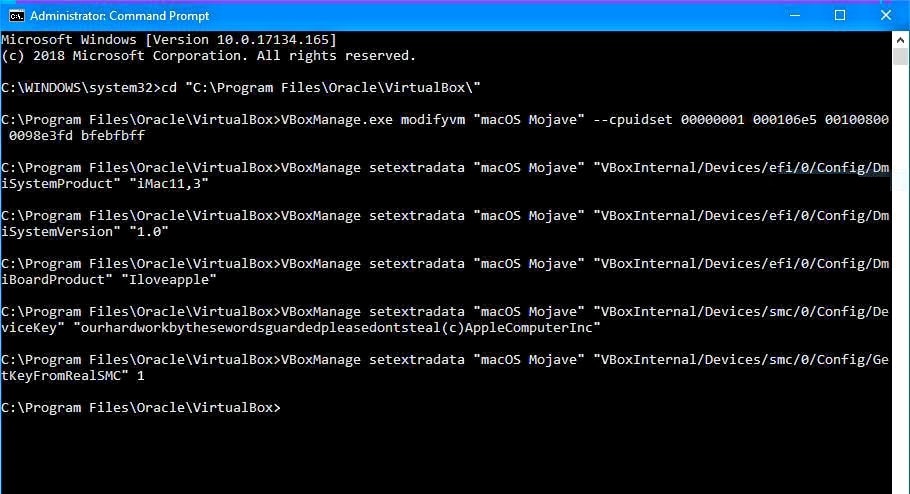
cd "C:\Program Files\Oracle\VirtualBox\"
VBoxManage.exe modifyvm "OS X Name" --cpuidset 00000001 000106e5 00100800 0098e3fd bfebfbff
VBoxManage setextradata "OS X Name" "VBoxInternal/Devices/efi/0/Config/DmiSystemProduct" "iMac11,3"
VBoxManage setextradata "OS X Name" "VBoxInternal/Devices/efi/0/Config/DmiSystemVersion" "1.0"
VBoxManage setextradata "OS X Name" "VBoxInternal/Devices/efi/0/Config/DmiBoardProduct" "Iloveapple"
VBoxManage setextradata "OS X Name" "VBoxInternal/Devices/smc/0/Config/DeviceKey" "ourhardworkbythesewordsguardedpleasedontsteal(c)AppleComputerInc"
VBoxManage setextradata "OS X Name" "VBoxInternal/Devices/smc/0/Config/GetKeyFromRealSMC" 1
To make things a little easier, press Ctrl + H to open the replace panel — write down OS X Name on Find What and write down macOS Mojave in Replace with. Finally, click Replace All to make your replacements at once. Remember, if you have installed VirtualBox in another drive out of C:\ drive, specify it at the first line of code in cd “C:\Program Files…” before applying.


Once you’ve replaced those, copy the code, right-click at the start menu, and run Command Prompt (Admin).


On Command Prompt, right-click to paste down the code and press enter. It’ll take no more than a moment. Here, you shouldn’t get an error. Just close when done. Here’s a glimpse of what it looks like.

Step 6: Add VirtualBox Boot Disk
The settings are now near the end. We’ll add the VirtualBox boot disk to enter the installation mode for this step.
First, open VirtualBox and click on Settings.

Then select Storage, click on the small disk icon, and then click Choose Existing disk.


Next, click on Add and open the VirtualBox Boot Image.


Now select the disk and hit Choose.


It will look like this. Then click OK on the virtual machine settings.


Step 7: Install macOS Mojave on VirtualBox on Windows.
Now, you’ve finished the configuration and are ready for installation.
Start the virtual machine and wait for the booting. Sit back and grab a cup of coffee because it will take some time.


If you see several codes running on the screen, you don’t need to worry about it. It will just boot up; only wait.


When booted, you’ll be greeted with the Welcome page. Choose your location accurately and Continue.


Next, select your keyboard layout. If you don’t see your one there, click Show All and pick your one, then Continue.


Click Continue.


Click Continue.


If you wish to use services like iCloud, iTunes, App Store, iMessage, and others, you will need to sign in with your Apple ID. If you don’t have an Apple ID, you can create one to take advantage of these services. To create a new Apple ID, click on “Create new Apple ID” and follow the prompts. Alternatively, if you don’t want to sign in or create a new account, you can click on “Set up later.”
It is important to note that the virtual machine is automatically connected to the internet via NAT.


Click Agree.


Just like Windows, you need to create a local computer account to sign in. Fill out the blanks with your name, account name, password, and hint, and Continue.


Congratulations! You have successfully installed macOS Mojave on Virtualbox.


Step 8: Download & Install Latest Updates
If you desire the latest features for macOS Mojave, you may proceed. Since this Mac is already enrolled in the Apple Beta Program, it is likely to receive the most recent updates. So you can move forward without any worries.
Navigate to Settings > Software Update > It will check and present the newest updates if available. Click Update Now to download the updates. When you’re asked for your password, enter to unlock the software update preferences. The update will start downloading when finished. It will be installed. You’ll also have access to the latest macOS Mojave on your PC.


And when you’re prompted to download & restart to install the updates, don’t hesitate to click Download & Restart. It will quickly restart to install those downloaded updates.
How to share folders on VirtualBox & Vmware? (Windows-MAC) Step by Step Guide
Troubleshoot Mouse & Keyboard Not Working
When installing, you may find a few problems with different things. In my case, I actually had issues with the mouse and Keyboard even when installed. If you are stuck with your mouse and Keyboard, and it isn’t working, here’s how to fix that.
Go to the VirtualBox download page and download the VirtualBox extension pack by hitting the All supported platforms link.


When the extension is downloaded, power off the virtual machine by clicking on the exit button and selecting power off the virtual machine. Don’t save; otherwise, you won’t be able to make changes.


On VirtualBox, navigate to File > Preferences > Extensions > click on Add new package button at the right corner. When you’re prompted to select the extension pack file, go on and double-click on the extension pack to choose.


Now, you will be asked whether you want to install an extension pack or not. Just click Install.


On this page, you need to agree to the VirtualBox license. To do that, click Agree and continue with the installation.


Finally, you may be asked for administrator credentials or permission to install it. On that hit, Yes, and you’ll see this.


When you’ve installed the extension pack, power off the virtual machine and wait for it.
Head to virtual machine settings > USB > Select USB 3.0 and click OK.
Remember, in my case. The mouse worked fine with selecting this option ( USB 3.0 ) without adding my mouse. However, in your case, if the mouse didn’t work, you may power off the virtual machine, and in settings > USB > click on the green plus ( + ) icon and add your mouse. It will likely work.

If this doesn’t work, tweak the settings, and you can change the options to another USB version. It won’t be a hurdle since this works for everyone.
For the Keyboard, when you finish the installation, the keyboard set-up assistant wizard will automatically identify your Keyboard. If not, you’ll need to select your keyboard type by pressing a key at a time.


All right, everything should work fine and soft. If you have other problems with a boot or other things, let me know in the comments below.
If you have problems and errors out of here, you can check for solutions we’ve listed and answered.
If you would like to increase the screen resolution to your preferred one, here’s how to do it: Increase/fix macOS Mojave Screen Resolution on VirtualBox.
If you are into the EFI Internal Shell, here’s how you can fix it: Fix EFI Internal Shell on macOS Mojave on VirtualBox
If you are experiencing slow performance, here’s how to speed up Mojave on Virtual Machine.
That was all about how you install macOS Mojave on VirtualBox on Windows. If you have questions, suggestions, and ideas for us, we are happy to know them.