
Table of Contents
In this article, we will learn: How To Install macOS Catalina On VirtualBox On Windows.
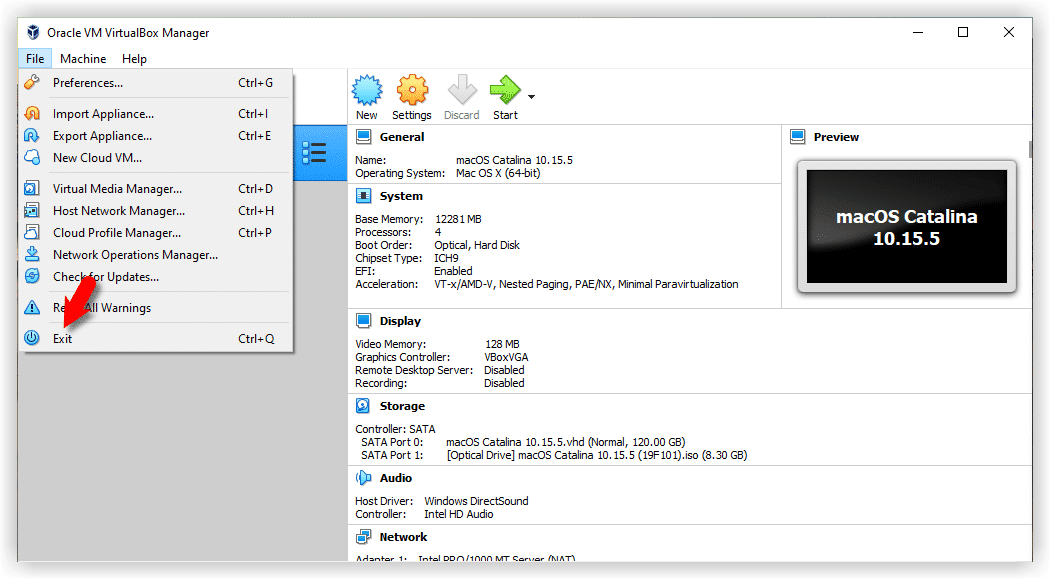
I am sure the process isn’t easy and works for everyone. You might face these common errors when installing MacOS X On VirtualBox On Windows- Here is a complete guide to help you fix those errors. Complete Guide To Fix VirtualBox Errors While Installing Mac OS X
Tested on LOW CONFIGURATION DESKTOP on 28th December 2020
Installing macOS on VirtualBox onto a Windows PC isn’t technically legal under Apple terms of usage, but we use it for educational and testing purposes. If anybody misuses it, then that is not our duty.

How To Install macOS Catalina On VirtualBox On Windows
Helpful: Before reading the guide (How to Install macOS Catalina On VirtualBox On Windows), it is suggested to browse into the necessary File part of the article and download macOS Catalina file, and you will have time to browse the post before downloading has finished.
How To Install macOS Catalina On VirtualBox On Windows
- Download macOS Catalina ISO
- Install VirtualBox onto Windows PC
- Install & Update VirtualBox Extension
- Create a New Virtual Machine & Customize it
- Run VirtualBox Code via Command Prompt
- Start your Digital Machine
- Produce macOS Catalina Bootable Disc
- Perform a Clean Installation of macOS Catalina
- Overview
NOTE:
Before we begin the process of How To Install macOS Catalina On VirtualBox On Windows, make sure Virtualization Technology (VT) is enabled on your system.

Download the Required files to Install macOS Catalina On VirtualBox On Windows
All the needed files are available below.
- Download macOS Catalina ISO
- VirtualBox Code
- Virtualbox 6.1.10 Installation (Direct Link)
- Download Virtualbox Boot Image File
- Download Virtualbox Extension
1: Download macOS Catalina ISO
You have to get macOS Catalina ISO in the link supplied above. (You can also create macOS Catalina ISO file. Most of the download links available on the internet are trash. So, this guide will help you create a fresh macOS Catalina ISO file)
We are going to use the ISO image of macOS Catalina in this guide. Please see the manual step-by-step. If you miss any measure, the setup may not get the job done. Read all of the measures because all of these are significant.
Recommendation: Making a brand new drive in your Windows PC and putting macOS Catalina onto another drive is highly suggested.
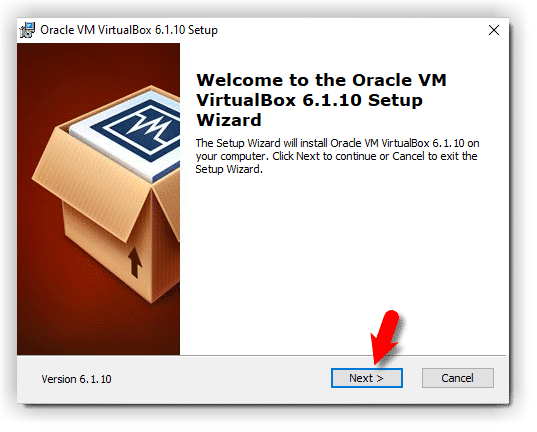
2: Install VirtualBox on Windows PC
Download and Install VirtualBox’s latest version and install it directly in your Windows program. If you have installed VirtualBox, then you may bypass this step. Aside from that, follow the steps below.
1. On Your welcome Wizard page, then click on Next.

2. Click Next.
3. Click Next to take the default options if you don’t would like to modify something.
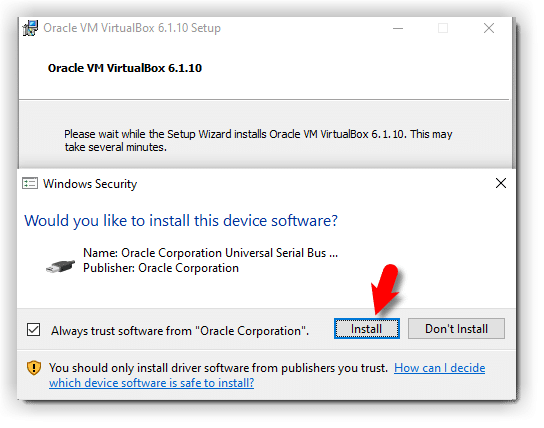
4. Click on the Install button to set up VBox. Click Yes when needed.
5. Whilst installing VBox, you may get a safety warning regarding “Oracle Corporation.” You must click Install on this webpage to proceed with this installation. If you click Do not set up, the setup procedure will soon be finished here, and you can not proceed. If you find the safety warning, click on the Setup button.

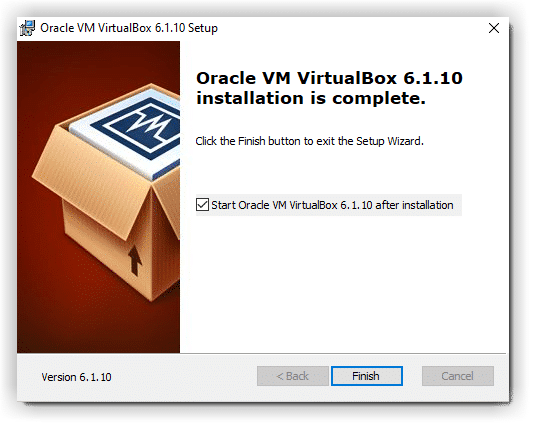
6. Eventually, click Finish.

3: Install & Update VirtualBox Extension
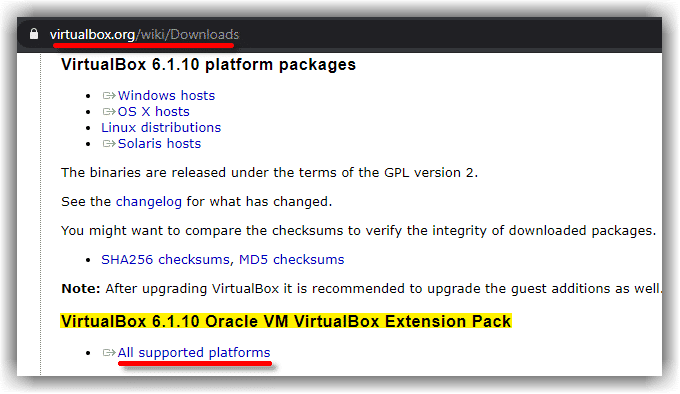
Go to the Virtualbox download page. Beneath VirtualBox 6.1.10 Oracle VM VirtualBox Extension Package segment, Click All supported platforms to get the Most Recent version of Virtualbox Extension Package.

As soon as you’ve downloaded the Extension package. Now, follow the steps below to upgrade the Virtualbox expansion package.
Open VirtualBox, and navigate into Programs >Pereferences>Extensions.
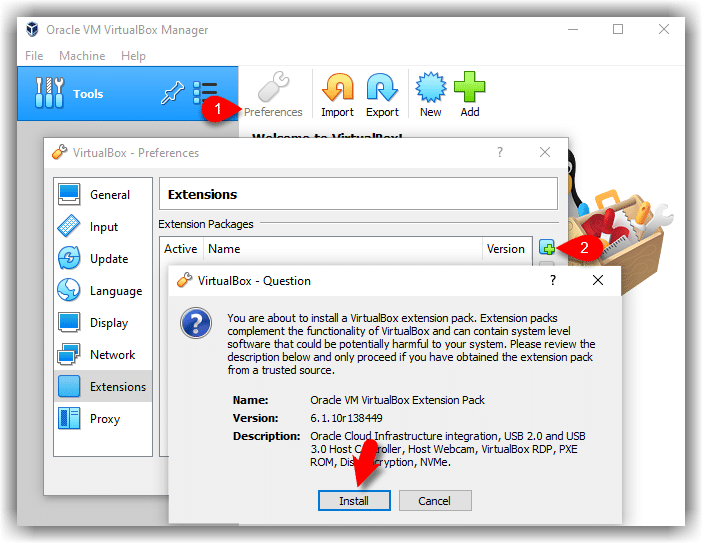

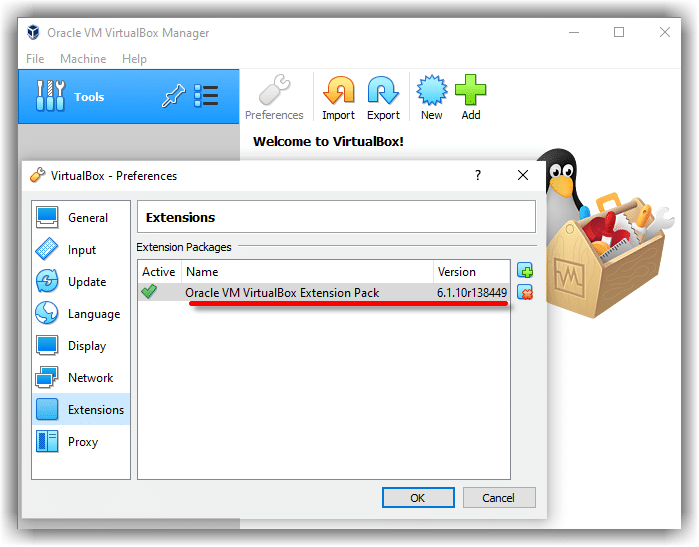
Click the Plus (+) icon and choose the VirtualBox extension you’ve downloaded at the segment’s start. Just click Install or Update, and click Agree. Now, click on the OK button.
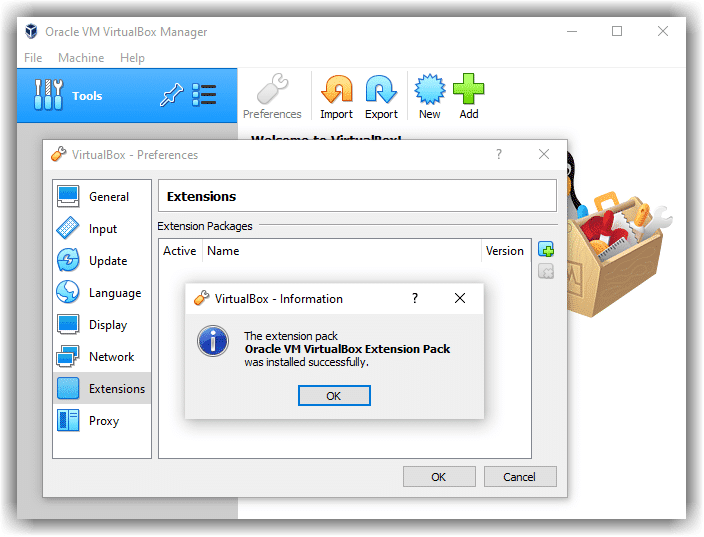

Last, it would help if you saw something similar to the screenshot below.

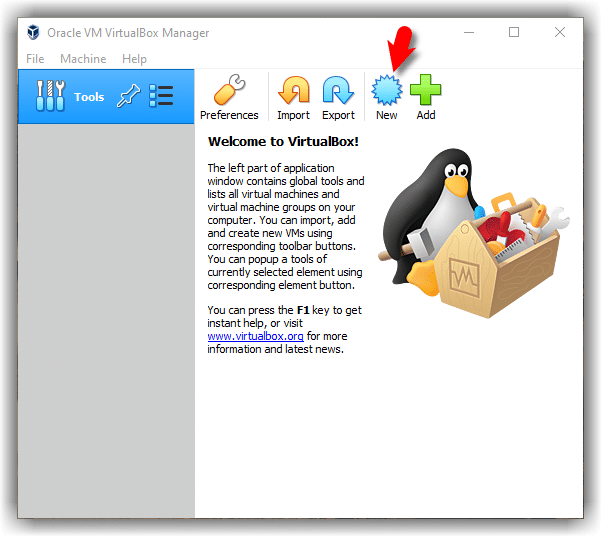
4: Create a New Virtual Machine & Customize it.
Developing a digital server to get macOS Catalina is the same as producing a virtual server for your Windows operating platform or Linux but with a few minor alterations. In this article, I will show those modifications. Follow the steps below to make a new virtual server for macOS Catalina utilizing an ISO file.
1. Open your VirtualBox program and click on New.

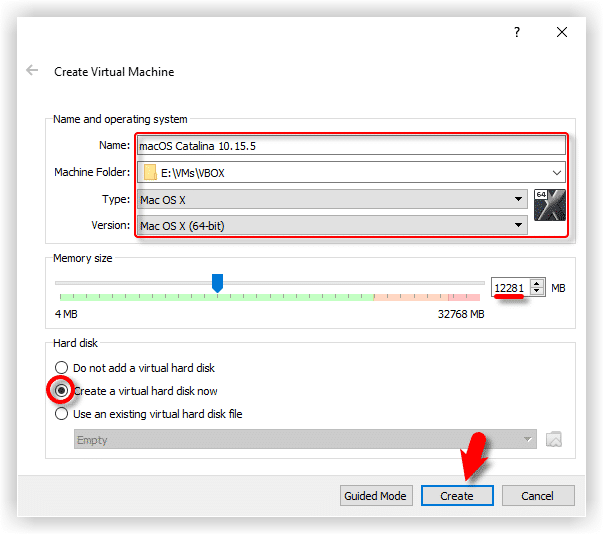
2. Click on Expert Mode, then click CREATE.
- Add an Acceptable Virtual Machine Title.
- Virtual Machine Location (leave it default or choose a fresh drive).
- Type (Mac OS X).
- Model (Mac OS X 64-bit).
- Memory 4 GB (advocated 8 GB or greater ).
- Hard Disk: Create a Virtual Hark Disk now
- Click Create
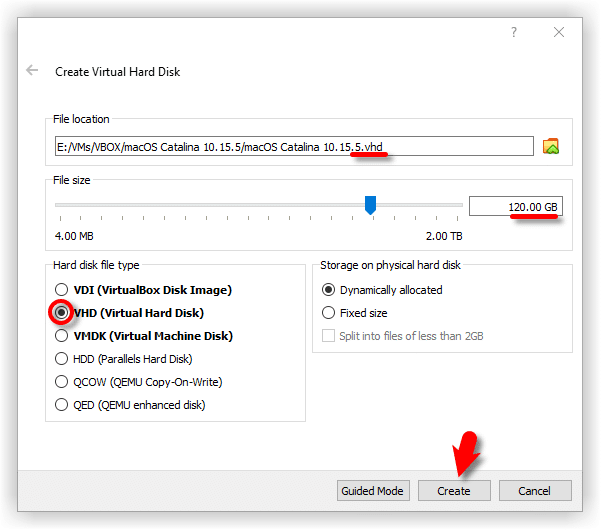
- Disc Location: The default location should be OK if you don’t like to switch to another site.
- Document Size: You also can define the disk size.
- Hard disk type: Select VHD (Virtual Hard Disk) format.
- Storage physical hard disk: Select exactly the Dynamically allocated alternative. But if you would like a much better performance disc, opt for a fixed disk drive. The fixed disk will devote the designated size in the server system instantly. Read more about this dynamic versus fixed-size disc.


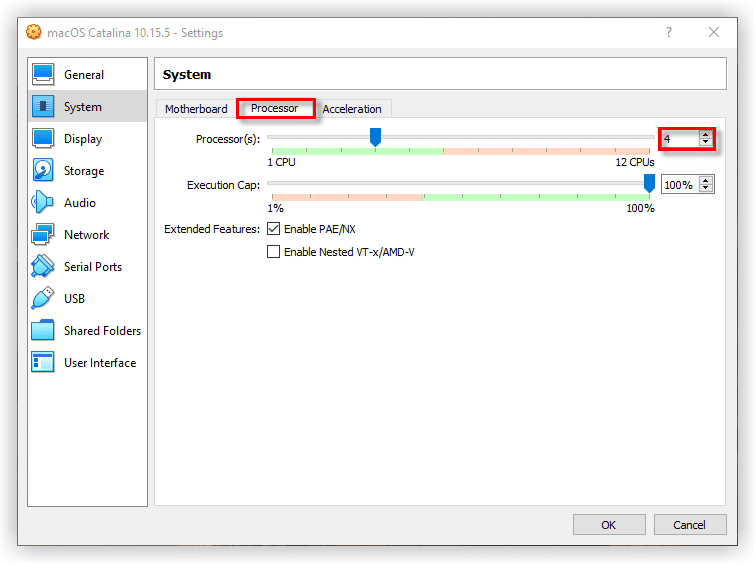
3. Select macOS Catalina VM and Click Settings. Now, bring the next changes into macOS Catalina VM.
- Beneath System>Motherboard, raise the Base Memory to 12281 MB. But, you may use a little memory in case your system does not possess this RAM.
- Uncheck Floppy in the Boot Order section.
- Below the Processor tab, raise the processor to 4 or greater.
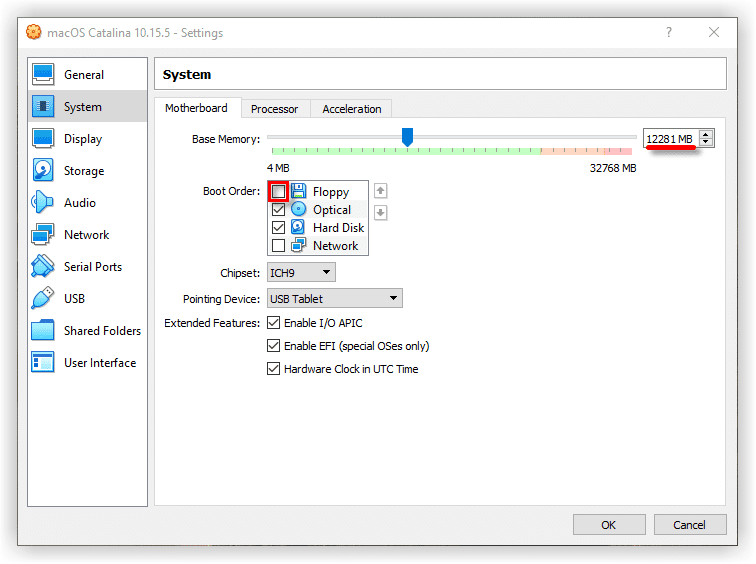
- In the Display window, raise the Video Memory to 128MB.

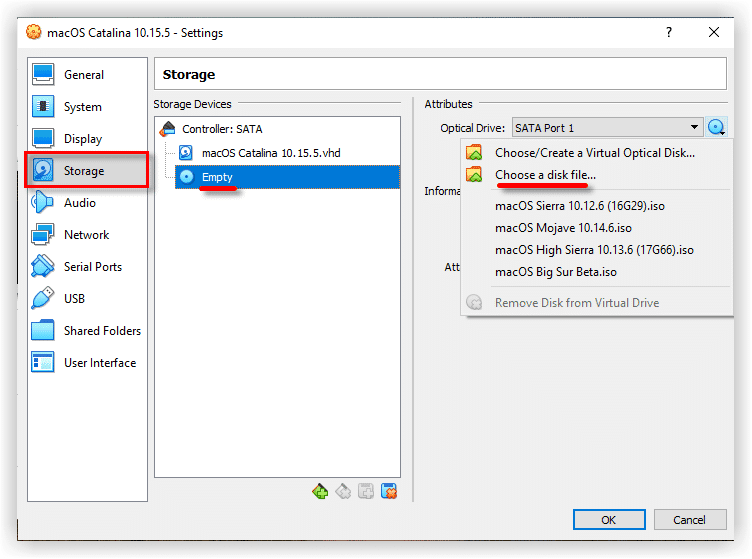
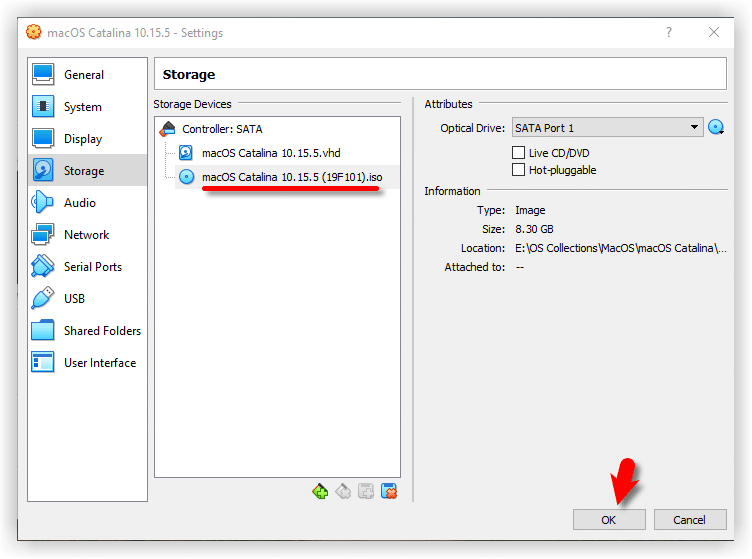
- In the Storage segment, Click the Empty>DVD icon. Click select a disk. It would help if you chose macOS Catalina ISO that you’ve downloaded. Ultimately, click on OK to close the macOS Catalina Settings window.


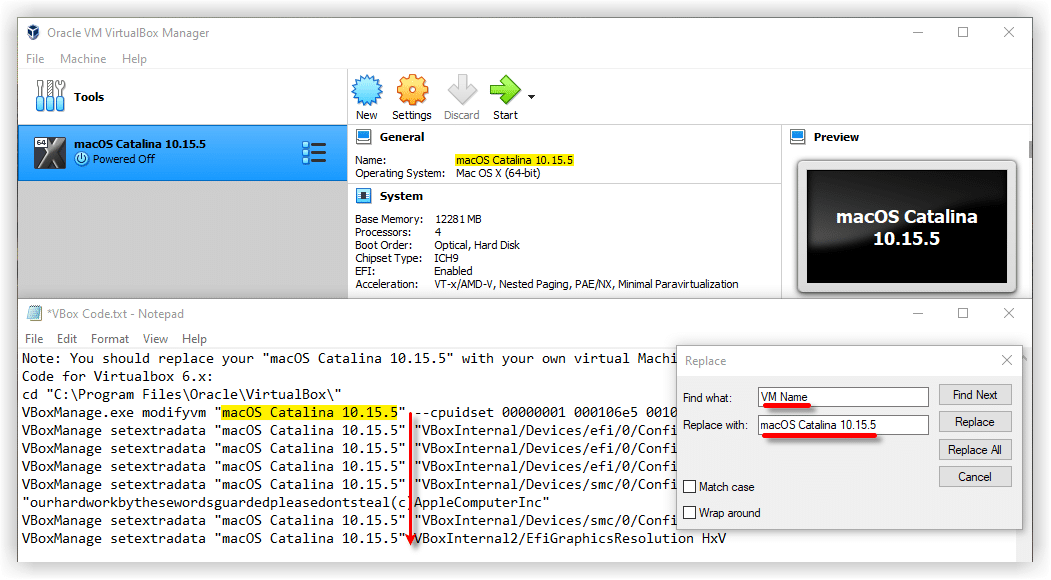
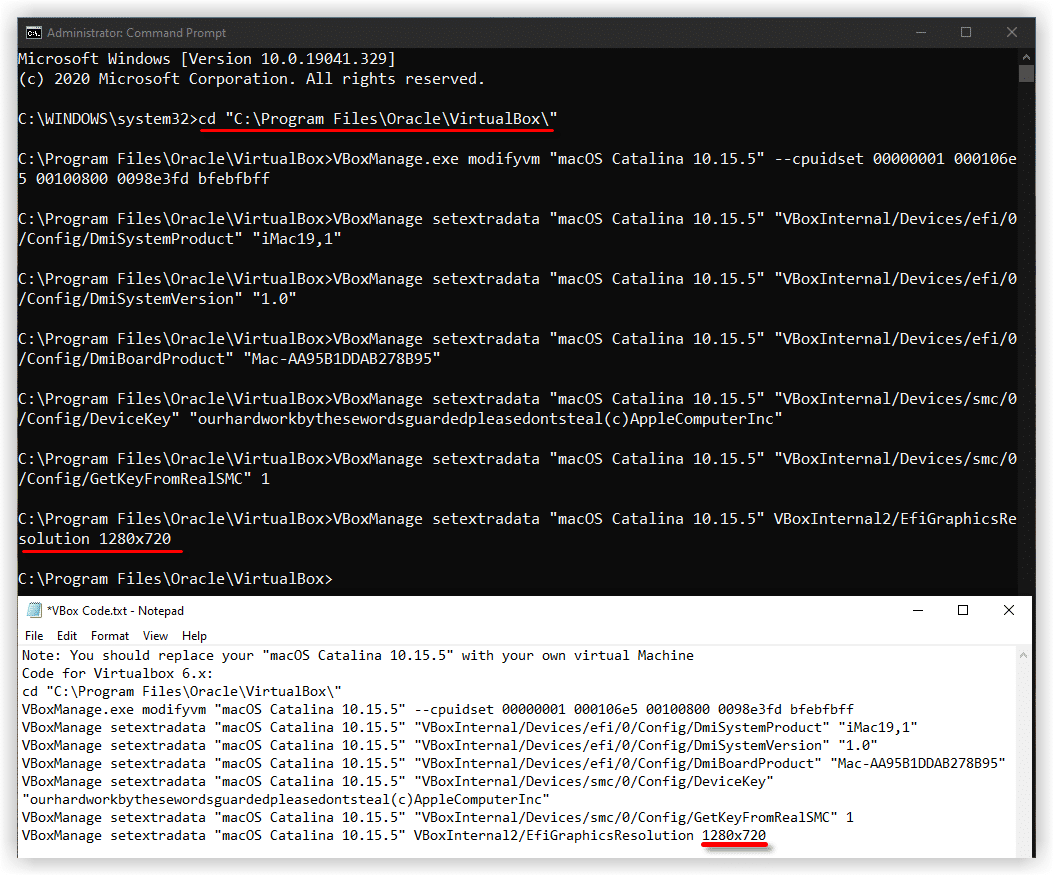
5: Run VirtualBox Code Via Command Prompt
Once you’ve customized and created your virtual machine, it is time to run some VBox codes to set up macOS Catalina on VirtualBox.
To begin with, you need to copy your virtual machine name. Open the VirtualBox code you have downloaded in the necessary File part of the article. If you have not downloaded does not matter. Use the following link.
Once you opened the VirtualBox code through notepad or some other text editor, use this app’s substitute function to Replace the “VM Name” with your virtual machine name. See the image below to understand the best way to take action.

For more supported display resolution on VirtualBox and an in-depth guide, see fix macOS Catalina display resolution on VirtualBox.
VBoxManage setextradata”VM Title” VBoxInternal2/EfiGraphicsResolution HxV
Significant Note: We highly recommend Closing the VirtualBox app before implementing the code. If you do not do it, then your digital machine may not proceed to the setup step.
After you substituted the “VM Title ” together with your digital machine name, run on the code by one through the command prompt (CMD). Starting the command prompt by pressing Windows+X and choosing Control Prompt in the listing is possible. Or push the Windows key and type CMD. Click on Run As Administrator and click on Yes.

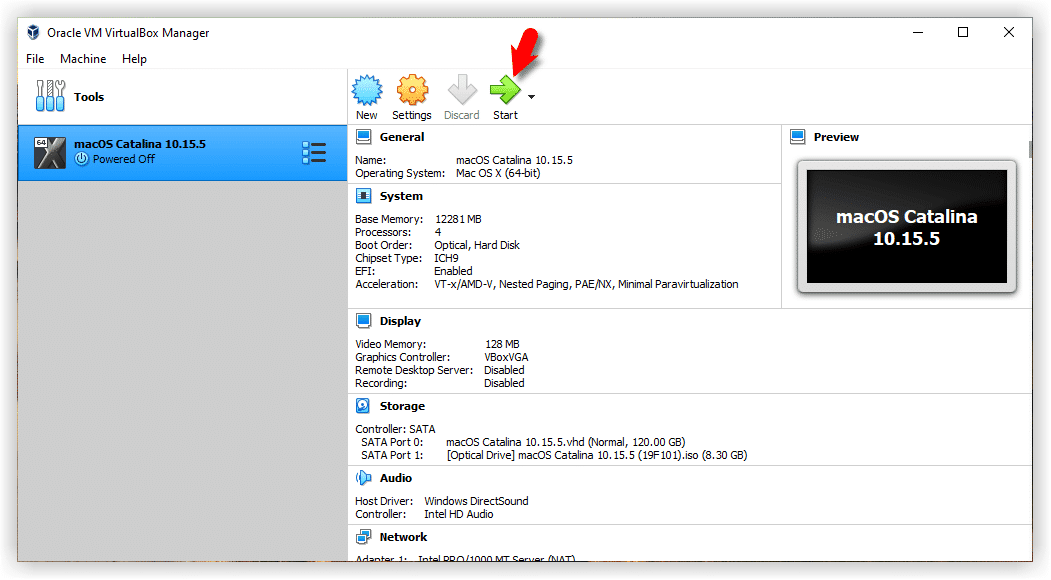
6: Start the Virtual Machine
1. Open the VirtualBox program, then click the Start button again. A black screen with a couple of white & yellow text will show up on the monitor.
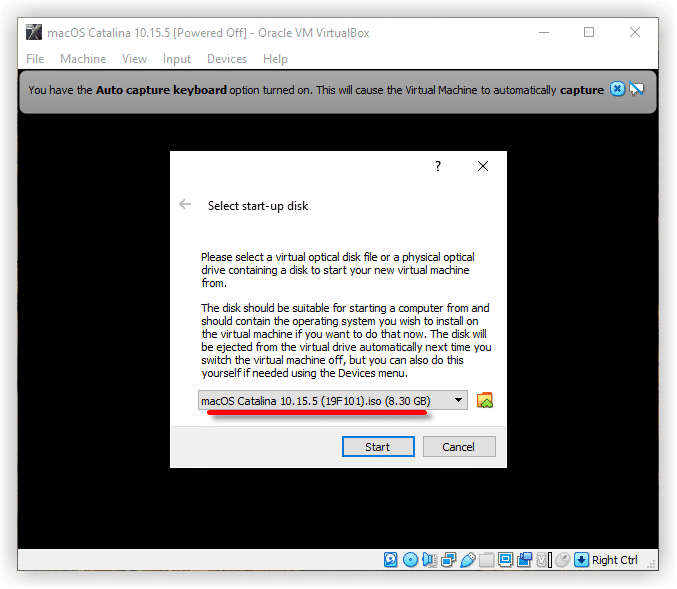
2. As soon as you’ve started your virtual machine, you may need to decide which ISO to pick if you have attached just 1 ISO image. You likely not find the window beneath. Just be sure you are utilizing the proper macOS Catalina ISO.

You might encounter this error. Here is the fix- Install.nsh is Not Recognized as an Internal Command: 4 Possible Fixes – TechRechard
7: Create macOS Catalina Bootable Disc
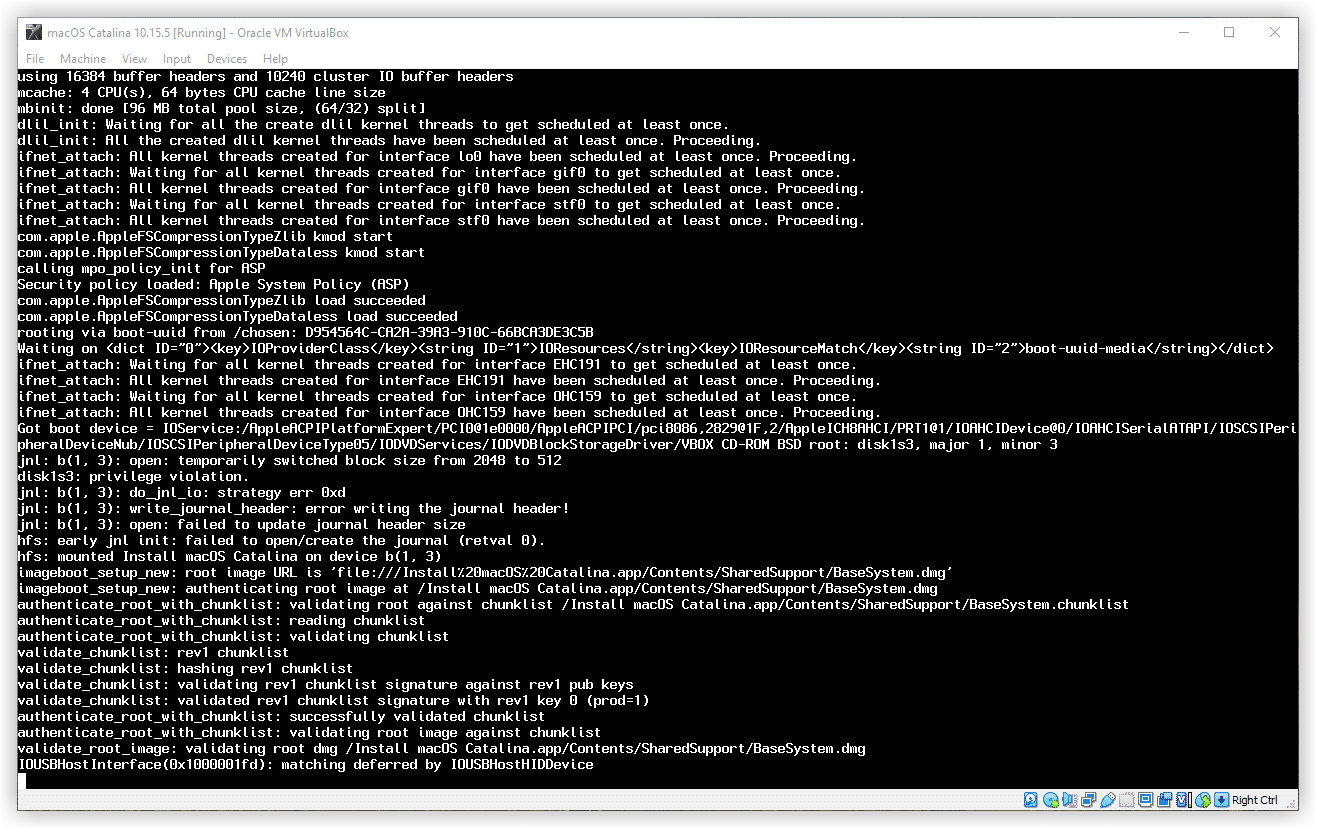
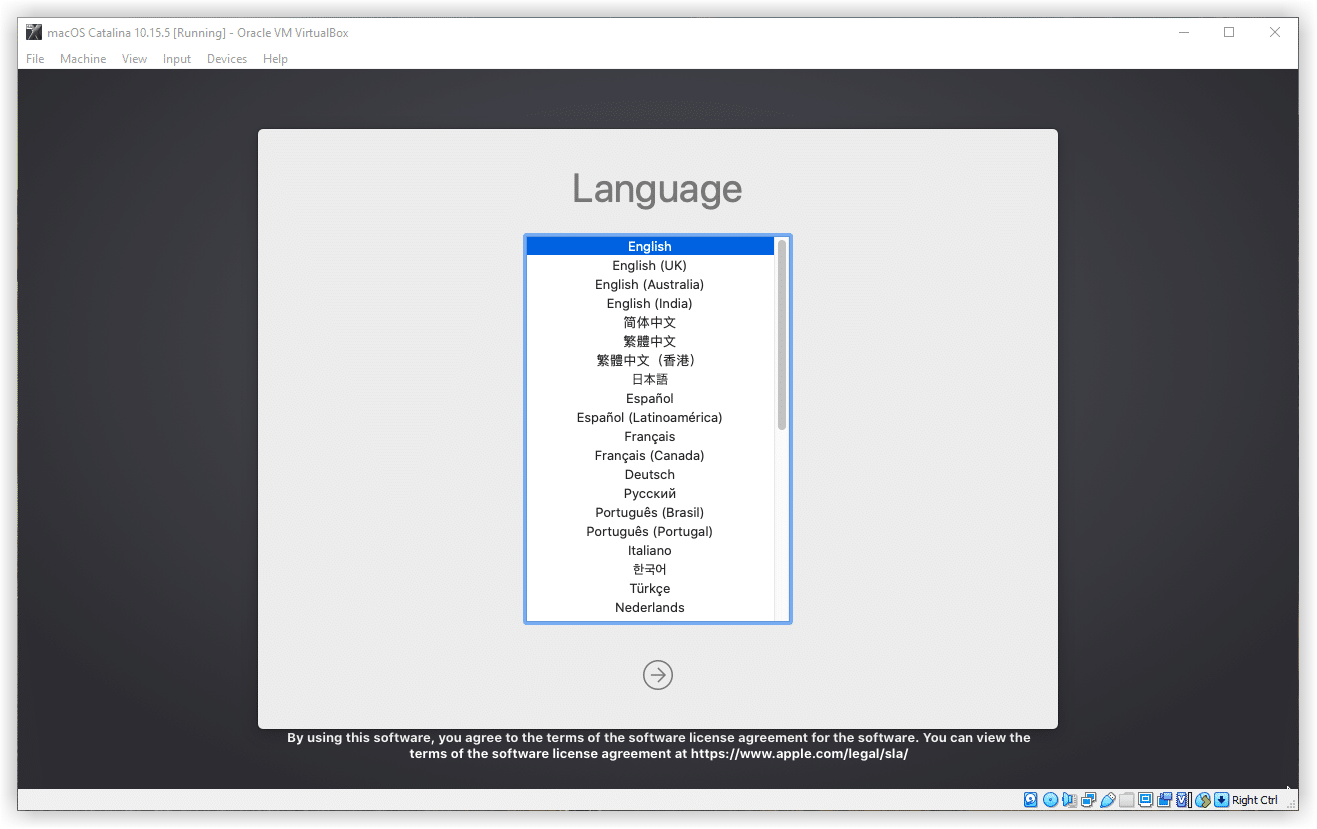
When you begin your VM, a whole group of code will operate on the display, but you shouldn’t worry about it. Wait for a few minutes, and you should observe the macOS Catalina Language window. Select your Language and click on the Proceed arrow.

If you are somehow stuck here, try executing one of the following commands on CMD-
VBoxManage modifyvm “YOUR MACHINE” –CPU-profile “Intel Xeon X5482 3.20GHz”
if you are still stuck on start/end random-seed, change the last line with!
VBoxManage modifyvm “YOUR MACHINE” –cpu-profile “Intel Xeon X5482 3.20GHz”
VBoxManage modifyvm “YOUR MACHINE” –CPU-profile “Intel Core i7-2635QM”
VBoxManage modifyvm “YOUR MACHINE” –CPU-profile “Intel Core i7-3960X”
VBoxManage modifyvm “YOUR MACHINE” –CPU-profile “Intel Core i5-3570”
VBoxManage modifyvm “YOUR MACHINE” –CPU-profile “Intel Core i7-5600U”
VBoxManage modifyvm “YOUR MACHINE” –cpu-profile “Intel Core i7-6700K”
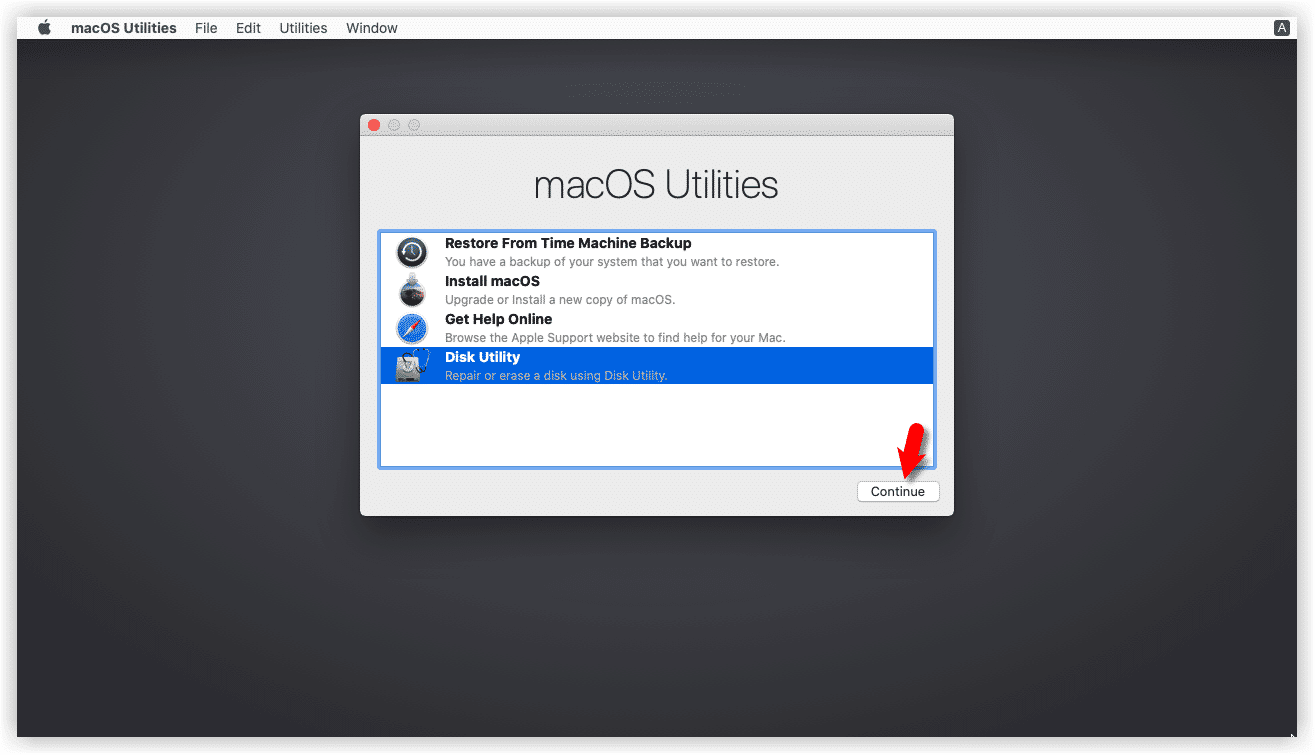
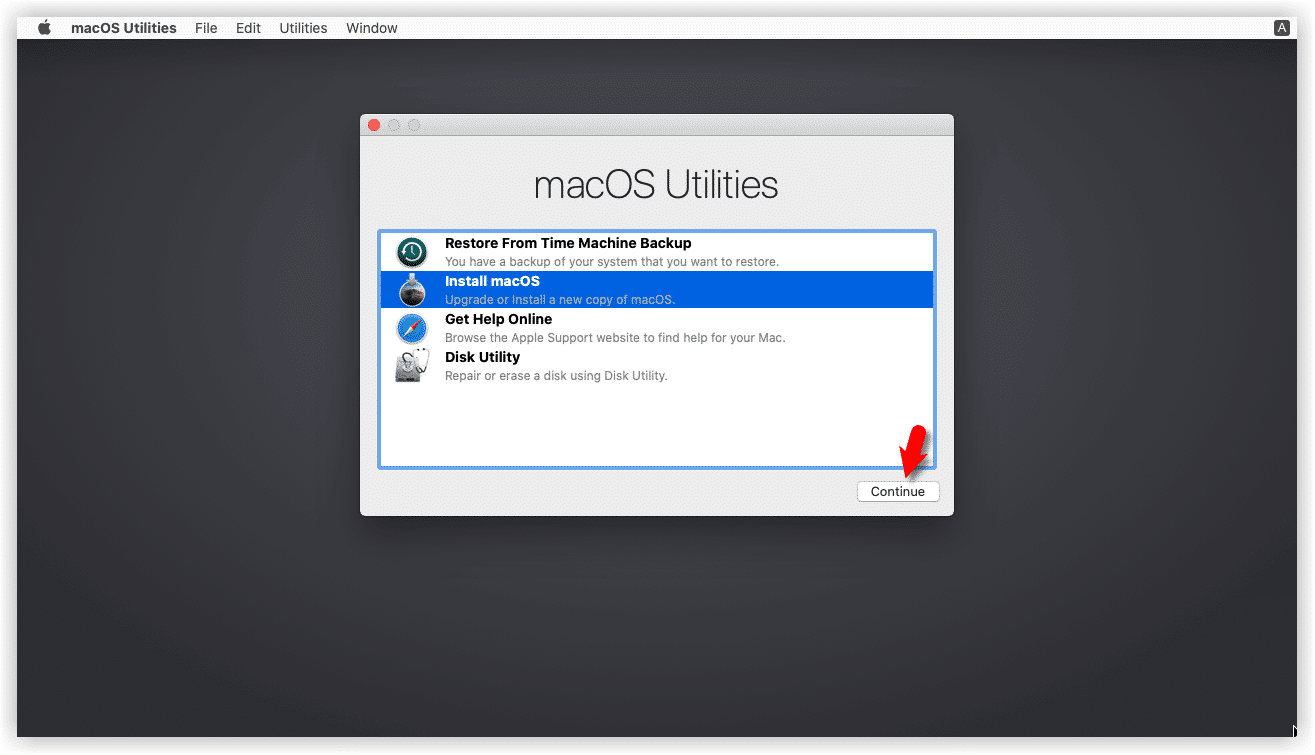
You’ll find macOS Utilities Window. In the list, choose Disk Utility and click on Proceed.
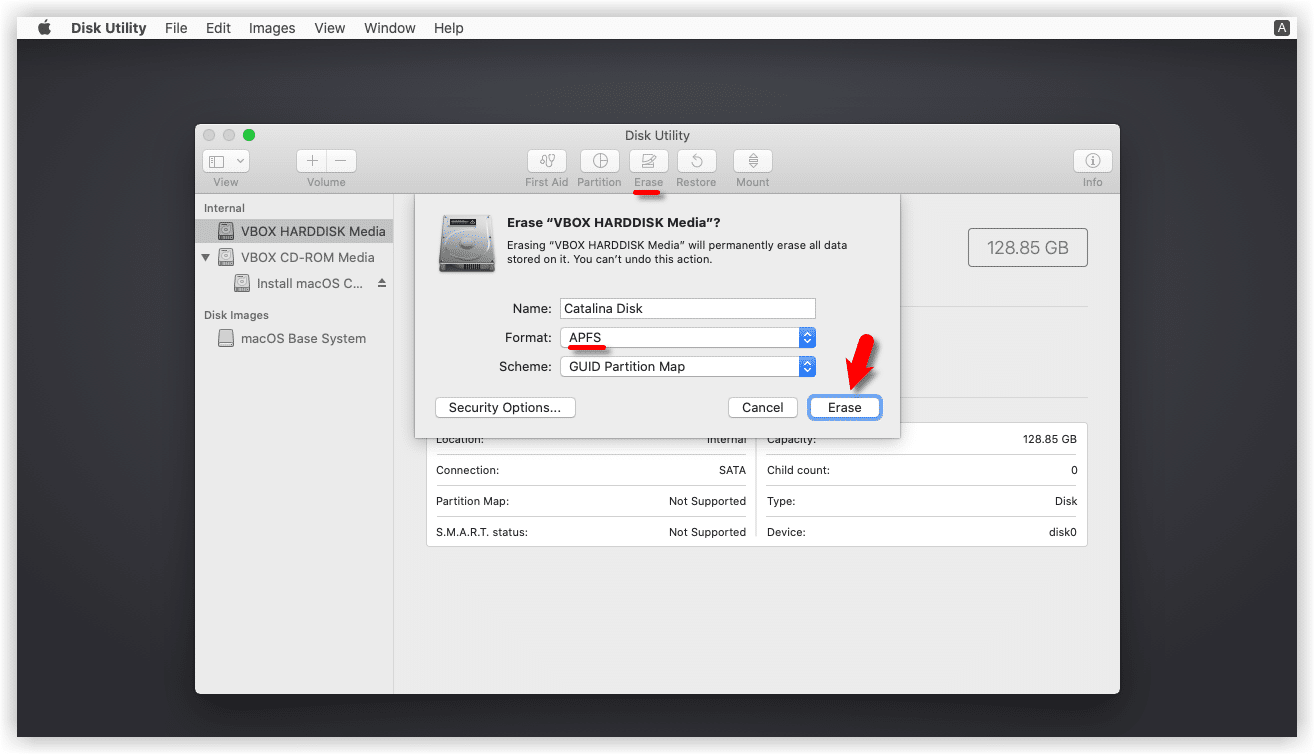
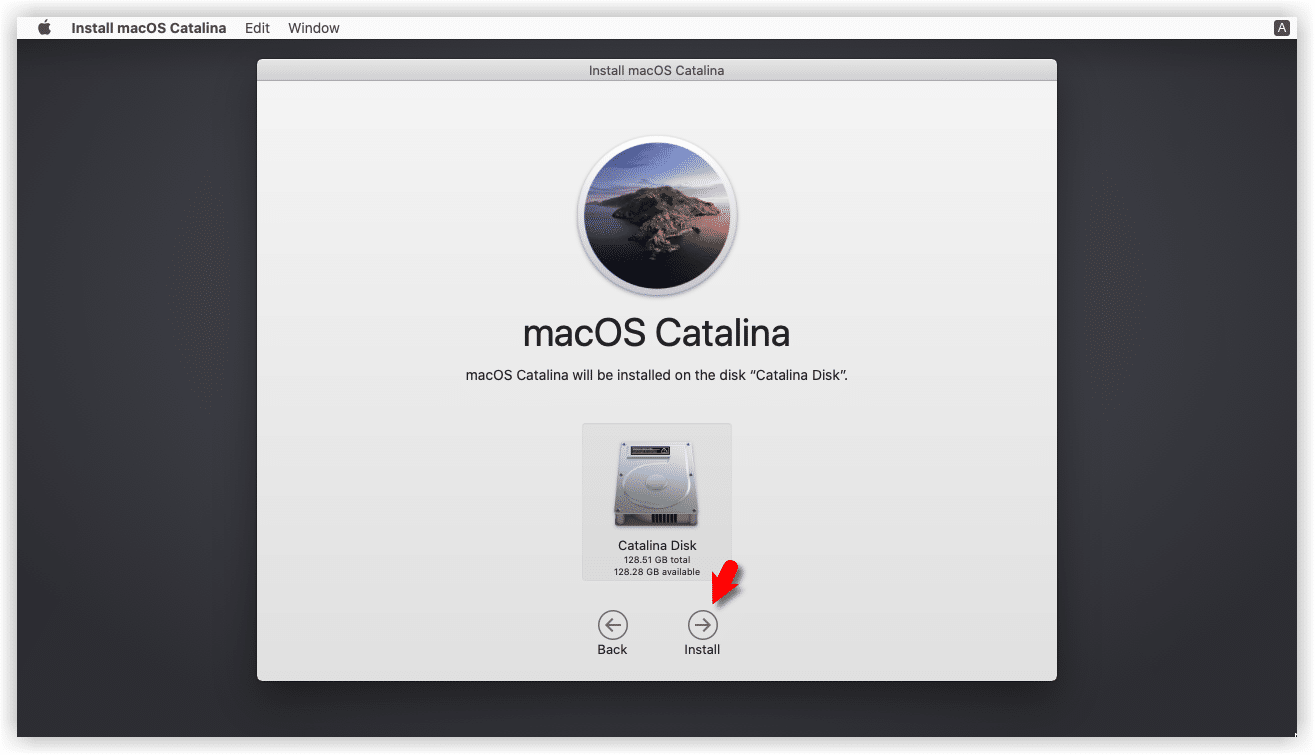
Select your Principal VHD Disc and click on the pull-down button. Pick these options and click Erase.
- Title: Catalina Disc (You can type any name you desire )
- Format: APFS (In case you get an error, then choose Mac OS X Extended Journaled)
- Style: GUID Partition MAP
Now, shut the Disk Utility window.

From macOS Utilities, pick Install macOS and click on Continue.
Click Continue Install macOS Catalina display.

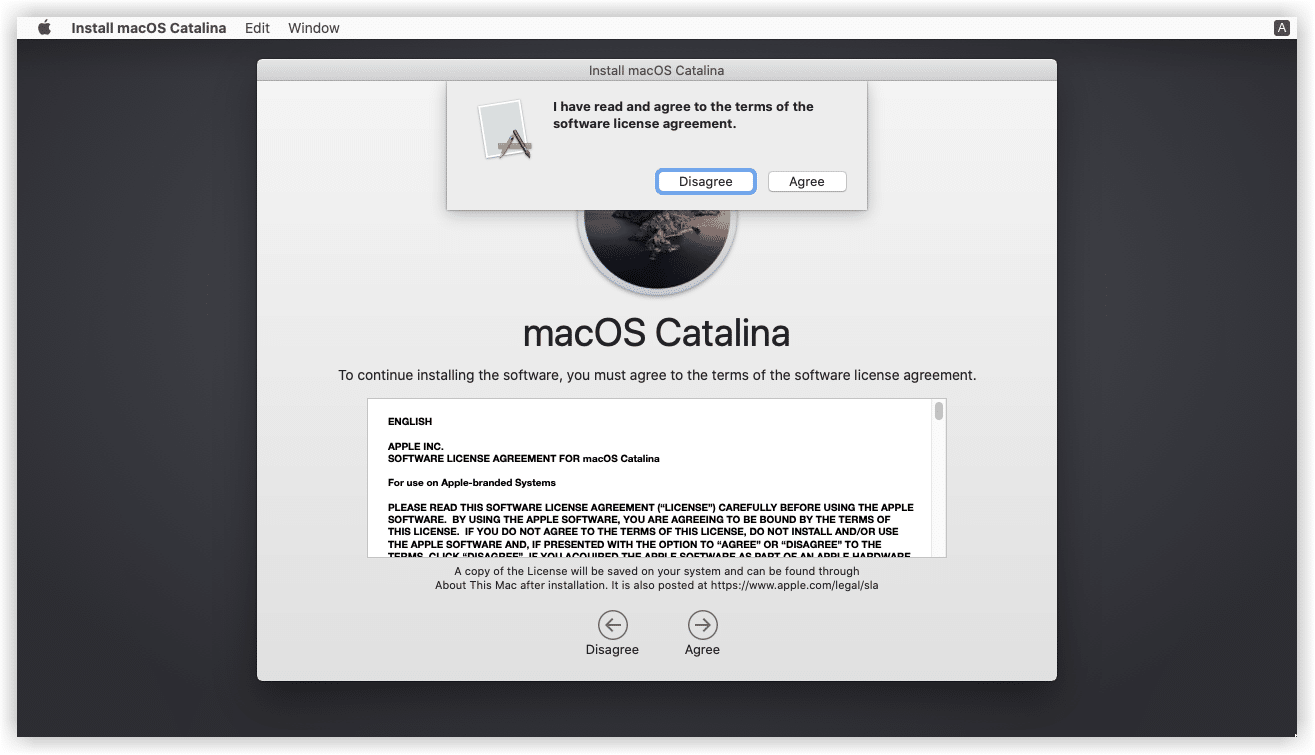
Agree on the macOS Catalina License arrangement.
Select macOS Catalina Disc and click on Install.
Agree to the Terms and Conditions
Select Setup Disk for Catalina
Now wait for three minutes, as well as your VM will restart. macOS Catalina is going to be set up in your Disc. Next, you shouldn’t do anything. You’ll see the following 30 minutes installment window.
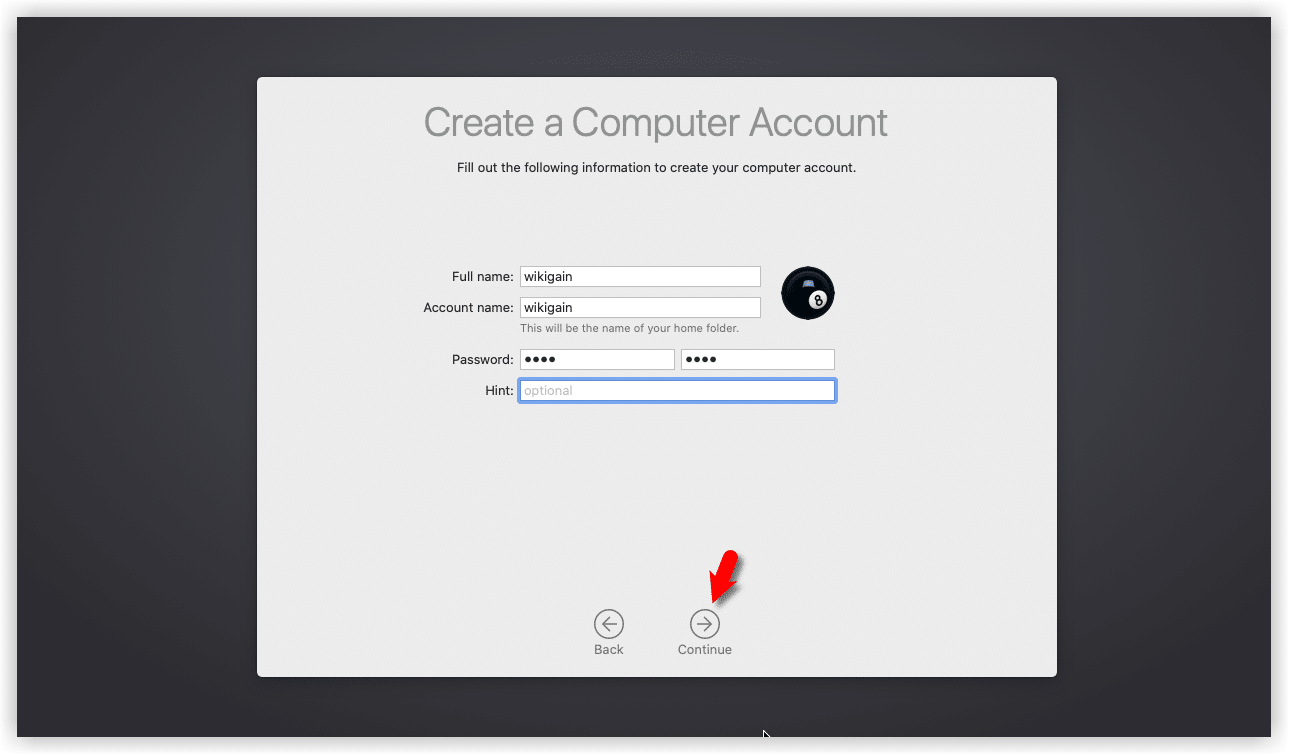
8: Perform a Clean Installation of macOS Catalina
When You’ve passed step 7, you will observe the macOS Catalina window. You can now proceed with the final installation steps.

- Wait a couple of seconds. Your macOS ought to be installed.
- Close to Feedback Assistant for now and now mouse keyboard window.
Well done! You have successfully set up macOS Catalina on VirtualBox with the ISO image.
How to share folders on VirtualBox & Vmware? (Windows-MAC) Step by Step Guide
Repair Common Errors
The problem is seeing “[EB|#LOG:EXITBS: START] (AND present DATE/TIME).” Use the control below.
VBoxManage modifyvm “VM Title” –cpu-profile “Intel Xeon X5482 3.20GHz”
— is a double dash
Please note that your issue might be different depending on your location. Please share your error in the comment section below, and we will try to fix it.
Related: How to Speed Up macOS Catalina? 7 Easy Methods
Here are some- Common macOS Catalina Problems and Solutions: 11 Key Errors and their Fix
Overview: How to Install macOS Catalina On VirtualBox On Windows
Fundamentally, in the following guide (How to Install macOS Catalina On VirtualBox On Windows), I have shown you the step-by-step guide to Install macOS Catalina On VirtualBox On Windows.
