Table of Contents
As time passes, the performance of a Windows 10 system can decline due to the accumulation of unnecessary files and registry errors, necessitating the need to speed it up. While reinstalling the Windows 10 system is the most effective method, we will attempt to optimize system settings as much as possible by disabling unnecessary features and removing clutter to enhance its speed.
System startup
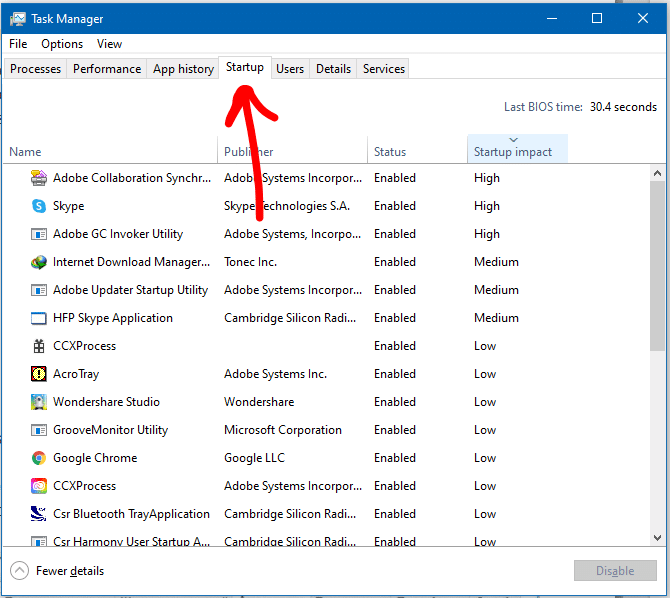
Let’s start with the Number of unnecessary programs at the startup of windows 10. The picture shows that half of the loaded programs at startup are unnecessary. Disable them to speed up the Windows 10 system boot itself. This will help you to speed up Windows 10 at startup.
- Open the Task Manager by pressing the Ctrl + Shift + Esc buttons and go to the Startup tab.
- Disable unnecessary programs for us. You can see on google what the program is and what it is responsible for anyone who does not know.
Loads on all processor cores
By default, Windows 10 boots with only one core active, leading to slower performance. To speed up the system, we can increase the number of active cores to boost the processor’s load. This optimization process can enhance the loading time of Windows 10.
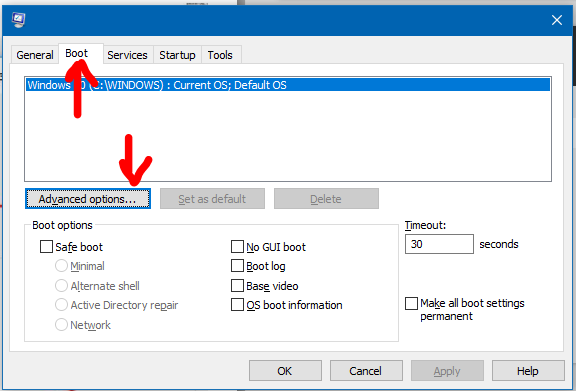
- Press Windows + R and enter MSConfig in the field.
- Go to the BOOT tab.
- Extra options.
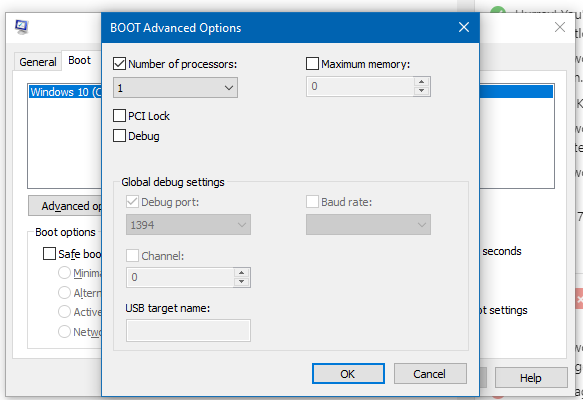
- Check the Number of processors box.
- We select the penultimate value. (if there is a 5-core processor, put 4 cores).
Defragment disks
Disk fragmentation is an essential thing in the system. After defragmenting, mainly the HDD, you will speed up Windows 10 computer or laptop. Related: How To Free Up Disk Space And Clean C Drive? 7 Tips
- Right-click on the local disk, and select properties.
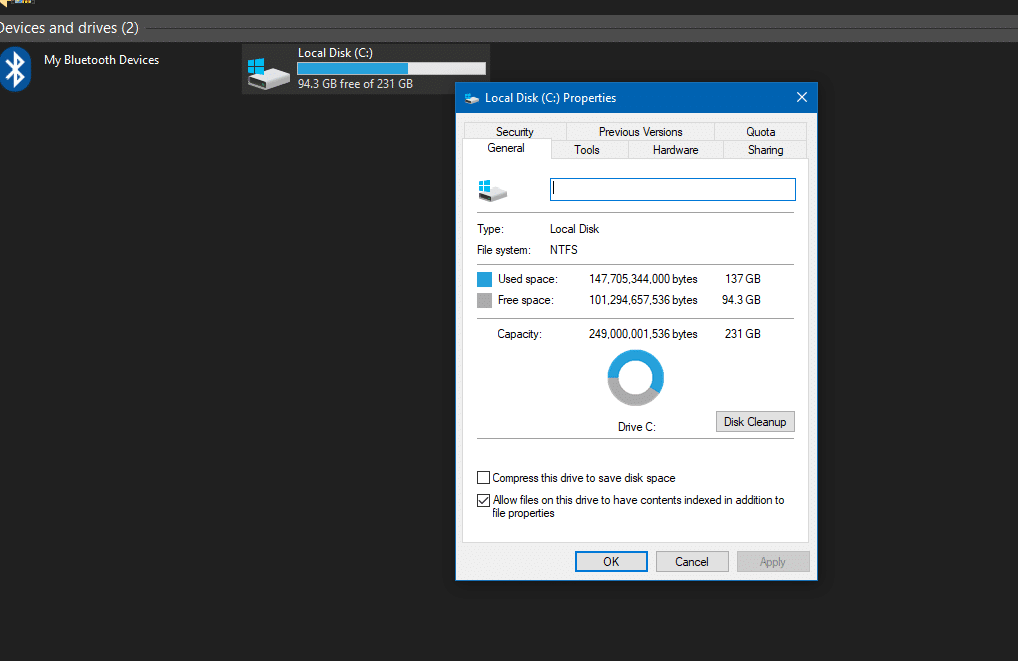
- Tools tab.
- Optimize.
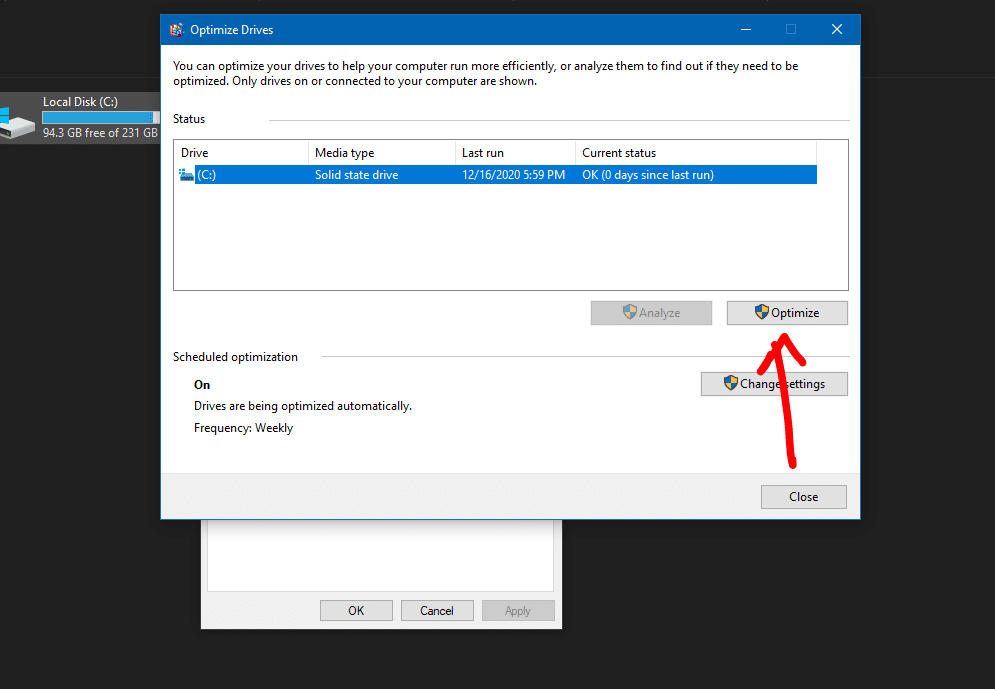
- Click optimize on each local disk and wait for the end of the procedure.
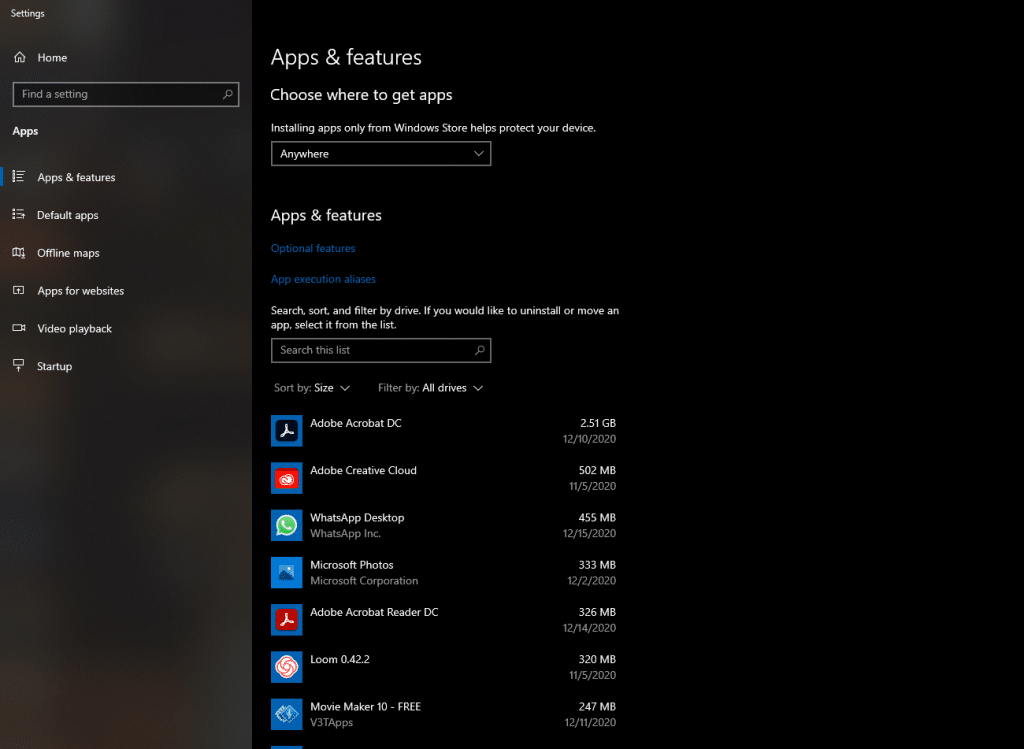
Remove unnecessary applications
Windows 10 has so-called classic and modern applications. Classic – these are ordinary programs installed on a computer with a “.exe” installer. Modern – these are UWP applications installed from the Windows store with the extension “.appx.” We remove applications we do not need. All these unnecessary applications result in a speed downgrade, and when they are removed, it will automatically speed up Windows 10.
- All parameters.
- Applications.
- Applications and features.
- We remove applications we do not need.
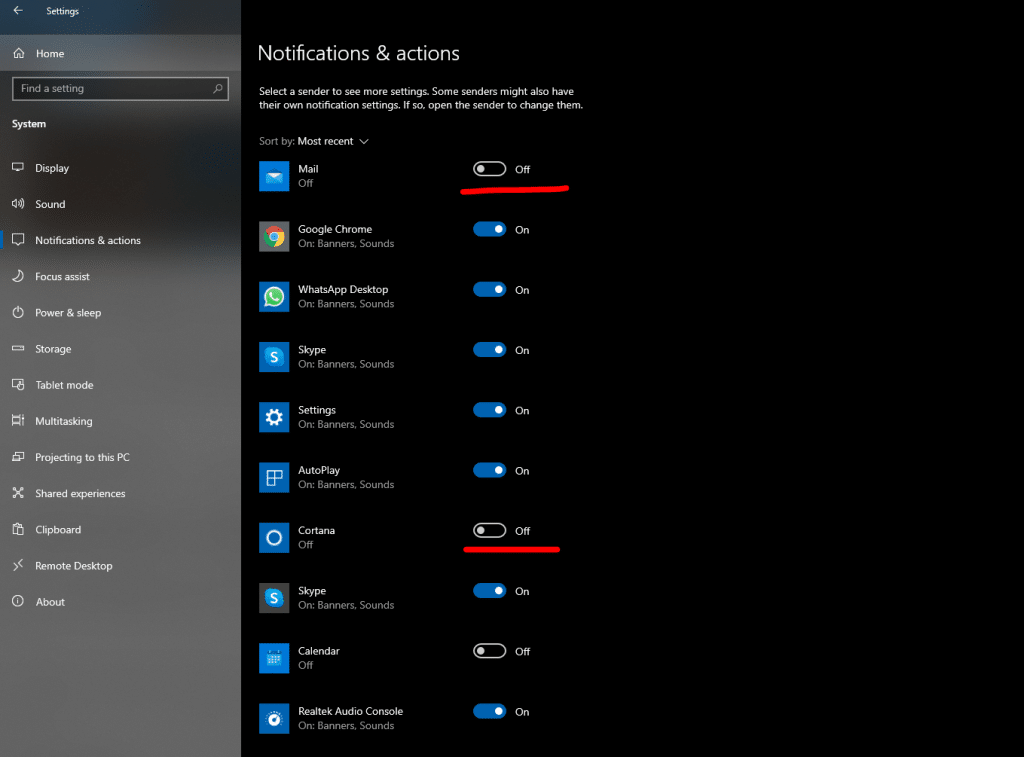
Disable notifications
You will receive notifications when you have installed a UWP game or program. These notifications can create micro lags for your PC or laptop. You can disable unnecessary notifications and speed up Windows 10.
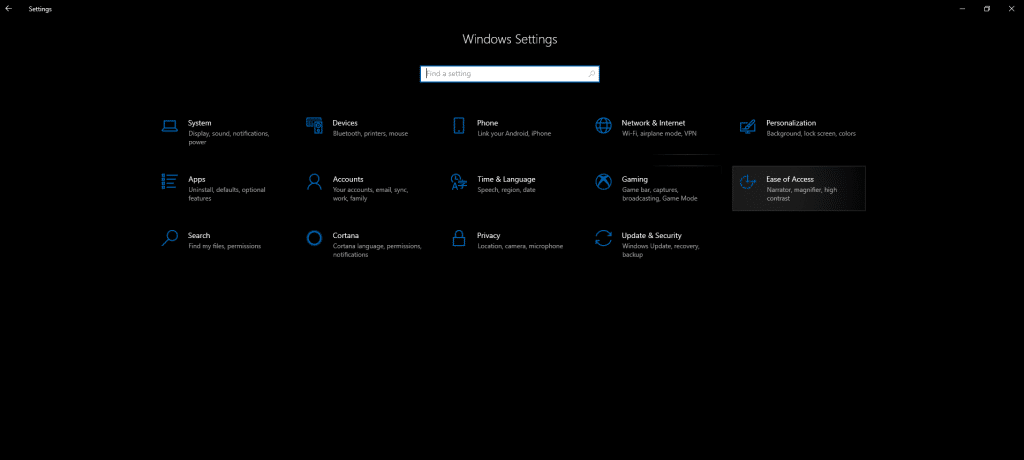
- Go into the System Settings.
- Select “System.”
- Go to “Notifications and actions.“
- Disable the slider on the applications we do not need with the right.
Disable background apps
Some applications: weather, news, etc., work independently even when you don’t run them. Disabling such applications will speed up your computer or laptop with Windows 10. Go to the system settings:
- Go to Privacy.
- Background apps

- Disable those that we do not need: games and programs.
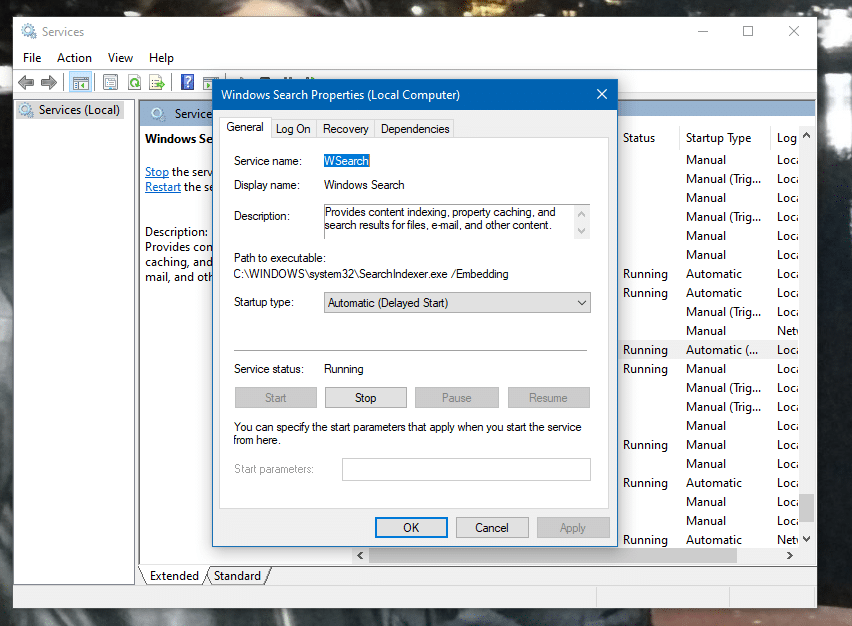
Disable Indexing Service
Windows Search is an indexing service for searching folders and files. Suppose you have organized folders and files on your computer and know which folder or file is located. In that case, you can disable the indexing service, thereby increasing the speed of Windows 10.
- Open the Run window, press the Windows key + R, or type Run in the Search bar.
- Type services.msc and press Enter or click OK.
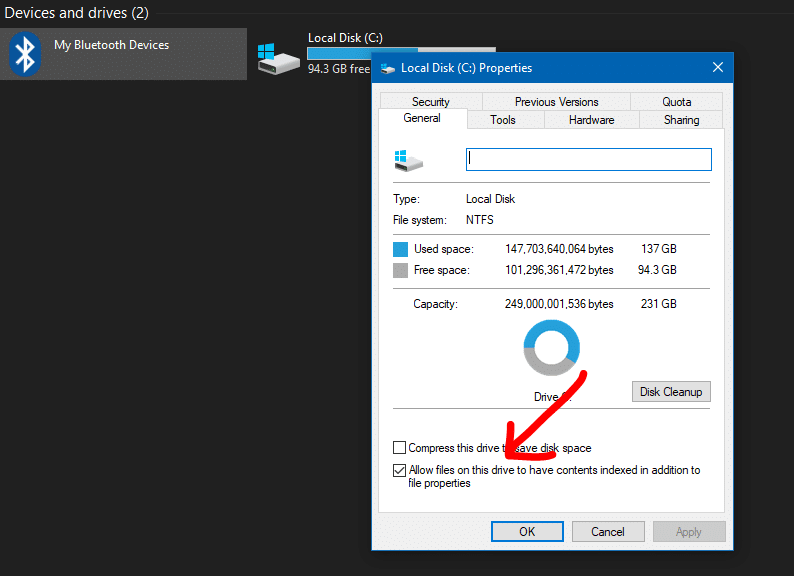
Disable indexing on local drives
- Right-click on the local drive “C” and select properties.
- In the General tab, uncheck the “Allow content indexing …” checkbox.
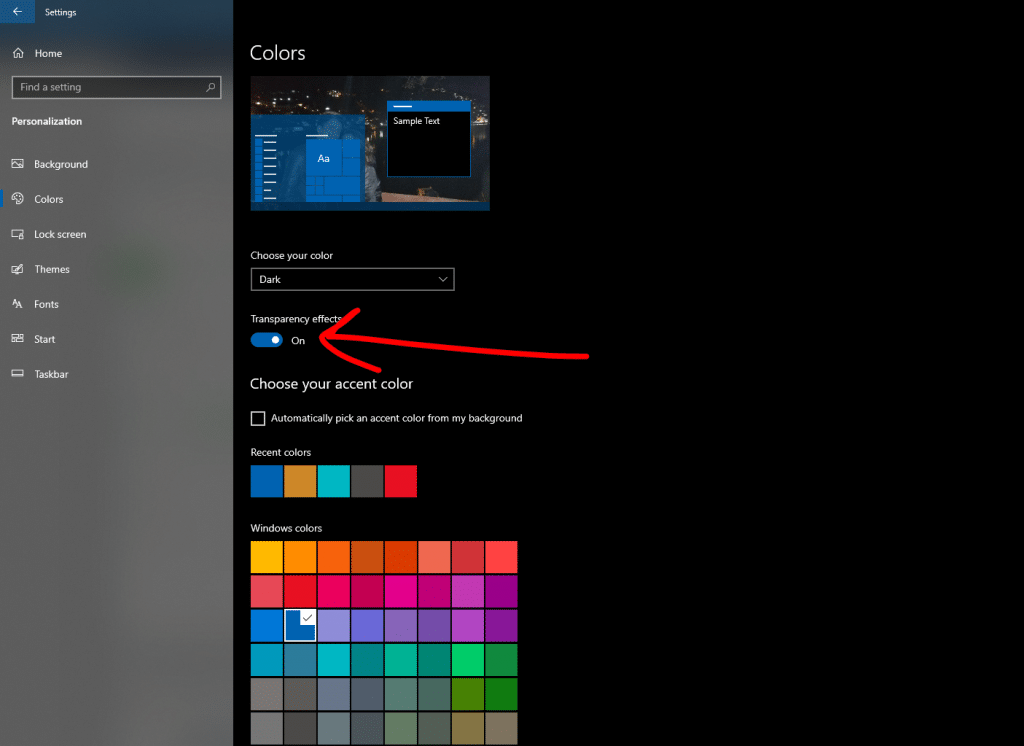
Disable menu transparency
Removing transparency will add some more boost to the windows 10 optimization. Go to Settings > Personalization > Colors.
- Select the Colors row, and on the right, drag the slider to disable Transparency Effects.
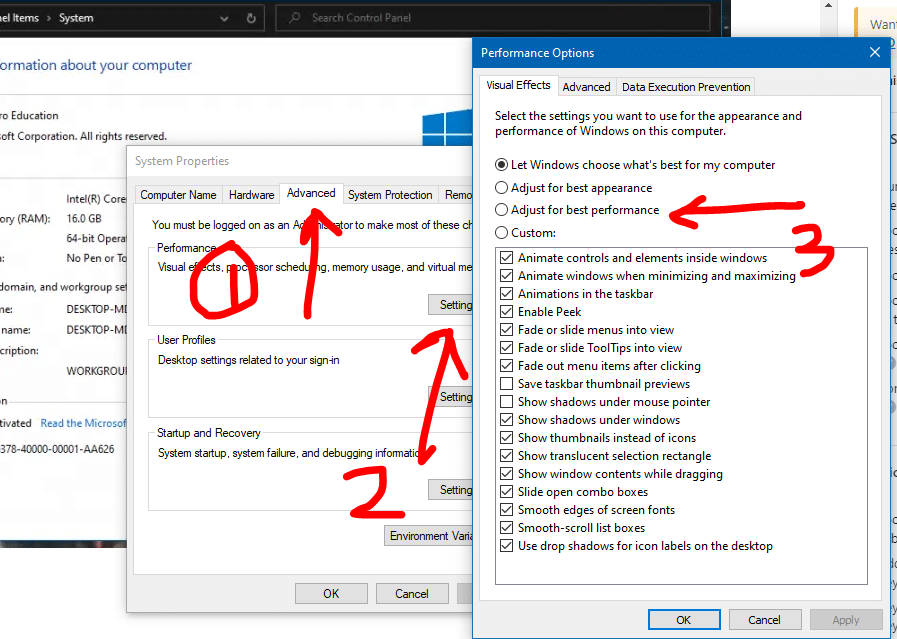
Remove special effects
From the days of Windows XP, the right old way will help us add a little power and speed up Windows 10.
- Click in Explorer (my computer) and select properties.
- On the left, click on Advanced system settings.
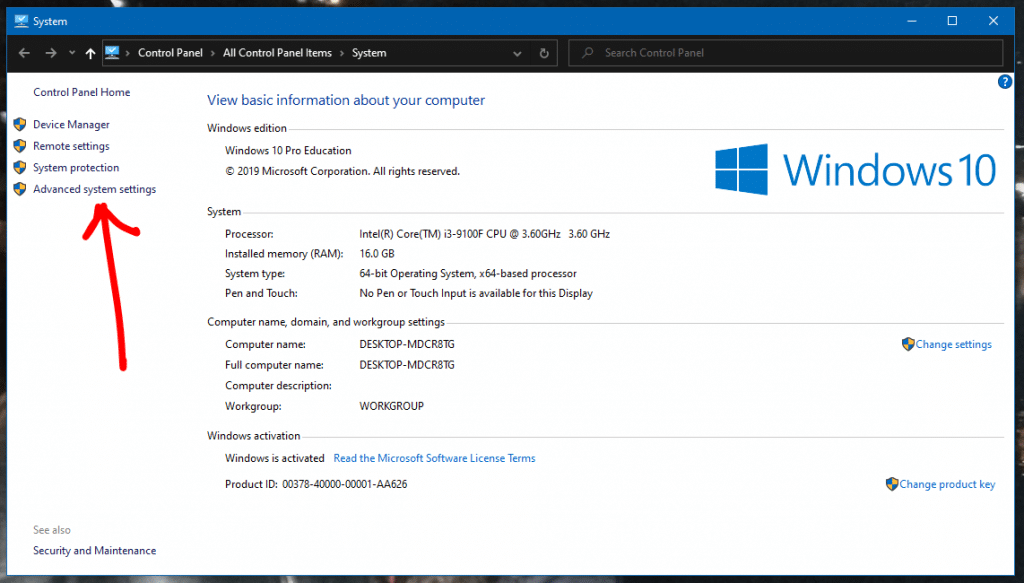
- Go to the Advanced tab.
- Performance in the same tab settings.
- In the visual effects tab, select Provide best performance.
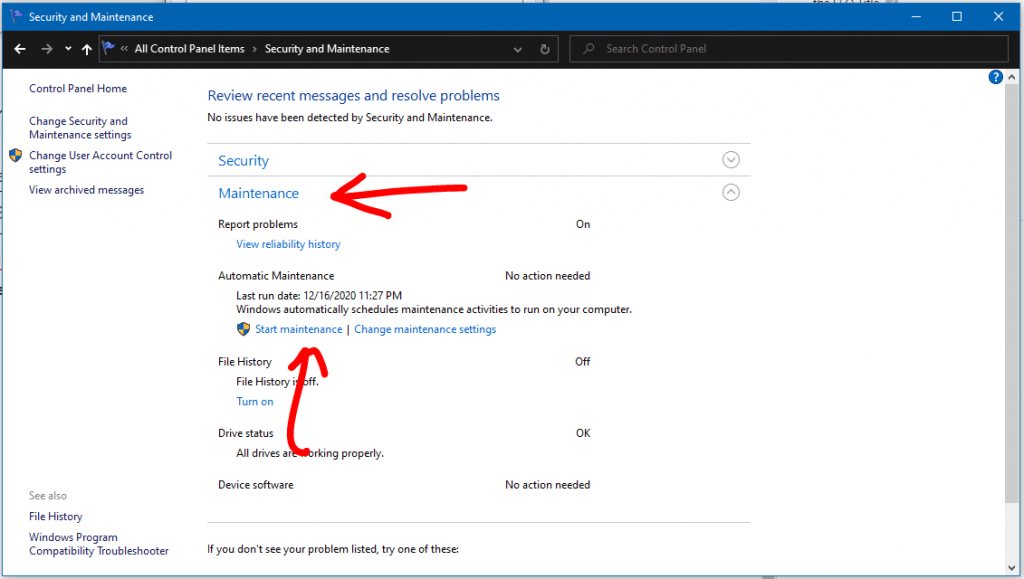
Running maintenance tasks
The built-in utility will help identify the causes of system failures and automatically fix them, thereby speeding up a computer or laptop with windows 10.
- Open Control Panel> Security and Maintenance > Maintenance > Start Maintenance.
- At the very bottom, click Run maintenance tasks and follow the tips in the window that appears.