Table of Contents
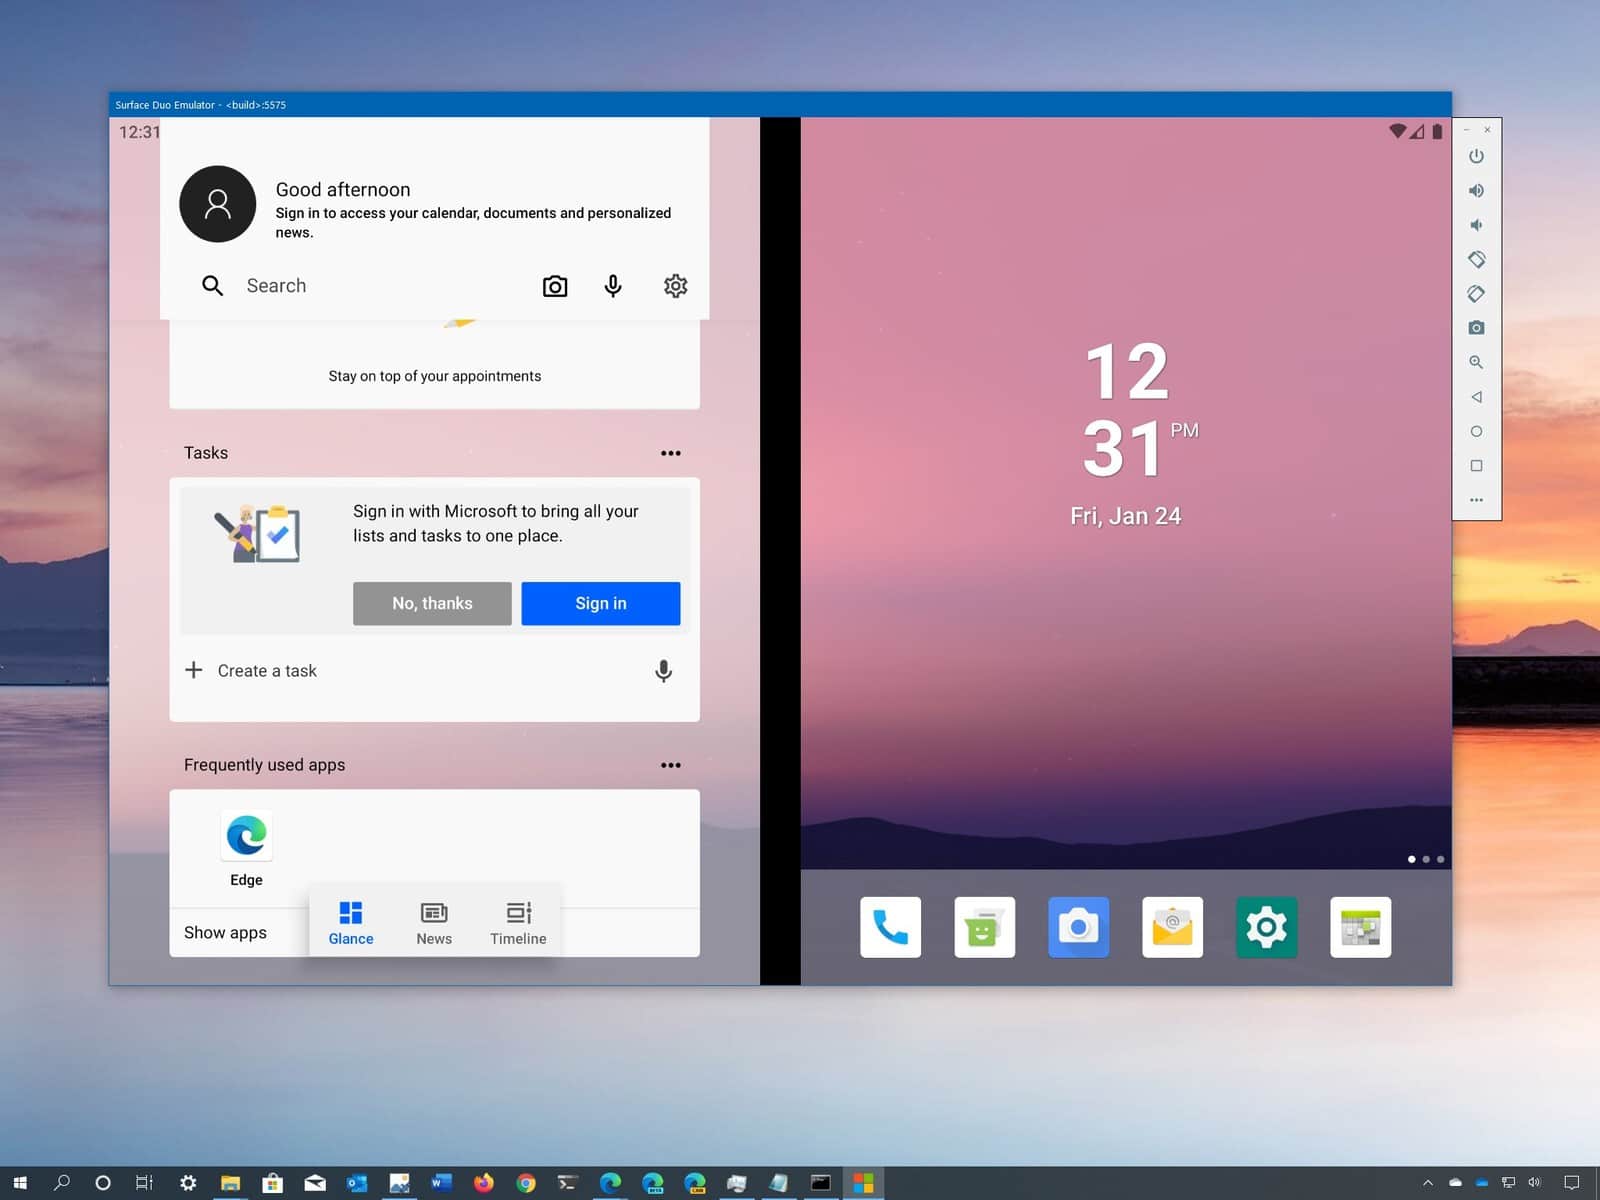
In this article, we will learn how to run Surface Duo emulator on Windows 10. The new Surface Duo SDK lets you run the device emulator with a double screen and test your apps in the new interface.
Recently, Microsoft announced Microsoft’s dual-screen smartphone, the Surface Duo. Despite the novelty having not yet been released, users and developers can already appreciate the advantages and features of the gadget with two displays. To do this, Microsoft has developed the free Surface Duo SDK, which includes the Surface Duo device emulator.
How to Run Surface Duo Emulator on Windows 10: Step by Step Guide
In this article, we’ll walk through the process of installing and running the Surface Duo Emulator on Windows 10. And while the Surface Duo SDK is designed for app developers, it can be installed by any advanced Windows user.
Preparing for Installation
To work with the emulator, you need to install some additional programs and perform some operating system settings. To run the emulator successfully, you will need a computer with the Windows 10 operating system and at least 4 GB of RAM. Also, make sure that 15-20 GB of free space is available on the partition with the installed operating system.
First, check the system board settings of your computer or laptop. The BIOS or UEFI settings must have Intel Virtualization Technology or AMD-V hardware virtualization enabled.
Here is a video guide you can use:
Verify that the operating system has the components required for the emulator to work. In the start menu search bar, type “Turn Windows features on or off” and verify that you have Hyper V, Hyper V Platform, Hyper V Management Tools, Virtual Machine Platform, and Windows Hypervisor Installed.
If your system is configured and ready, you will only need to install all the necessary software: Android Studio, Visual Studio 2019, and Surface Duo SDK.
Install Android Studio
Android Studio is a software for developing mobile applications for the Android operating system. Versions of Android Studio are available for Windows, Linux, Mac, and Chrome OS. We are interested in the Windows version.
Download Android Studio for Windows
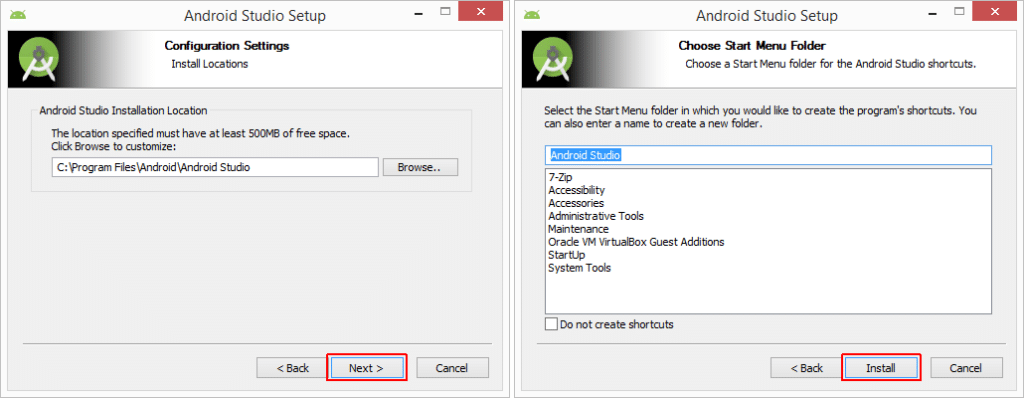
Run the Android Studio installation file. Click Next in the welcome screen and, without changing the installation, click Next again.
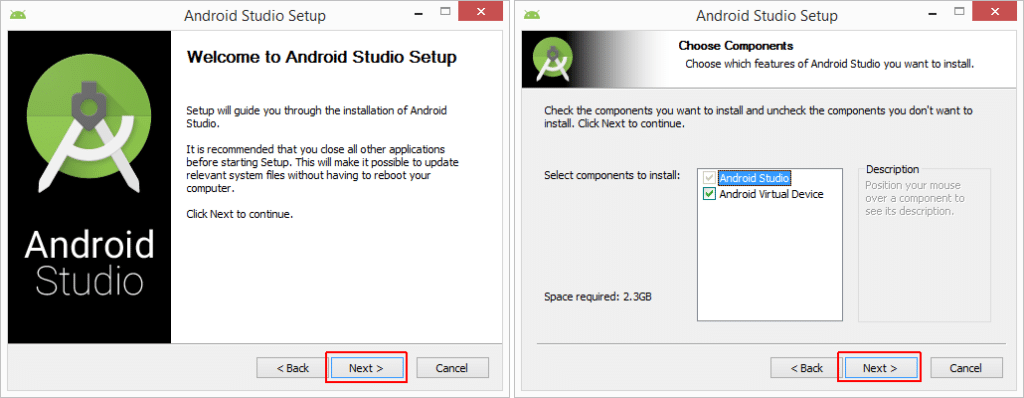
In the next step, you can change the installation path of Android Studio. Click Next to continue and Install to start the installation.
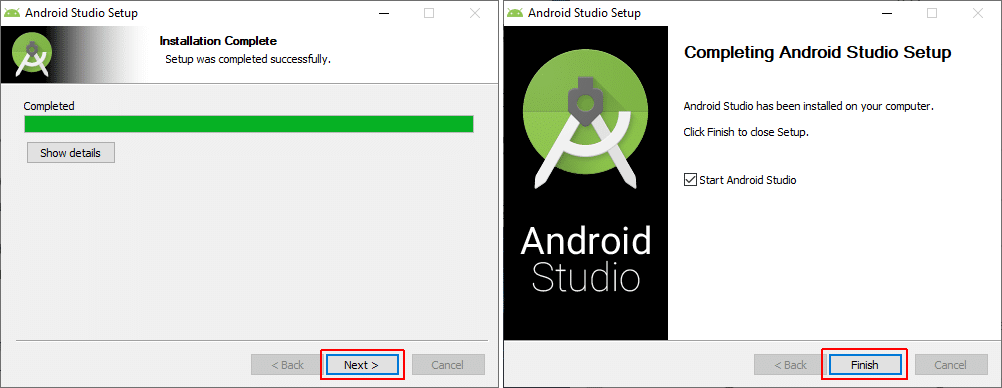
When the installation is complete, click Next, check “Start Android Studio,” and click Finish.
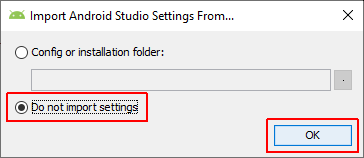
Once installed, you will be prompted to import your Android Studio settings. Skip this step by selecting “Do not import settings” and click “OK.”
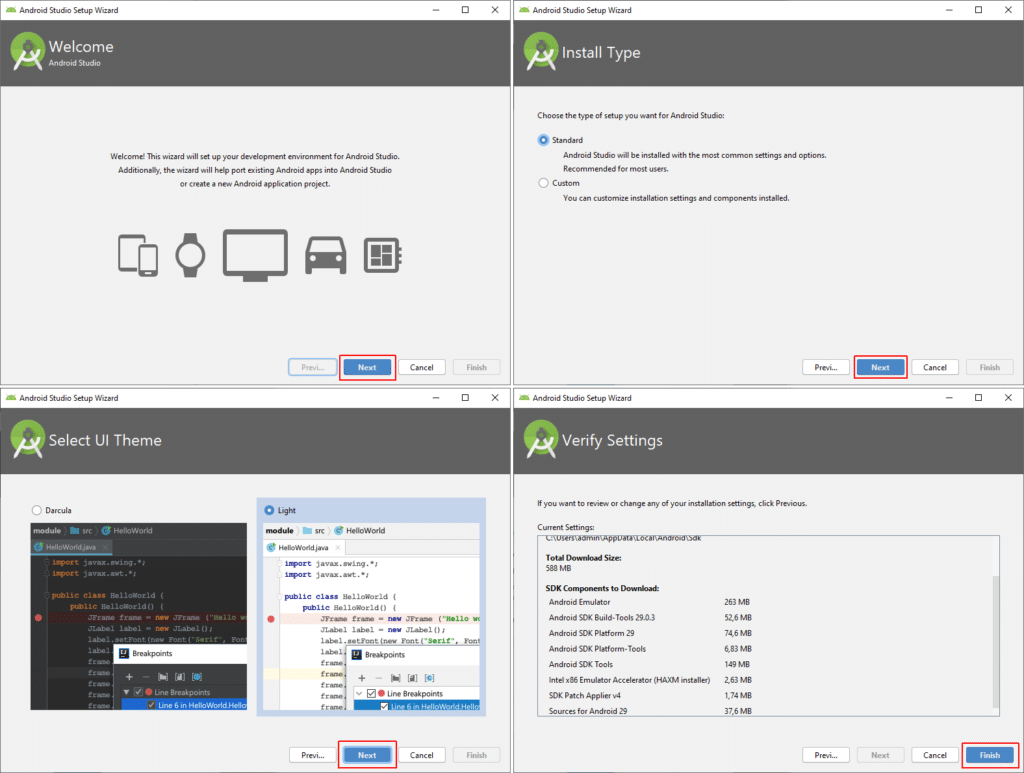
Next, the Android Studio components will be downloaded and installed. Click the “Next” button on all windows without changing the settings, and, after the installation is complete, click the “Finish” button.
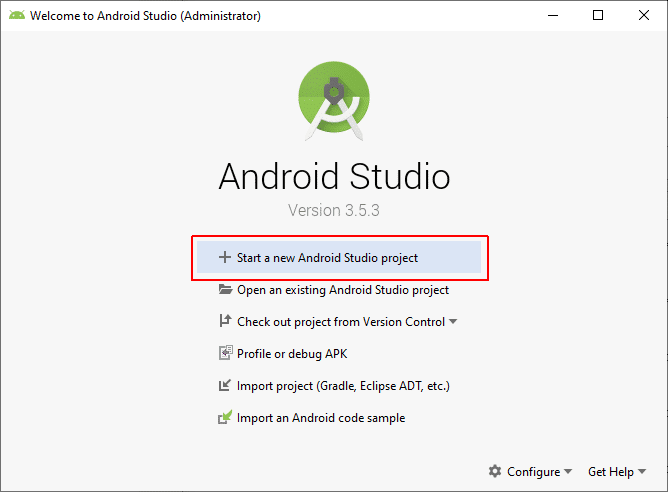
Android Studio starts. Open a new project by selecting “Start a new Android Studio project“.
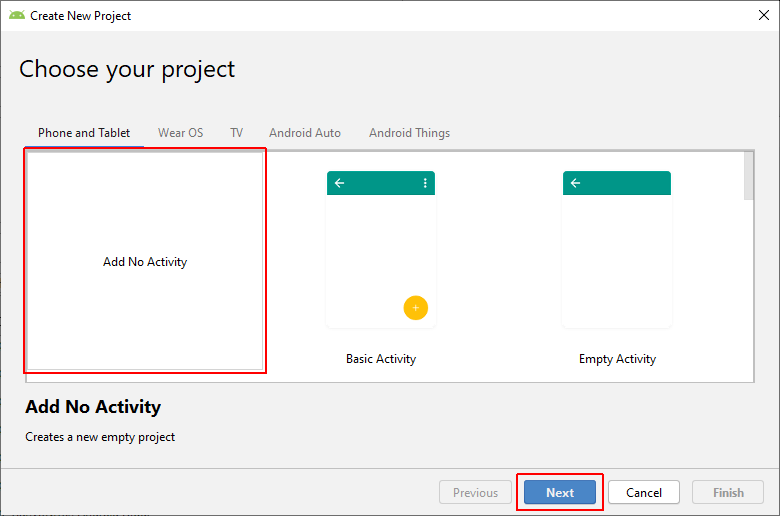
Select “Add No Activity” and click “Next“.
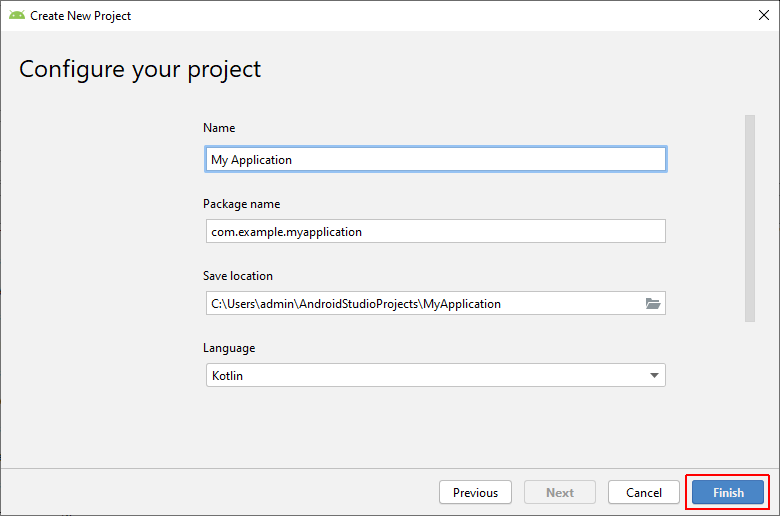
Do not change any parameters and click “Finish“.
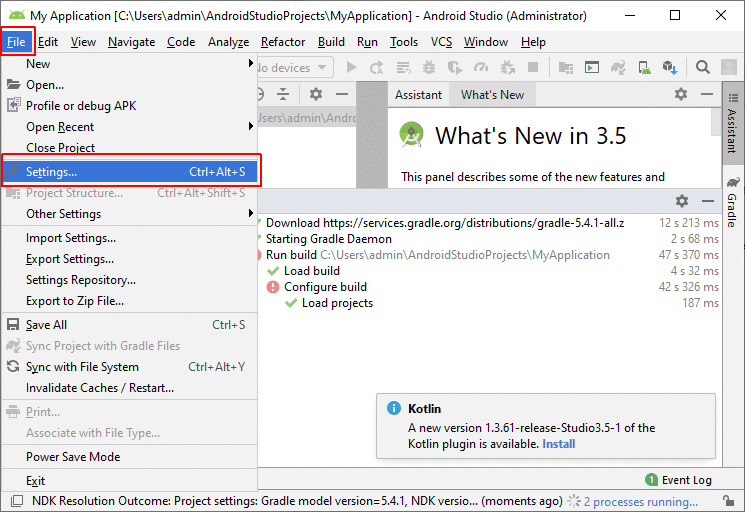
When the new project loads, open Android Studio Settings. From the “File” menu, select “Settings“.
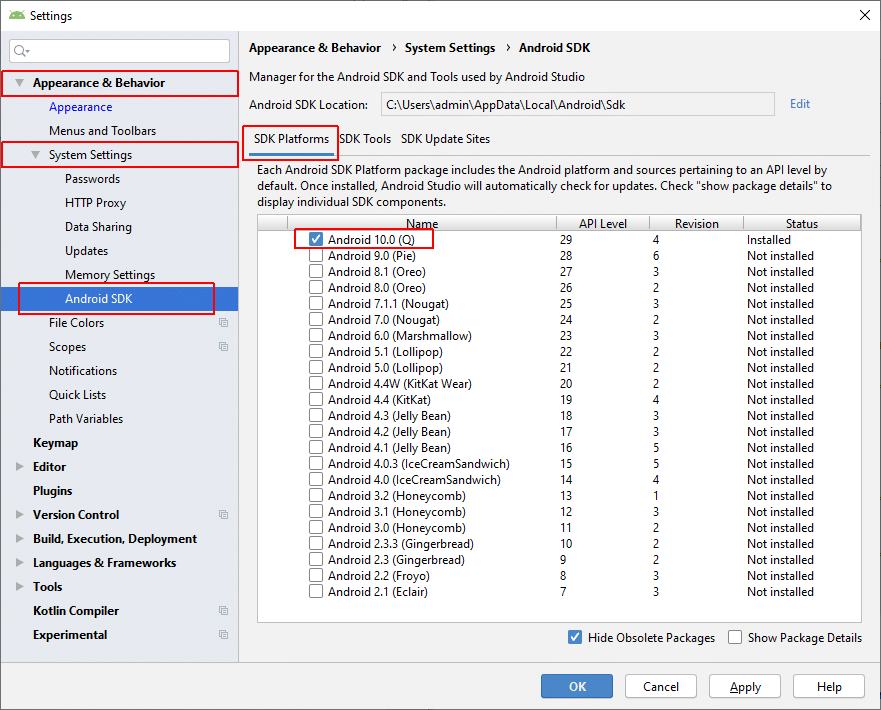
In the settings window, go to the menu “Appearance & Behavior” – “System Settings” – “Android SDK.” On the “Platforms SDK” tab, “Android 10.0 (Q)” should be checked.
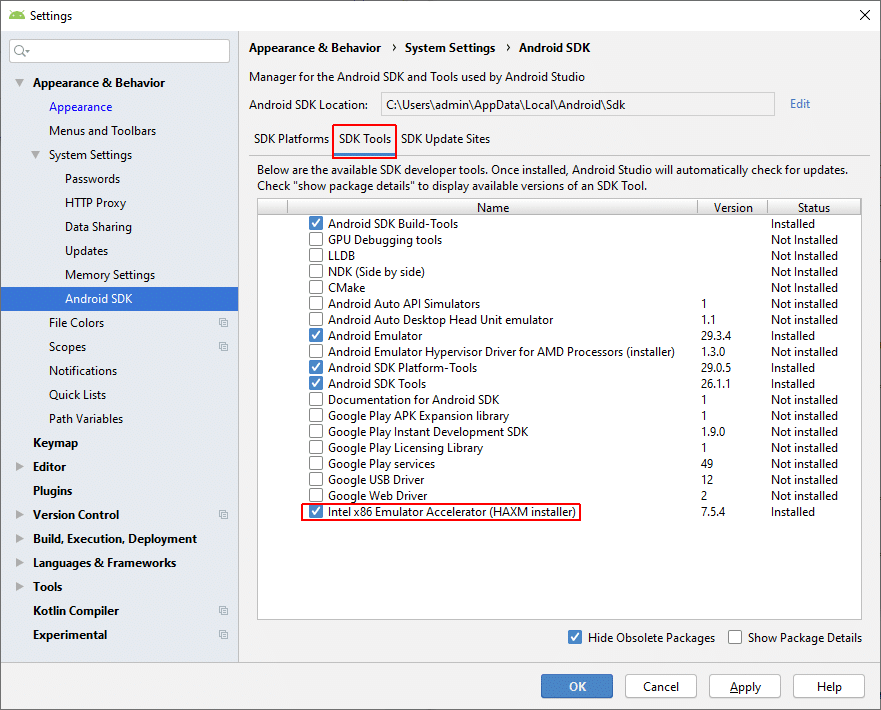
Also, on the tab “SDK Tools” should be marked “Intel x86 Emulator Accelerator.“
After that, you can close Android Studio.
Install Visual Studio
Download the free version of Visual Studio Community. You’ll need these tools to run and run the Surface Duo emulator.
Download Visual Studio for Windows
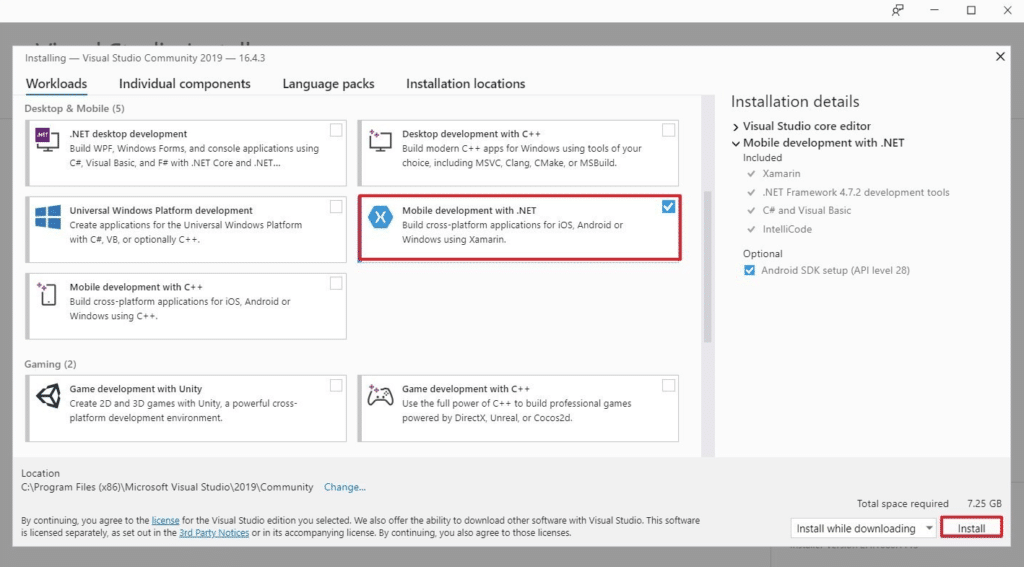
After running the installation file, click “Continue” and wait for the additional files to be downloaded. Then, check the box “Mobile application development in .NET” and click “Install” in the main component selection window.
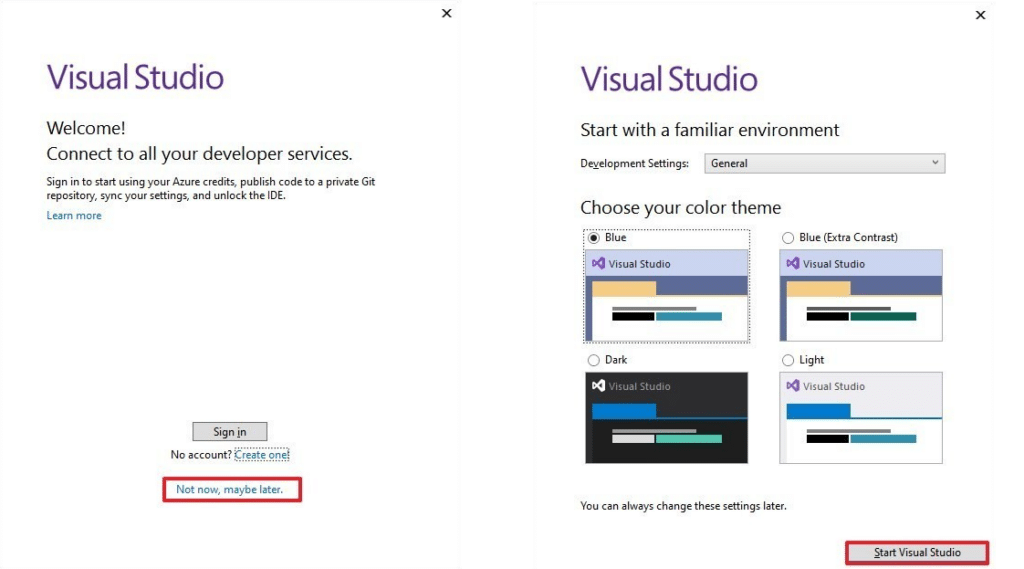
The installation process may take a long time. When the installation is complete, you’ll be prompted to connect to developer services. Click “Not now! Possibly later” and then “Start Visual Studio.“
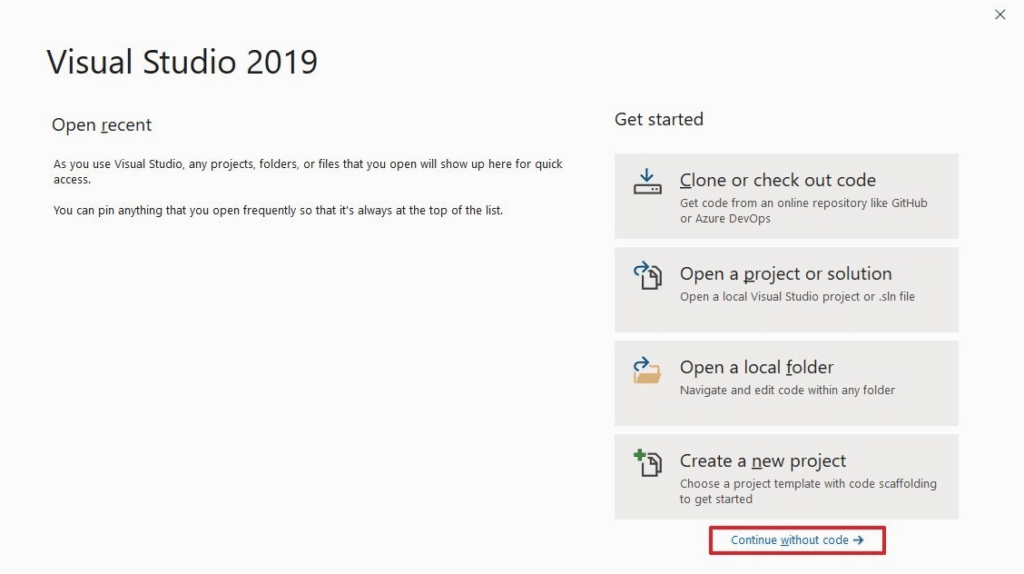
Click “Continue Without Code” to launch Visual Studio in the start window.
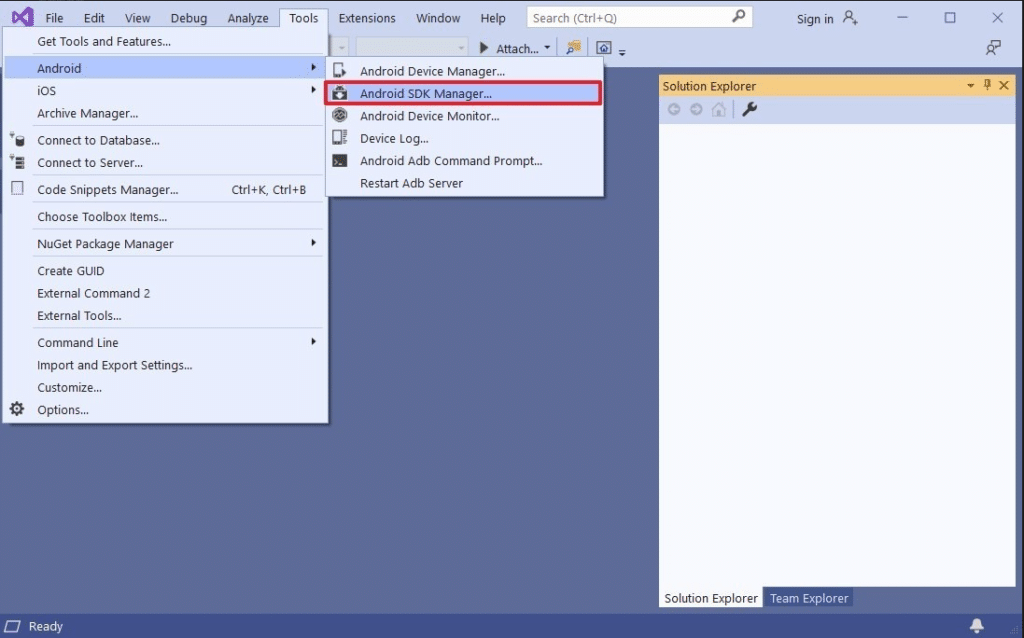
You need to verify that Visual Studio has all the necessary Android development tools installed. In the top menu, click “Tools” – “Android” – “Android SDK Manager…“.
Make sure that all prerequisites are installed. In the ” Platforms ” tab, you will need the SDKs for Android 9 and Android 10.

As well as “Android SDK Tools,” “Android SDK Build Tools,” and “Android Emulator” in the “Tools” tab.
If any component is not installed, check it and click “Apply Changes.” At this point, the configuration of Visual Studio is complete.
Install Surface Duo SDK
Once you’ve already installed Android Studio and Visual Studio 2019, you can start with our goal of installing the Surface Duo SDK. Windows and macOS versions are available. You can download the latest version from our website.
Unpack the archive and run the installation file. Follow the installation wizard and wait for the Surface Duo SDK installation to complete. After that, a shortcut will be created on the desktop to launch the Surface Duo Emulator.
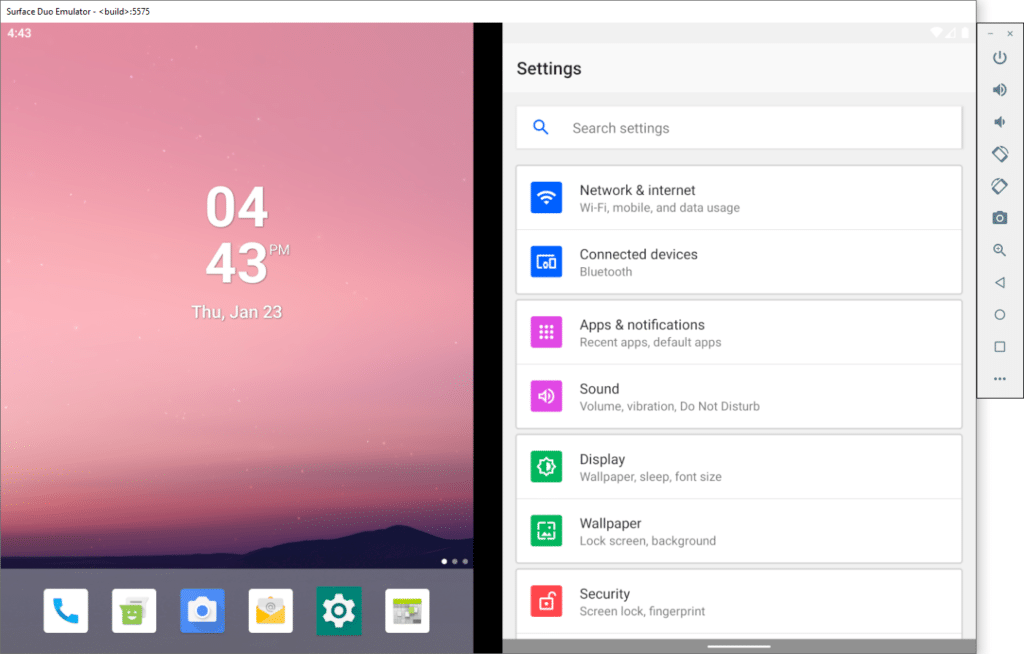
The emulator has few features, but you can run the Edge browser and some built-in apps like Mail and Weather. Mobile app developers can test their apps for compatibility with the dual-screen interface. For ease of use, the emulator has many settings that will be useful for developers of mobile applications.
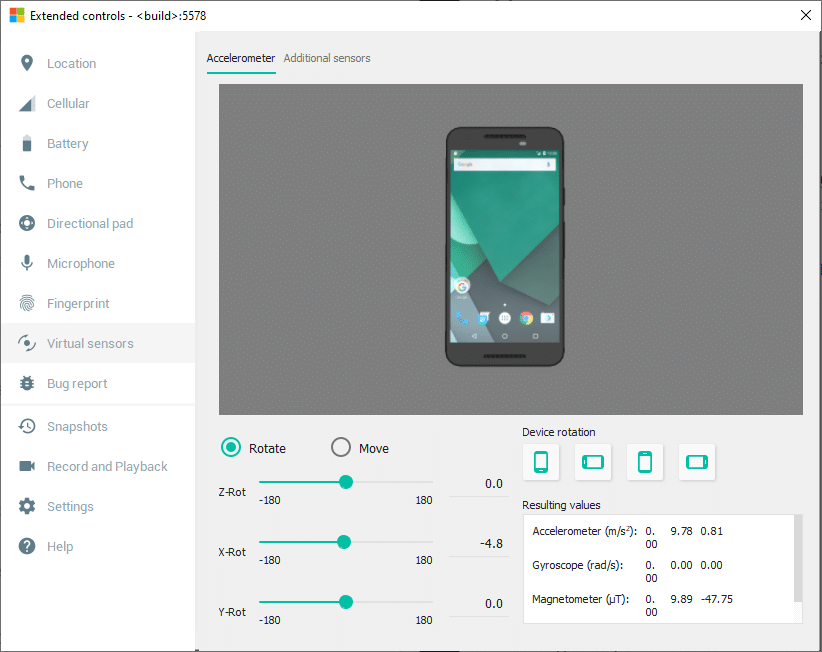
The presence of a special version of the emulator for devices with a double screen will allow developers to prepare their applications in advance for correct operation on new devices, and users – to fully use all the advantages of devices of the new format, and use their favorite applications adapted to the dual-screen.
Conclusion:
I hope this guide on How to Run Surface Duo Emulator on Windows 10 was helpful. If you face any issues, please comment down below.
Also, If you want to learn more, you can check the Microsoft documentation, and for SDK samples, you should visit this Surface Duo GitHub page.

