Table of Contents
An administrator account on Windows does not always mean that a program will automatically run as administrator. This is to make sure that administrators are only in charge when it’s necessary. In this guide, we will share how to run a program as an administrator in Windows.
Windows UAC is responsible for following this rule by removing unnecessary permissions and asking for confirmations when an application tries to make changes.
If you need to conduct tests on the PC or run command-line utilities, you’ll likely need to run them with administrative privileges.
You can also read: How to Personalize Windows 11 experience with these free apps.
How to run a program as an administrator in Windows: 3 different methods
Here are three easy and different methods to run a program as an administrator in Windows. Let’s discuss.
Right click and “Run as administrator”
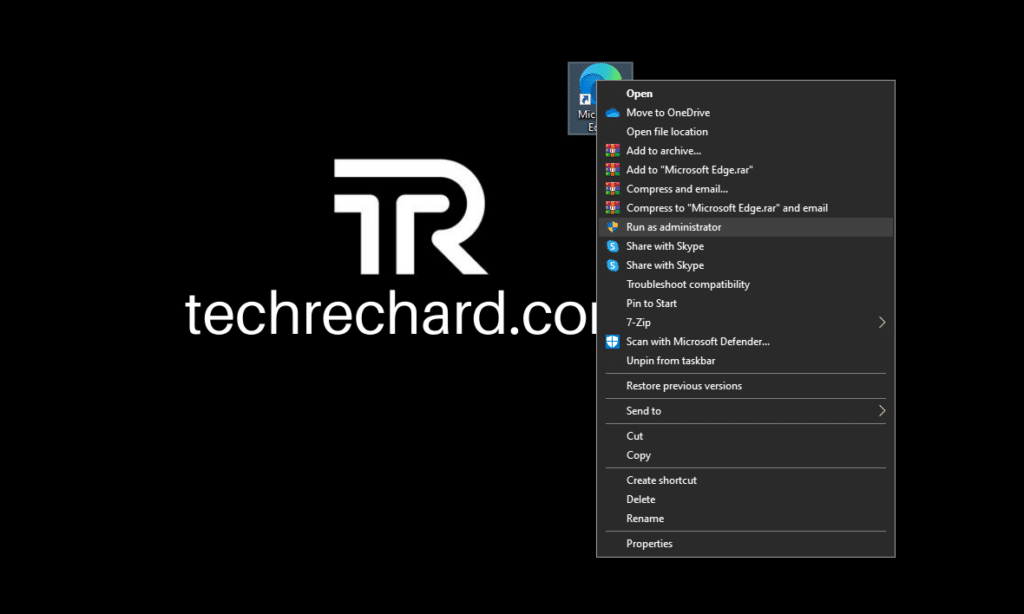
One of the most popular ways of changing the settings is to locate the program’s executable file, right-click it, and select “Run as Administrator.” Doing this will prompt you for your administrative credentials. Just click “Yes” when prompted.
Use the Windows Start bar
If you know where the program’s executable file is, you can open it from the Windows Start bar without having to search for it in a browser. Just type in the name of the program and when it pops up in the search, select “Run as Administrator.”
Note: You can also right-click on the application and select Run as administrator.
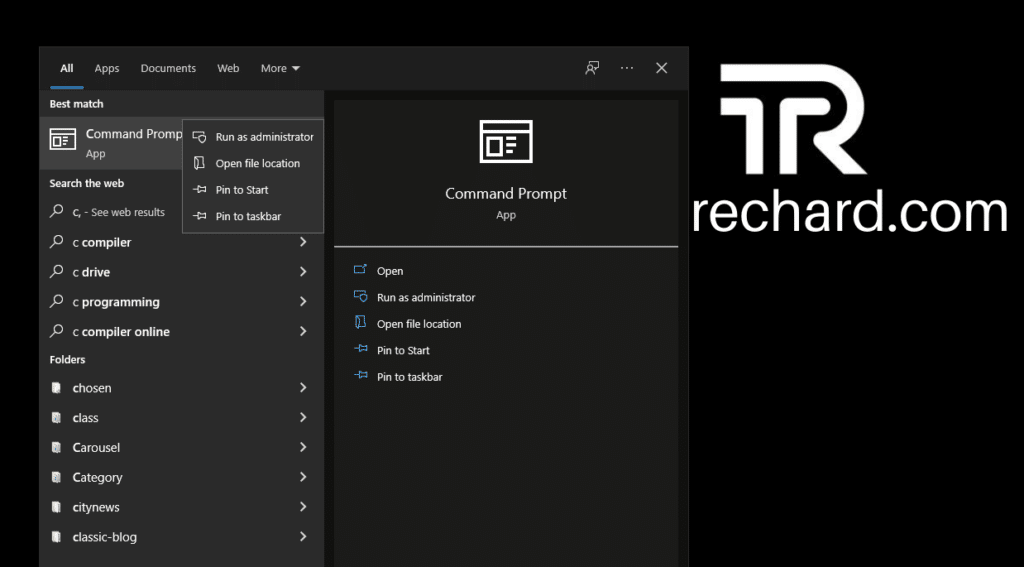
You can launch the Windows search bar in both Windows 10 and Windows 11 by pressing the Windows symbol on your keyboard.

If you cannot see the “run as administrator” option, press the Shift key and then right-click on the application.
Task manager
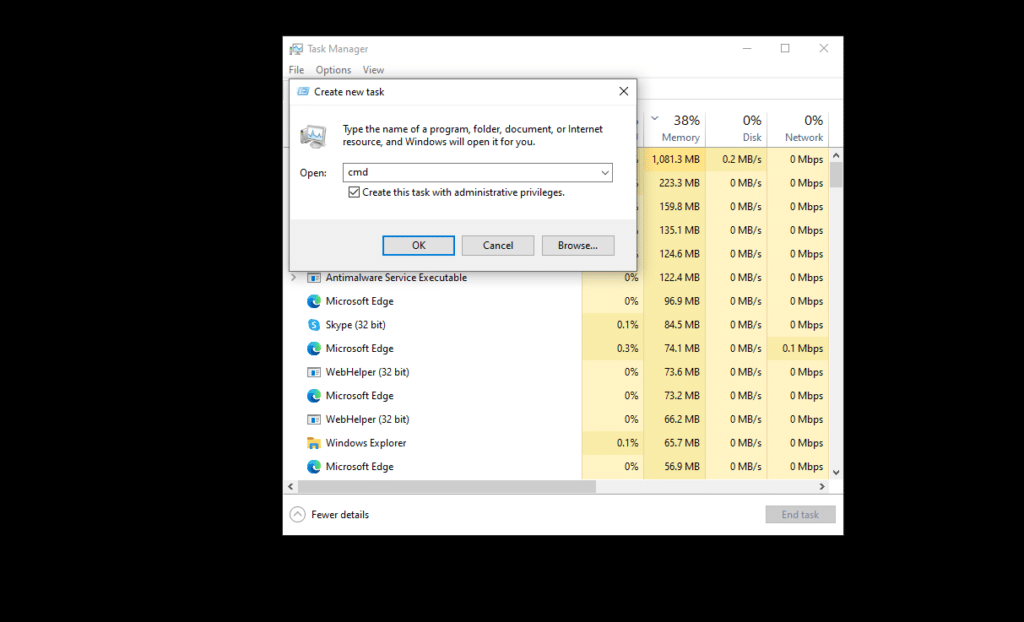
If we usually can’t navigate or want to try something else, we can also try executing programs with the task manager.
- Press Control+Alt+Del and select “Task Manager”.
- Go to “File -> Run New Task”.
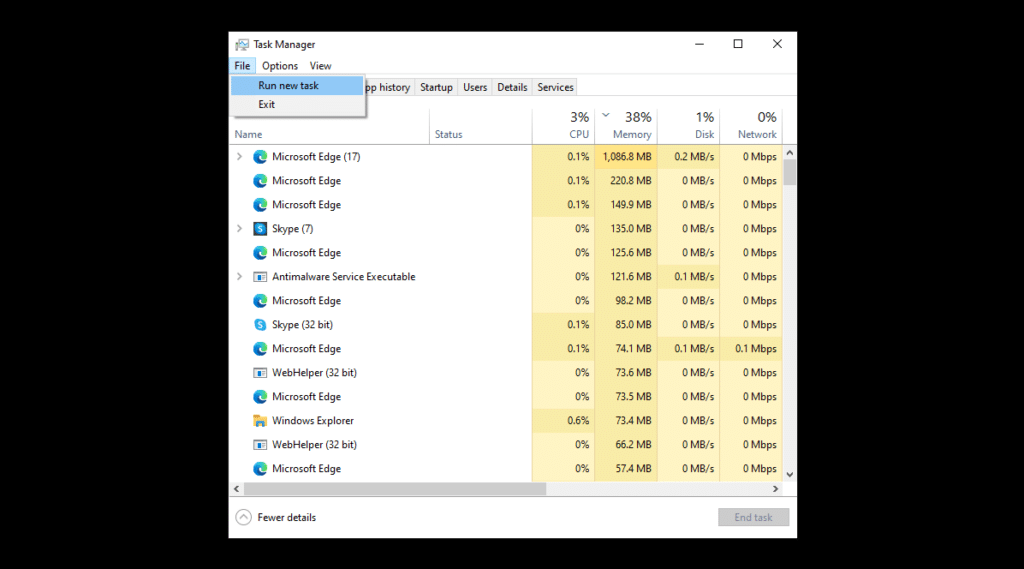
- Type the name of the executable file and check the box “Create this task with administrative privileges”. Click “OK”.
How to Always Run the program as an administrator
To configure an application to always run with administrator privileges, you can take these steps:
- Open Start (you can simply do that by clicking the Windows icon on your keyboard) and type the name of the program.
- Right-click on the application and click “Open File Location“. See below screenshot for referrence.
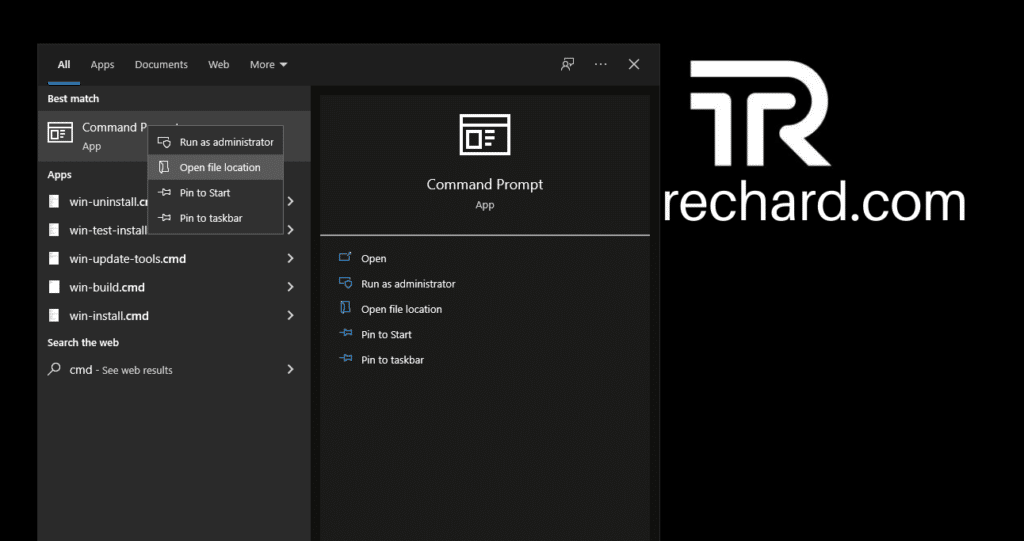
- Right-click on the . EXE file, mouse hover to Send to and click “Desktop (create shortcut)“.

- This will create a shortcut of the program on the Windows desktop.
- Finally, right-click on this new shortcut and click “Properties“.

- In the “Shortcut” tab, click on “Advanced options” and tick the “Run as administrator” checkbox.
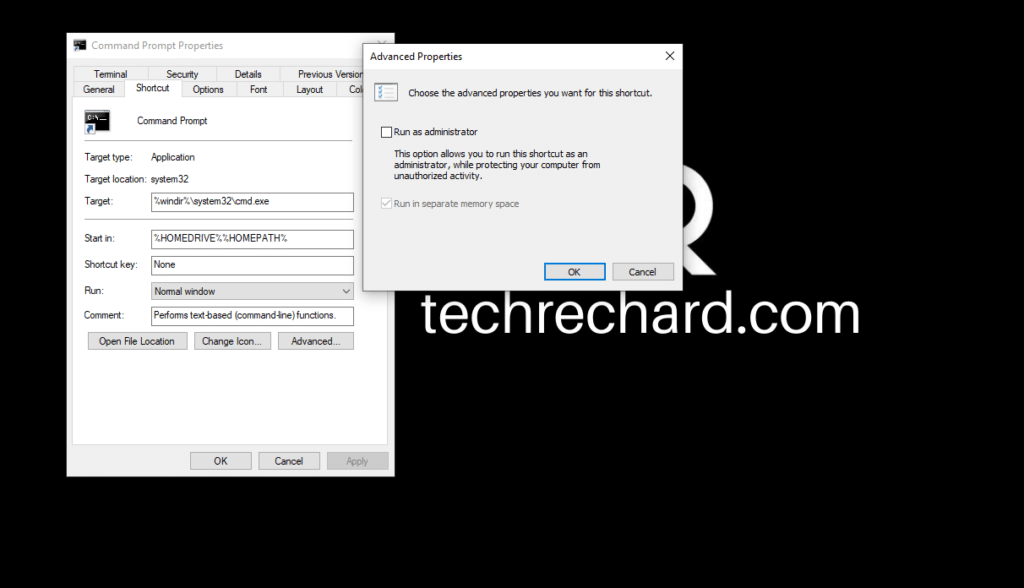
This method is efficient because we can use the program usually, and when we need to be an admin, the shortcut will be right there on our desktop.
Conclusion:
I hope this guide on How to “Run as Administrator” an application on Windows was easy. If you face any issues, please comment down below.


