Table of Contents
Considering the next version of macOS is a beta, you’re at least curious to know what it’ll look like. But what do you do when you no longer want to use the beta? In this article, we will learn How To Remove MacOS Ventura Beta From A Mac and revert back to macOS Monterey.
Below, I’ll teach you how to roll back from macOS Ventura beta to macOS Monterey. The steps are pretty simple:
- Leave Apple’s macOS beta program. Apple’s macOS beta program is a great way to stay on the cutting edge. However, it can be difficult to upgrade your OS, and an update may break your computer.
- Rollback from macOS Ventura Beta to macOS Monterey using one of the methods listed below.
There were several easy methods previously to downgrade from a beta version to a stable version of macOS. But, while I was trying to download from macOS Ventura Beta to macOS Monterey. It turned out to be much more complicated than I could imagine.
You can read our following guides:
How to install macOS Ventura on Virtualbox
How to install macOS Ventura on VMWare
Step 1: Leave the macOS beta program
The first thing to do is withdraw from Apple’s beta program for macOS, which will prevent any more updates from reaching your Mac.
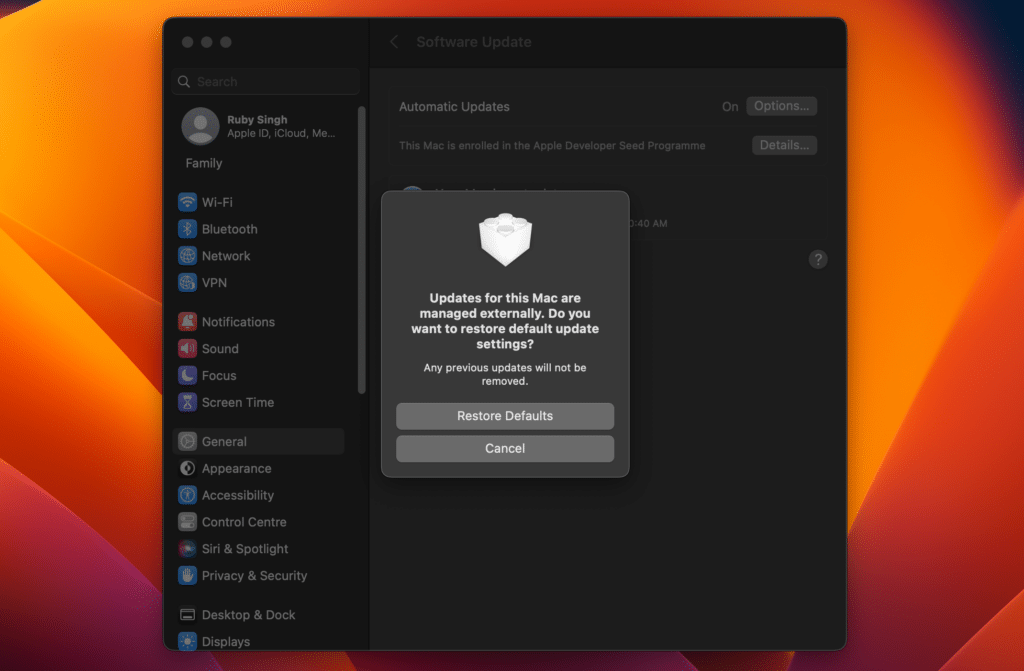
1. Open Software Updates from your Settings and click Details.
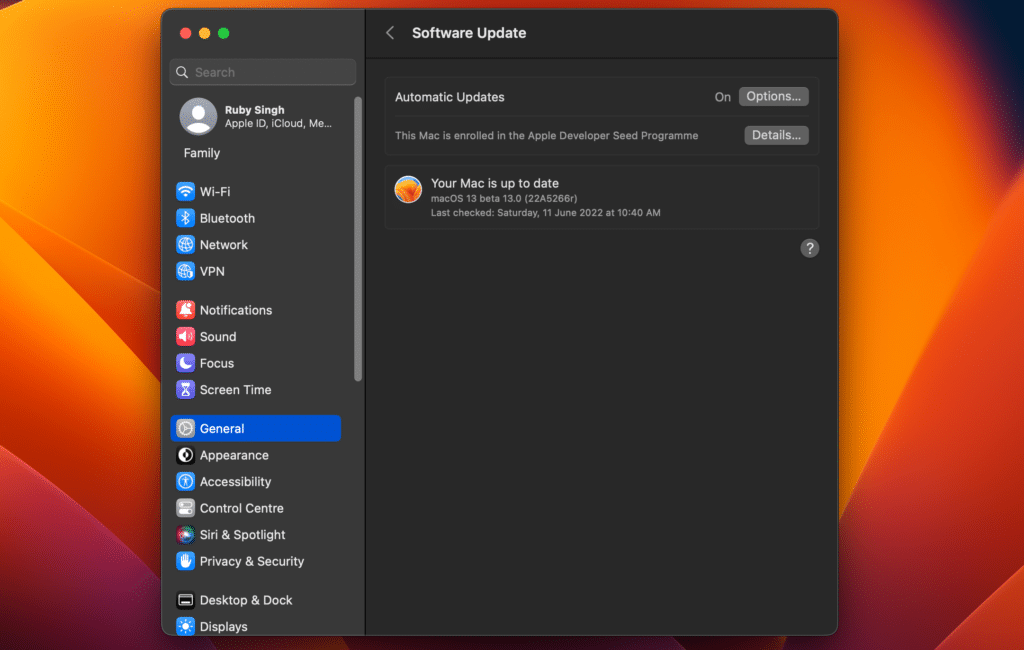
2. Select Restore Defaults in the pop-up that appears.
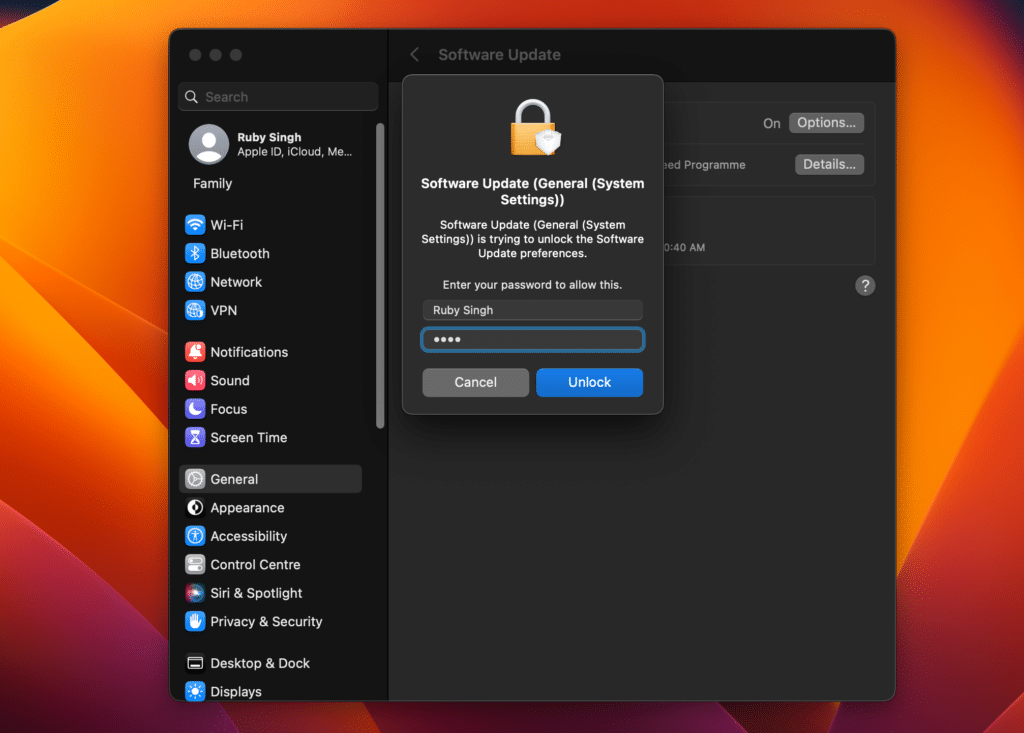
3. Enter your password when asked.
With this, you can turn off the beta software updates in Mac OS, but it will not remove the beta from your computer. If you want to keep getting updates after turning off the beta, you’ll have to re-enroll in the program or wait for the next public update to be released.
Step 2: Uninstall macOS Ventura Beta
There’s more than one way to transition a Mac from beta to the latest full operating system version. You’ll need to know the macOS version you want and whether or not you wiped your data because some methods require a backup.
You removed your Mac from the beta program and will then be able to install macOS Monterey on it. Your options include:
- Reinstall macOS Monterey via Recovery
- Reinstall macOS Monterey via Time Machine
- Reinstall macOS Monterey using a Bootable Drive
You might have tested another method, directly installing the macOS from App Store. But, that method is not working on macOS Ventura Beta. I tried all the ways and all the previous stable operating systems. But, it doesn’t seem functional at all. This is what is happening:
As you can see in this video when trying any other older version of macOS from AppStore. The System Update sections seem to have hung, and there is no way to download the macOS installer directly.
This was the easiest method to downgrade the beta version of macOS. But, since this method is not working on macOS Venture. We will have to look into the other three ways.
Remove macOS Ventura and Reinstall macOS Monterey via Recovery.
If you have a good internet connection, you can also download and install an older operating system using the recovery menu of your device – this might be the fastest method to try.
Before upgrading your Mac to an older operating system, back up all your important files first.
Here are the steps you need to take to install the latest version of macOS on your Mac:
1. Restart your Mac.
2. Hold down the ‘Option‘ and ‘Command‘ keys on your Mac’s keyboard, followed by “R” if you use an Intel-processor system. This will lead to the display of the Apple logo.
For others, use Shit+Command+Options+R.
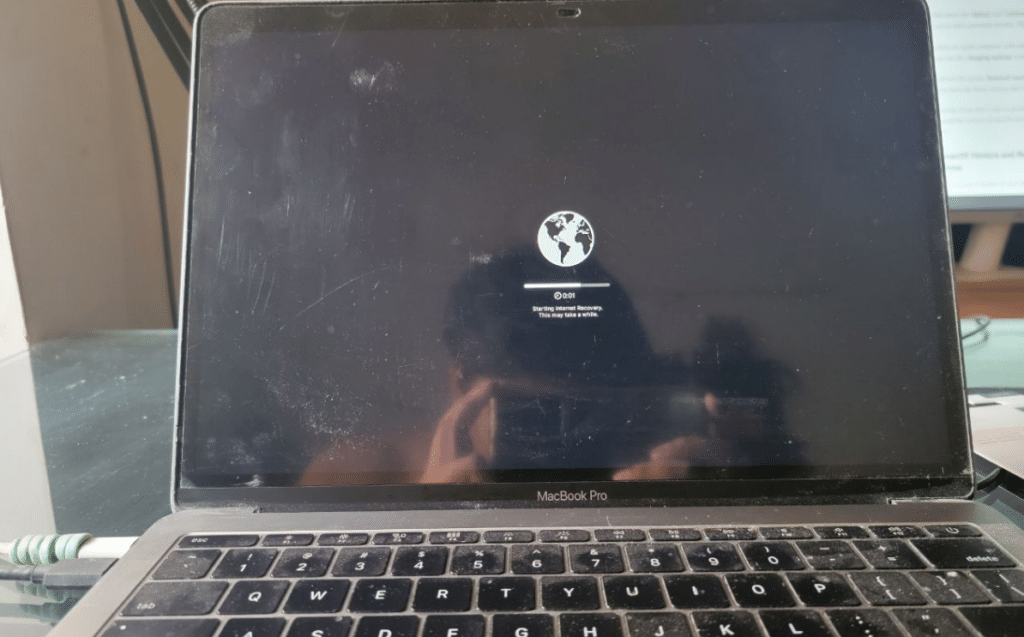
If you have an Apple computer with silicon, you have to press and hold the power button until you see the ‘charging options‘ screen. Click on ‘Options‘ then choose ‘Continue‘.
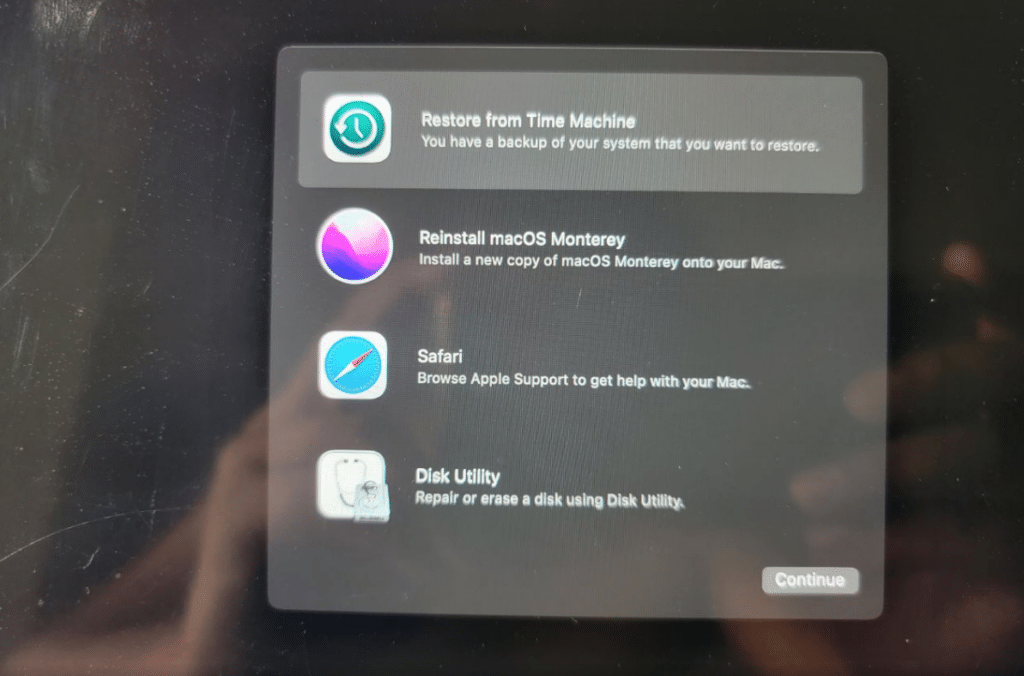
3. You will see the option ‘Reinstall macOS Monterey.’ Go ahead and click on it to reinstall macOS. Be sure you have the latest version that is compatible with your Mac!
Remove macOS Ventura and Reinstall macOS Monterey via Time Machine.
There’s a feature to make a backup of your Mac, but don’t forget that it won’t include any changes you’ve made after running the macOS Beta.
The restore process will delete all the data on your Mac, so it’s best to make a backup or use iCloud to store a copy of anything you’d like to keep.
Once you’re no longer a part of the beta program, as we explained before, follow these steps:
1. Connect the hard drive where your Time Machine backup is located.
2. Restart your Mac.
3. To restart your Mac, do the following: hold down the ‘Option‘ key, ‘Command‘ key, and press ‘R’. until you see a spinning circle icon on your screen. Keep holding these keys while it’s spinning, and wait until you see your Mac’s logo before releasing.
For others, use Shit+Command+Options+R.
4. Now that you are in recovery mode, you should see the option of ‘Restore from your Time Machine backup.’ Select that and click ‘Continue.’
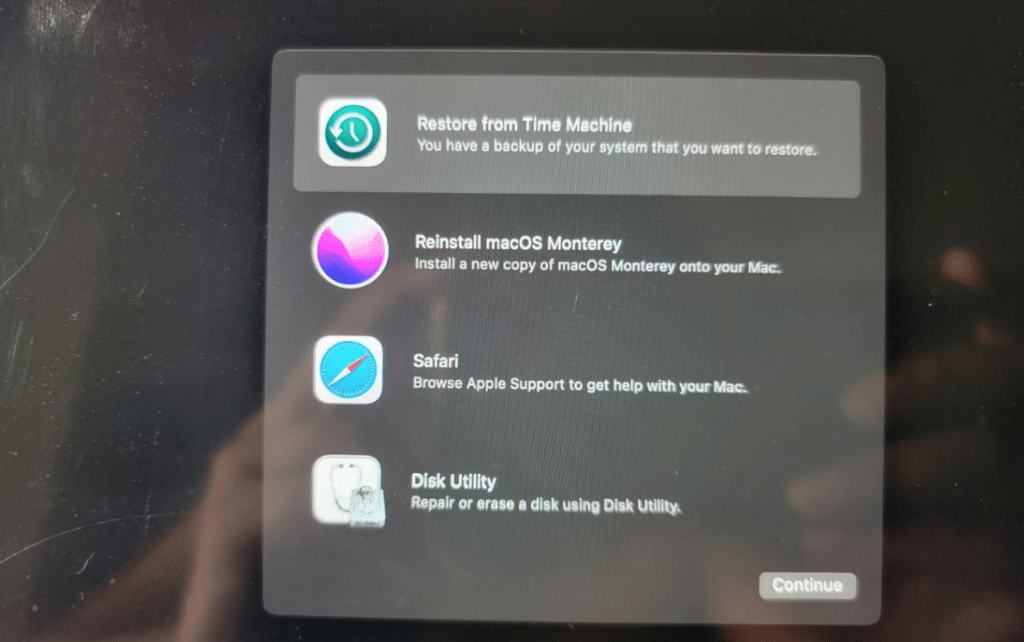
5. Pick the device where you’ve saved the backup and click ‘Continue‘ once again.
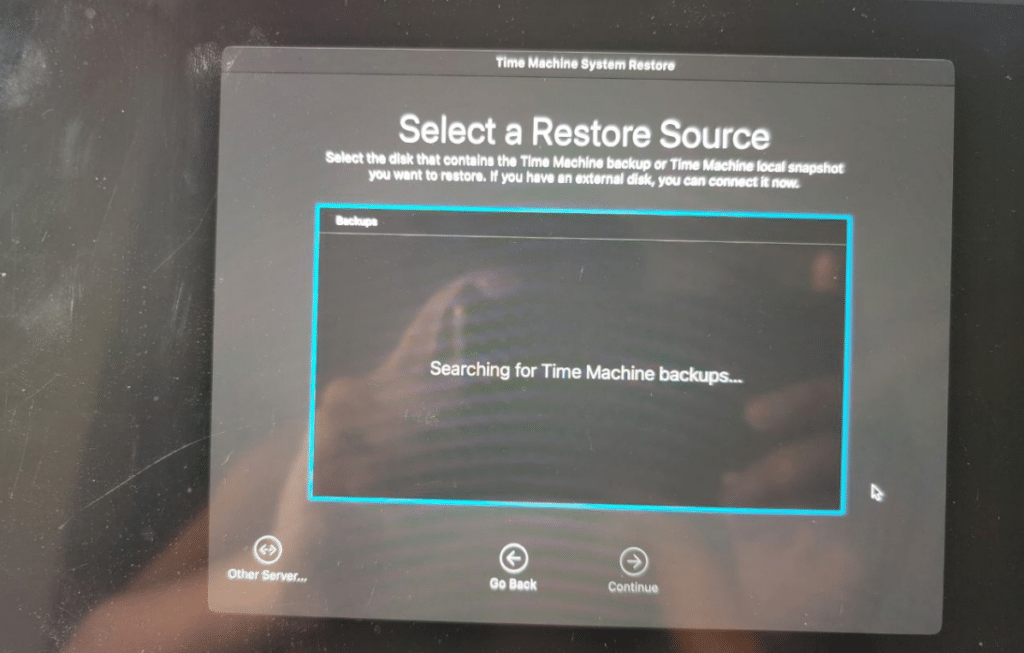
6. Choose the right backup, the one before installing the beta. (You can find it by looking at the macOS version column).
Remove macOS Ventura and Reinstall macOS Monterey using a Bootable Drive.
This method will require you to clean your Mac from anything other than the beta version. So it’s best to back up or copy all critical files on a different drive before installing the beta.
The next step is to download the macOS Monterey DMG file. If you want to revert to any other version, you can download the desired DMG files below:
Download macOS Monterey DMG
Download macOS Big Sur DMG
Download macOS Catalina DMG
If you are looking for older versions, you can use the search feature on our website and find the desired macOS DMG file.
To create a bootable macOS, follow this guide: How to Create macOS Ventura Bootable USB on MAC: Using UUByte.
In this guide, we have used the macOS Ventura DMG file, so you use the macOS Monterey DMG file and create the bootable USB.
Once your macOS Monterey Bootable Media is ready to use, restart your MAC system, press and hold the options key (to show the boot menu), and select your Pendrive to proceed with the Clean Installation of macOS Monterey.
Complete video tutorial:

