

Table of Contents
In this article, we will learn How to restore files from file history in Windows 11. It certainly doesn’t mean that you should rely on it for all your backup needs. However, it is a great way to save yourself from any unexpected data loss.
How to Backup and Restore in Windows 11
But essential documents can be hard to replace when lost or damaged, which is why File History is only designed to back up your essential files.
What is File History
When using File History, you can create versions of your file by following the steps below. This way, if you need to recover a lost or corrupt document, it will be easy for you to find what you are looking for by browsing through all the versions of that file.
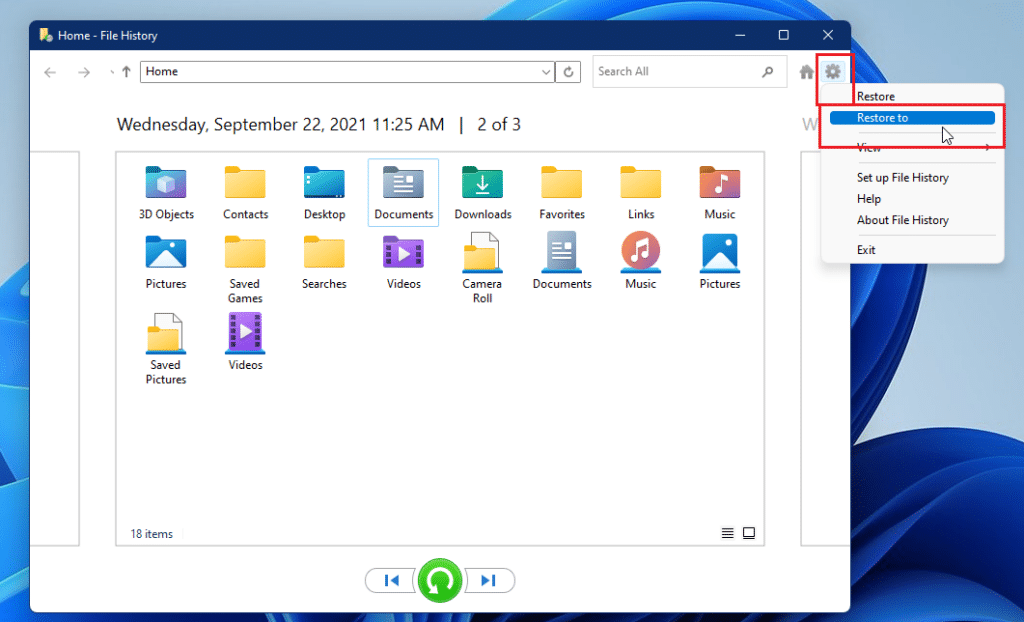
When you find an improved version of the file you want to restore, choose to Restore to move the file back to its original location. Here’s how:
To start restoring files through File History, follow the steps below:
How to restore a lost or damaged file in file history
As mentioned earlier, File History makes restoring lost or damaged files easy. Here’s how you do it:
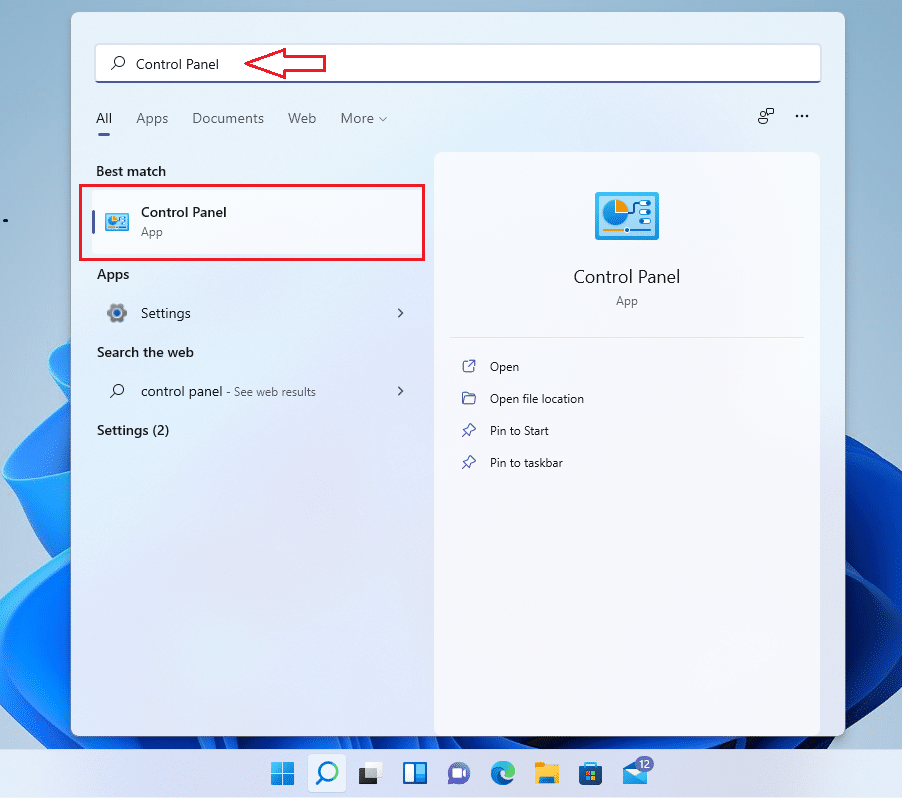
Click on the Start Menu, then find and open the Control Panel application as shown below.
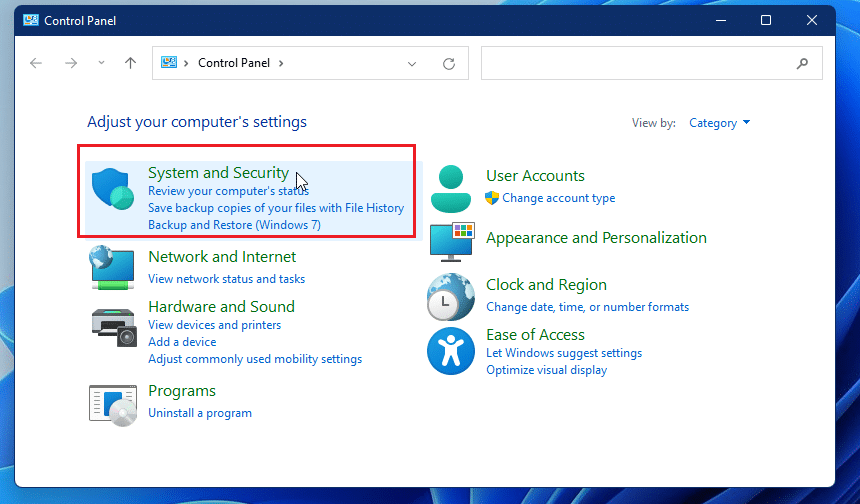
The Control Panel opens up when clicking the System and Security category group.
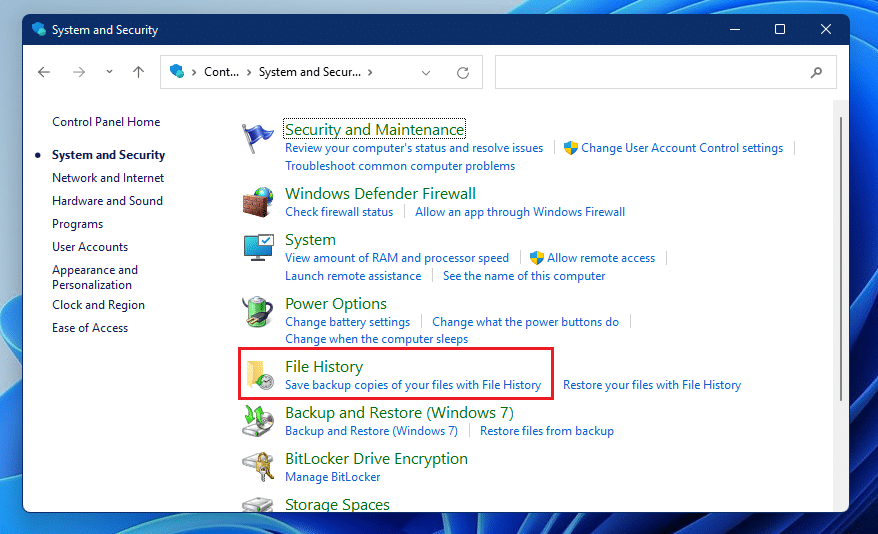
Click File history to open the File History panel, which is found below.
On the left-hand side of this panel, click Restore personal files to restore your lost files.

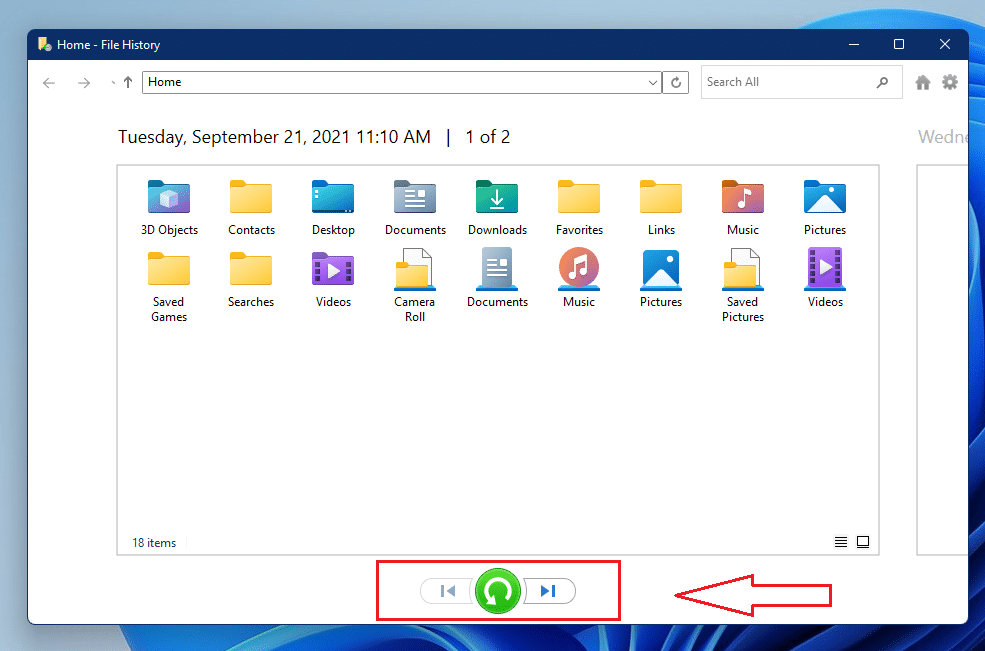
Select the previous button or next at the bottom of your screen to navigate your backed-up versions until you find the date you are looking for.
Select the file or folder you want to restore, then click on Restore. By default, File History will be restored to its original location by overwriting everything there.
You can use the Control option to restore to a different location, as shown below. You’ll have an additional option available to use when restoring.
- File: To restore a specific file or folder, select the desired item from the list.
- Records: Someone is trying to restore multiple files. Make sure each file you open is the correct one by opening it and looking at its content before proceeding”
- A file: To roll back to an older file, open that file from the File History window
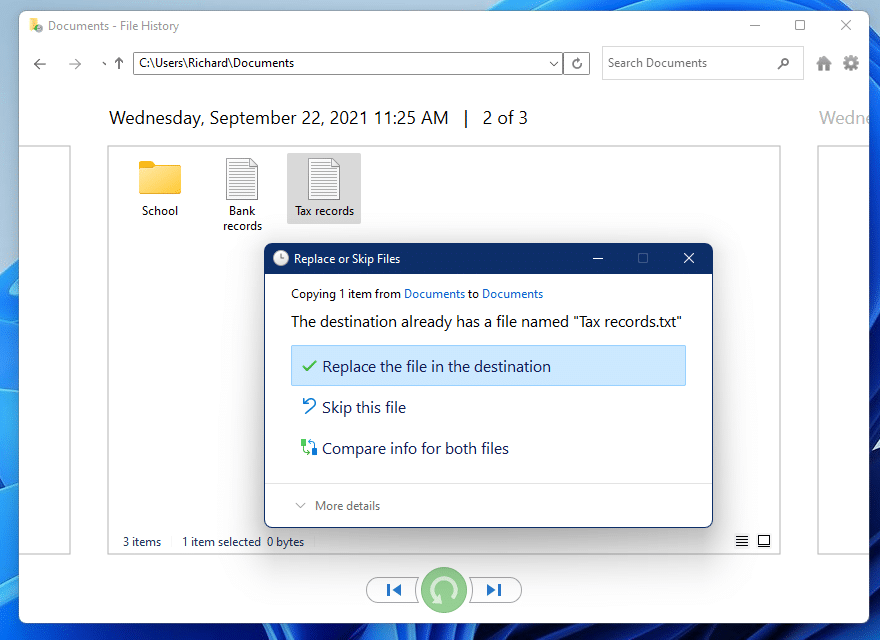
If restoring a file or folder will overwrite an existing one, you will be asked-
These are your options:
- Replace the file in the destination folder – To replace the current file with the backup one, select this option only if you are sure that the previous file is better than the current file.
- Skip this file –Do not select this option if you want to restore the file or folder
- Compare the information of both files – This option allows you to compare file sizes and times before choosing which one to keep.
Restore the computer, then close File History.
That is all!
Conclusion:
In this tutorial, we’ve seen how to restore an item in File History. If you find any errors above or have something to add, feel free to use the comment form below


