
Table of Contents
In this guide, we will learn How to put your password on a folder in macOS. Many users use the password to protect their data on the computer. But, as practice shows – it is not very reliable when it comes to important confidential data. If an attacker has physical access to a computer, it is only a matter of time before the password is reset.
Silver Sparrow malware: How to check if your MAC is infected? Easy Tips to remove
Fortunately, a fairly simple and most important reliable way to secure your data – is to put your password on a folder in macOS. Unlike code when logging in, such a password is almost impossible to “open” because it uses reliable AES encryption algorithms.
All the necessary steps can be done with standard macOS tools. You won’t need to download any third-party apps or programs. So let’s directly move on to- How to put your password on a folder in macOS.
How to Use the Podcasts app on Mac? 10 Easy Answers
How to put your password on a folder in macOS?
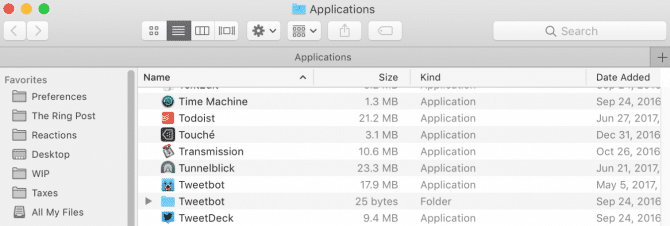
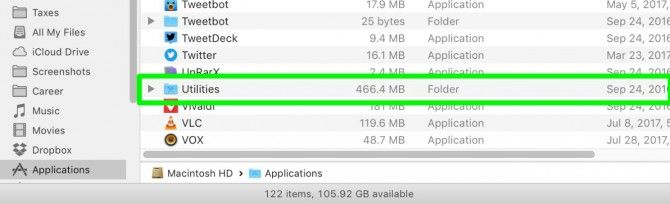
Step 1: Open your Application Folder
You can also use the shortcut Command + Shift + A to open your Applications folder or you can simply Click Finder, on the left panel you will see your Application folder.
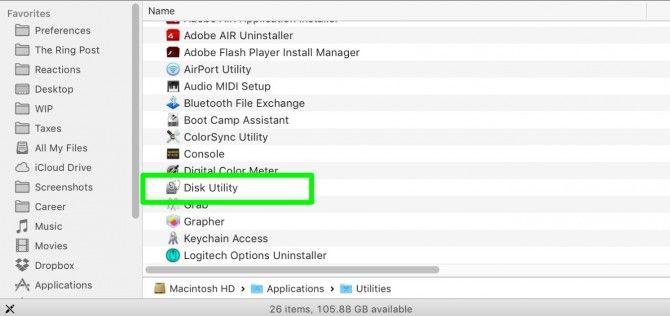
Step 2: Open Disk Utility
Under the Application folder find Utilities folder and open it.
Now double click the Disk Utility icon.
Step 3: Create a New Image
On the top header, click File.

Now click, New Image and click Image from Folder.

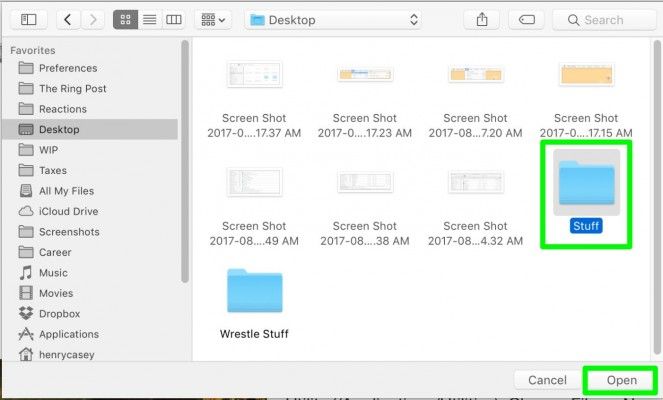
Choose the folder that you want to want to put the password on.
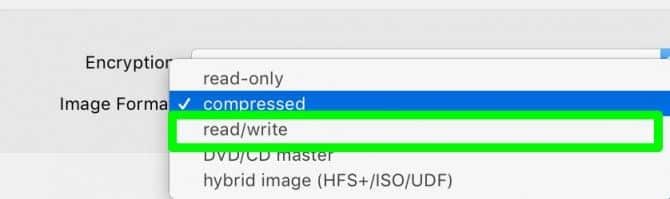
Click on the Image Format option menu and select read/write.
Click on the Encryption menu and click 128-bit AES encryption.
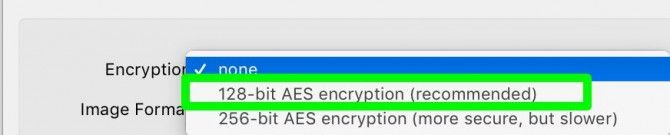
Step 4: Set the password of the folder
Enter the password you wish to keep on the folder and verify the password.
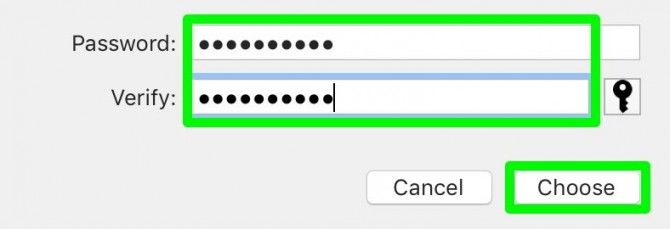
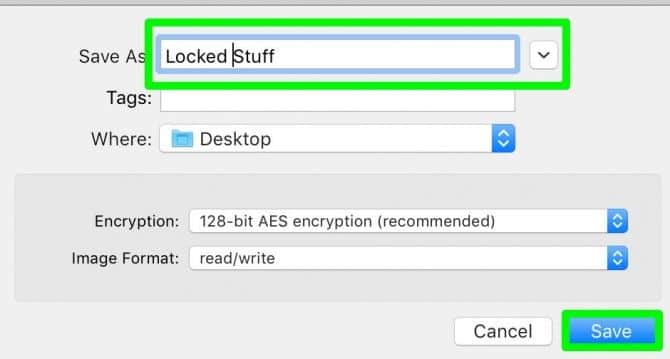
Enter any name of the Image and save it.
Click Done.
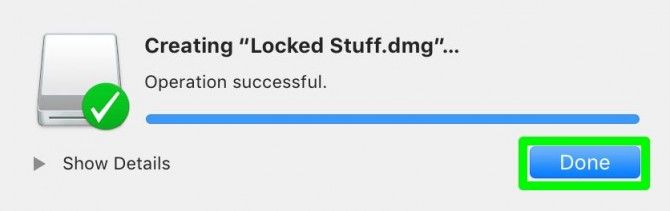
An encrypted image with a dmg extension will appear next to the original folder. Files can now only be accessed by password on a folder. You can delete an unprotected folder, but you should check the image before that, making sure that all the right files are in their places. Congratulation, you have successfully put your password on a folder in macOS.
Some other guide that you would like to read:
How to sign documents on your Mac with iPhone or iPad? 2 Easy Ways
How to share folders on VirtualBox & Vmware? (Windows-MAC) Step by Step Guide
How to turn PlayStation and Xbox controllers into a remote control? Mac Guides
How to Save Tabs in Safari after Closing?
Touch Bar: How to fix Touch Bar freeze? 3 Easy Steps
How to manage battery status on macOS Catalina?
How to Install New Free Fonts in macOS Catalina for Free?
Accountsd: How to Fix High CPU Usage on Mac? 3 Possible Fix
How to remove the HP printer “malware” driver from Mac? 9 Easy Steps
How to block a cookie in Safari? Hush for Safari {Easy Guide}
How to rollback from the macOS Big Sur on Mojave? 5 Steps Steps
How to install Windows 10 on macOS 11 Big Sur: Step-by-step Guide
How to manage widgets on macOS Big Sur?
MacBook Pro Display Issue: What to do?
Mac stuck on the splash screen. What to do?
How to Speed Up macOS Big Sur? 7 Easy Methods
How to Speed Up macOS Catalina? 7 Easy Methods
Wi-Fi Not Working on MAC? What to do? 3 Problem Fixes