

In this article, we will learn How to Install Windows 11 Beta on an Unsupported PC. There are mainly two ways to achieve this, and we will discuss both methods in this article. If you are still not able to install Windows 11 on your unsupported system, you can install Windows 11 on VMware Workstation or Virtualbox.
The Windows Insider Insider Is a great way to learn about Microsoft’s innovations for Windows 11. But users may have some problems when getting test builds of Windows 11 for developers if the PC or laptop does not meet the minimum system requirements of the new OS. On the other hand, the developers from Microsoft decided to make regular participants of the Windows 10 insider program a natural gift – they will be able to receive Windows 11 for developers even on incompatible hardware.
The problem is that you need to register in the program before June 24, 2021 – it’s too late now. Fortunately, there is an opportunity to circumvent this limitation.

How to Install Windows 11 on an Unsupported PC: Step by Step Guide
Rufus enables you to create a Windows 11 install disk on a USB Flash drive, and specific settings disable the TPM and CPU requirements. You can boot off the flash drive for a clean installation or run the setup file from it.
For most people, this method is ideal, but there are a couple of difficulties.
The first thing you need to think about is the size of your USB Flash drive – it needs to be at least 16GB in capacity. The next consideration is that it can’t be used for virtual machine setups when an ISO file would do instead.
1. To get the most out of Rufus, download and install the latest version on your computer. The current version is 3.17, which has been updated for Windows 11. Once installed, kindly restart your system.
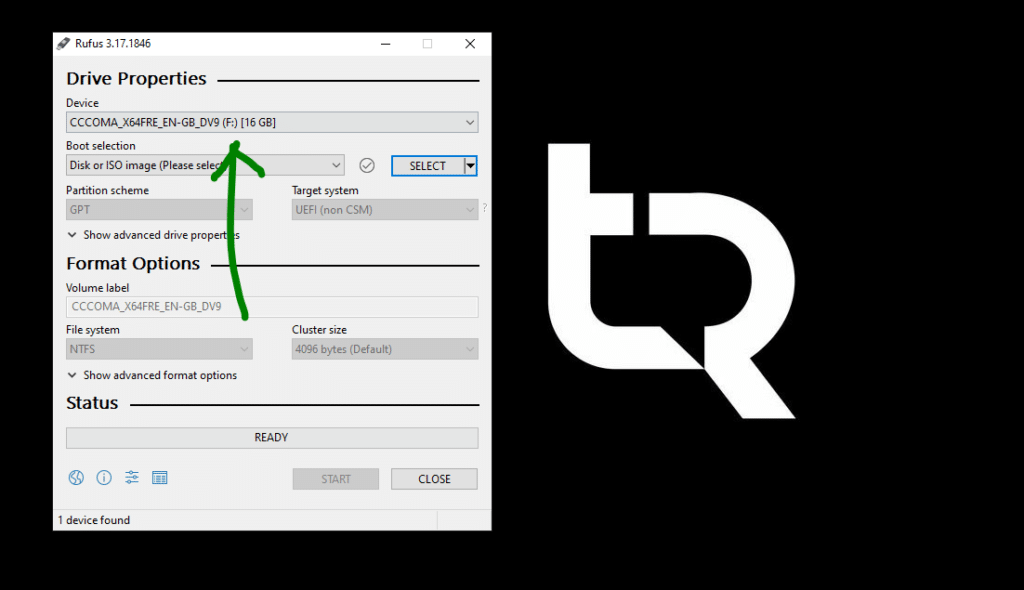
2. Please insert a 16GB or larger USB stick and open Rufus.
3. Select the USB device you want to install Windows 11.

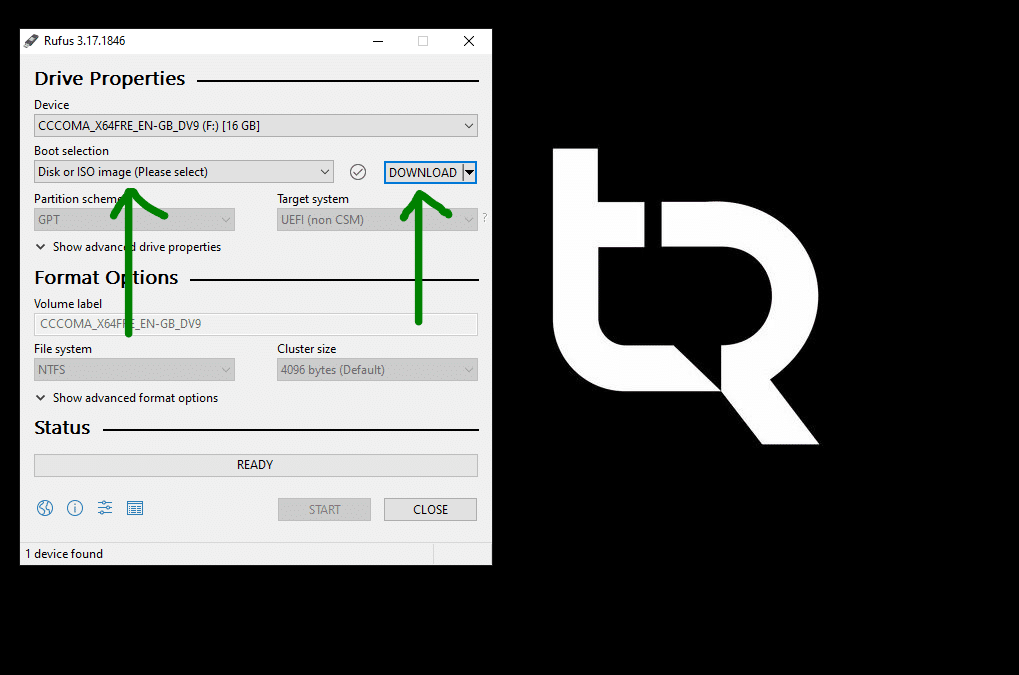
4. Ensure Boot Selection shows “Disk or ISO image” and click DOWNLOAD. If you don’t see a download button, click on the arrow beside select and click DOWNLOAD. Once done, again click on the DOWNLOAD button.
NOTE: If there is no arrow, you need to restart your system or update the Rufus tool.

5. You can now select Windows 11 and click Continue.
6. Now select the latest build, Edition, Language, and Architecture, and then click DOWNLOAD.

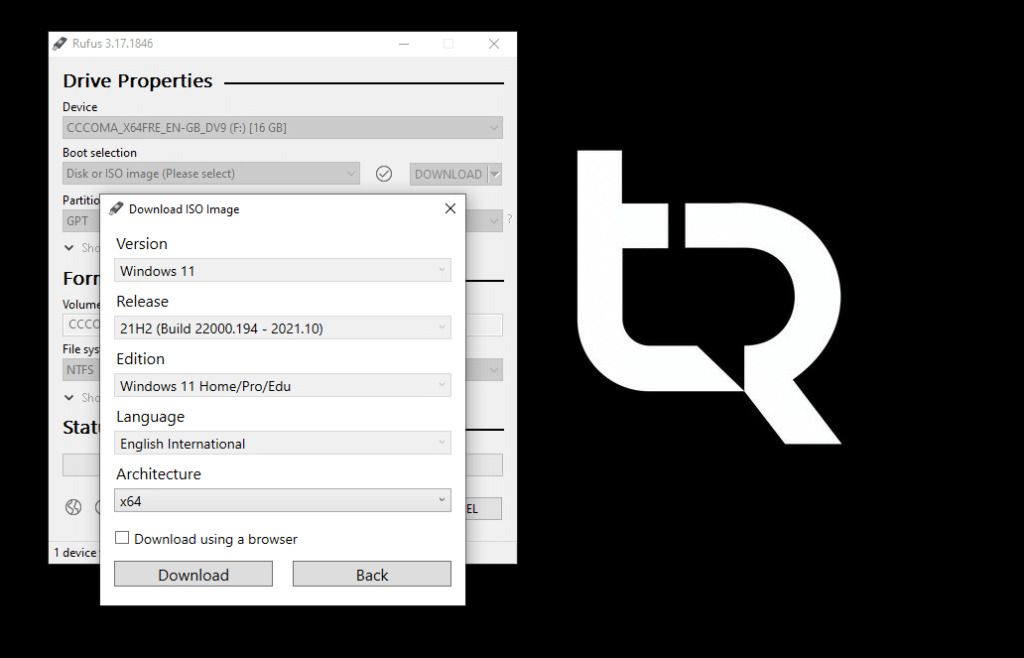
7. Downloading the ISO file will take a few minutes.
8. Click on the Windows image option drop down and select the Extended Windows 11 installation to disable TPM, Secure Boot, and the 8GB of RAM requirement.

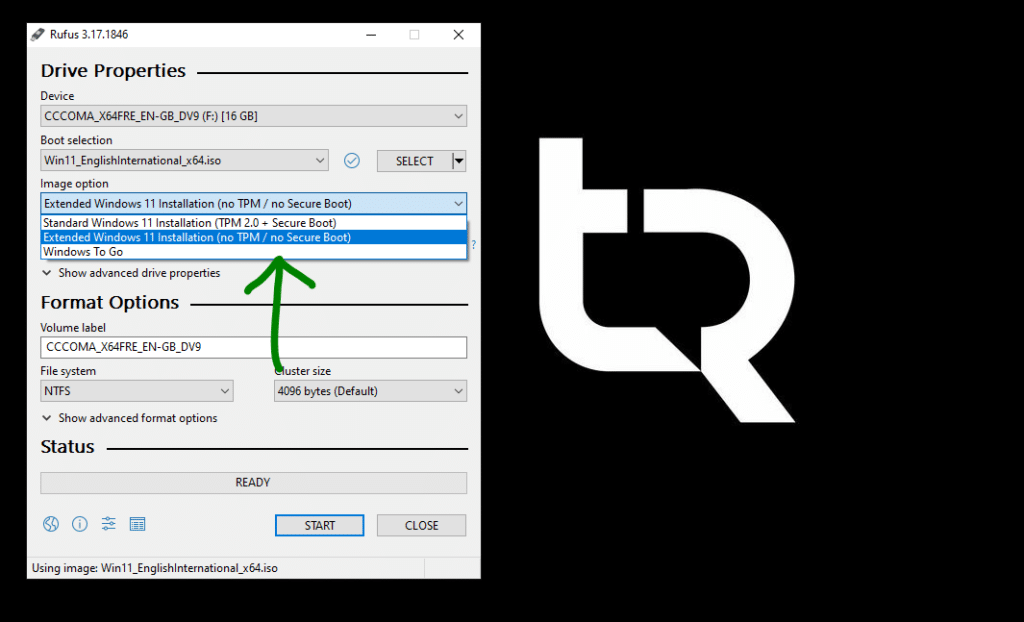
9. Click Start.
Depending on the USB drive being used, the entire process can take a few minutes. Once complete, the USB drive can be removed and used to install Windows 11 on an older computer or even in a virtual machine.
Now you can use this USB drive to fresh install Windows 11 from boot or directly upgrade from your Windows 10 interface.
Conclusion:
I hope this guide on How to Install Windows 11 on an Unsupported PC was helpful. This is the only working solution right now. You can also install Windows 11 on VMware Workstation or Virtualbox.
If you face any issues, please comment below.