

Table of Contents
In this article, we will learn how to install macOS X El Capitan on VirtualBox on Windows.
I am sure the process isn’t easy and works for everyone. You might face these common errors when installing MacOS X On VirtualBox On Windows- Here is a complete guide to help you fix those errors. Complete Guide To Fix VirtualBox Errors While Installing macOS X
MacOS X El Capitan is one of the best operating systems, such as Mac and Macintosh. MacOS X EL is the major release of MacOS X, which may support desktop and server operating systems for Macintosh systems. It is the successor to OS X Yosemite and focuses on its safety and functionality it. macOS X El Capitan premiered in 2015 as a WWDC keynote.
System Requirements to Install MacOS X El Capitan on VirtualBox:
- MacBook, MacBook Air, MacBook Pro, Mac Mini
- iMac Mini
- Mac Guru
- Xserve
Install MacOS X El Capitan on VirtualBox
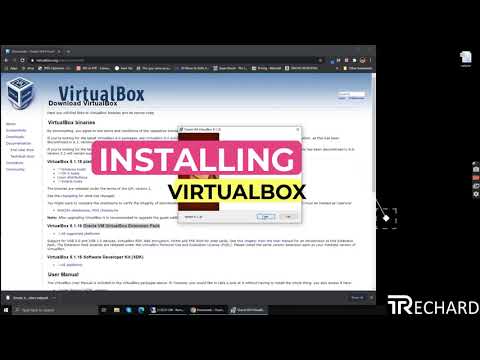
Step 1: Before installing macOS X El Capitan on Virtualbox, you have to download and install VirtualBox. Here is a video tutorial that you can use:
Remember one thing VirtualBox and VMware Workstation is also an essential tool for Virtualization. Thus, you cannot run both of these machines at the same. Otherwise, you’ll face unique types of problems during installation. You can download the requirements in the link below.
Download MacOS X El Capitan ISO (Google Drive)
Step 2: After downloading the image file, you must extract it because WinRAR compresses it. To Extract that from compress, you require WinRAR or even 7Zip. After that, right-click and select Extract Here.

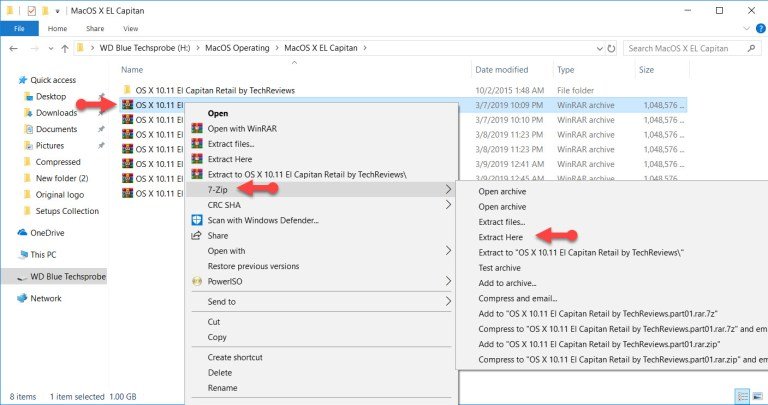
Note: Extract the Mac OS El Capitan compressed file with 7Zip, because the Mac OS ISO file is compacted by 7Zip.
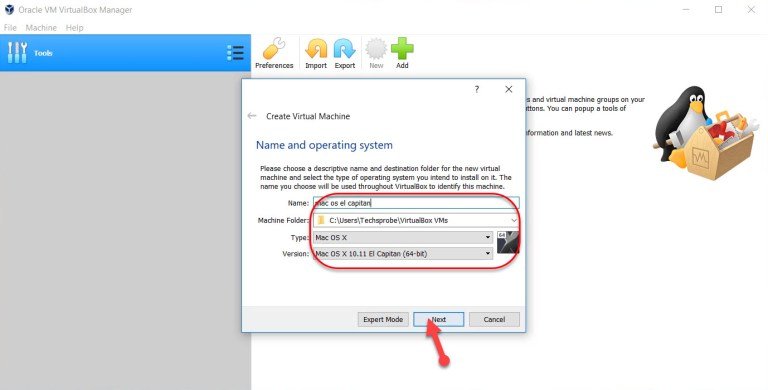
Step 3: After you have successfully installed VirtualBox on your PC. Open VirtualBox and Click on New.


- Enter the name of your Virtual machine. Under type, select macOS X. Once done, click next.

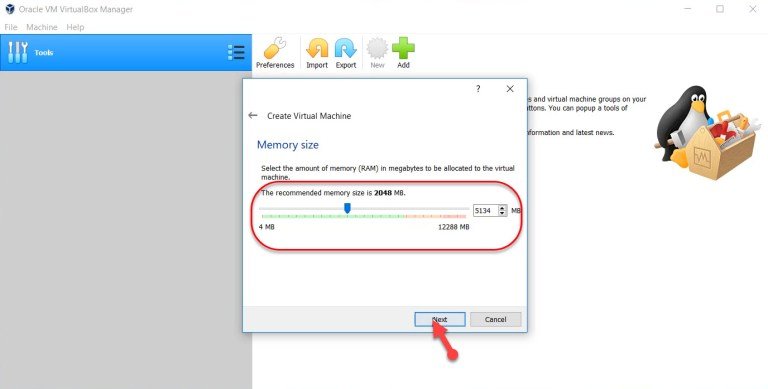
- Choose the amount of Memory (RAM) for Virtual machines. At least select two GB of RAM 4096 and click Next.
- Select use an existing virtual hard disk file.

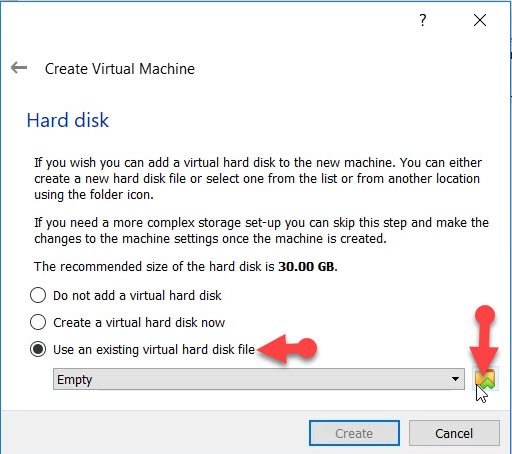
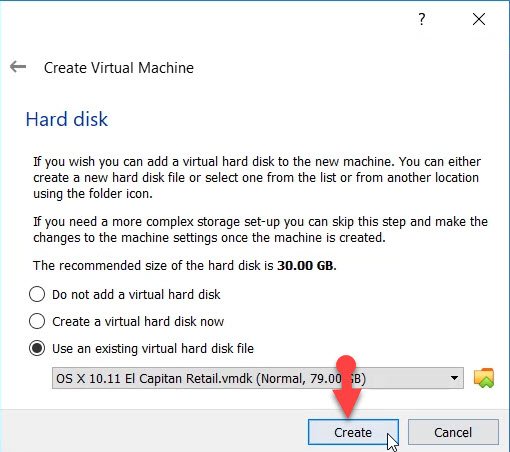
- Select the image file of MacOS X El Capitan that you downloaded above and click on the “Open.”


- Once the image file is selected, click Create.

Step 4: Edit the virtual machine settings.
- After you successfully created the virtual machine. Click on Settings, and make the following changes.

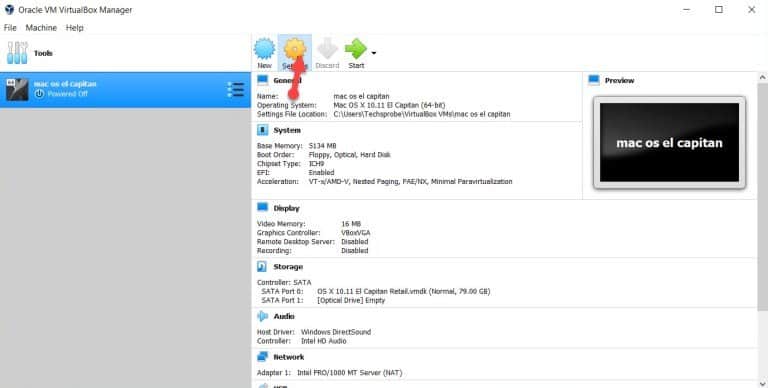
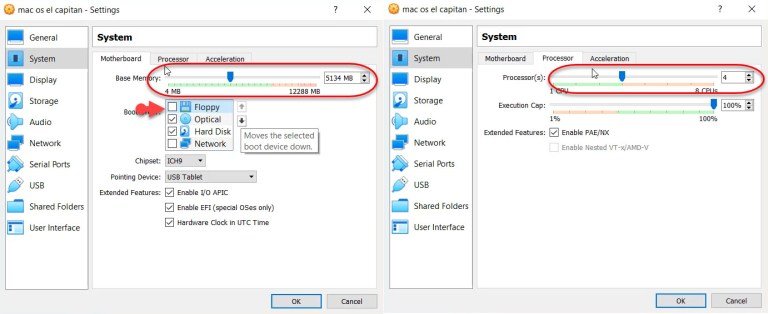
- Click on Motherboard, select the base memory to 5134, and uncheck the Floppy disk. Now, click on the Processor tab, and increase it to 4.

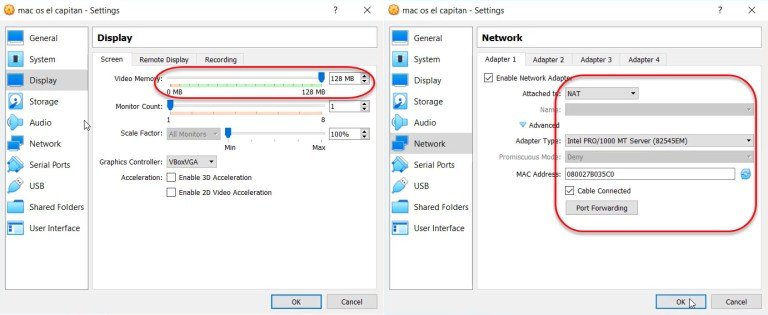
- Go to the Screen tab and increase the Video Memory to 128 MB, also enable the network adapter and click OK.

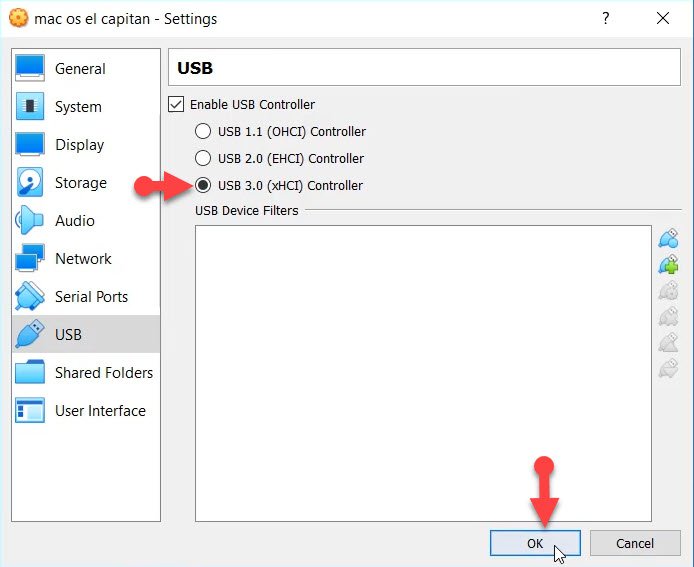
- Now go to USB and select USB 3.0 (xHCI) Controller and click OK.

Step 5: Add the codes to VirtualBox.
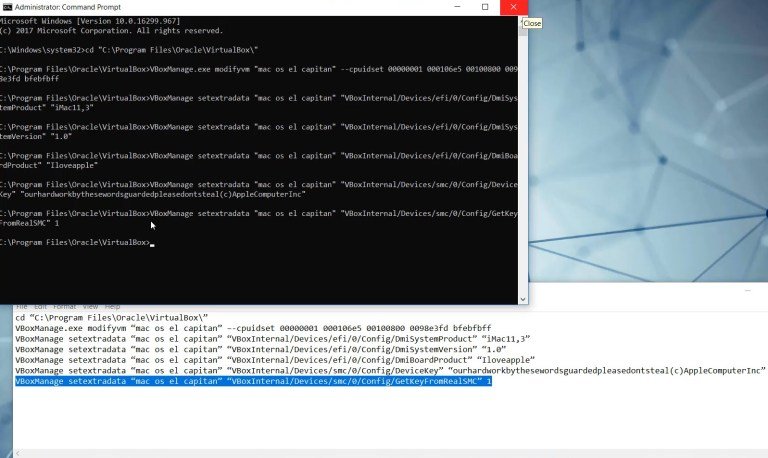
Copying and pasting codes to VirtualBox is a simple process that can be completed in a few easy steps. First, open Command Prompt/CMD and run it as an administrator. Next, replace the virtual machine title with your actual virtual machine name. In my case, “mac os el capitan” . Finally, copy and paste each code step-by-step, pressing enter after each one.
Codes for Virtualbox 5.0.x
cd “C:\Program Files\Oracle\VirtualBox\”
VBoxManage.exe modifyvm “mac os el capitan” –-cpuidset 00000001 000106e5 00100800 0098e3fd bfebfbff
VBoxManage setextradata “mac os el capitan” “VBoxInternal/Devices/efi/0/Config/DmiSystemProduct” “iMac11,3”
VBoxManage setextradata “mac os el capitan” “VBoxInternal/Devices/efi/0/Config/DmiSystemVersion” “1.0”
VBoxManage setextradata “mac os el capitan” “VBoxInternal/Devices/efi/0/Config/DmiBoardProduct” “Iloveapple”
VBoxManage setextradata “mac os el capitan” “VBoxInternal/Devices/smc/0/Config/DeviceKey” “ourhardworkbythesewordsguardedpleasedontsteal(c)AppleComputerInc”
VBoxManage setextradata “mac os el capitan” “VBoxInternal/Devices/smc/0/Config/GetKeyFromRealSMC” 1

Codes for Virtualbox 4.x.x
cd “C:\Program Files\Oracle\VirtualBox\”
VBoxManage.exe modifyvm “Your VM Name” –-cpuidset 00000001 000306a9 04100800 7fbae3ff bfebfbff
VBoxManage setextradata “Your VM Name” “VBoxInternal/Devices/efi/0/Config/DmiSystemProduct” “MacBookPro11,3”
VBoxManage setextradata “Your VM Name” “VBoxInternal/Devices/efi/0/Config/DmiSystemVersion” “1.0”
VBoxManage setextradata “Your VM Name” “VBoxInternal/Devices/efi/0/Config/DmiBoardProduct” “Iloveapple”
VBoxManage setextradata “Your VM Name” “VBoxInternal/Devices/smc/0/Config/DeviceKey” “ourhardworkbythesewordsguardedpleasedontsteal(c)AppleComputerInc”
VBoxManage setextradata “Your VM Name” “VBoxInternal/Devices/smc/0/Config/GetKeyFromRealSMC” 1

Step 6: Now Begin a clean installation of MacOS X El Capitan.
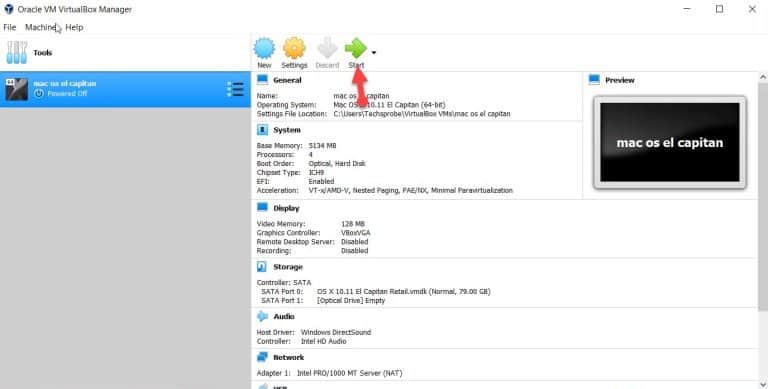
- Now, open VirtualBox, then click the Start button of VirtualBox to execute the setup.
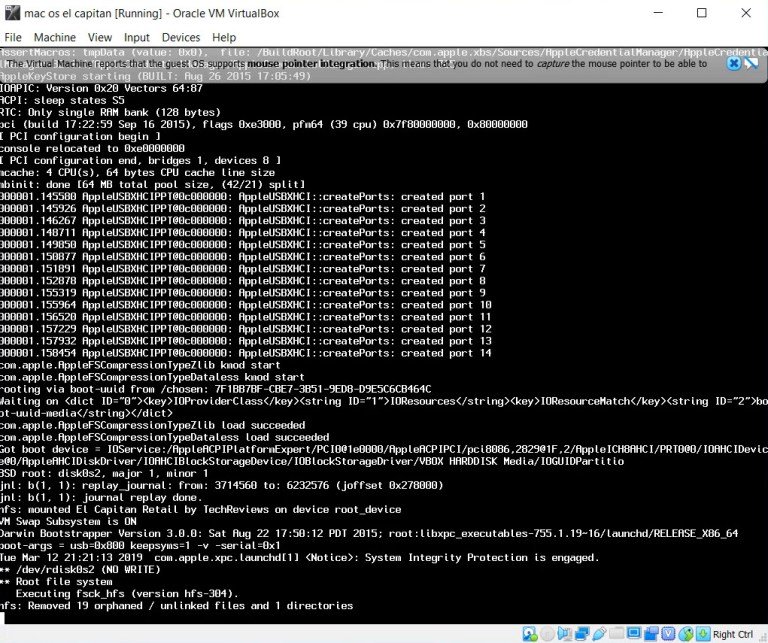
- You will find a black window full of code. Wait for a second. It will finish.

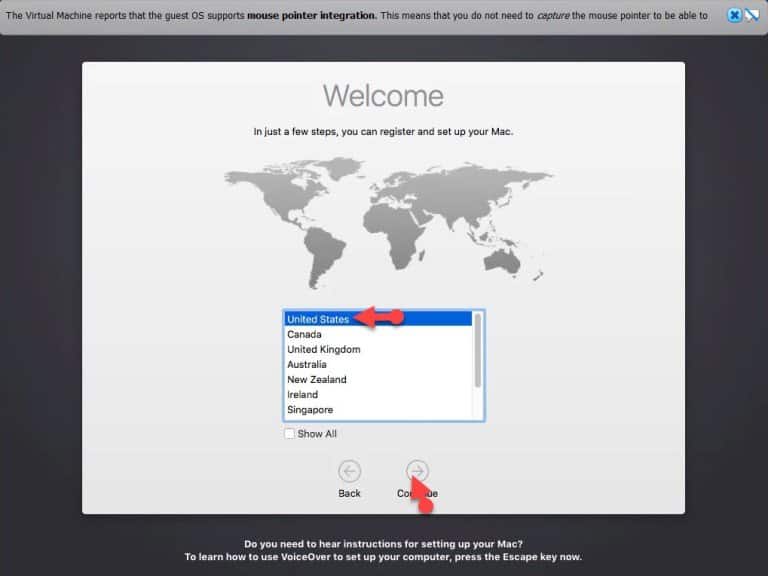
- Within this step, select your Language, then click Proceed, or you can default also.

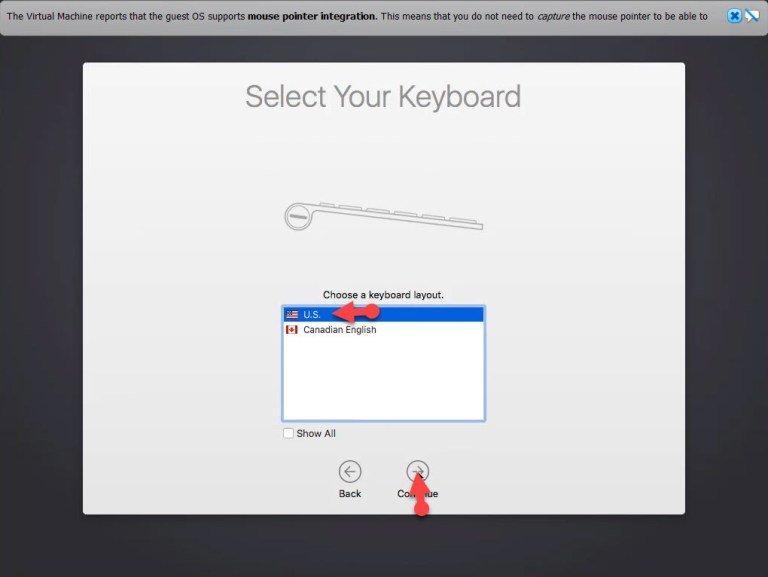
- Choose your keyboard layout and click Continue.

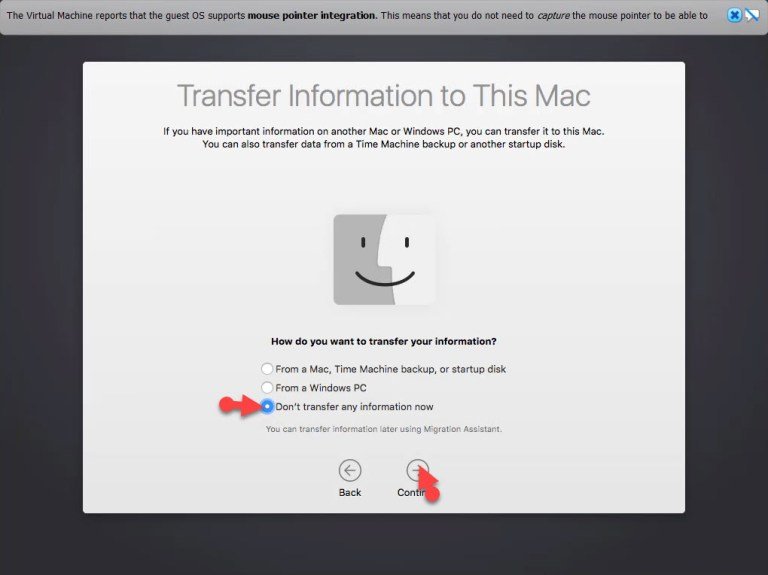
- Choose Don’t Transfer any info now and click on Continue.

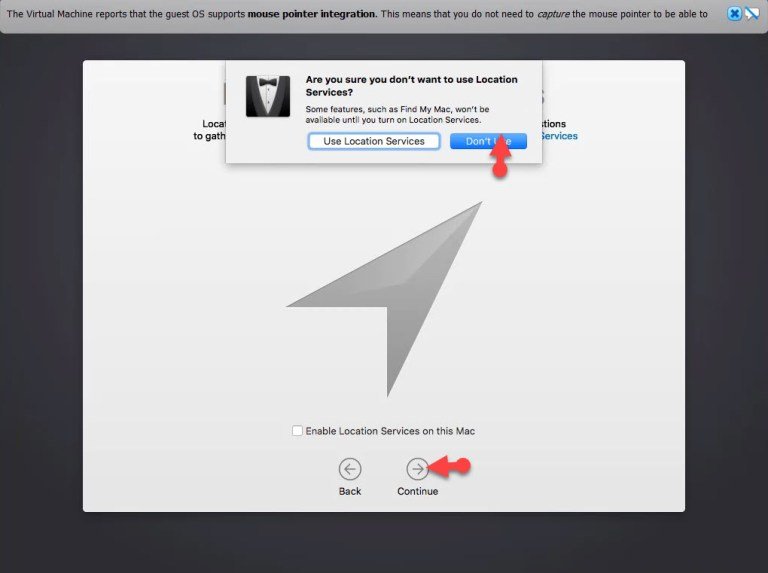
- Choose your location providers, click the Continue button, and choose Do not Use.

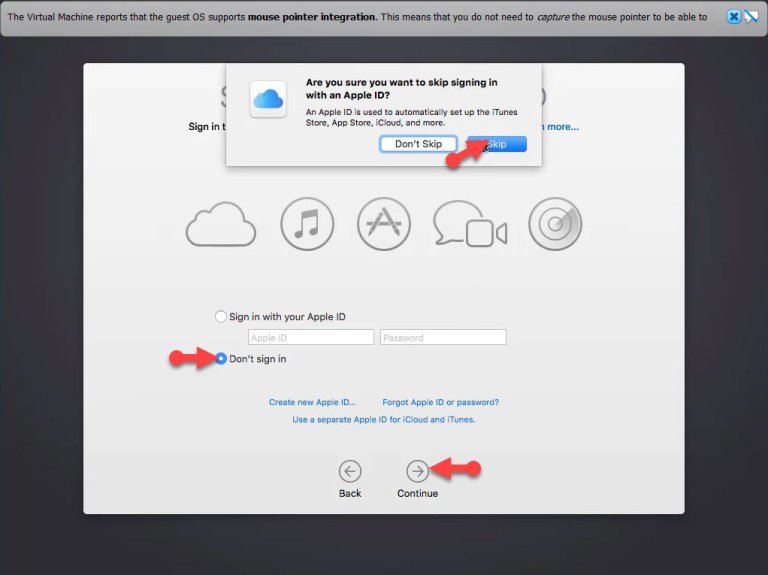
- You need to provide your Apple or iCloud account. Therefore, when you have an Apple account, you can enter that. You can simply skip this step.
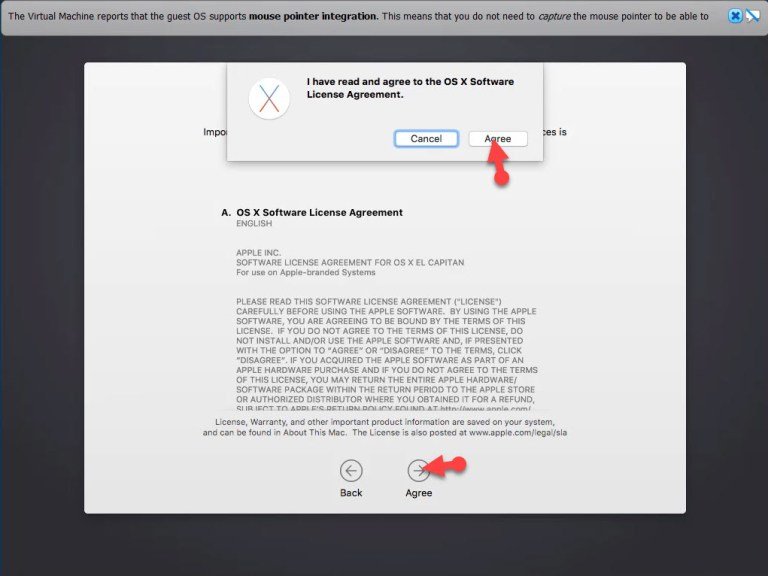
- Just click Continue and click Agree.
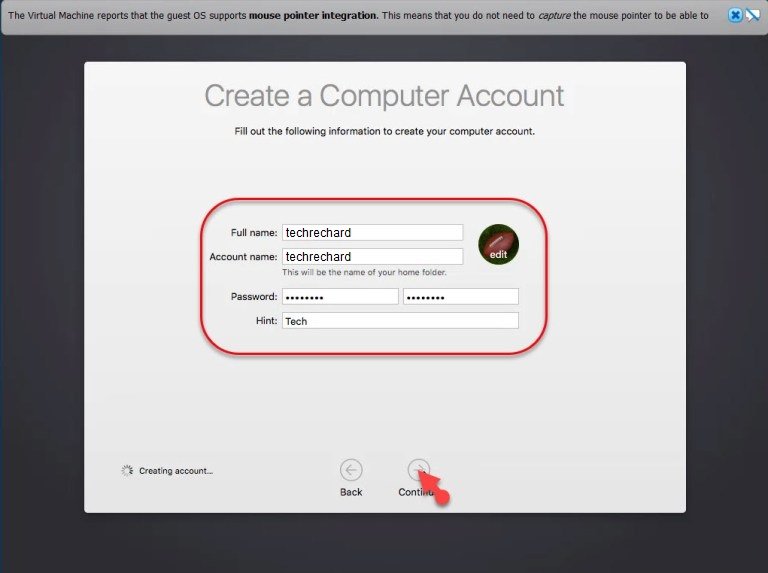
- Step 7: Create a Computer Account
- Enter your account name, and password and proceed.
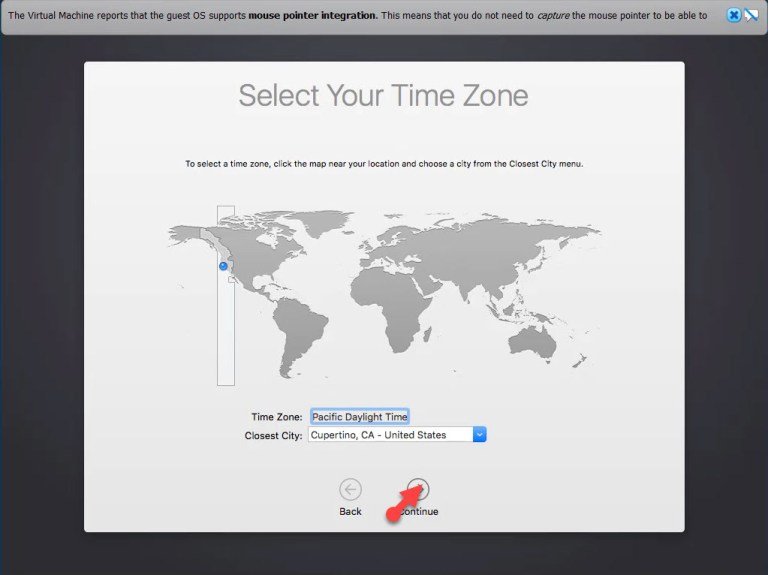
- Select your time zone, click Continue.
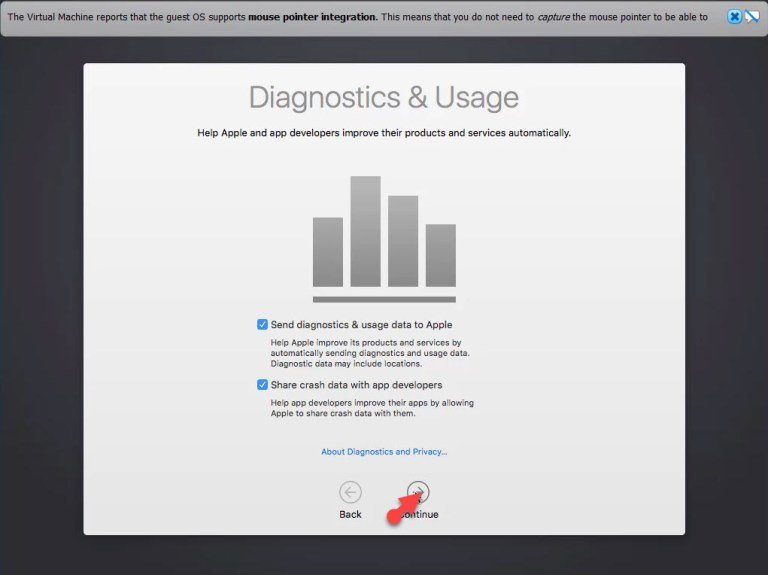
- Click Continue.
- Wait for a few seconds.
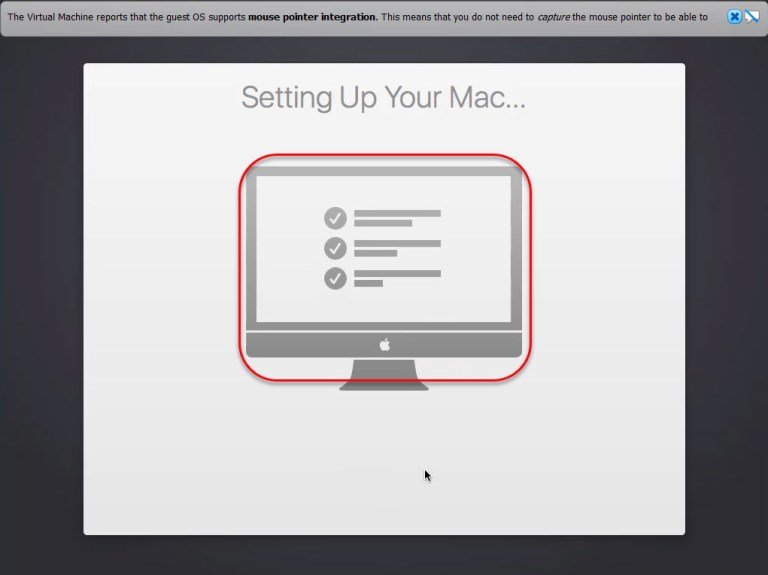
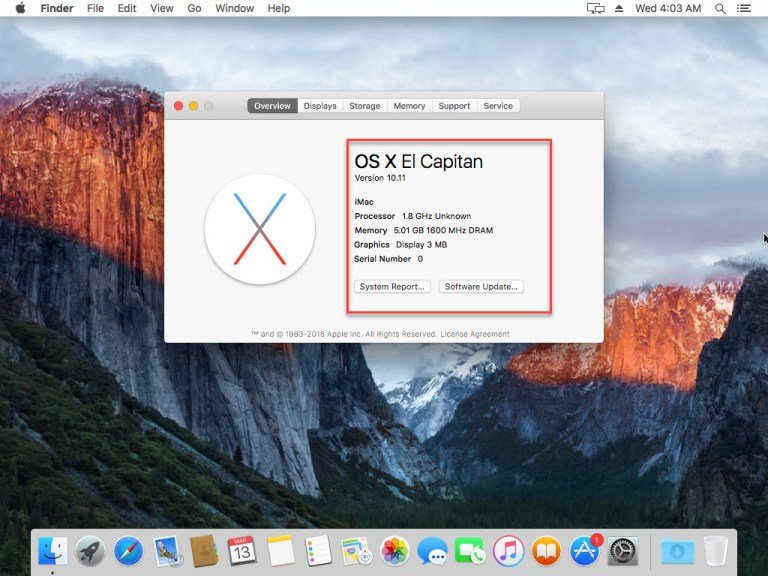
- Congratulations! You have successfully set up the macOS X El Capitan operating system on VirtualBox. You can now use it on VirtualBox just like on a Mac computer.
You can also read: How to share folders on VirtualBox & Vmware? (Windows-MAC) Step by Step Guide
Conclusion: How to install MacOS X El Capitan on VirtualBox on Windows
That concludes the process of installing MacOS X El Capitan on VirtualBox for Windows. If you encounter any issues during this process, please feel free to leave a comment below. We welcome your suggestions and any shortcuts you may have. Don’t forget to subscribe to our website using your email address to stay up-to-date with our latest posts.
Related links: Install MacOS Mojave On VMware On Windows PC
How to share folders on VirtualBox & Vmware? (Windows-MAC) Step by Step Guide