
: 6 Easy Steps")
Table of Contents
In this article, we will learn How To Install macOS High Sierra on VirtualBox on Windows PC Using ISO in 5 Easy Steps. In our previous guide, we shared: How to install macOS High Sierra on unsupported Mac.
Running macOS High Sierra on a Windows PC might seem impossible, but with the help of virtualization software like VirtualBox, it is entirely possible. macOS High Sierra is the thirteenth release of Apple’s operating system for Macintosh computers, released in 2017. It introduced several new features, including the Apple File System, HEVC video compression, and improvements to Siri and Photos. In this article, we will explore step-by-step instructions on how to install macOS High Sierra on VirtualBox on a Windows PC.
How To Install macOS High Sierra On VirtualBox On Windows
Here is a summary of the steps we will go through in this guide:
- Download macOS High Sierra ISO
- Install VirtualBox on Windows PC
- Install & Update VirtualBox Extension
- Create a New Virtual Machine & Customize it
- Run VirtualBox Code via Command Prompt
- Start your Virtual Machine
- Perform a Clean Installation of macOS High Sierra
- Overview
NOTE:
Before we start installing macOS High Sierra on VirtualBox on a Windows PC, make sure that virtualization is enabled on your system. Here is a video tutorial for the same.
Step 1: Download the Required files to Install macOS High Sierra On VirtualBox On Windows (using ISO)
You can find all the required files for this guide here:
Step 1. Download and Install VirtualBox on a Windows PC
Once you have downloaded the Virtualbox from the above links. Double-click on the installation file and proceed with the installation. Here is a video tutorial you can use:
Step 2: Install & Update VirtualBox Extension
As soon as you’ve downloaded the Extension package. Now, follow the steps mentioned in the video above and upgrade the Virtualbox expansion package.
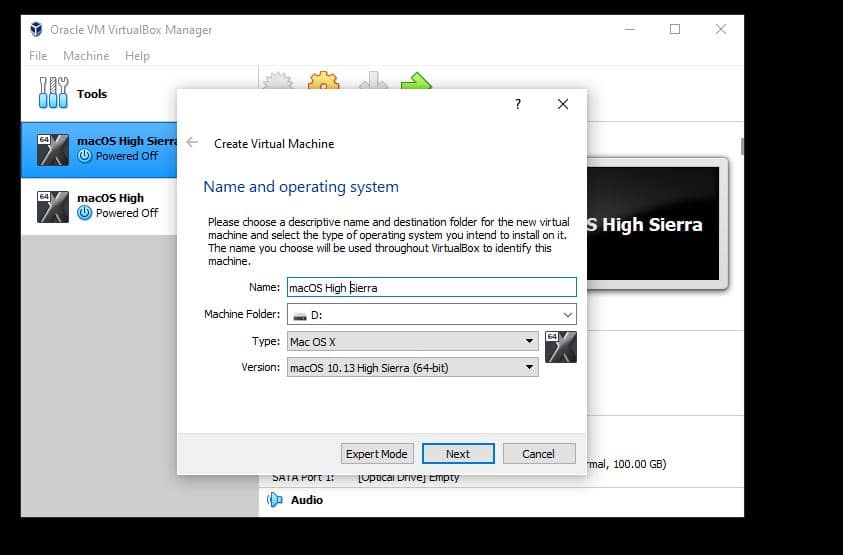
Step 3. Create a New Virtual Machine of macOS High Sierra
To start with, you will need to create a new virtual machine. Therefore, follow each step to easily Install macOS High Sierra on VirtualBox on a Windows PC.
1. Open VirtualBox and click New.
2. Enter the virtual machine name and select the type as Mac OS X also select the suitable version, macOS 10.13 High Sierra (64Bit). Then click on Next.
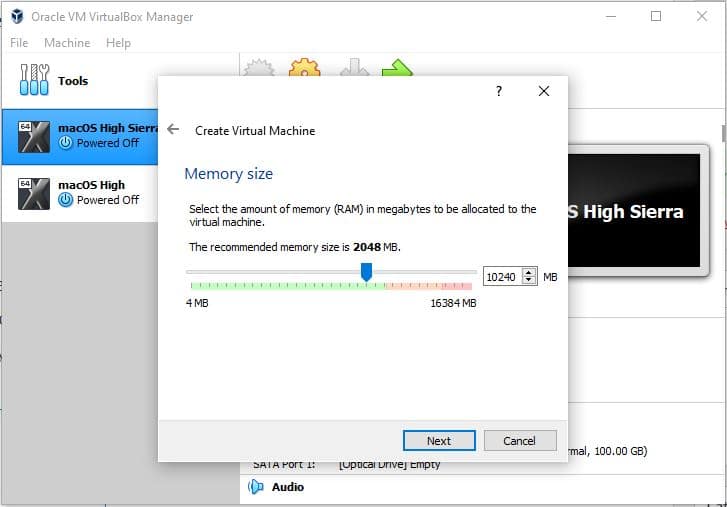
3. Select the Memory size of anything greater than 2GB.
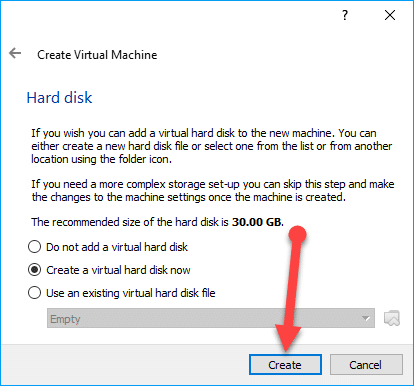
4. Click Create a virtual hard disk now and click Create.
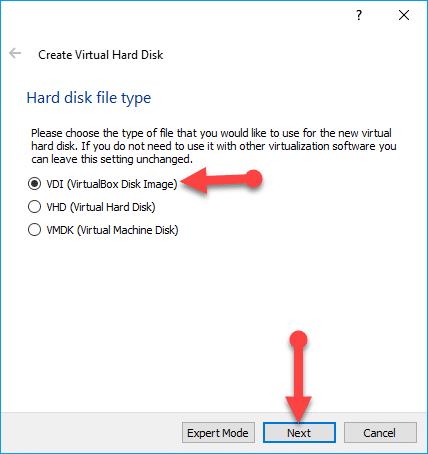
5. Select the hard disk file type as VDI ( Virtual Disk Image). Click Next.
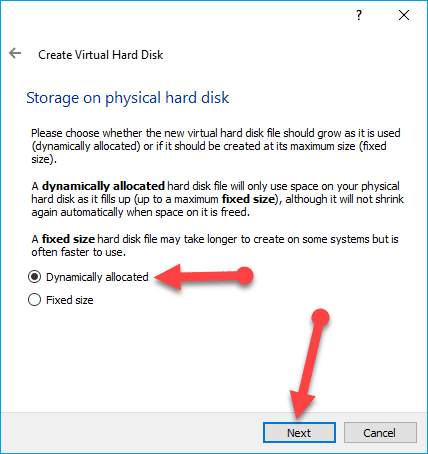
6. Choose Dynamically Allocated. and click Next.
7. Choose the file location and size.
Step 4: Setting the Virtual Machine for macOS High Sierra Installation
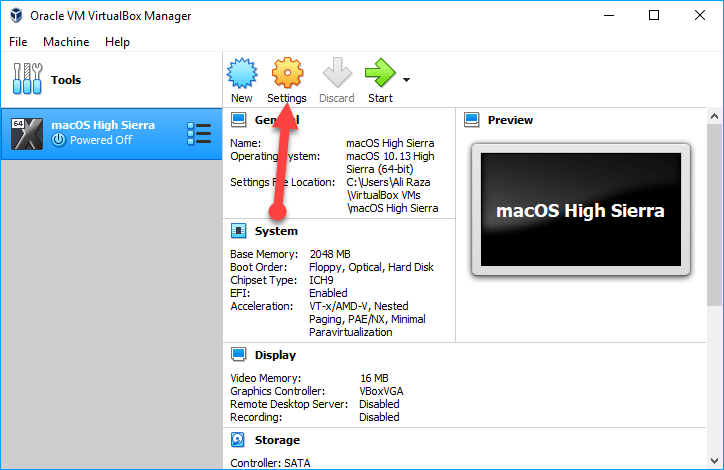
1. Click on Setting, which is located at the center at the top of this VirtualBox.
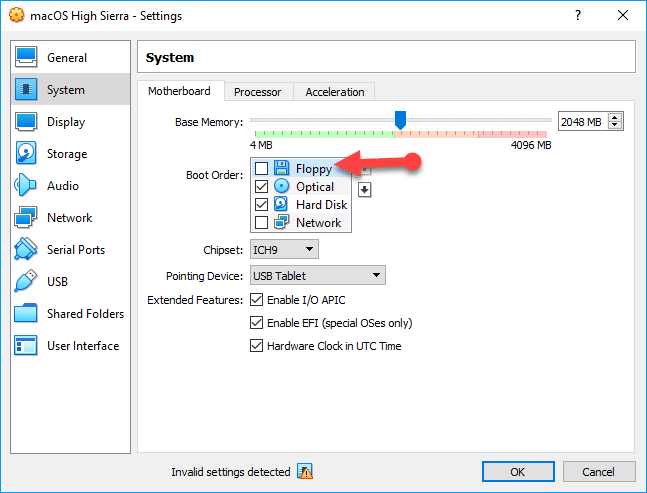
2. Open the System tab on the left of this window, then deselect the Floppy, and don’t touch anything else.
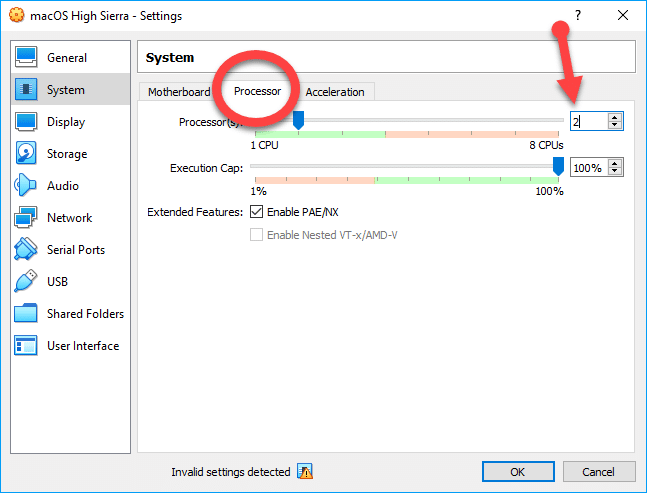
3. Then, go to the Processor in the system, increase the number of processors around, and 2 (recommended 4), the Execution cap should be 100 percent, and enable the PAR/NX.
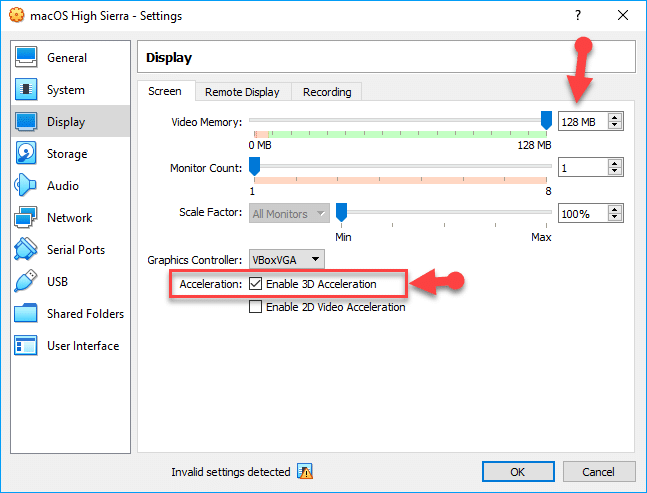
4. Go to Display and select Video Memory, increase the size up to 128 MB, and then enable 3D Acceleration.
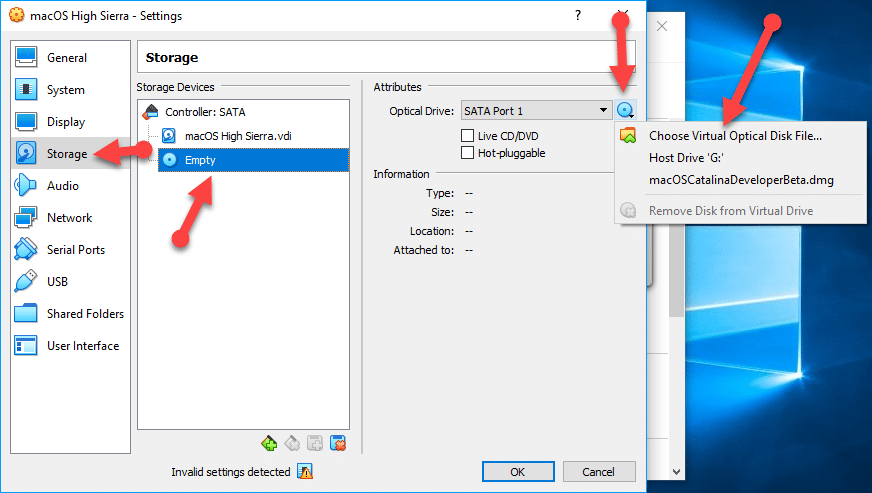
5. After the above steps are all performed, go to the Storage tab. Then, you need to choose Empty and press on the CD icon on the right side. Then click Choose Virtual Optical Disk file. Select the macOS High Sierra ISO file you downloaded in the above section, then click on Open.
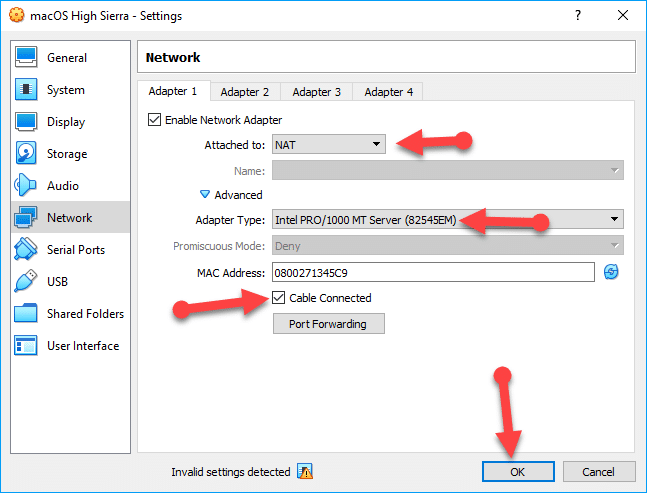
6. Click Network and then personalize the network settings as shown below.
Step 5. Add VirtualBox Commands on CMD
1. Open the Virtualbox codes file that you downloaded above using Notepad. Now, replace the VM Title with the actual Virtual machine name. Once done, press ctrl+A to select the entire set of codes and then press Ctrl+C to copy them.

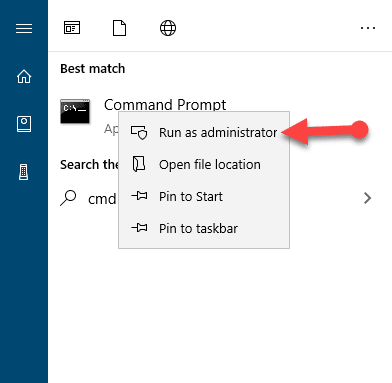
2. Open Command Prompt as Administrator. You can press Windows+R and type CMD. Right-click on CMD and click Run as administrator.
3. Now, paste the codes using ctrl+V.
For more supported display resolution on VirtualBox and an in-depth guide, see fix macOS display resolution on VirtualBox.
Significant Note: We highly recommend Closing the VirtualBox app before implementing the code. If you do not do it, then your virtual machine may not work as desired.
If you are somehow stuck here, try executing one of the following commands on CMD-
VBoxManage modifyvm “YOUR MACHINE” –CPU-profile “Intel Xeon X5482 3.20GHz”
if you are still stuck on start/end random-seed, change the last line with!
VBoxManage modifyvm “YOUR MACHINE” –cpu-profile “Intel Xeon X5482 3.20GHz”
VBoxManage modifyvm “YOUR MACHINE” –CPU-profile “Intel Core i7-2635QM”
VBoxManage modifyvm “YOUR MACHINE” –CPU-profile “Intel Core i7-3960X”
VBoxManage modifyvm “YOUR MACHINE” –CPU-profile “Intel Core i5-3570”
VBoxManage modifyvm “YOUR MACHINE” –CPU-profile “Intel Core i7-5600U”
VBoxManage modifyvm “YOUR MACHINE” –cpu-profile “Intel Core i7-6700K”
NOTE: Before cpu-profile, there are two dashes (- -)
I am sure the process isn’t easy and works for everyone. You might face these common errors when installing macOS X On VirtualBox On Windows- Here is a complete guide to help you fix those errors. Complete Guide To Fix VirtualBox Errors While Installing Mac OS X
Step 6. Setup macOS High Sierra on VirtualBox
1. Start your Virtual Machine. And after that, you will see a black screen with some codes. Wait for the Apple logo to proceed. Once you see the welcome screen of macOS High Sierra, then you’ll be asked to choose your country.
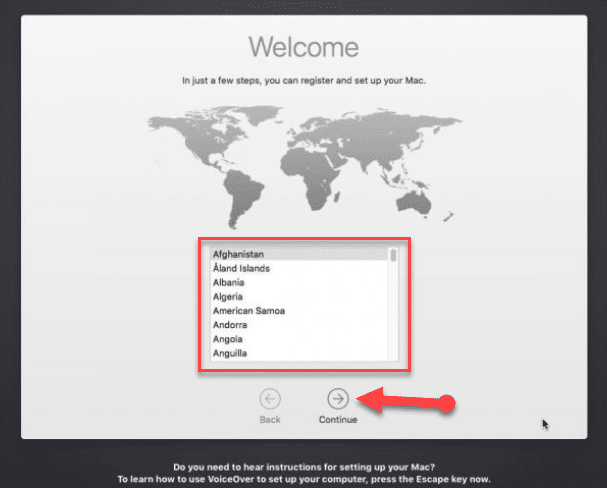
2. Then, you have to select your keyboard and click on ->.

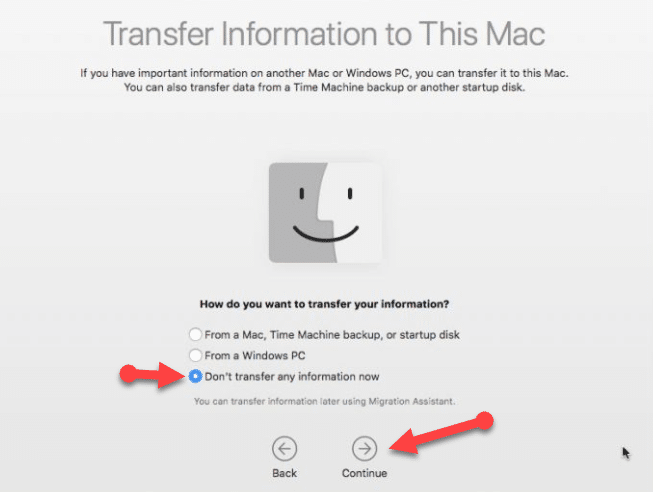
3. Click Continue.
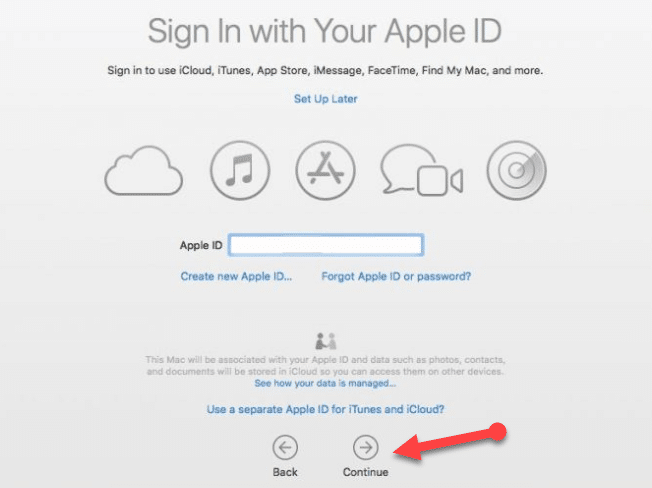
4. Login with your existing Apple ID account or make 1 apple ID if you don’t have one.
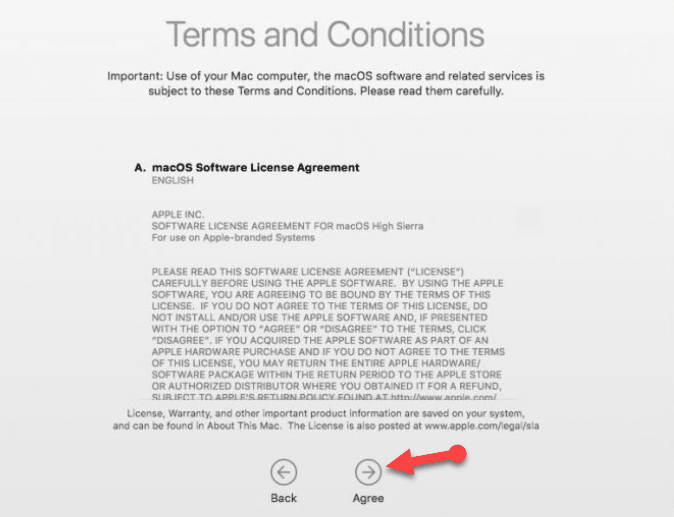
5. Click Agree.
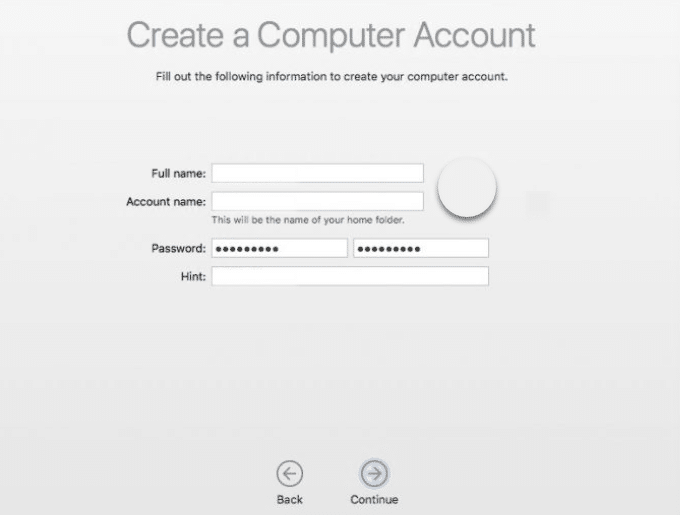
6. Complete the following information to create your computer account. You must provide your Full name, Account Name, Password, and Tip. Subsequently, click on Continue to create a computer account.
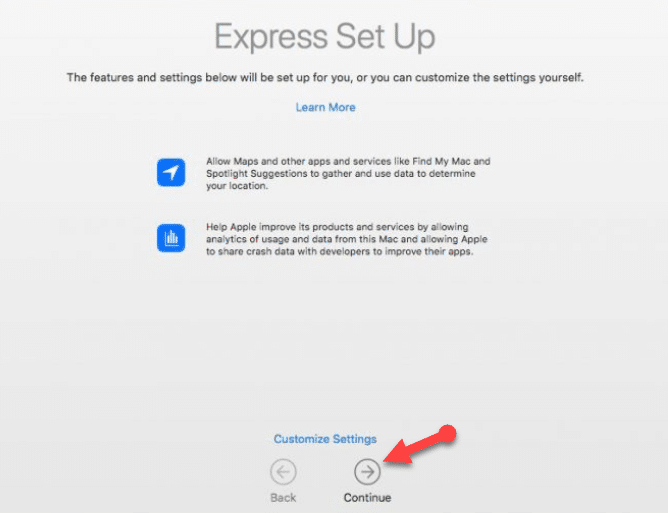
7. Click Continue.
That is it. Congratulations, you have successfully installed macOS High Sierra on Virtualbox on Windows.
How to Install macOS High Sierra on VirtualBox on Windows PC: Final Words
This concludes the tutorial on installing macOS High Sierra on VirtualBox on a Windows PC. We hope that the steps outlined were helpful and that you are now enjoying using macOS High Sierra as an additional operating system on your Windows machine. If you encountered any difficulties or have any questions, please feel free to leave a comment below. We would also love to hear about your experience using macOS High Sierra on Windows.


14 Comments
Hi. I have tried yours and others ideas to get macOS High Sierra installed on my Windows 10 machine but I can never get past Shell prompt. Nothing loads after that regardless of the ideas I try. Have similar difficulties with VMWare as well.
Could you please send an email to admin@techrechard.com
Just can’t get it to work. It goes into an infinite loop at the beginning of the install process, with dozens of errors, brief display of VirtualBox logo, then back to the errors.
Problem is probably that I get lost at step 4. Which file are you editing to put in the actual name of the mac guest?
I’m on linux (Debian Buster) not Windows. The vbox files are in various dirs in my ~home. If I knew what I was looking for, I’m sure I could find the one you mean.
Also, in my case “run CMD” means run from command line in terminal, right?
Hope you can help. It’d be nice to get this working!
Hi.
I am not sure if this works on Linux as I haven’t tested it there.
uhh hey. when i startup the machine it wont go any further. I am on Windows 7 Home Premium and want some help with my Mac Guest
Can you please share a snapshot?
Hello!
I followed your instructions to install the High Sierra and it worked up the point that the macOS Utilities shows up. I then followed the steps as shown in your Youtube but I did not see the first step of easing the previous install. So I just went to Install macOS and it gave me the error message that the This copy of the install macOS High Sierra application is damaged, and can not be used to install macOS.
Please help what to do.
Thanks.
Did you try using the VMDK file?
You need to change the date in the installation window. Go to utilities. Terminal. And enter Date 0925000017
Ok. After that I see Select a disk to install MacOS, but it’s not view any disk and it’s not possible to continue. Why?
I wonder the writer of this post is looking at the questions people have posted.
There are so many people asking the help in the past 2 to 3 months but no reply from the
techrechard.
Please help.
Thanks.
It’s hell here in India with Covid 19. So took us some time to get back.
Hi, after first boot and selection language appear Utility MacOS, how to continue?
Regards.
Go to disk utility, click on the default hard disk, and erase it. Once erased, select the hard disk again and click Install macOS,