
Table of Contents
Want to install macOS High Sierra, but your Mac is not on the supported list? In this detailed guide, we will learn how to install macOS High Sierra on unsupported Mac models. Installing macOS High Sierra on unsupported Mac can be achieved with macOS High Sierra Patcher file. We have a detailed guide to help install macOS High Sierra on unsupported MAC.
You can also read: How to install macOS Big Sur on unsupported Mac? 5 Easy Steps with Patch file and How to Install macOS Catalina on Unsupported Mac: 9 Easy Steps
This article will help you install macOS High Sierra 10.13.x on your Mac with macOS High Sierra Patcher. The article will be helpful to owners of outdated Mac models but quite workable today.


Also, Mac models owners officially supported by the macOS High Sierra operating system may face the fact that installing the system imposes a new APFS file system, which may be undesirable for the user for various reasons. For example, some owners of Mac Pro 5.1 or Mac Pro 4.1 models installing macOS High Sierra 10.13.6 (the last build) can install the operating system on the Mac OS Extended (logging) section and not apply Patch.
Which Mac models will support macOS High Sierra?
Early 2008 or newer Mac Pro, Xserve, iMac and MacBook Pro:
- MacPro3,1
- MacPro4,1
- Xserve 2,1
- Xserve 3,1
- iMac8,1
- iMac9,1
- MacBookPro4,1
- MacBookPro5,1
- MacBookPro5,2
- MacBookPro5,3
- MacBookPro5,4
- MacBookPro5,5
End of 2008 release or newer MacBook Air or Aluminum Unibody MacBook:
- MacBookAir 2,1
- MacBook 5,1
Early 2009 release or newer Mac Mini or White MacBook:
- Macmini 3,1
- MacBook 5,2
Which Mac models will not support macOS High Sierra?
Release 2006-2007 all models Mac Pro, iMacs, MacBook Pro and Mac Mini:
- MacPro1,1
- MacPro2,1
- iMac4,1
- iMac5,1
- iMac5,2
- iMac6,1
- iMac7,1 *
- MacBookPro1,1
- MacBookPro2,1
- MacBookPro3,1
- Macmini1,1
- Macmini2,1
The iMac 7.1 of 2007 is compatible if the CPU is upgraded to the T9300 Core 2 Duo (Penryn).
MacBook 2006-2008 models:
- MacBook1,1
- MacBook2,1
- MacBook3,1
- MacBook4,1
2008 MacBook Air:
- MacBookAir 1,1
More on High Sierra incompatibility
Built-in iSight cameras: iSight’s built-in cameras are currently not working correctly on some machines. It’s likely to work but knows before you install it your iSight camera may not work.
Trackpad (MacBook 5.2 only): The trackpad in MacBook 5.2 is not fully supported in High Sierra. Although it works and is entirely usable, High Sierra detects it as a standard mouse, preventing you from changing some trackpad-oriented settings.
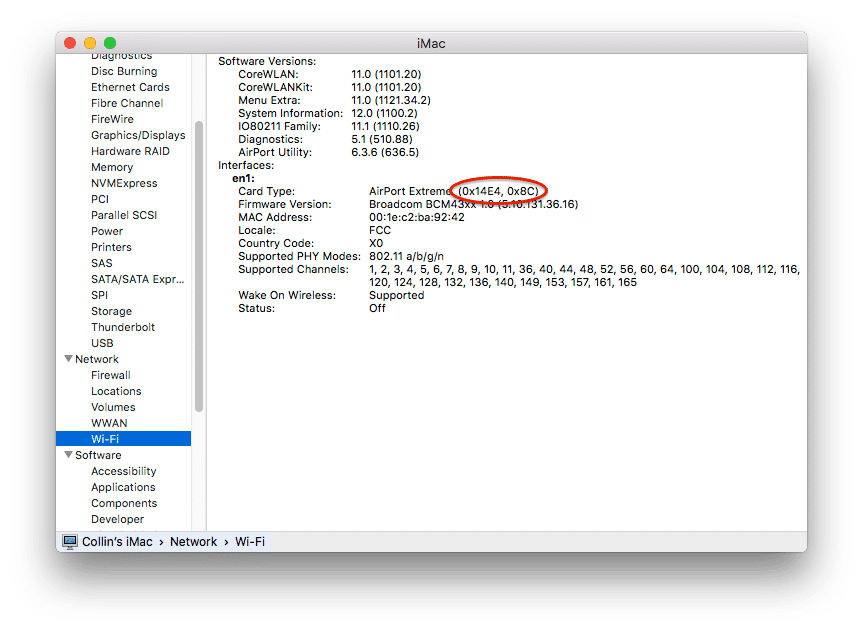
Macs that use the Broadcom BCM4321 (BCM94321) WiFi will not have available WiFi when high Sierra is launched, and support for these modules has been discontinued since macOS Sierra. This usually applies to MacPro3.1, MacBook5,2, MacBookPro4,1, iMac8.1, Macmini3.1, and MacBookAir2.1 computers. Please note that not all of these machines will have an unsupported map. It is just a list of machines known to come with this card in some configurations.
You can find out that you have an unsupported card by opening System Profiler (click on Apple’s Mac’s System Report) and clicking on Wi-Fi in the Network section. Note the value for the map type field.
Below are ID Wi-Fi modules that don’t work in High Sierra:
- (0x14E4, 0x8C)
- (0x14E4, 0x9D)
- (0x14E4, 0x87)
- (0x14E4, 0x88)
- (0x14E4, 0x8B)
- (0x14E4, 0x89)
- (0x14E4, 0x90)
FOR EXAMPLE, any ID not listed above (0x14E4, 0x8D) is a supported card and will work great in High Sierra.


Install macOS High Sierra on unsupported Mac: What you’ll need?
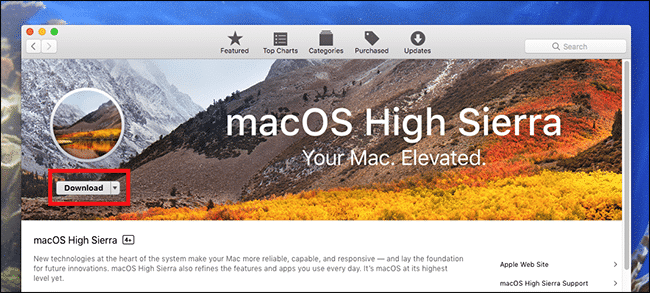
1. Mac OS High Sierra installer file.
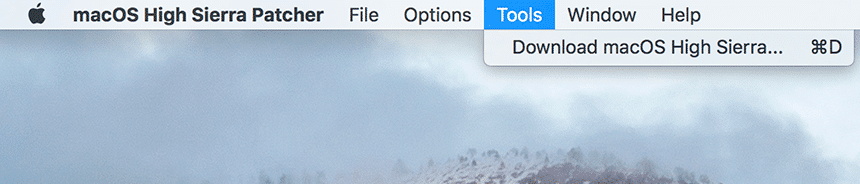
You can download it from the Mac App Store with a high Sierra-enabled computer or a built-in download feature directly from the macOS High Sierra Patcher. Start macOS High Sierra Patcher and select “Tools and Download macOS High Sierra…” As shown in the picture below:

2. USB drive at least 16GB
3. macOS High Sierra Patcher File
Download the latest version: Link
See the list of changes (in English) and download previous versions of the utility from below:
- 1.0.1.zip
- 1.0.2.zip
- 1.0b1.zip
- 1.1.2.dmg
- 1.1.4.dmg
- 1.1.zip
- 2.0.1.dmg
- 2.0.2.dmg
- 2.1.0.dmg
- 2.1.1.dmg
- 2.1.2.dmg
- 2.1.3.dmg
- 2.1.6.dmg
- 2.1.7.dmg
- 2.1.9.dmg
- 2.2.0.dmg
- 2.2.1.dmg
- 2.2.2.dmg
- 2.2.3.dmg
- 2.2.4.dmg
- 2.2.5.dmg
- 2.2.6.dmg
- 2.3.0.dmg
- 2.3.1.dmg
- 2.3.2.dmg
- 2.3.3.dmg
- 2.3.4.dmg
- 2.3.5.dmg
- 2.3.6.dmg
- 2.4.0.dmg
- 2.5.0.dmg
- 2.5.1.dmg
- 2.5.2.dmg
- 2.5.3.dmg
- 2.5.4.dmg
- 2.5.5.dmg
- 2.6.0.dmg
- 2.6.1.dmg
- 2.6.2.dmg
How to install macOS High Sierra on unsupported Mac? 5 Easy Steps with Patch file
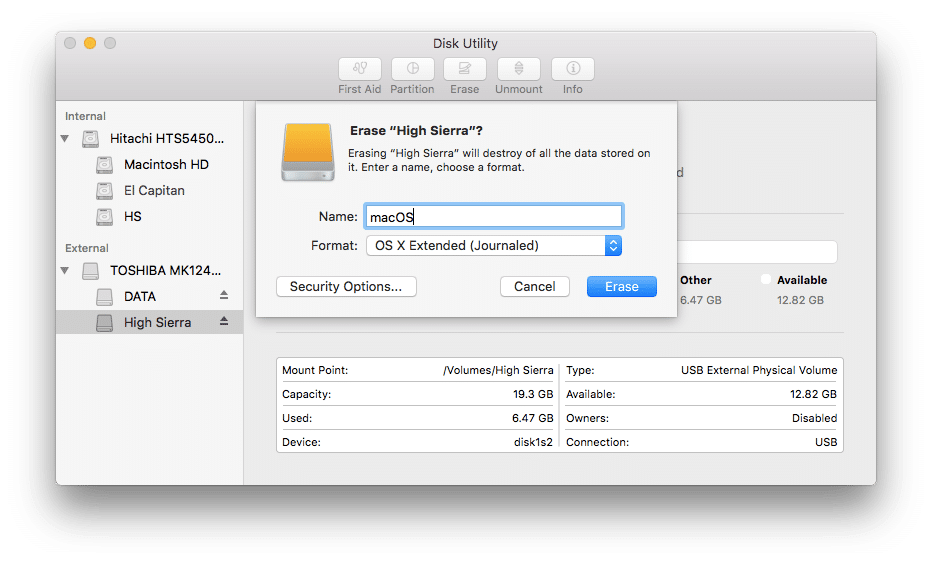
1. Insert your USB drive (remember at least 16GB), open the disk utility, and format it as OS X Extended (Journaled). For reference, follow the snapshot below:

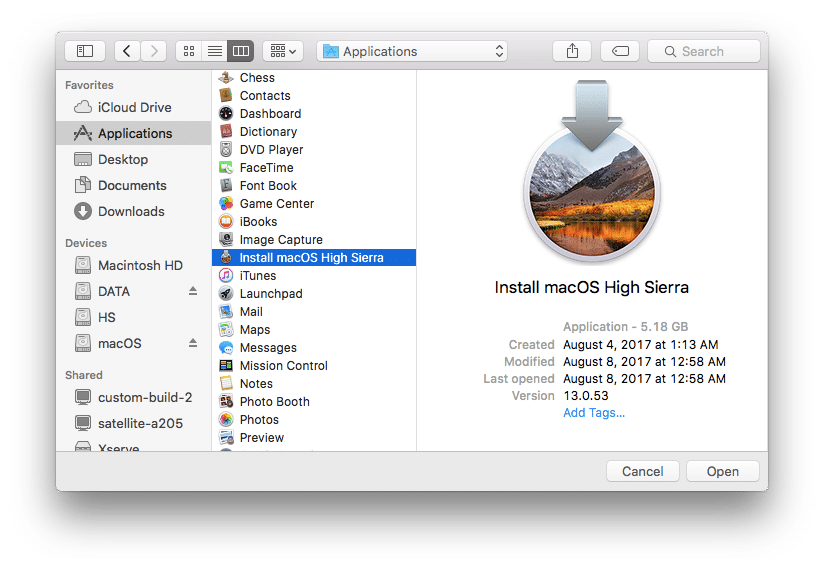
2. Open the previously downloaded “macOS High Sierra Patcher” utility and find your copy of the macOS High Sierra Installer program, usually a macOS installer that is usually used to download into the Applications folder. For reference, follow the snapshot below:

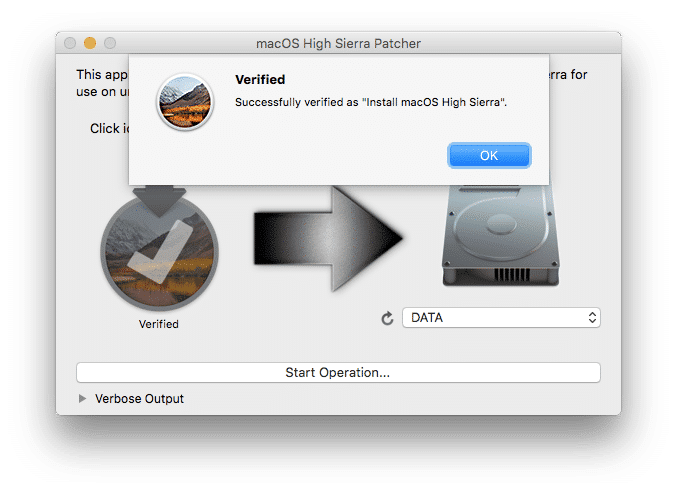
There should be a window that the utility successfully checked the application macOS High Sierra Installer. Click OK. For reference, follow the snapshot below:

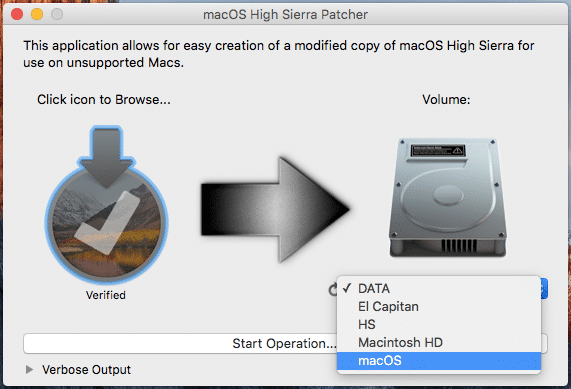
3. Then select the USB drive in the drop-down list on the right and press the “Start Operation” wide button. For reference, follow the snapshot below:

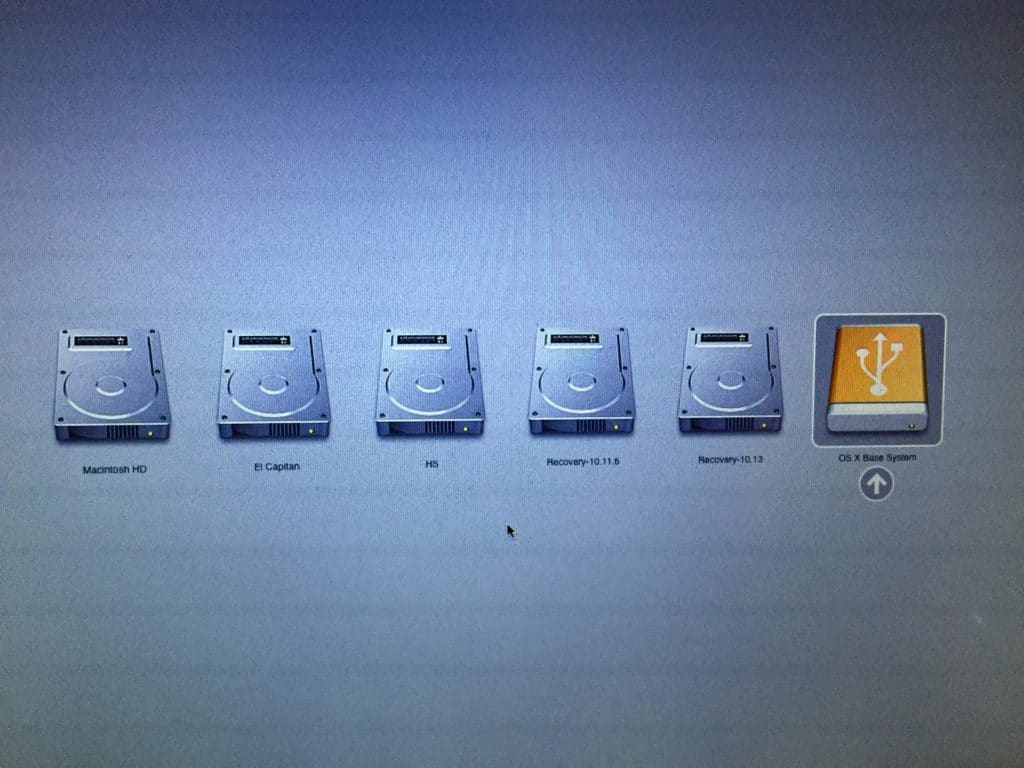
4. When the installation flash drive is ready, it is necessary to load it from it. To do this, turn off the Mac and turn it on again, holding the Option (Alt) button and select the macOS High Sierra. For reference, follow the snapshot below:

Note: Follow steps 5 and 6 if you want to do a clean installation. If you already have experience installing macOS, you can skip these steps and install the High Sierra operating system on that previous version of OS X, after which an on-site update will be performed.
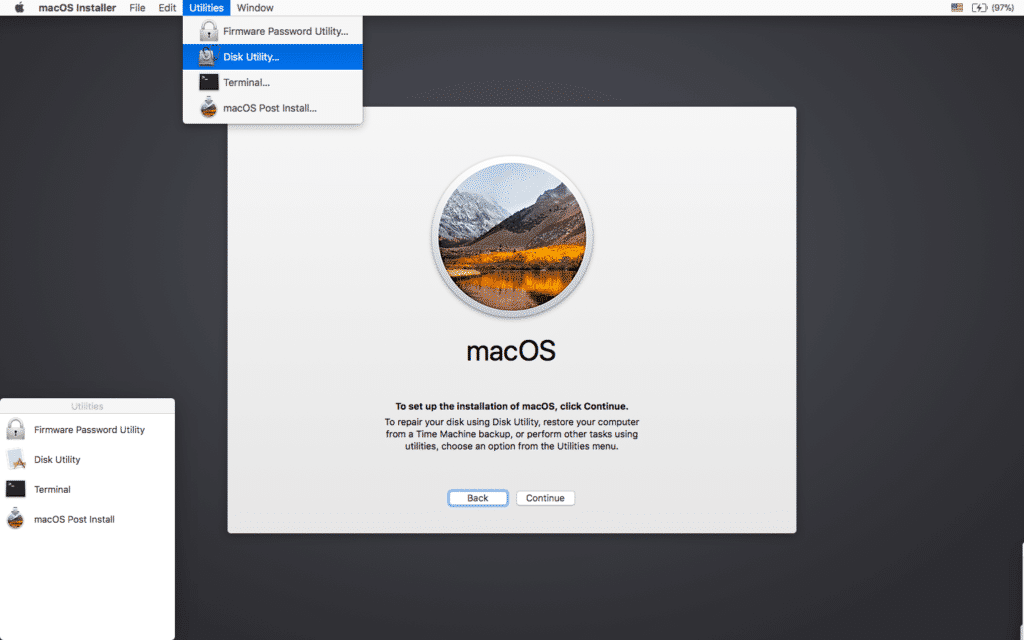
5. Once the installation program is loaded, open the Disk Utility from the utility menu or double-click it in the utility window in the bottom left corner of the screen.
For reference, follow the snapshot below:

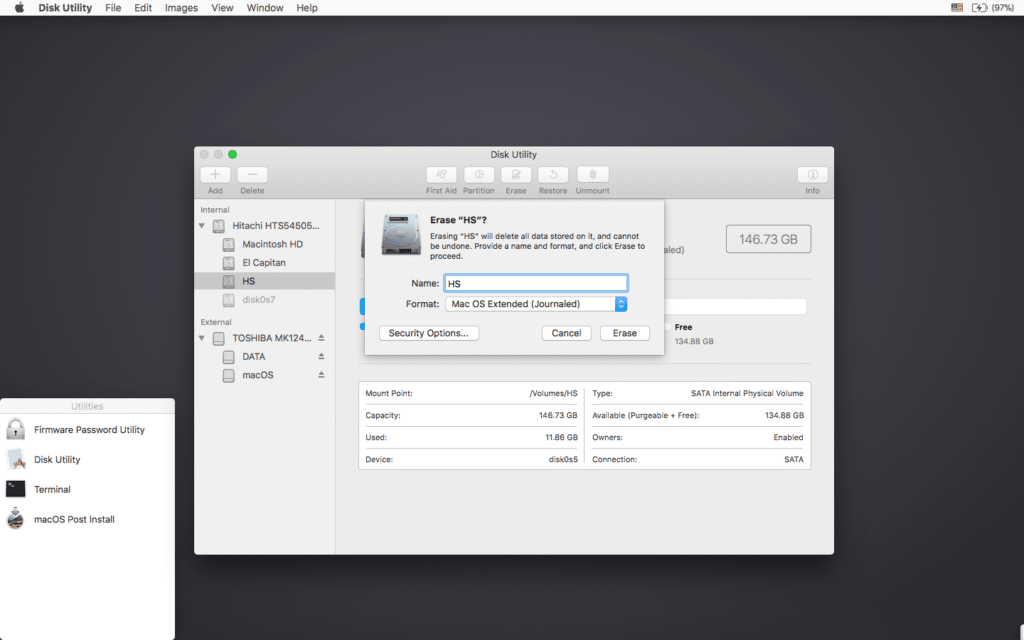
6. Select the drive or section you want to install macOS High Sierra on and click Erase, then select Mac OS Extended (Journaled) or APFS. When you format the entire disk, make sure you select the GUID markup.
- Use APFS for 2009 models and later, will work, as on macOS High Sierra.
- It’s a good idea to use APFS only if you’re installing High Sierra on an SSD drive.
If you have a Mac that didn’t initially support High Sierra (and therefore can’t download from the APFS volume initially), please note:
- If you use APFS, you won’t have a Recovery HD.
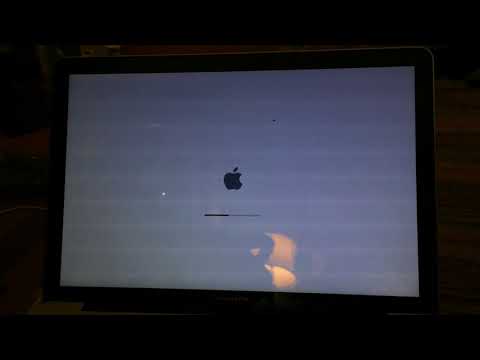
- If you decide to use APFS, the loader will be installed by the utility later, as the built-in software of these unsupported machines does not support the loading from the APFS volumes. This is not exactly a native (native) download method, but it won’t cause any working High Sierra. The demo process of such a download can be seen below.
7. Next, install the MacOS High Sierra as usual on the desired volume.
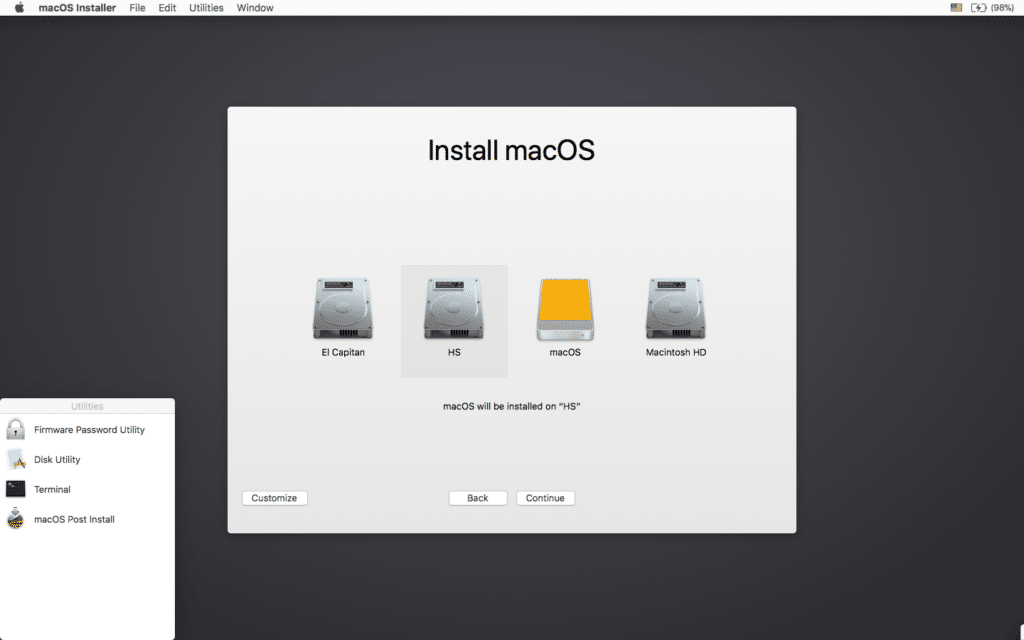
It should be noted that if you install the operating system on an officially supported Mac model for any reason, then at this stage, the installation is complete, and you don’t need to do 8-11 steps. Just reboot your Mac.
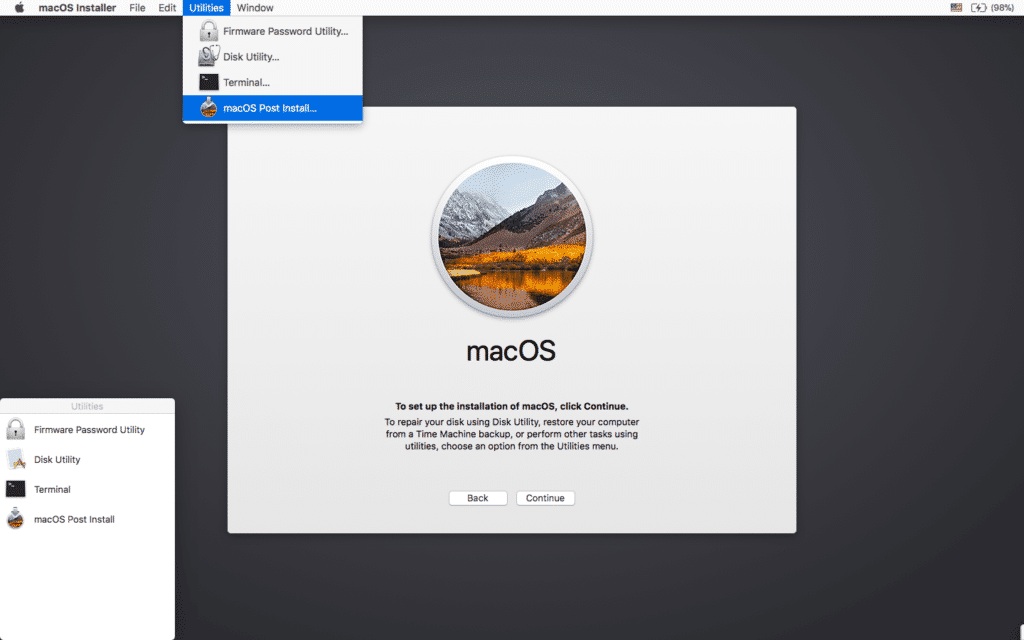
8. Once the installation is complete, restart again by holding the Option (Alt) key and select the macOS High Sierra again. Once downloaded, open the “mac OS Post Install” app. For reference, follow the snapshot below:
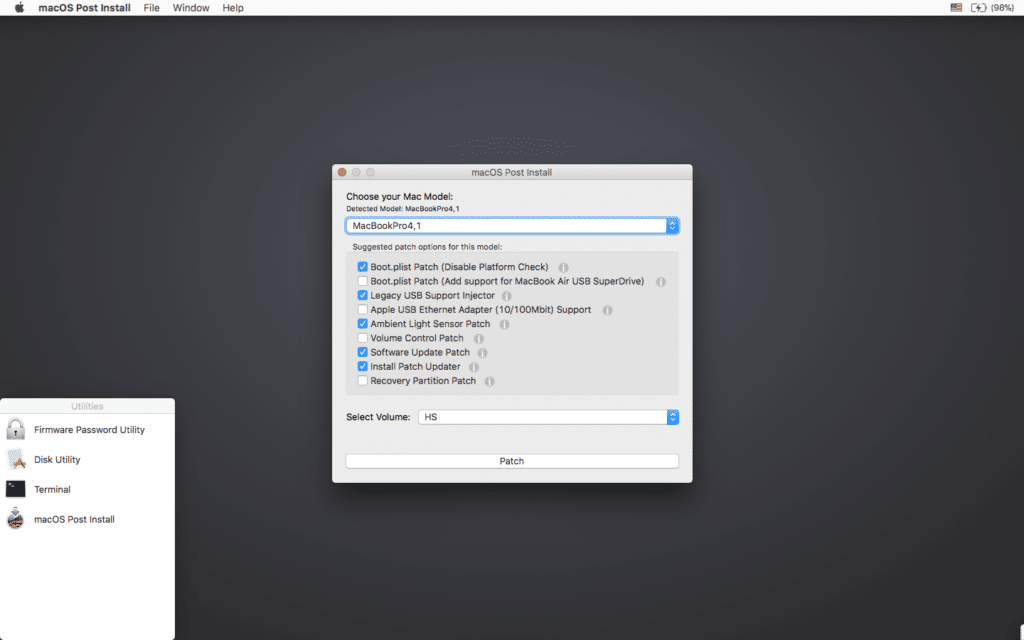
9. You’ll open a window from the top in the “Choose your Mac Model” section of the drop-down list to choose your Mac model. Once you’ve selected the Mac model, the optimal checkboxes (ticks) will be marked automatically for your model. You can also tick other ticks of your choice you don’t need them.
10. At the bottom of the Select Volume section in the drop-down list, select the volume you just installed on Mac OS High Sierra and click “Patch.” When the utility installs all the patches, you select click “Reboot.” The Mac can rearrange the cache within minutes before restarting.
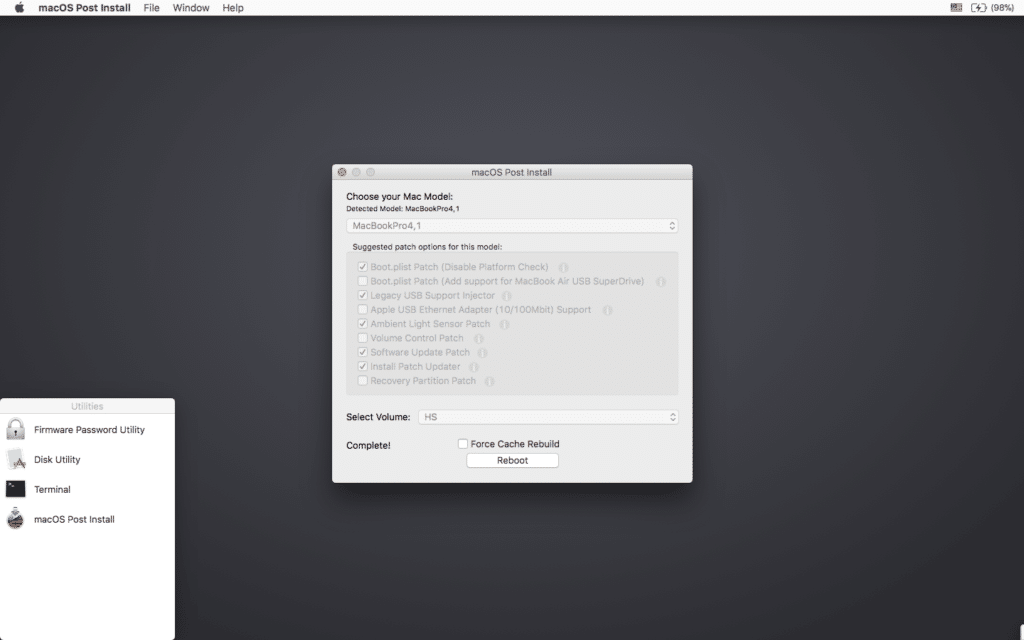
If the system doesn’t work properly after the restart for some reason, download back to the installation drive, re-start “mac OS Post Install” and select “Force Cache Rebuild” before restarting. In most cases, this is not necessary.
11. After the restart, your Mac should be loaded into a fully operational operating system macOS High Sierra.

For more information:
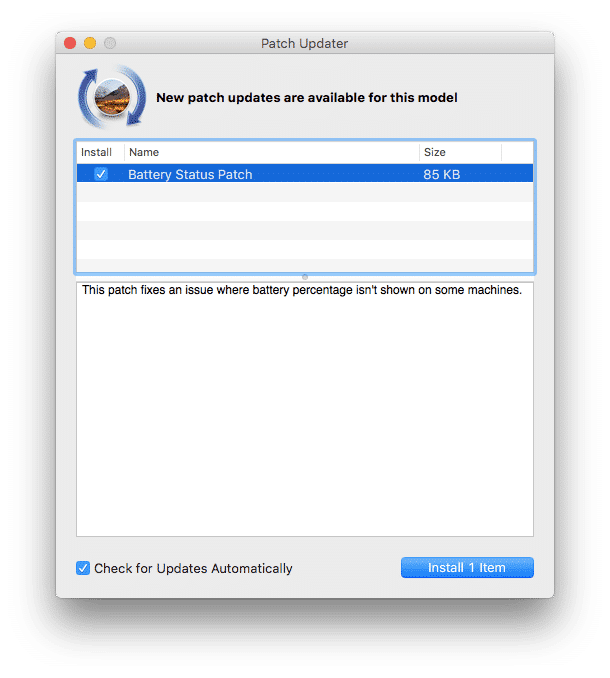
High Sierra installs the “Patch Updater” program in the Application/Utility folder when you install The Mac OS Post Install tool. This program will alert you when new patch updates are available for your machine and ask you to install them. If you don’t have Patch Updater installed, but you want to install it, you can download and install this program, click on the link and unpack the archive after downloading it.

Reinstalling patches:
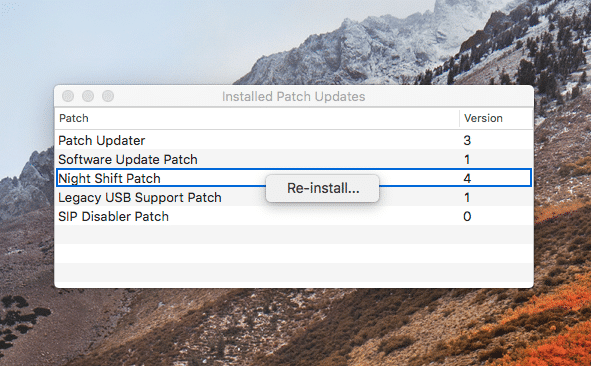
During the macOS High Sierra update, some of our fixes may be overwritten. You can reinstall these fixes with a click to update the patches. To do this, open the Patch Updater app and select “View Installed Updates” or use the “View and Show Installed Updates” menu in the menu line.
To re-install one of the patches, click the right button on it in the list and select “Re-install…”. You can also click “Re-install All” to reinstall all installed fixes at once.

Update:
System updates, such as 10.13.1, should be installed as normal if “Software Update Patch” has been tagged in the mac OS Post Install tool or you installed it later using InstallPatchUpdater. If for some reason, updates don’t show up or are installed incorrectly, you need to reinstall the software update fix with the Patch Updater app.
If the system doesn’t start properly after the update is installed, you’ll need to download the corrected install volume and re-start the fix after installing it on the High Sierra volume. Make sure you choose “Force Cache Rebuild” before the reboot.


How to install macOS High Sierra on unsupported Mac: FAQs
I’VE SUCCESSFULLY CREATED A USB DRIVE, BUT WHEN DOWNLOADED, THE RUN INDICATOR FREEZES HALFWAY.
Check out your copy of the Installation mac OS High Sierra installation. Download the latest version of the installation of the operating system Install mac OS High Sierra. Check out the macOS High Sierra Patcher version. It should be version 1.1 or higher.
HIGH SIERRA PATCHER SAYS “ERROR COPYING FILES…”.
Make sure the USB drive is available for recording. Try reformatting it, or try another USB drive.
PATCHER IS SHOWING ME THE ERROR OF “MOUNTING FAILED”
Make sure the macOS High Sierra is installed correctly. The size should be about 5GB. If you’ve used the “Skip App Verification” option, you’ve probably chosen a macOS High Sierra that doesn’t have the original installer and it doesn’t contain the files you need.
THE HARD DRIVE SECTION DOES NOT APPEAR ON THE SCREEN AT THE TIME OF INSTALLATION.
Make sure FileVault is off. You can manually disable it with the terminal, use the instructions by clicking on the link.
I SEE THE “NO” SYMBOL WHEN I RUN HIGH SIERRA AFTER A SUCCESSFUL INSTALLATION.
Make sure that after installation, you’ve been doing the Mac OS Post Install tool and patching the volume on which the macOS High Sierra is installed, as described above in 8-10 steps.
I SEE THE “NO” SYMBOL WHEN I START WITH A USB DRIVE
Check out the list of supported and unsupported Macs at the top of this page. Make sure your device is on the support list.
I SEE A “NSURL” ERROR MESSAGE WHEN I TRY TO UPDATE YOUR COMPUTER THROUGH THE APP STORE
This is usually the result of an inappropriate set of directory URLs. To fix it, give the command in the “sudo softwareupdate-clear-catalog” terminal and then run Patch Updater.
SAFARI, APP STORE AND/OR MAIL APP STOPPED WORKING AFTER SYSTEM UPDATE
Download and run the Onyxapp, select the Maintenence tab, then click “Run.”
IMPORTANT!!! WHEN YOU TRY TO INSTALL HIGH SIERRA, YOU SEE A MESSAGE SAYING”NO PACKAGES ALLOWED TO INSTALL”
This is due to the incorrect setting of the date and time in the system. To fix this, you need:
1. Open the terminal after downloading from your USB installer to set a date.
2. In the terminal, please command: date 0318125014 and click Enter
Now you can continue installation, and this message will not be displayed.
You can also follow our other guides:
How To Install MacOS High Sierra On VirtualBox On Windows (Using VMDK): 8 Step Ultimate Guide
Download macOS High Sierra ISO For VMware & Virtualbox (Working checked on 2nd Jan, 2020)
Download macOS High Sierra 10.13.6 DMG File
How To Install macOS High Sierra on VirtualBox on Windows PC (Using ISO): 5 Easy Steps
How to share folders on VirtualBox & Vmware? (Windows-MAC) Step by Step Guide
Conclusion: How to install macOS High Sierra on unsupported Mac
I hope this guide on How to install macOS High Sierra on unsupported Mac was useful for you. You can install macOS High Sierra on unsupported Mac by using the macOS High Sierra Patch file. I have shared all the download links above. If you are still facing any issues, you can comment down your query.