

Table of Contents
In this article, we will learn how to macOS Catalina on Linux using the Snap package Sosumi.
Sosumi is a snap package based on the macOS-Simple-KVM project, making it easy to download and install the macOS Catalina on a virtual machine. It comes bundled with qemu-virgil, virtio-vga, and a paravirtual 3D graphics driver. The macOS operating system image is not included but will be downloaded during installation. The macOS Catalina version will be downloaded and installed.
After using Sosumi for a few hours on a laptop with the Ubuntu 20.04 operating system, I can say that the installation takes a long time (almost two hours), and the macOS system was a bit slow but enough to use. Thus, the project may not suit heavy tasks, but it is ideal for testing.
Canonical/Ubuntu’s Alan Pope created the Sosumi snap package. Sosumi snap package makes it easy to install and run macOS on a virtual machine on Debian/Ubuntu, Fedora, and other Linux distributions (with snapd installed, the API for running snap packages) by supplying almost all the tools you need. The source code for the Sosumi package is available on GitHub. If you don’t want to use the snap package, you have an alternative – macOS-Simple-KVM, a set of tools for configuring a macOS Catalina virtual machine in QEMU (KVM).
Preparation: How to Install macOS Catalina on Linux using Sosumi
Before starting the installation of macOS Catalina on Linux, it is worth noting a few important things:
- After installing macOS Catalina on a virtual machine, the total size of the Sosumi folder ( ~/snap/sosumi) on my system is about 31.5 GB, but it may increase when I install additional applications on the macOS Catalina virtual machine.
- Your computer’s processor must support hardware virtualization. For a quick guide to KVM support, please visit. You can also follow the last steps mentioned in this article to enable virtulization from BIOS.
- Intel and AMD processors are supported, but Ivy Bridge (or later) Core and Xeon processors or Ryzen and Threadripper processors (from the macOS-Simple-KVM FAQ) are recommended.
- You can force the QEMU virtual machine to release mouse focus by pressing CTRL+Alt+G.
- A startup script that contains various parameters (such as available virtual machine memory, number of processors, etc.) that can be configured is located at ~/snap/sosumi/common/launch.
How to Install macOS Catalina on a Virtual Machine (QEMU) on Linux Using the Sosumi Snap Package: Step-by-step guide
To install Sosumi, the operating system must install Snap packages. Snapd is available by default on Ubuntu. For other Linux distributions, follow the instructions in the Snapcraft documentation.
Let’s proceed with the installation guide of macOS Catalina on Linux.
1. Install SNAP Package Sosumi:
sudo snap install sosumi --edge
2. Launch Sosumi using Terminal
Launching the terminal is required only once; then, an application shortcut will be created.
If you encounter an error stating that Sosumi/qemu could not start because it is impossible to start X11. To solve the problem, you need to add the user to the KVM group:
sudo usermod -aG kvm $USER
3. After installing the virtual machine and starting it, press Enter to start the macOS Catalina on Linux installation process
You can release mouse focus by pressing CTRL+Alt+G.
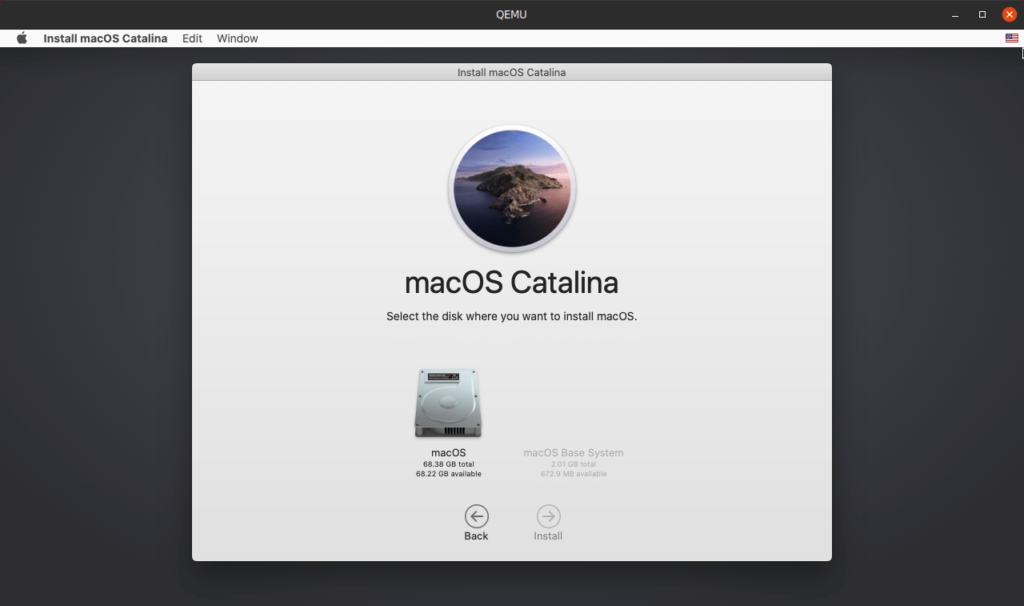
4. Format the hard disk of the macOS Catalina Virtual Machine
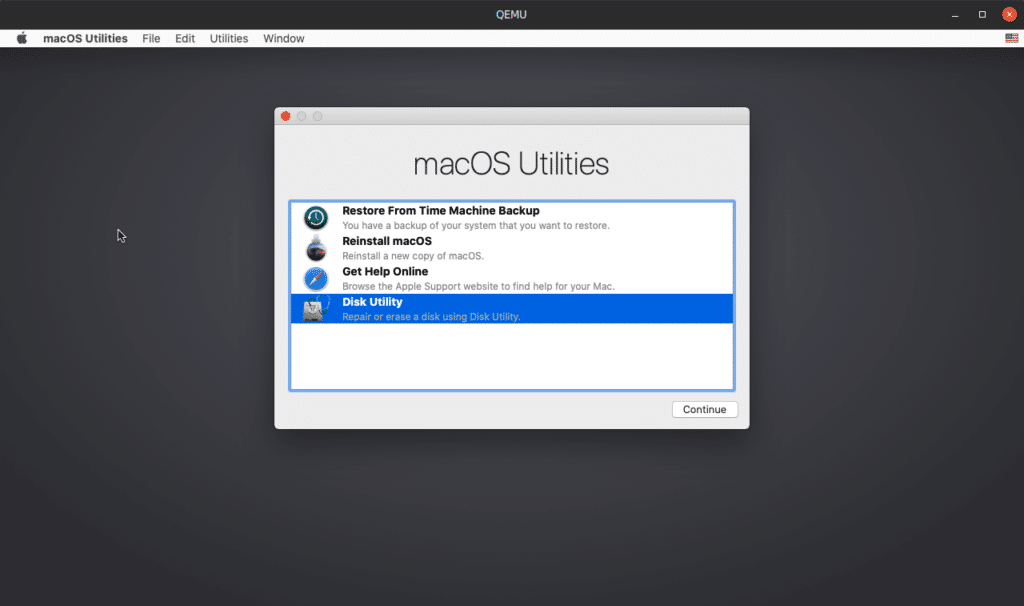
Now you will see the macOS utility window. There are 4 options to choose from. Now, click Disk Utility.
In the Disk Utility dialog box in the pane on the left side, select Apple Inc. Virtio hard drive (the one with a capacity of 68.72 GB). Click Erase and enter a name for the hard drive (for example, macOS). Leave the rest of the settings unchanged.
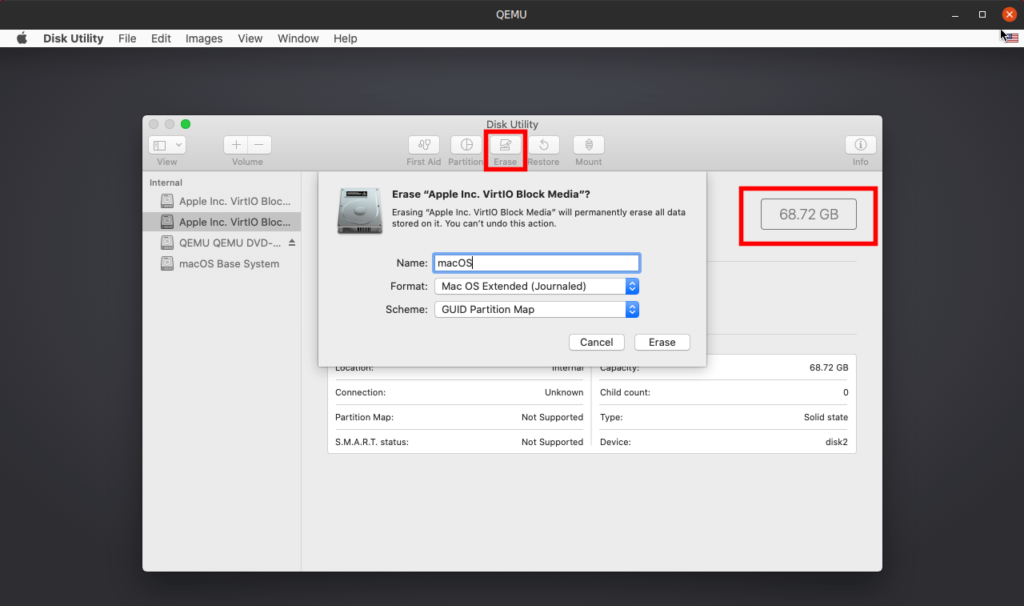
Now click the Erase button to format the partition.
5. Install macOS Catalina on Linux on a Virtual Machine
After you close the Disk Utility tool, you will be returned to the macOS Utility dialog box. In the window, select Reinstall macOS from the list of tools. Click Continue several times, and then a window will be displayed where you must choose the hard drive formatted in the previous step.
Select your hard drive and click Install.
During installation, the virtual machine will automatically reboot several times.
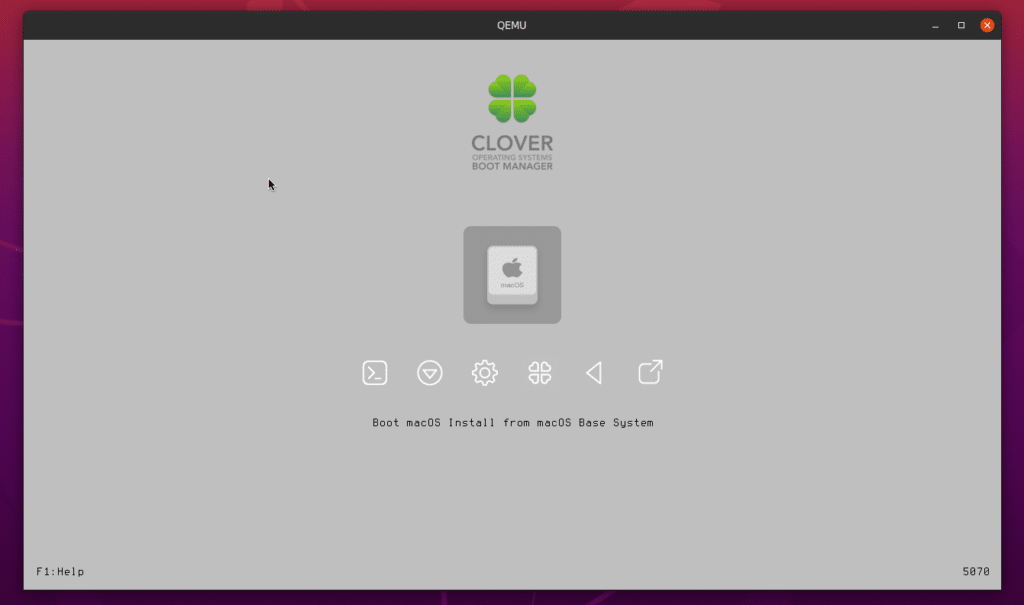
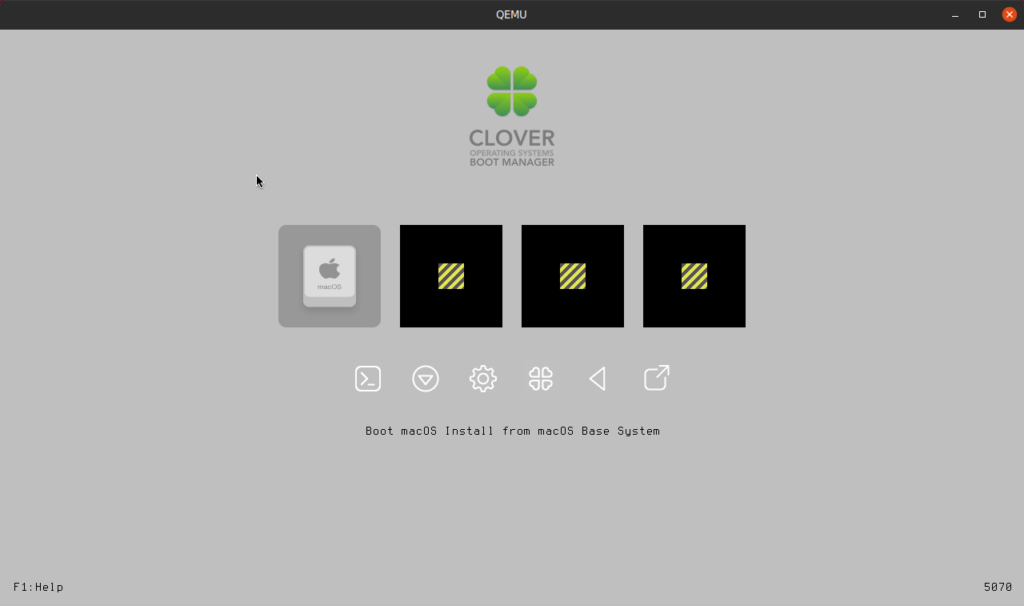
6. Start the macOS Catalina on Linux
After the installation is complete, the macOS virtual machine reboots. Now, you’ll see a few additional options in the Clover boot menu. Use the left/right arrow keys to select the boot macOS option. For example (Boot macOS from macOS, where the second name is the hard drive’s name configured in step 4).
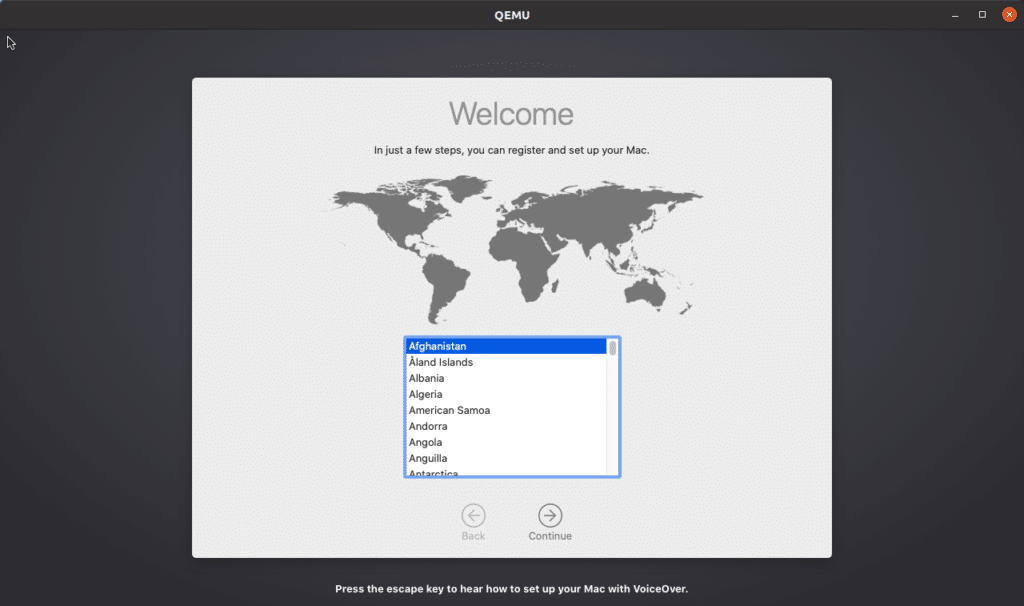
When you first boot to macOS, you must perform the initial setup. Choose your location, and preferred language, sign in with your Apple ID, accept the terms, etc., and create a computer account (username and password).
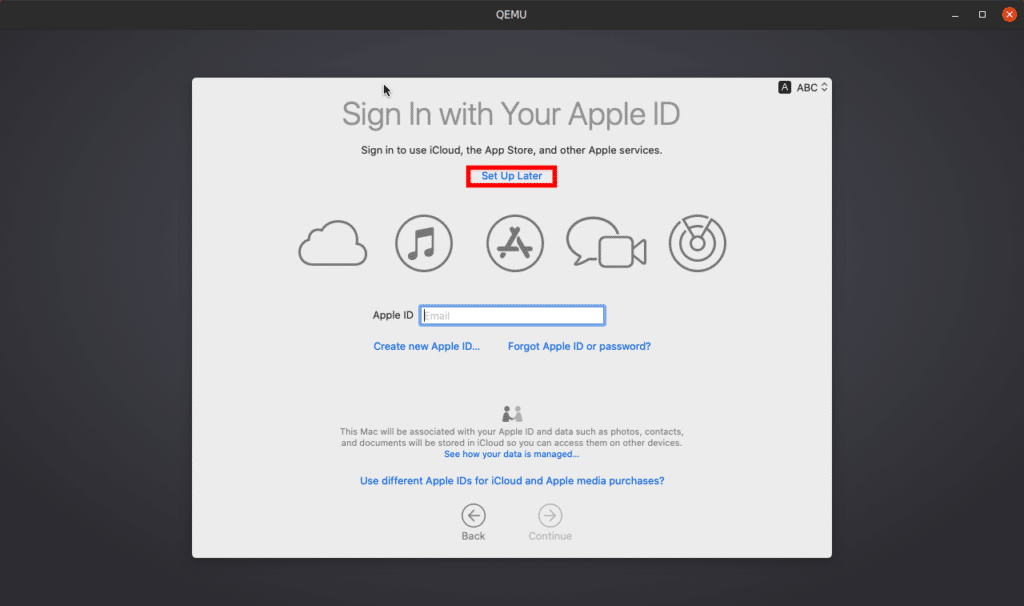
Since I don’t have an Apple ID, I chose Set Up Later.

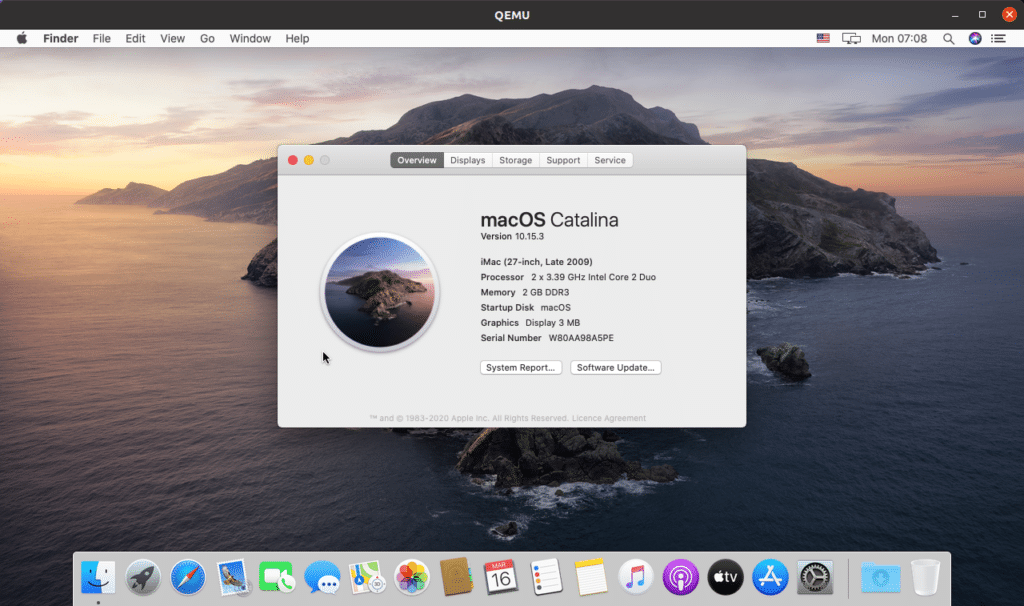
When setup is complete, the macOS Catalina desktop will boot.
macOS Catalina on Linux: Some common problems and their fix
1. Change screen resolution?
Solution: Use this guide: macOS-Simple-KVM/guide-screen-resolution.md at master · foxlet/macOS-Simple-KVM · GitHub
2. Permission issues as in the below screenshot:
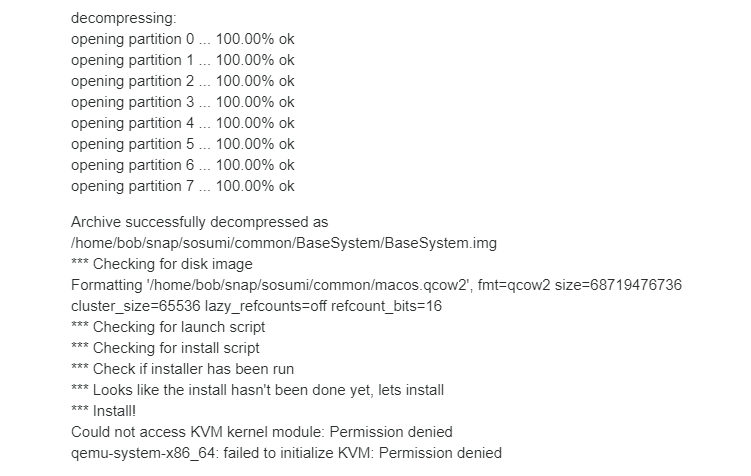
Solution: Use this command to add user to the group:
sudo usermod -aG kvm $USER3. Failed to create a SWAP file error
Solution: I was getting that too, that seems to be an Apple distress signal
related to memory. I changed the memory line in ~/snap/sosumi/common/launch to -m 8G \ and killed and restarted sosumi.
4. Mouse not working
Solution: Use your keyword and arrow keys to go to settings and enable the mouse.
Conclusion: macOS Catalina on Linux
I hope this easy 6-step guide on How to install macOS Catalina on Linux using Sosumi was easy. If you face any issues, please comment below. You can also troubleshoot some issues using these guides.


