

Table of Contents
In this article, we will learn how to install macOS Big Sur on VMware on Windows. You can also use VirtualBox and use this guide: How to Install macOS Big Sur on VirtualBox on Windows
macOS Big Sur is the famous operating system developed by Apple for its Macintosh computers, and it comes with a range of new features and improvements over the previous versions. While macOS Big Sur is designed to run exclusively on Apple hardware, installing and running it on non-Apple computers using virtualization software like VMware is possible. This allows users to experience the latest macOS features on their Windows or Linux machines without purchasing a Mac. In this article, we will explore the steps to install macOS Big Sur on VMware and its benefits.
You can also read: How to Speed Up macOS Big Sur? 7 Easy Methods
How to share folders on VirtualBox & Vmware? (Windows-MAC) Step by Step Guide
Steps to Install macOS Big Sur on VMware on Windows PC
1. Download Required Files
You will require some files to install macOS Big Sur on VMware on Windows PC. The main file is macOS Big Sur ISO Image, which will help VMware set up macOS Big Sur. So, download these files one by one.
Download macOS Big Sur VMDK File
VMware Workstation Latest Version (Download now).
Download macOS Unlocker
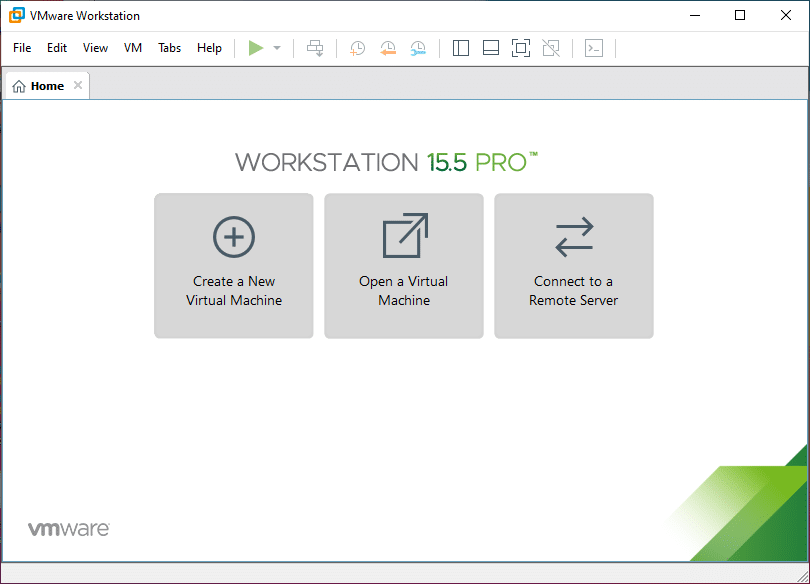
2. Install VMware on Windows
After downloading VMWare, the installation process is simple and similar to other applications. However, it’s important to follow the instructions below carefully to clearly understand how to install VMware.
- Locate the Download folder on your PC, double-click on the installer, and continue with the steps.
3. Install macOS Unlocker on VMware
Installing macOS Unlocker on VMware is critical because it enables the option to install Mac OS X on VMware. This tool is essential for setting up any other macOS version on VMware, making it a valuable asset.
If you haven’t downloaded it, scroll down to the appropriate file section above and download it from there. After downloading, you must extract the WinRAR application because it’s compressed.
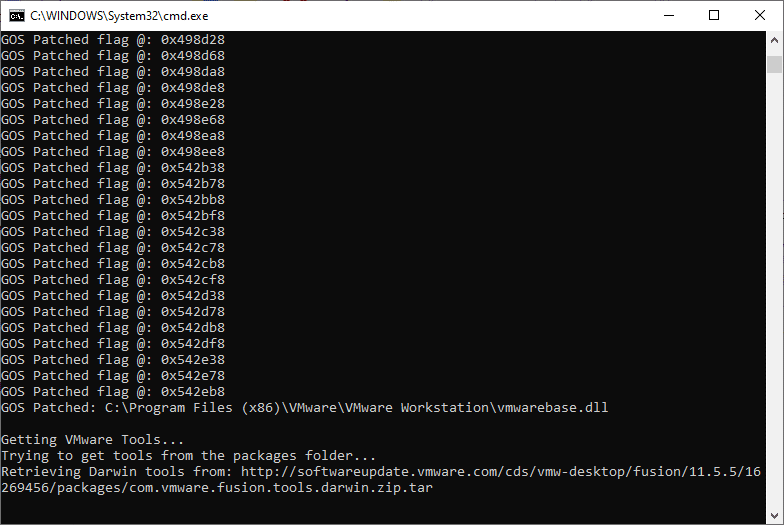
- Open the macOS Unlocker folder that you’ve downloaded. You also must right-click on the Win-Install file and click Run as Administrator.

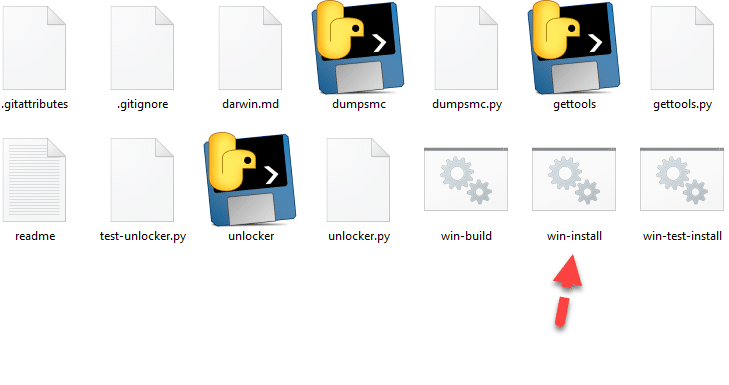
- The installation of the macOS Unlocker will begin and may take a few minutes to complete. Once it is successfully installed, the command prompt window will close.

4. Create a New Virtual Machine for macOS Big Sur
You have installed VMware on your Windows. Now, we must create a specific virtual machine for macOS Big Sur. Follow the instructions below.
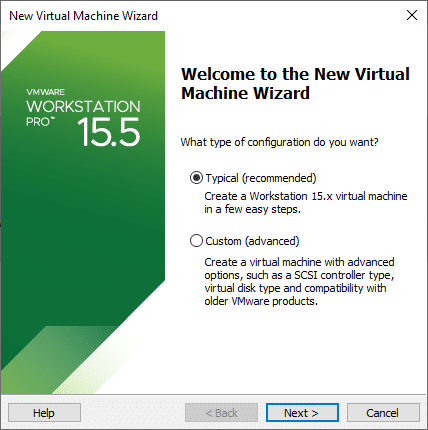
- Open the VMware and click Create a New Virtual Machine.

- On the Welcome screen, you must select Typical (recommended). And click Next.

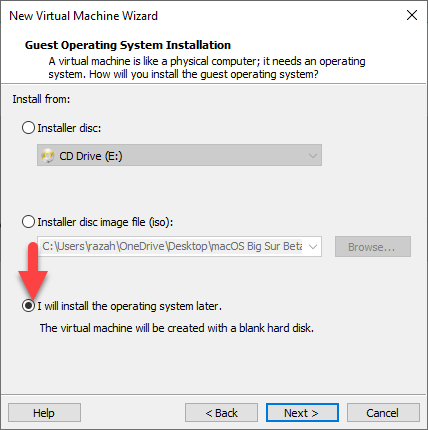
- In the guest operating system setup, you have to pick the third option: I will install the operating system later.
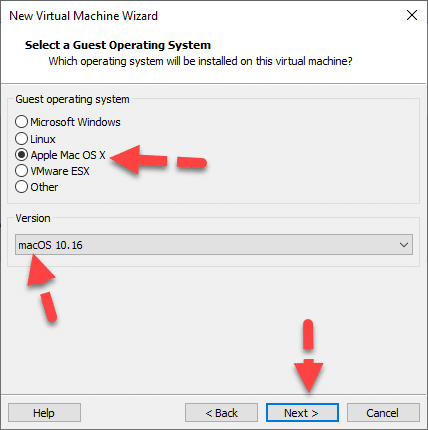
- Select Apple Mac OS X and version to macOS 10.16 and click Next.
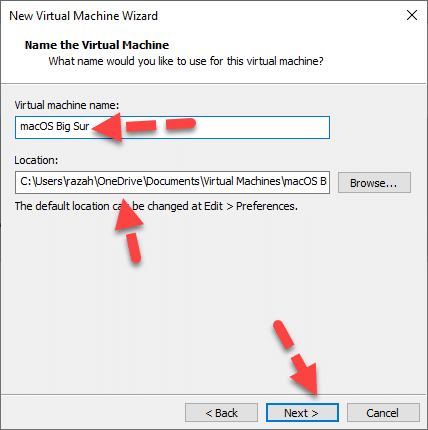
- Name the virtual machine. In my case, I will keep it macOS Big Sur and also specify the location on the harddisk. Click Next.
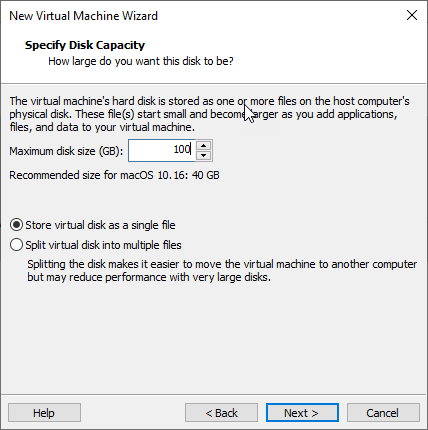
- Select the storage to 100 GB and select Store virtual disk as a single file, then click Next.
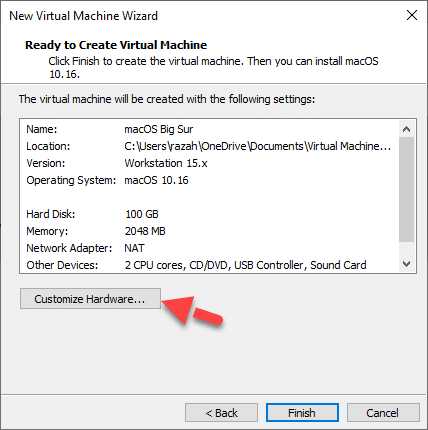
5. Customize Virtual Machine Settings
When you have created the virtual machine, follow the below step to customize the macOS Big Sur configurations.
- You need to click on the Customize hardware option.
- You need to increase the size Memory size to 2GB or 4GB.
- Click on the Processor from the left side, and increase it to 4.


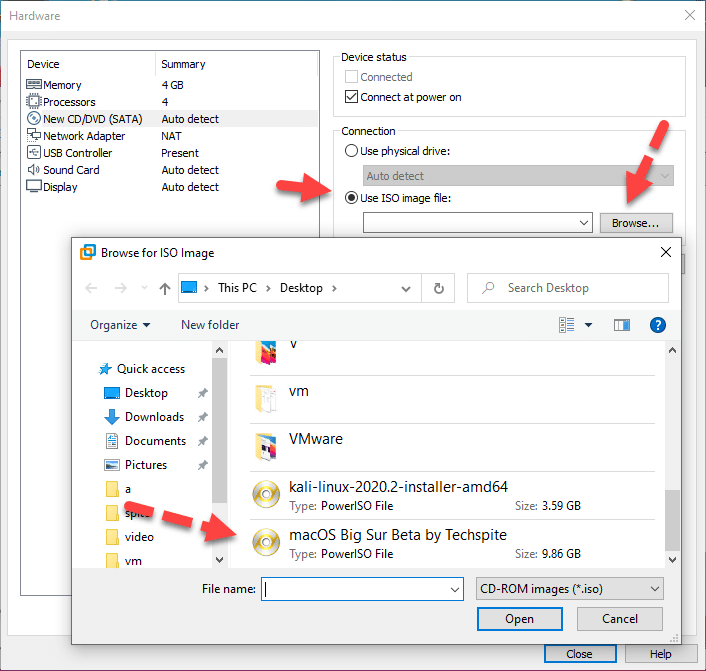
- Select New CD/DVD (SATA), and click Use ISO Image File, then click Browse and add the macOS Big Sur ISO Image that you have downloaded from the above link.
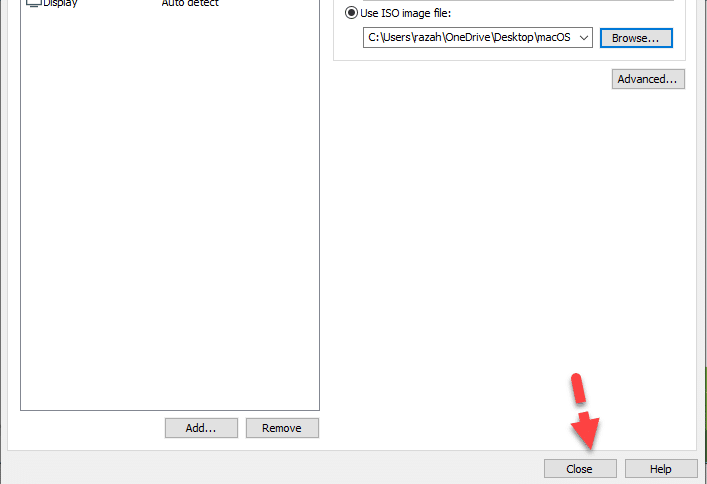
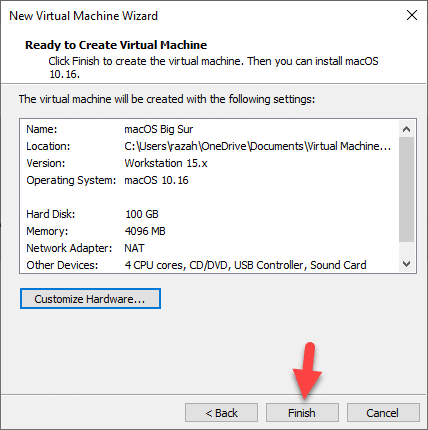
- Once you have done everything correctly, save the changes and click Close.

- You need to click on the Finish button.
6. Edit VMX File of all macOS Big Sur
Once you’ve successfully created a new virtual machine. It is the right time to edit the VMX file of macOS Big Sur. You can find the VMX file at Documents > Virtual machine > macOS Big Sur.
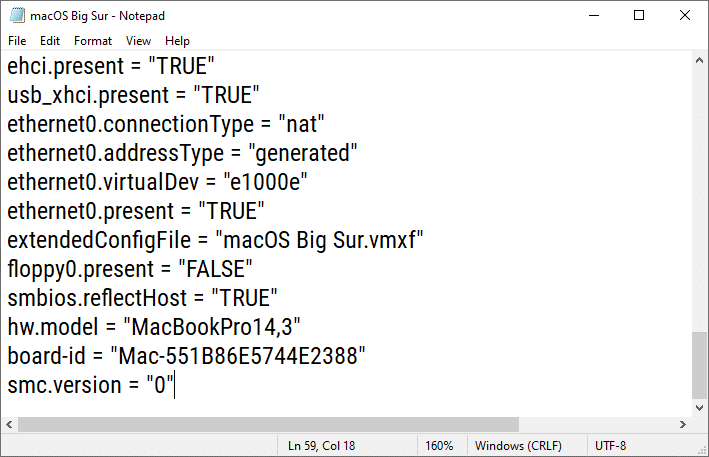
Right-click on the macOS Big Sur.vmx and click open with Notepad or any editor software.


Next, you must copy and paste the codes into the last line. And do not forget to save the Notepad.
smbios.reflectHost = "TRUE"hw.model = "MacBookPro14,3"board-id = "Mac-551B86E5744E2388"smc.version = "0"

7. Start the Virtual Machine
Now, open your VMware again and then click the Start button.
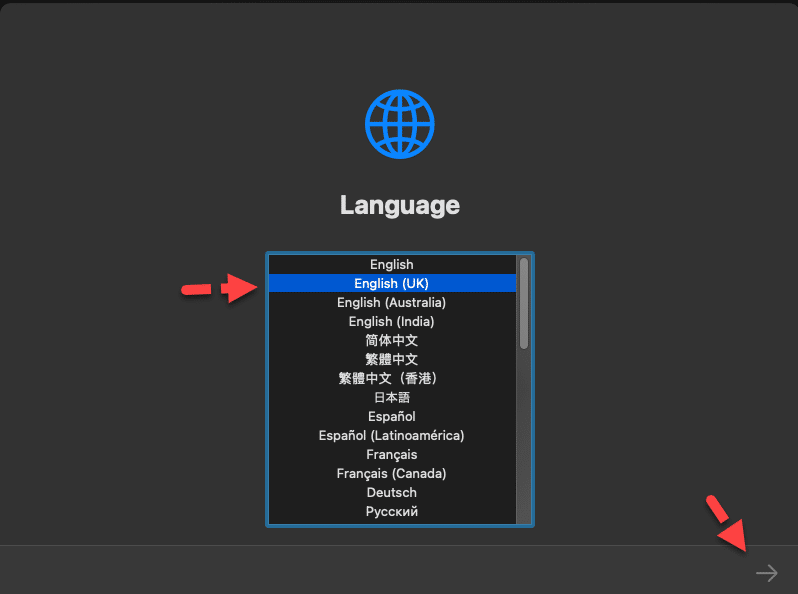
- After the Apple logo, you must choose the language you want to use in macOS Big Sur.

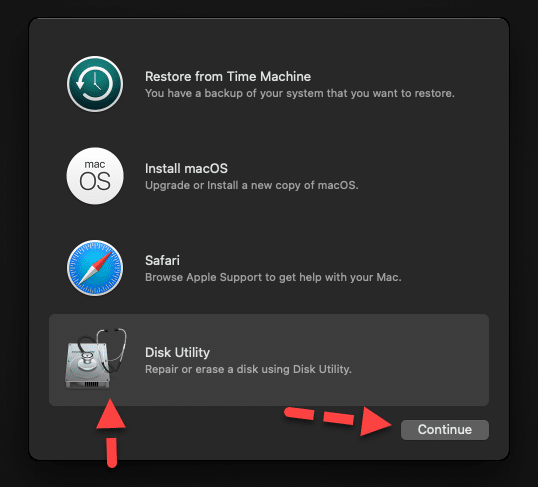
- Click Disk Utility and click Continue.

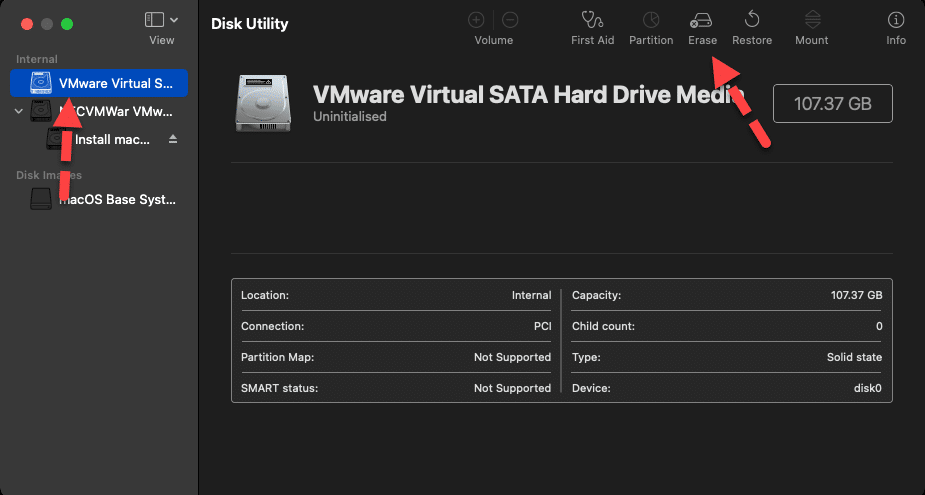
- You have to select the virtual disk, which is VMware Virtual System, and click on the Erase in the top menu.

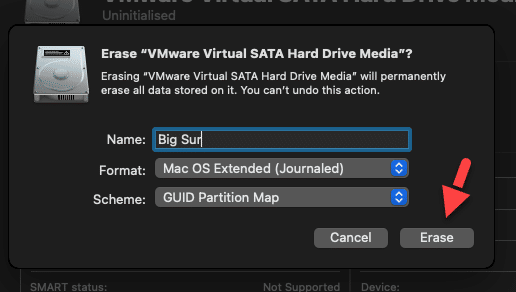
- Give a name to the disk and finally Click Erase.

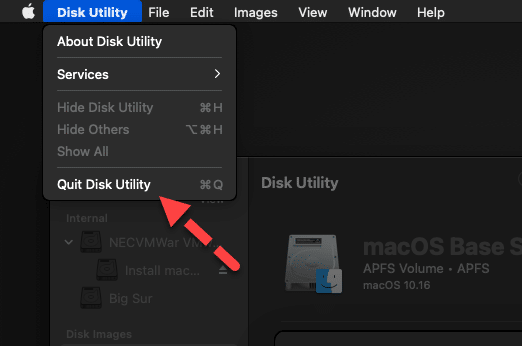
- Once it is erased, you need to quit the disc utility and go ahead.

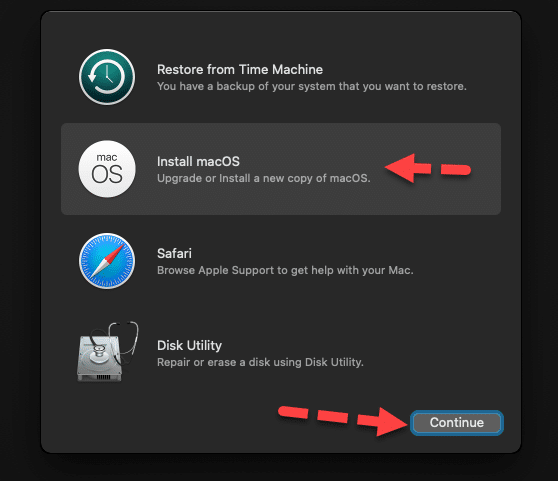
- When you’re back to recovery mode, you have to click on Install macOS and click on Continue.

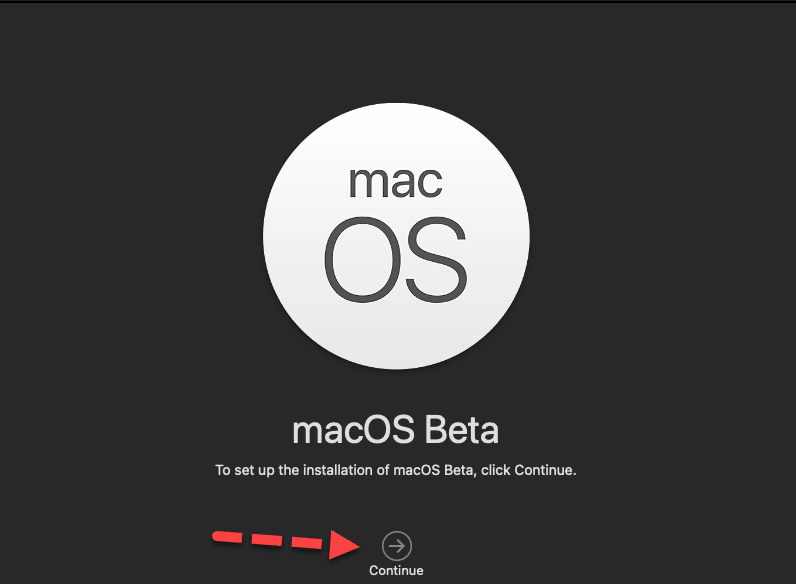
- Click Continue to go 1 step ahead.

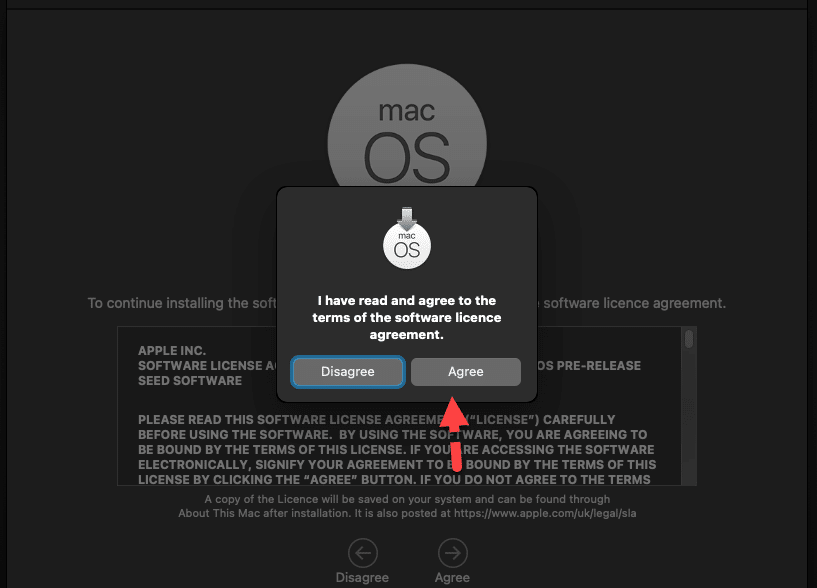
- Accept the terms and conditions of macOS Big Sur and Click Agree.

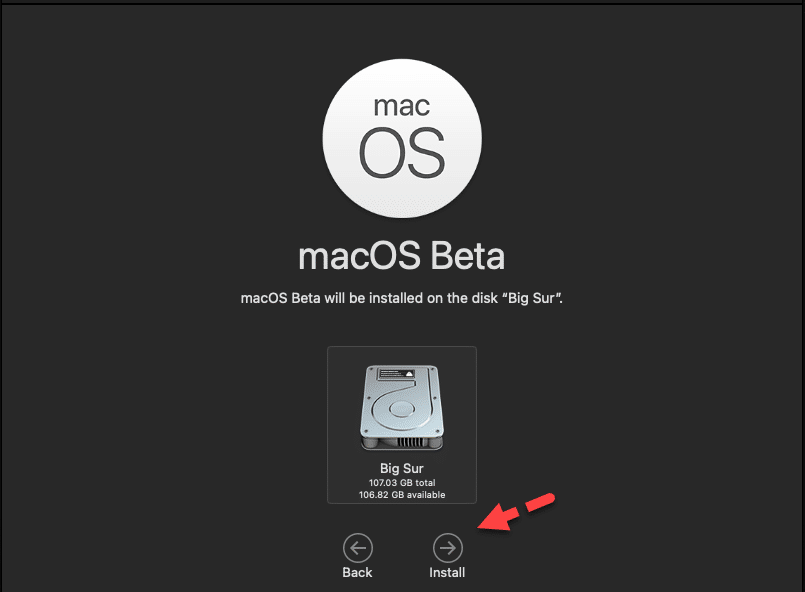
- Then, you must select the hard disk on which you wish to install macOS Big Sur. It is precisely the same hard disk that we have erased before. Anyhow, after it is selected, then click Install.

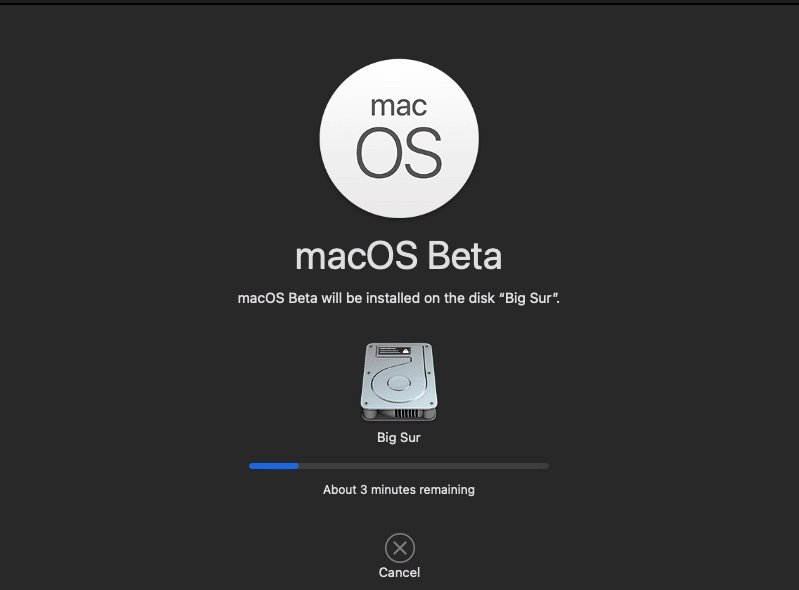
- The setup process will now start, which will restart several times. It’ll take about 30 minutes or longer than that. You don’t need to do anything else, so be patient and wait for the installation to be complete.

8. Clean Installation of macOS Big Sur on VMware
You can now proceed with the simple installation of macOS Big Sur on VMWare. The steps are elementary and straightforward.
You can also read: How to share folders on VirtualBox & Vmware? (Windows-MAC) Step by Step Guide
Install macOS Big Sur on VMware on Windows: Final Words.
This has been a comprehensive, step-by-step guide on how to install macOS Big Sur on VMware on a Windows PC. Once you’ve completed the installation, you can utilize all the features of macOS Big Sur. You shouldn’t encounter any issues if you follow all the steps correctly. However, if you experience any difficulties, please don’t hesitate to leave comments in the section below. We welcome your feedback and suggestions and will happily address any concerns.

You can also read: How to Speed Up macOS Big Sur? 7 Easy Methods