

Table of Contents
Advanced Mac users may appreciate using Homebrew, which greatly simplifies the process of installing command-line software and tools on a Mac.
These days, you can install your favorite command-line tools on Mac with a single command. For instance, if you want to get cask, htop, wget, nmap, etc installed right away for easy use in the terminal then simply type “brew install”.
This is aimed at more technically savvy Mac users who spend a lot of time at the command line. While there’s no particular issue for novice users installing Homebrew on their Mac, the odds of novices finding it useful are slim, unless they intend to learn command-line argument.
On the other hand, power users and those happy living inside a terminal environment will find Homebrew to be an obvious choice.
Requirements for installing Homebrew on Mac OS
There are certain requirements for installing Homebrew on a Mac:
- A Mac running Mac OS X 10.10 or later, though earlier versions are sort of supported
- You need to install either the CLI tools on their own or by using Xcode on macOS. Here is the guide you can use- How to Install Command Line Tools in Mac OS X (Without Xcode)
- Knowledge of the command line and using bash or zsh.
If you are interested in installing Homebrew and meet those requirements, then the rest of the installation process is just as straightforward.
How to Install Homebrew on Mac OS
Installing Homebrew is really easy. You can follow our easy guide that applies to all versions of Mac OS, or you can watch the video that walks you through it.
1. Type “Terminal” into Spotlight or on the macOS Launchpad or Spotlight menu, then double-click the “Terminal.app” application.
2. Enter the following commands:
For macOS Monterey, macOS Catalina, macOS Mojave, and macOS Big Sur:
/bin/bash -c "$(curl -fsSL https://raw.githubusercontent.com/Homebrew/install/master/install.sh)"
For macOS High Sierra, Sierra, El Capitan, and earlier:
/usr/bin/ruby -e "$(curl -fsSL https://raw.githubusercontent.com/Homebrew/install/master/install)"

3. Hit Enter where necessary. If you want to cancel it anytime, press ESC.
4. Please enter the administrator password to begin the installation.
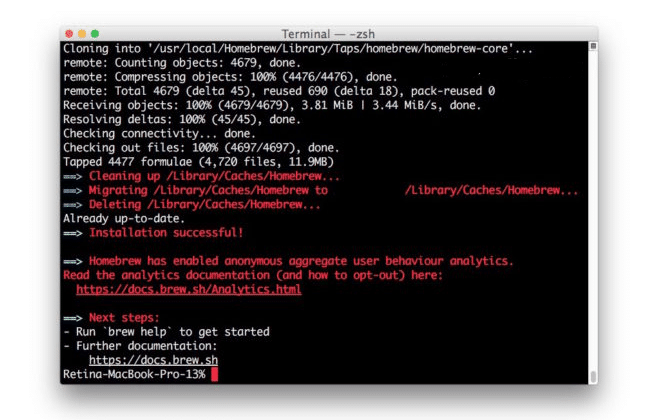
The installation process will take a while and it’s important that you have a steady internet connection and enough processing power for your Mac to download the necessary installation packages. The script will automatically install all of these packages without any input from you.
You should see an installation successful message now that your software is installed.
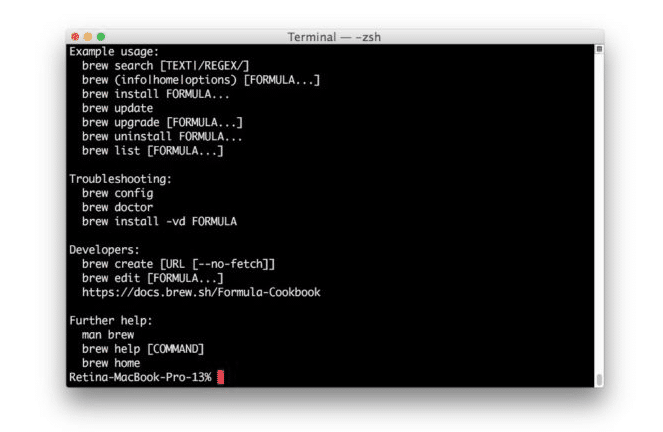
Now you are ready to install software packages through Homebrew. To see the help documentation, use the following command:
brew help
Installing Software Packages through Homebrew on Mac
Installing packages with Homebrew is easy, just use the following syntax:
brew install [package name]
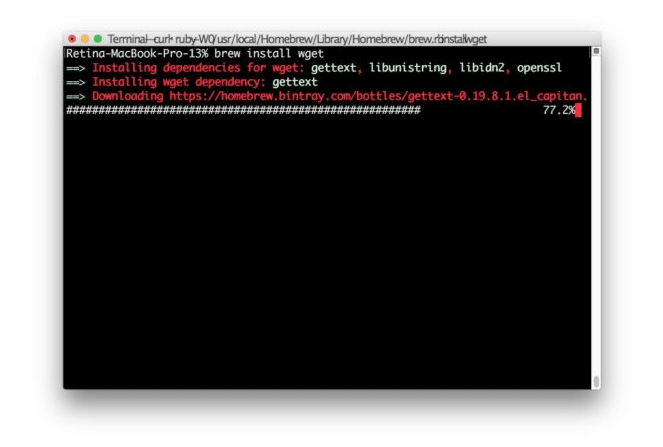
For example, you can install wget through Homebrew with the following syntax:
brew install wget
The installer should be straightforward and easy to use. Once completed, you will be able to run ‘wget’ as you usually do.
How to Remove HomeBrew from a Mac
If you’ve installed Homebrew but then want to remove it from your Mac for any reason, you can use the following ruby script to uninstall it from your system. Just be sure to choose the one that’s designed for your specific MacBook model:
Removing Homebrew in macOS Monterey, macOS Catalina, macOS Big Sur, and macOS Mojave:
/bin/bash -c "$(curl -fsSL https://raw.githubusercontent.com/Homebrew/install/master/uninstall.sh)"
Removing Homebrew from macOS High Sierra, Sierra, El Capitan, and earlier:
ruby -e "$(curl -fsSL https://raw.githubusercontent.com/Homebrew/install/master/uninstall)"
One alternative to this is downloading the uninstall, or “Script”, which allows you to run it yourself.


