

Table of Contents
In this article, we will learn How to Fix “The CPU has been disabled by default. Power off or reset the virtual machine” on VMWare.
Installing macOS on a virtual machine can be tricky if you’re not running the latest version. You’ll need to know whether you have an Intel or AMD processor and go through some steps. The installation process is a bit different if you’re on an AMD system. You follow these instructions for both processors.
There are a few potential reasons for this issue. First, you may not have configured your virtual machine for an AMD system, as AMD and Intel systems are different. We need to provide a different config key to set up the virtual machine for an AMD system.

How to Fix “The CPU has been disabled by default. Power off or reset the virtual machine” on VMWare
While this problem usually occurs while installing macOS on virtual machines, so we will look at How to Fix “The CPU has been disabled by default. Power off or reset the virtual machine” on VMWare.
Step 1: Change The VM Hardware Compatibility to 10.x
Performing all the usual installation steps is essential, but you need more in addition to them. The good thing is, it’s all done from the vmx file. There are two ways you can get it done. The first way you could do it is from VMware with its Wizard.
The other option that you can try is from the vmx file. We’ll move on to this one as it will be easier. Ensure you follow every step with screenshots, and you should be fine. Keep scrolling down for a quick tutorial on what we’re about to cover next: how to fix The CPU has been disabled by the guest OS.
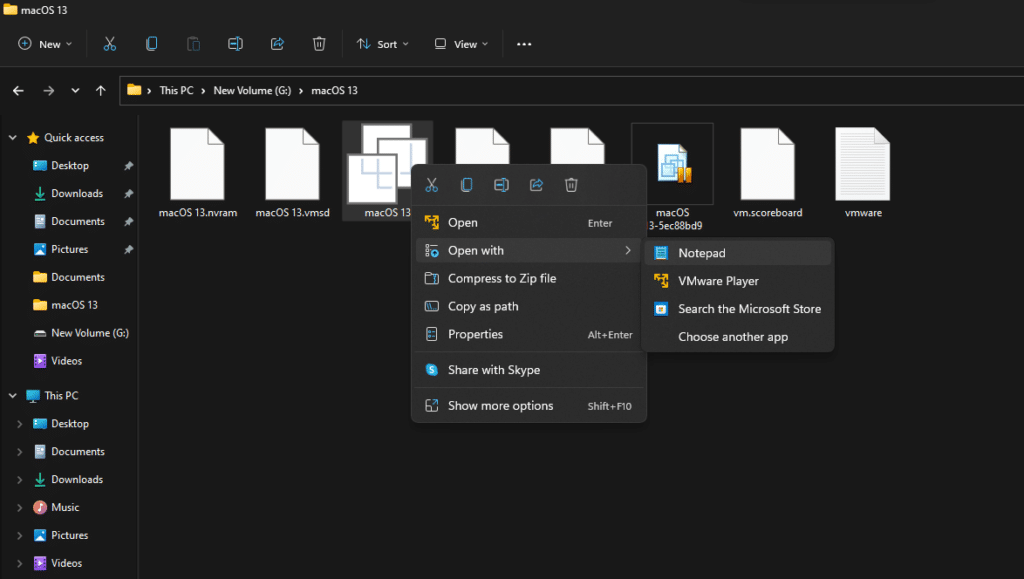
Part 1:
Navigate to the files for your virtual machine. Right-click on the .vmx file and select Open with Notepad.
Part 2:
When the file is opened, change the version number to 10. This will make sure that your virtual machine will operate as intended.
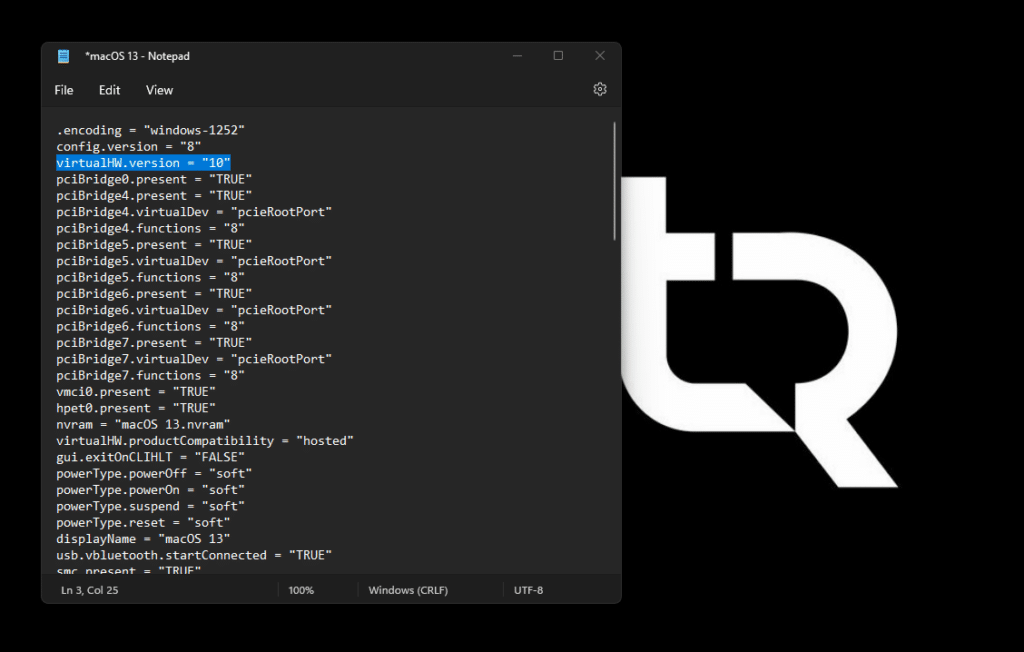
If you miss changing the hardware compatibility of the machine from VMware, you’ll likely be experiencing this problem.
Step 2: Add The Config Key For The Virtual Machine (For AMD Systems Only)
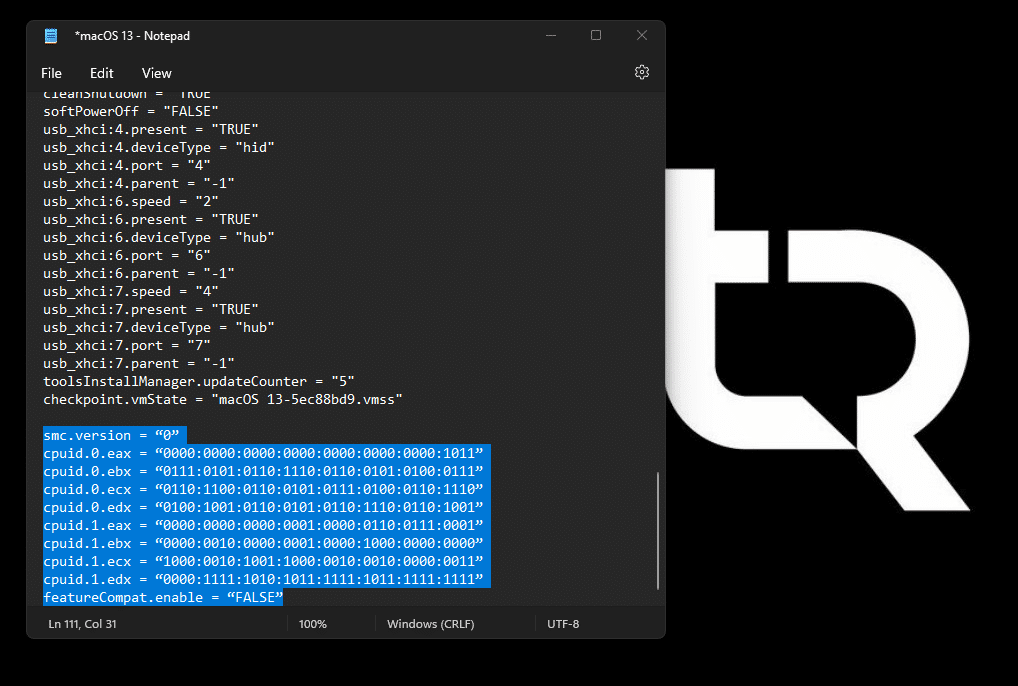
Without closing the .vmx file, please copy the following code and paste it at the end of all lines.
If you have the config key smc.version = “0” already there, you may remove it and paste this in place of it. It should look like this.
cpuid.0.eax = “0000:0000:0000:0000:0000:0000:0000:1011”
cpuid.0.ebx = “0111:0101:0110:1110:0110:0101:0100:0111”
cpuid.0.ecx = “0110:1100:0110:0101:0111:0100:0110:1110”
cpuid.0.edx = “0100:1001:0110:0101:0110:1110:0110:1001”
cpuid.1.eax = “0000:0000:0000:0001:0000:0110:0111:0001”
cpuid.1.ebx = “0000:0010:0000:0001:0000:1000:0000:0000”
cpuid.1.ecx = “1000:0010:1001:1000:0010:0010:0000:0011”
cpuid.1.edx = “0000:1111:1010:1011:1111:1011:1111:1111”
featureCompat.enable = “FALSE”
When added, save the file.
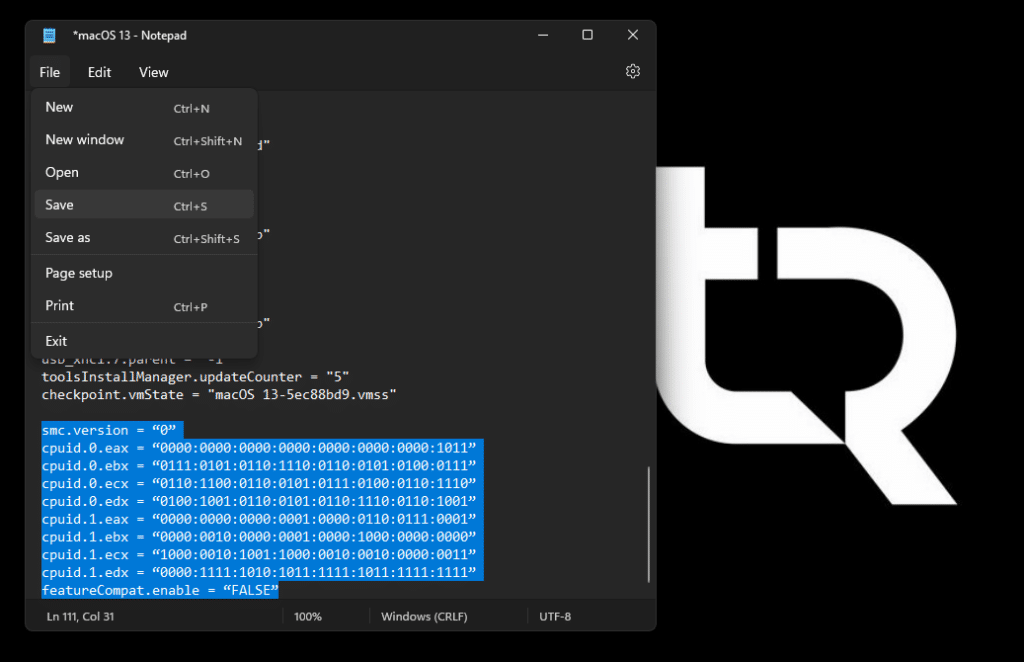
When the file is saved, you can power on your machine again.
Other things that you can take care of:

Conclusion
I hope this guide on How to Fix “The CPU has been disabled by default. Power off or reset the virtual machine” on VMWare was easy and helpful. If you face any issues, please comment below.


