

Table of Contents
How to Enable File Deletion Confirmation Prompts in Windows 11 – Via Recycle Bin Properties, Group Policy, or Registry Editor
When you delete files on a Windows 11 computer, you are not prompted to confirm that you want to delete the file. By default, files are immediately moved to the Recycle Bin. Users can recover accidentally deleted files from the Recycle Bin if it has not been emptied manually or automatically.
However, Windows 11 has an option that allows you to activate file deletion confirmation prompts when using the context menu option or the Delete key.
This request provides additional protection against accidental deletion of files and folders.
How to Enable File Deletion Confirmation Prompts in Windows 11
There are three ways to enable file deletion confirmations: by using Recycle Bin settings, Group Policy, and the system registry. Let’s look at them in order.
Through the properties of the Recycle Bin
The process of enabling file deletion confirmation prompts in Windows 11 is similar to this process in previous versions of Windows, including Windows 10.
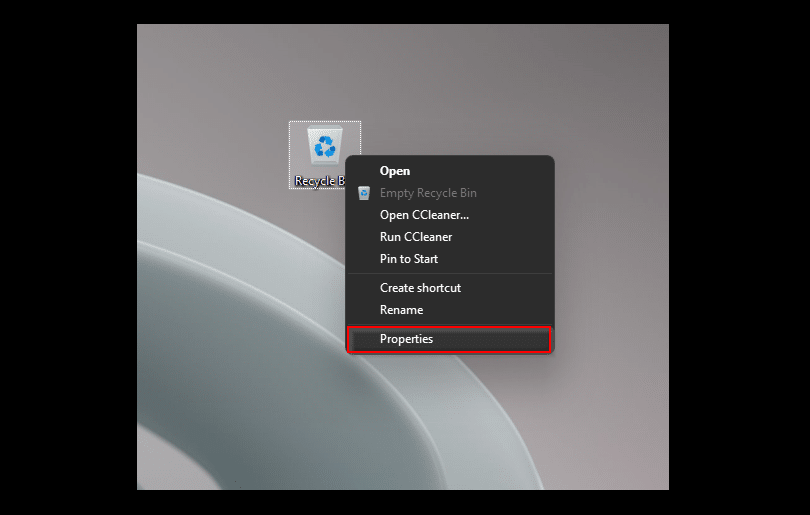
- Right-click on the Recycle Bin icon and select the Properties option.
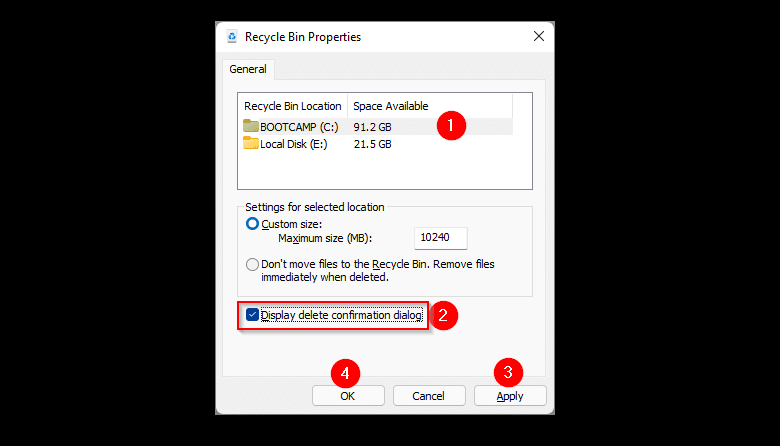
- A window appears with the Recycle Bin locations and the available space in each location. You need to check the box for the Prompt for deletion confirmation option, then click Apply and OK. This setting is global, which means that you will be prompted for all delete operations on all mounted disks.
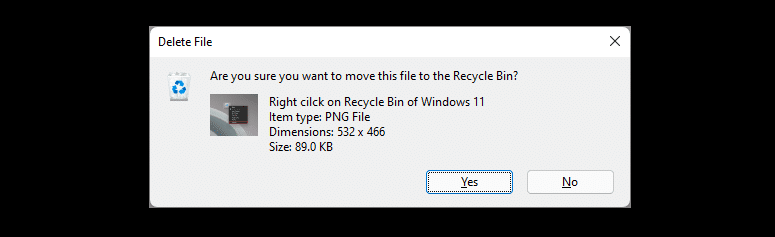
- You can now test the functionality. Try deleting a file in File Explorer using the context menu option or the key and you will be prompted Do you really want to move this file to the Trash?Del
You can restore the default behavior by unswing the check box in the Recycle Bin properties window.
Through Group Policies
The Group Policy Editor is only available on professional and enterprise versions of Windows 11. You can use this tool to enable dialog boxes to confirm that the user deletes files.
To do this, edit the status of the Prompt for confirmation when deleting files policy. It has the following description:
Allows you to display a confirmation dialog box in File Explorer when you delete or move a file to the Recycle Bin.
If you enable this policy setting, a confirmation dialog box appears when a user deletes or moves a file to the Recycle Bin.
If you disable or don’t configure this policy setting, the confirmation dialog box does not appear by default.
- Press Windows+R to open the Run command window.
- Type gpedit.msc and click OK.
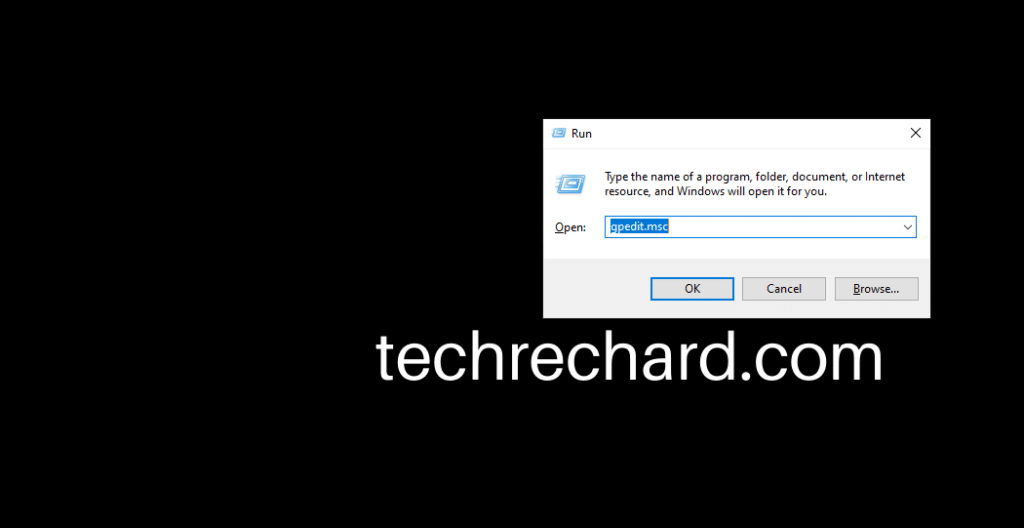
- In the Group Policy Editor that opens, navigate to the following path:
User Configuration\Administrative Templates\Windows Components\File Explorer
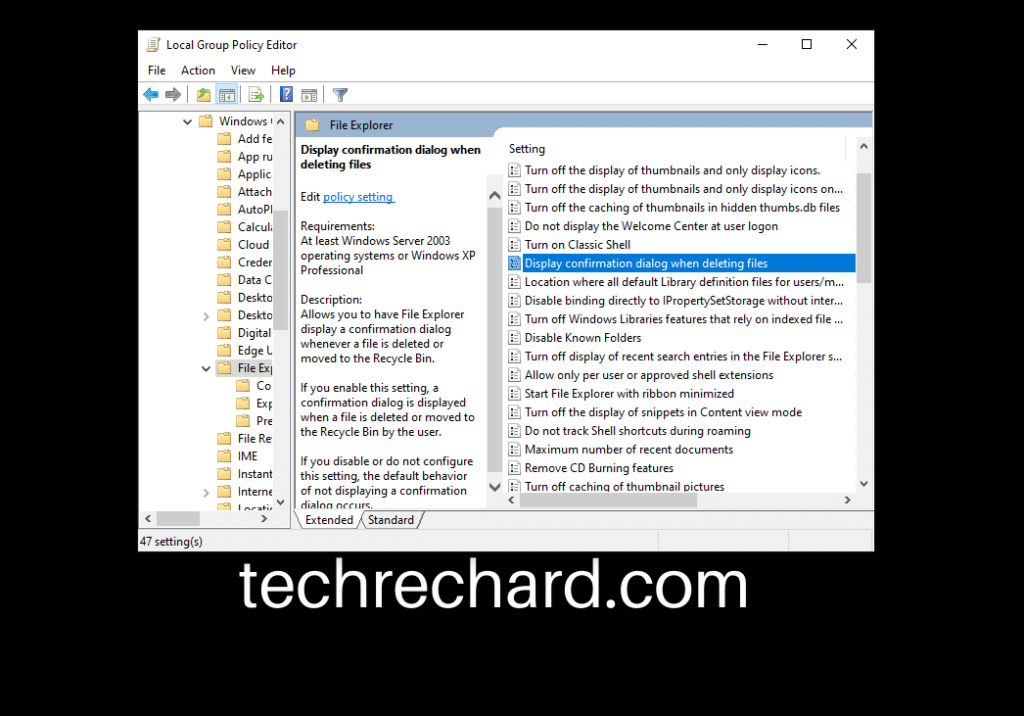
- Double-click the Display confirmation dialog when deleting files policy.
- Set the policy to Enabled.
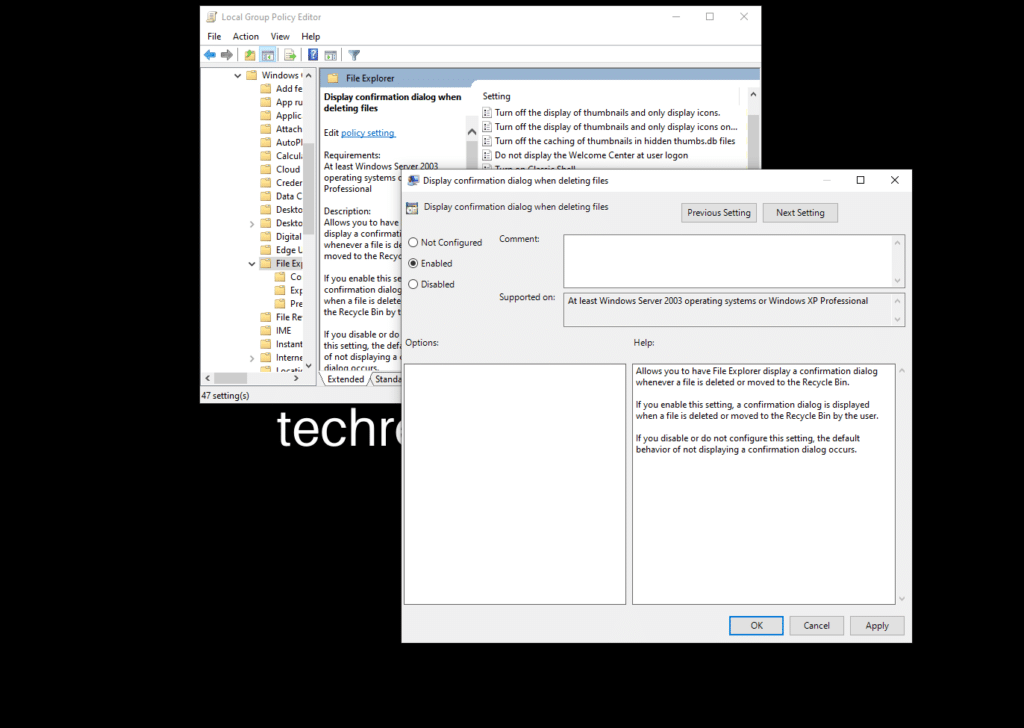
- Click on the Apply button and then OK.
You must restart your computer for the changes to apply.
You can restore the default behavior by setting the policy to Not Configured or Disabled.
Through Registry Editor
If you do not see the recycle bin icon or you are more accustomed to setting up the system using the registry, you can use this method. Registry Editor is available even in Windows 11 Home.
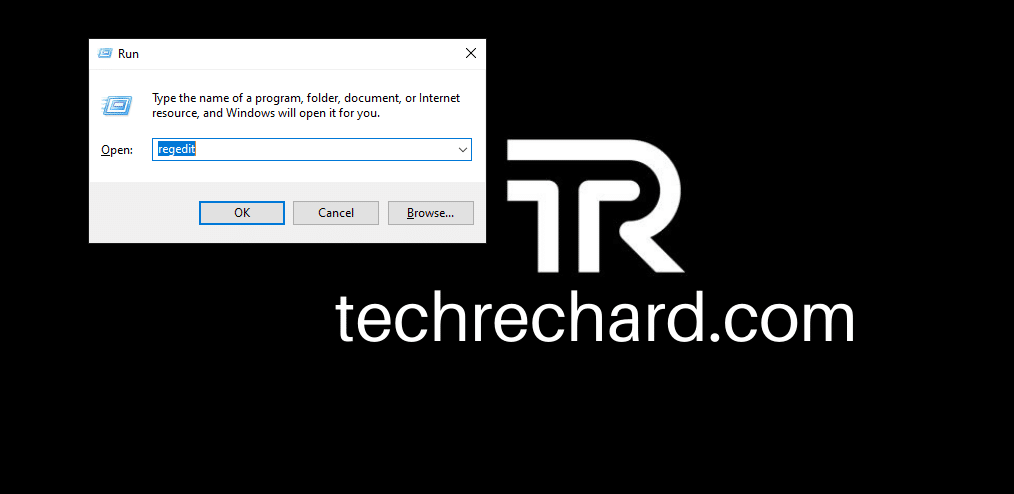
- Press Windows+R and type regedit, then press Enter. If necessary, confirm the User Account Control prompt to start Registry Editor.
- Navigate to the following path (copy and paste into the address bar of Registry Editor):
\HKEY_CURRENT_USER\SOFTWARE\Microsoft\Windows\CurrentVersion\Policies\Explorer
- Right-click the Explorer folder, click New > DWORD (32-bit) Value.
- Name the parameter ConfirmFileDelete and press Enter.
- Double-click the generated key and set the value to 1, then click OK.
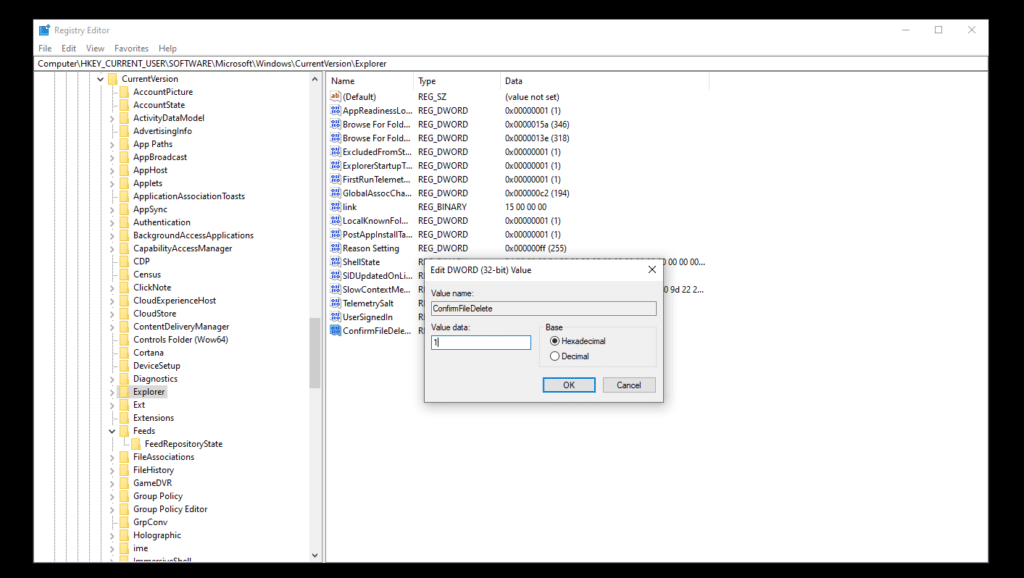
You must restart your computer for the changes to apply.
You can restore the default behavior by deleting the ConfirmFileDelete parameter in the registry.
Conclusion:
I hope this guide on How to Enable File Deletion Confirmation in Windows 11 was easy. If you face any issues, please comment below.


