


Table of Contents
In this article, we will learn how to move Facebook photos to Google Photos. Or you can say, How to Download Photos from Facebook and Move to Google Photos.
Facebook is not a platform geared towards storing images. Okay, it is a social network, and therefore it is full of audiovisual content of a personal nature, but it is not a digital photo album. This means that when we want to copy or delete a photograph, we will most likely spend a good time doing the corresponding management.
If we want a place to have all our photos well stored and organized, it is more practical to use a dedicated application such as Google Photos. We may even want to delete our Facebook account and need to export a backup of all our multimedia content. Nothing like suddenly migrating all Facebook photos to Google Photos for these cases. Below, we explain the simplest and fastest way to do it.
Note: You can follow this method on your smartphone and desktop. For this tutorial, I am using a desktop. The steps are similar for a smartphone; I have added notes for smartphone users where necessary.
Step #1: Download All Facebook Photos
As it can not be otherwise, the first step is to download all the photos we have saved on Facebook.
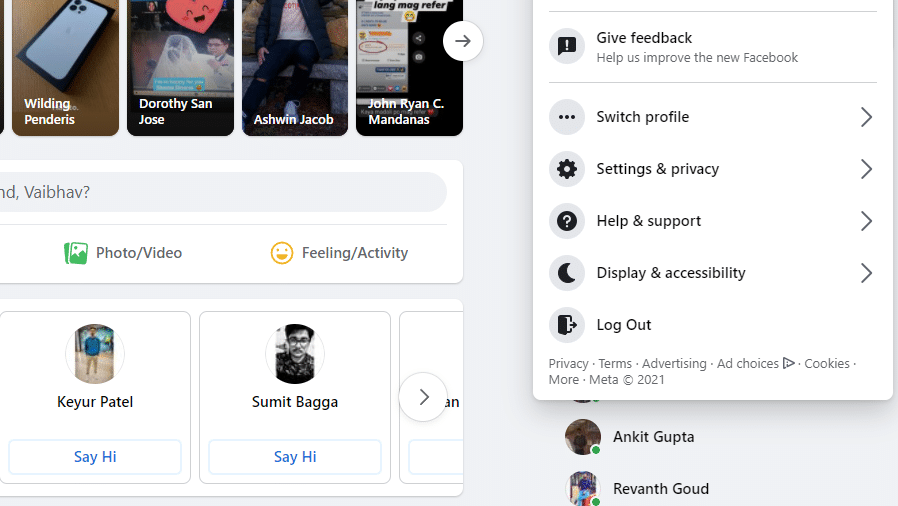
To do this, we open Facebook and click on the Account icon (v) from the top-right corner. Now, click Settings and Privacy.

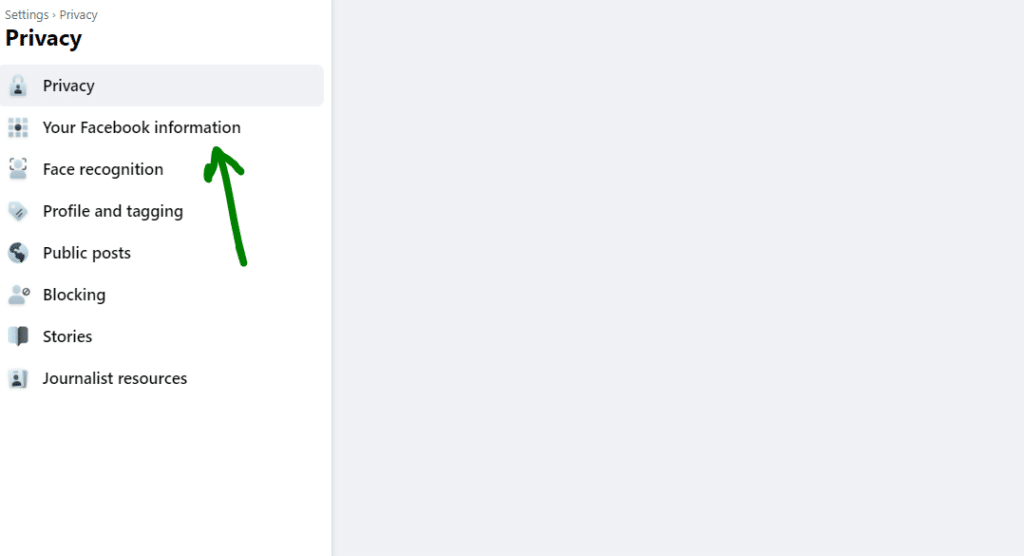
Now, again click Settings followed by Privacy on the left panel.


Under Privacy, click Your Facebook information.

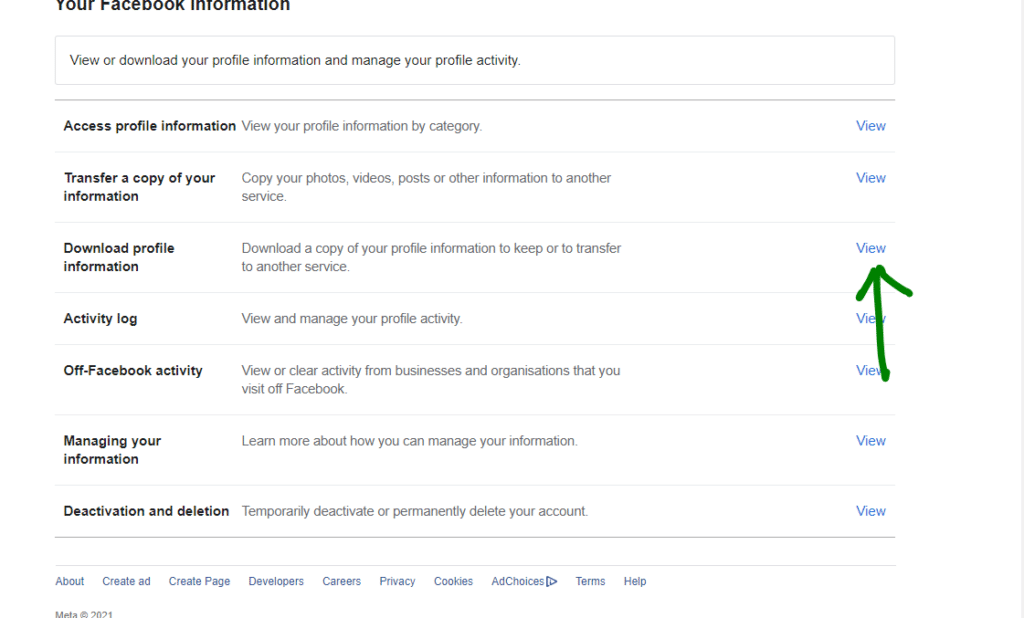
Now, click View under Download Profile Information.

Choose the quality of media you want to download and tick All-time in the Date range.


Click Deselect All.

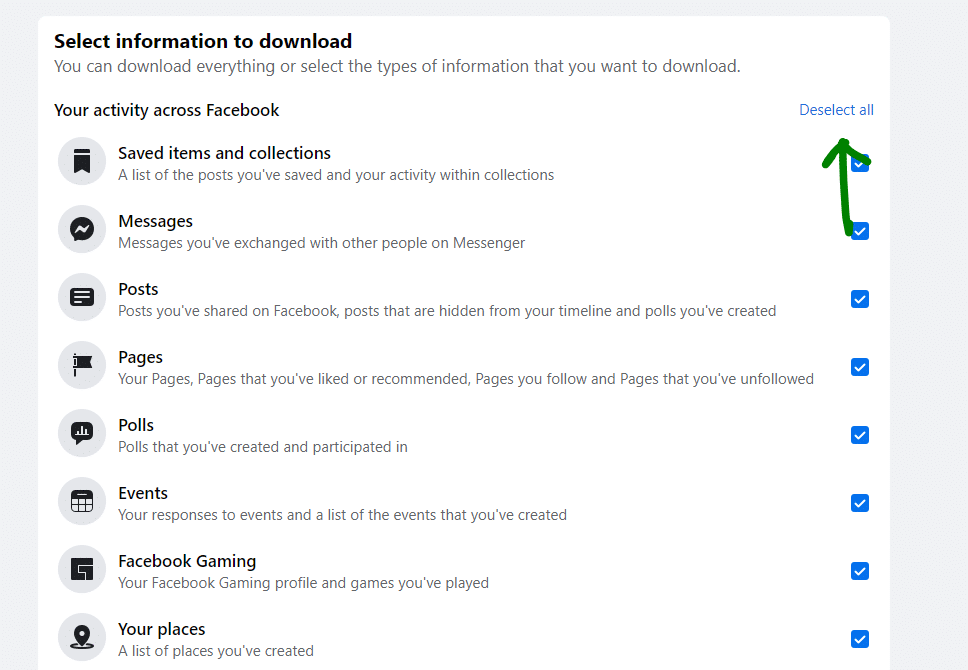
Now select the Posts and leave the rest unticked.

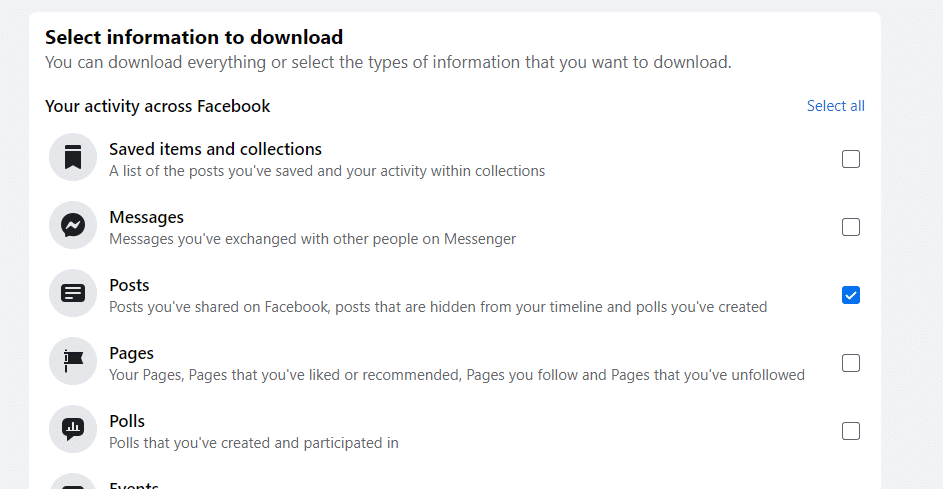
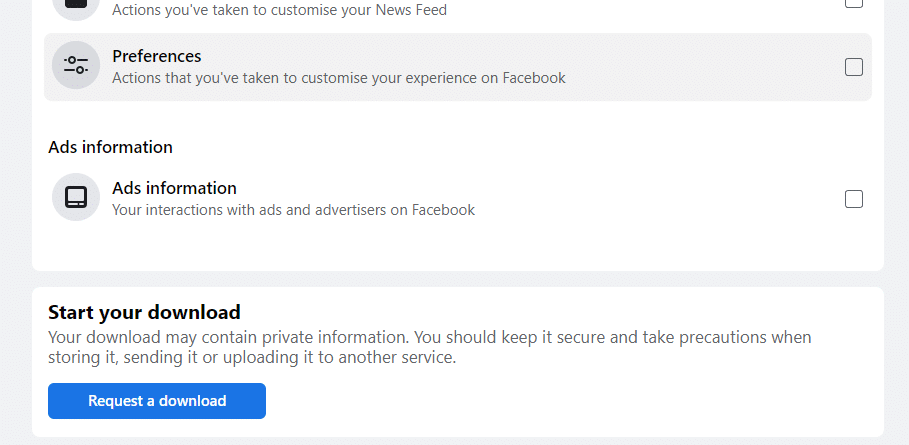
Scroll down to the bottom of the page and click Request a download.

Wait for some time, and then you will get a notification that your Download is ready.

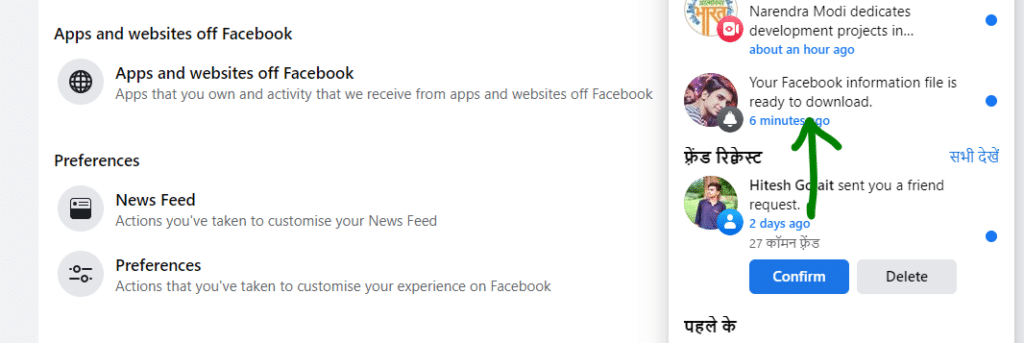
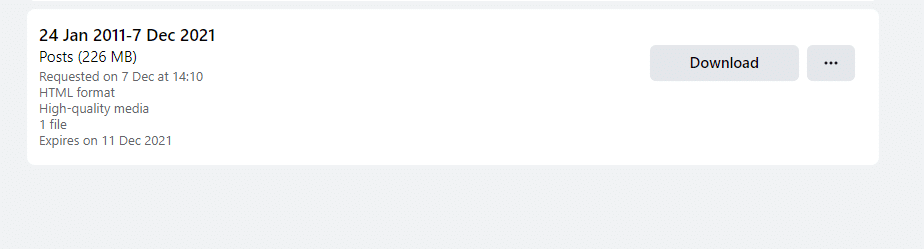
Click Download.

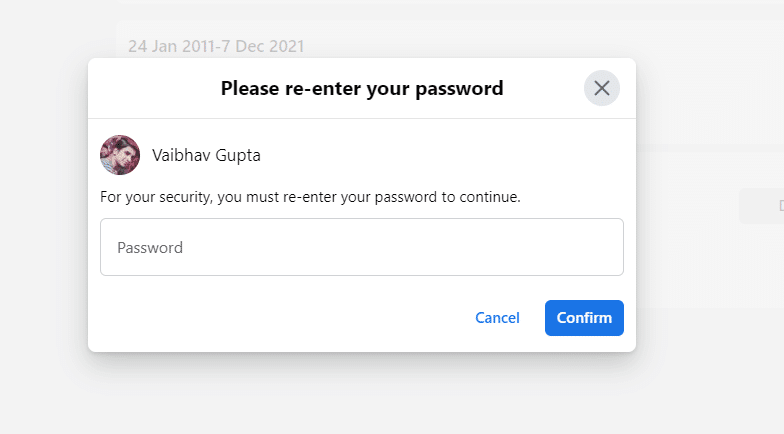
Enter your Facebook password to continue and click Confirm.

Step #2: Unzip the backup and extract the photos
Now, you will see a zip file in your default download location. Extract the files using WinRAR.
If you are using a smartphone: Once we have the file in our hands (a compressed file in ZIP format), we open our Android file explorer. If we do not have any, we can go to Google Play and install an application for this purpose, such as ASTRO or Mi File Explorer.


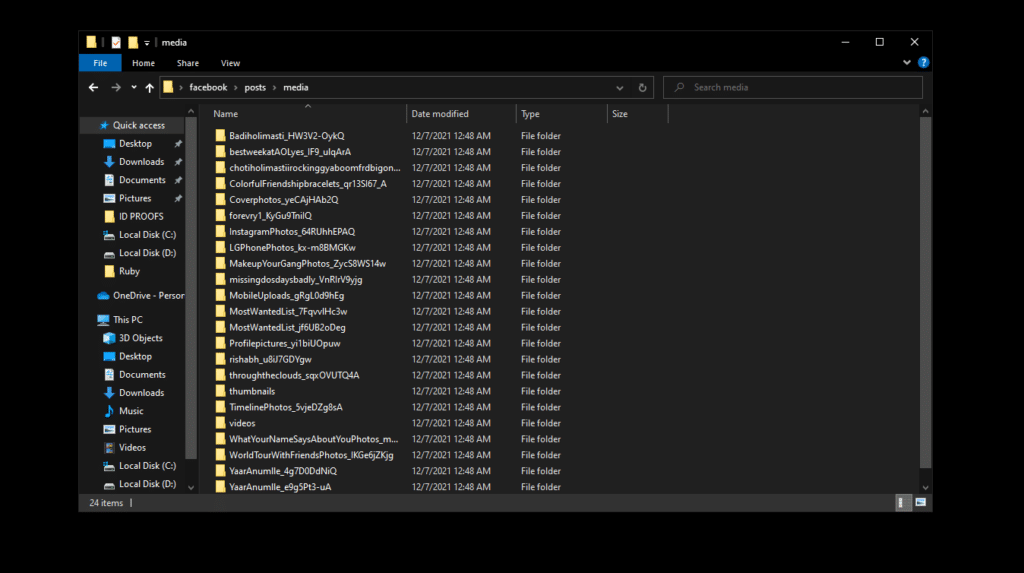
Once extracted, open the folder and click Posts>Media. You will find all your photos albumwise.

Step #3: Sync the folder and upload the images to Google Photos
Now that we have the photos in our possession, we only have to upload them to Google Photos.
For smartphones: If everything has gone well, it is most likely that when unzipping the photos the Google Photos app itself “jumps” automatically, asking us if we want to synchronize the folder and make a backup.
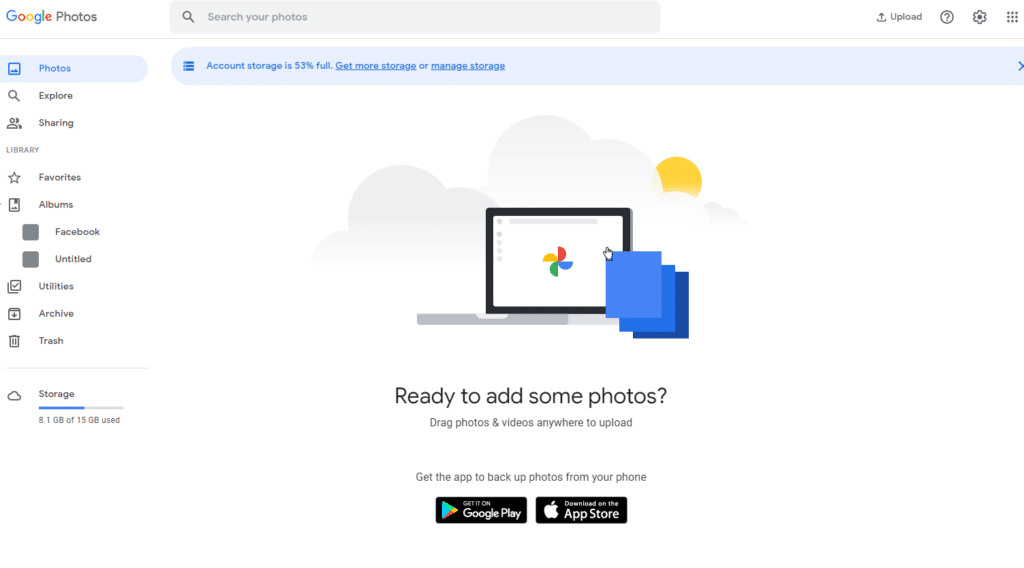
On a desktop, open Photos – Google Photos.

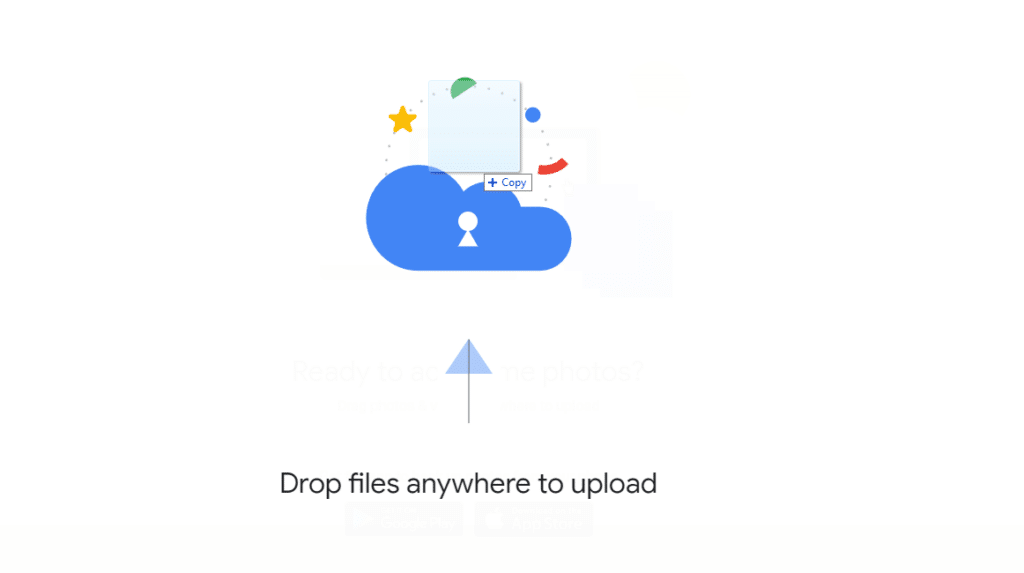
Now, drag and drop your Facebook folder>Posts>Media to your Google Photos.
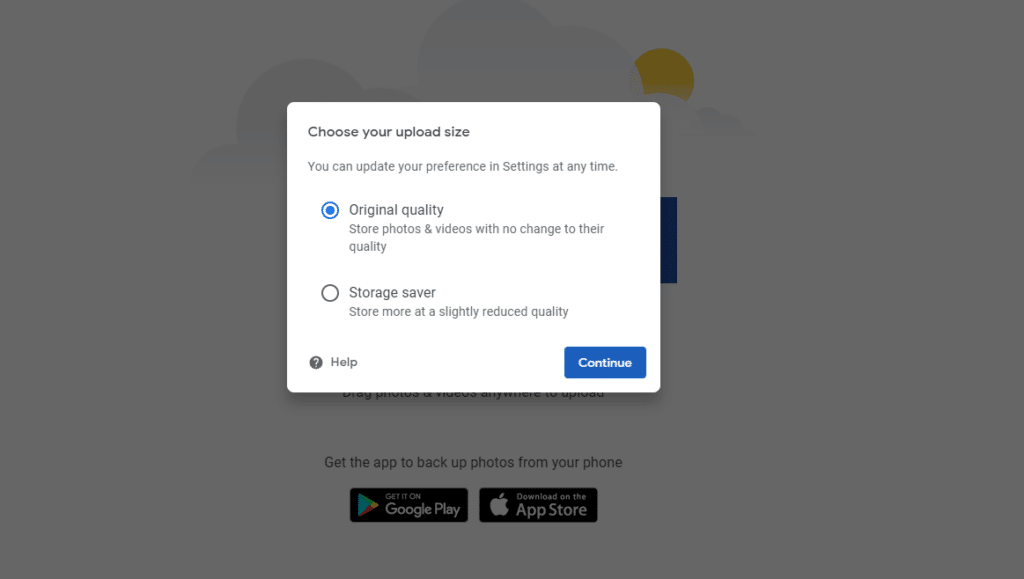
Select the right upload size and click Continue.

You can alternatively use the desktop app of Google Photos to manage your photos.
For smartphones: You can use the google photos app and sync your Facebook photos folder on your Google Photos.
- Open Google Photos and click on the hamburger icon (3-line button located in the upper left margin).
- Go to “Device Folders“ and locate the folder with the Facebook photos. Click on it and activate the tab “Create backup and synchronize“.
This way, when the phone is connected to a Wi-Fi network, Google Photos will start copying all the photos we have indicated to you. Once the upload is complete, we can access all these photos directly from Google Photos without re-entering Facebook. Good job!
Note: The upload can take several minutes depending on the volume of images collected on Facebook over the years.