
 in Windows 11 and Windows 10")
Table of Contents
Superfetch (also known as SysMain in Windows 11 and 10) is a built-in Windows service that preloads frequently used applications into RAM.
If you are experiencing system performance issues, you can disable this service. Let’s see how to do it. You can also read our guide: How to speed up Windows 10 computer? 10 Best Ways
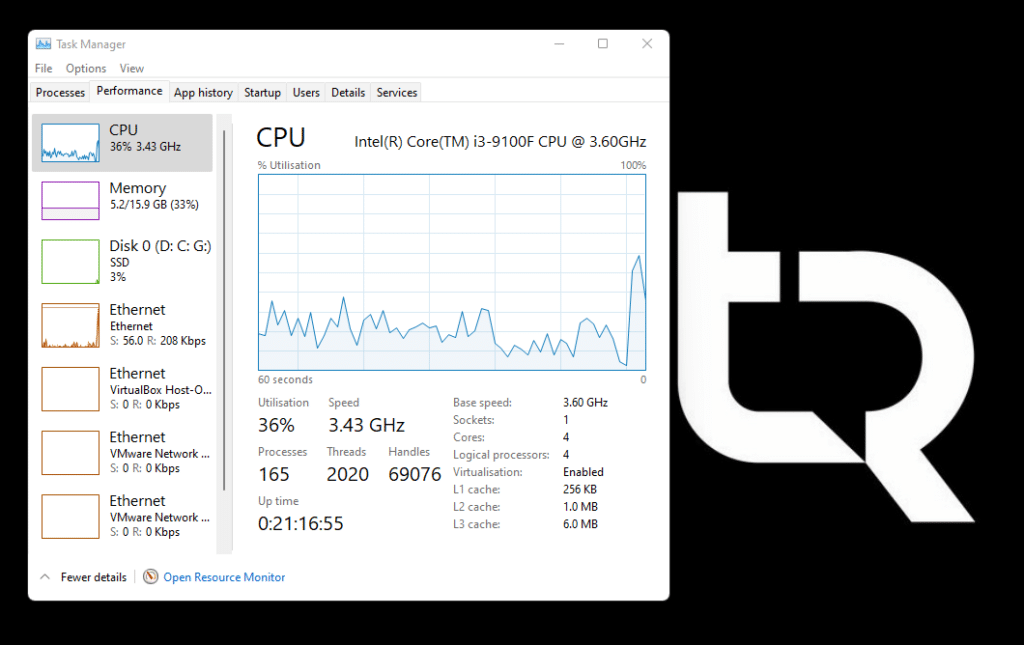
What is SysMain (SuperFetch) responsible for?
The description of SysMain (SuperFetch) says that this service “maintains and improves system performance over time.” However, the mechanism of the service is not disclosed in detail.
SuperFetch is a feature that first appeared in Windows Vista. The service constantly runs in the background, analyzes RAM processing patterns, and learns which applications are used most often. Over time, SuperFetch marks these applications as “frequently used” and preloads them into RAM.
Thus, thanks to the work of SuperFetch, the application launch will be much faster because it has already been preloaded into RAM.
By default, SuperFetch fills the free area of RAM with loaded applications. As soon as the operating system needs more RAM (for example, to load an application that was not preloaded), SuperFetch will release the required amount of RAM.
SuperFetch is the successor to the Prefetch service introduced in Windows XP. However, Prefetch did not parse usage patterns and set up prefetching accordingly.
Do you need SysMain (SuperFetch)?
In most cases, SuperFetch is beneficial. If you are the owner of a modern computer with at least average characteristics, the SuperFetch service will work fine and will not cause trouble.
However, SuperFetch can cause some problems:
- Because SuperFetch is always running in the background, the service itself is always using CPU and RAM resources.
- SuperFetch does not eliminate the need to load applications into RAM but speeds up the process. Whenever a boot occurs, your system will experience the same slowdown as if you were running the application without SuperFetch.
- System startup may be slow because SuperFetch preloads a large amount of data from your hard drive into RAM. If every time you start or restart your computer, your hard drive runs at 100% load for several minutes, then SuperFetch could be the culprit.
- The effect of using SuperFetch may not be noticeable if Windows 10 is installed on an SSD. Since the SSD is speedy, there is no need to preload.
- SuperFetch may cause problems in games if your system has 4 gigabytes of memory or less. This problem is relevant for games that use a large amount of RAM, constantly requesting and freeing memory. This behavior can cause SuperFetch to load and unload data continually.
Is it safe to disable SysMain (SuperFetch)?
Yes, it is safe for the system, but this action has a risk of side effects. If your system is working well, leaving the SuperFetch service enabled is recommended. If you are experiencing issues with high hard disk usage, high memory usage, or performance degradation during active RAM operations, try disabling SuperFetch and observe the system. If something goes wrong, you can always turn the service back on.
How does SuperFetch work?
The Superfetch service was first introduced in Windows Vista and is known as SysMain in the latest versions of Windows 10 and 11. The service runs in the background and analyzes PC usage scenarios.
Based on these scenarios, the service determines which applications are most likely to be used. These applications are then loaded into the computer’s RAM to speed up the launch of programs. In other words, the primary purpose of the service is to speed up the launch of frequently used applications.
Although the service is helpful in most cases, you can try disabling it if you experience performance problems with your computer. Disabling Superfetch will speed up the system a bit.
Disabling Superfetch in Windows 11 and Windows 10 is the same. The shutdown is available to you using the graphical interface and the command line.
Disabling Superfetch (SysMain) Using the GUI
To disable Superfetch, you can use the system application “Services.” Let’s take a closer look at how to do this.
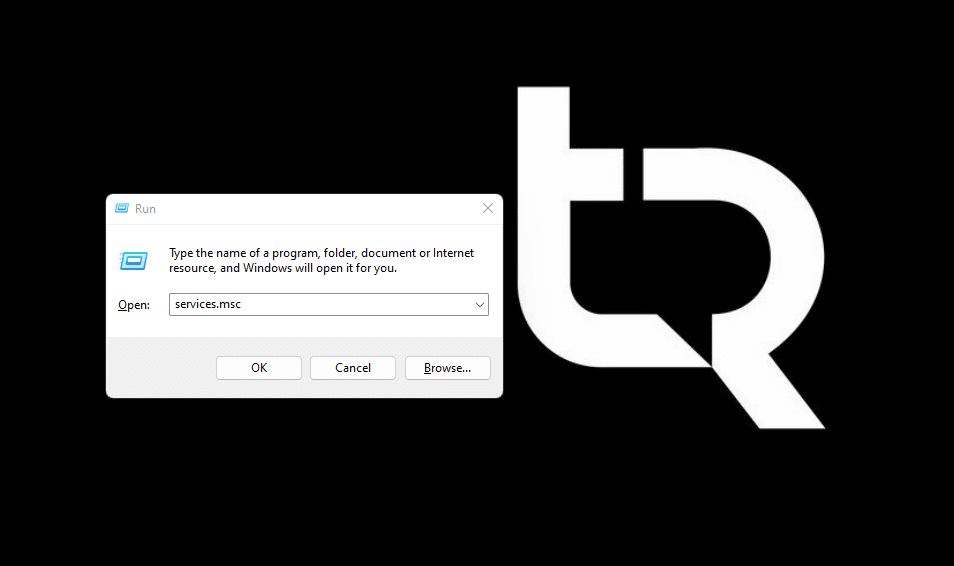
- Click Windows+ R to launch the Run command window. Then type in the box
services.mscand press Enter:
- In the Services window in the right pane, look for an entry named SysMain.
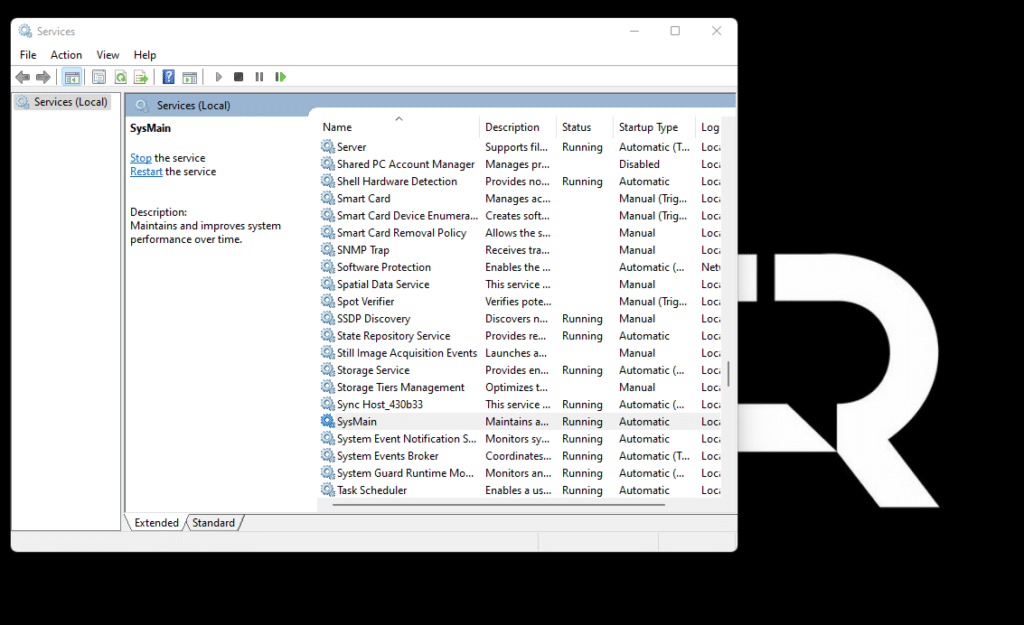
- Then right-click this entry and select Stop.
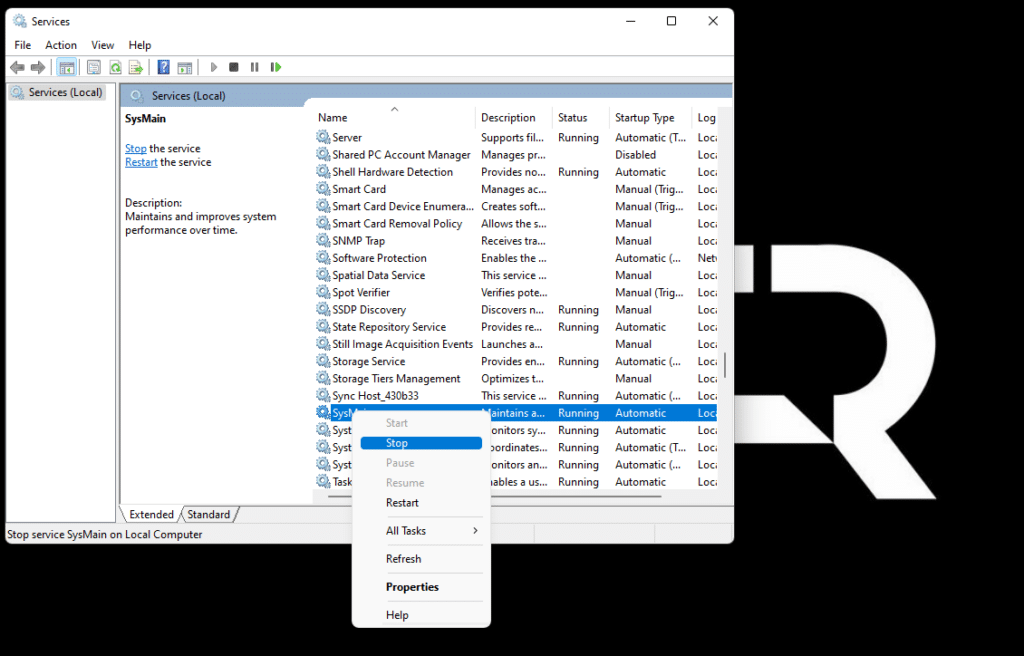
To quickly find “SysMain,” select any entry in the list and start typing sysmain on your keyboard).
- Allow the Service Control window to stop the service. Then right-click on the same SysMain entry and select Properties.
- In the Properties: SysMain window, click the Startup type drop-down menu and select Disabled. Then click Apply at the bottom and then OK. You’re done: the Superfetch (SysMain) service is now disabled on your Windows PC.
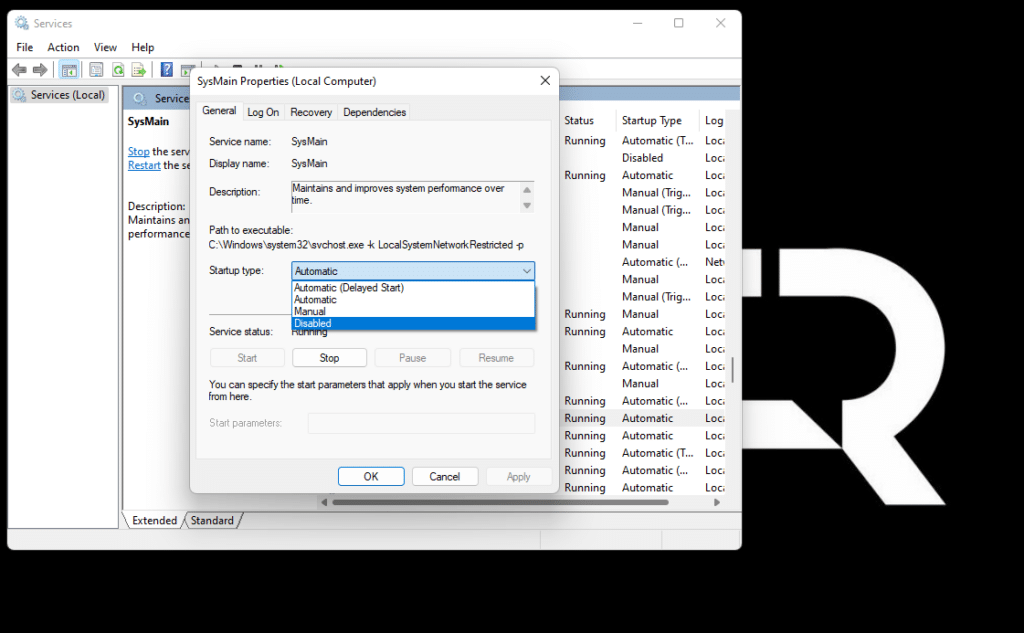
To re-enable Superfetch, click the Startup type drop-down menu and select Automatic.
Disabling Superfetch (SysMain) Using the Command Line
If you prefer to work with the console interface, you can disable Superfetch using the command line.
- Open the Start menu and search for Command Prompt (in Windows 11, you can also use the Terminal with Command Prompt profile). In the right pane, click on Run as administrator. You can read this guide: How to “Run as Administrator” an application on Windows: 3 Easy Methods
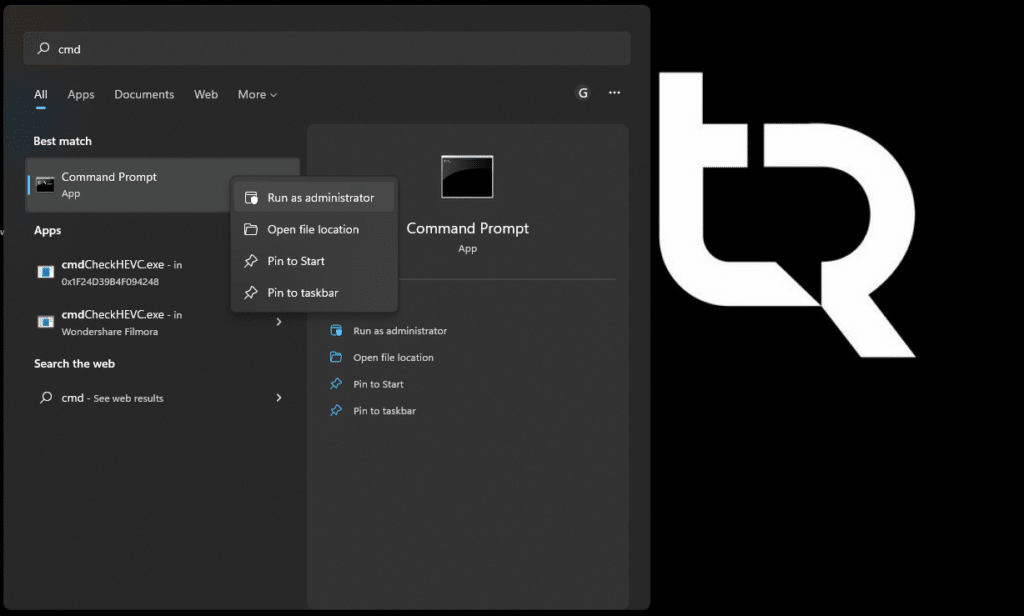
- Select Run as administrator on the right.
- Confirm the User Account Control prompt.
- After launching the command prompt, type the following command and press Enter:
sc stop "SysMain" & sc config "SysMain" start=disabled
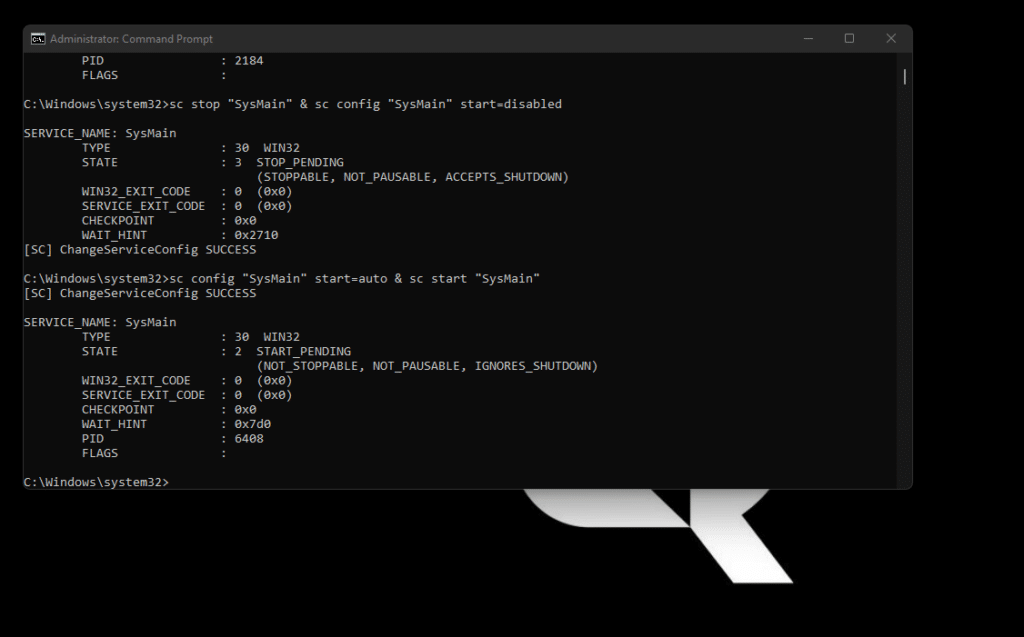
The Superfetch (SysMain) service is now disabled on your Windows machine.
To re-enable Superfetch, enter the following command:
sc config "SysMain" start=auto & sc start "SysMain"
Conclusion
I hope this guide on How to disable Superfetch (SysMain) in Windows 11 and Windows 10 was easy and helpful. If you face any issues, please comment down below.


