

Table of Contents
In this article, we will learn How To Create macOS Mojave Bootable USB on Windows. In our previous post, we shared an easy method to How To Create macOS Catalina Bootable USB on Windows: 4 Easy Steps (+Video Tutorial). We also shared a method on How to Create a Bootable Disk of MacOS X: 2 Easy Steps using a MAC system.

What are the main macOS Mojave features?
The features Apple discussed during the conference focused on the user interface. They’ll make it easier to work with the Mac. Here’s a list of a few new features:
- Continuity Camera – allows you to instantly run your camera on your iPhone to take photos and add a picture to a document that’s open on the Mac.
- Dark mode – you can choose the type of design: standard or dark.
- Stack is a tool for quickly grouping files and shortcuts on your desktop.
- A dynamic desktop is a function that automatically changes your desktop image depending on the time of day.
- Finder updates: Gallery view mode (the ability to flick through file thumbnails) display all file metadata and the “Fast Action” panel.
- OS and Safari are more secure.
FaceTime now supports group calls (up to 32 people).
Which computers support macOS Mojave?
- MacBook (early 2015 and newer)
- MacBook Air (mid-2012 and newer)
- MacBook Pro (mid-2012 and newer)
- Mac mini (end 2012 and newer)
- iMac (end 2012 and newer)
- iMac Pro (2017)
- Mac Pro (end 2013, plus mid-2010 and mid-2012 models with recommended Metal-enabled GPU)
If your Mac isn’t on this list, you can continue to work on macOS Sierra and High Sierra.
Create macOS Mojave Bootable USB on Windows: Required Files
- macOS Mojave DMG file for a clean installation. (Download links have been provided below) The DMG file is around 5.36 GB, so you need a good internet connection to download the macOS Mojave DMG file. So, here is a tool that you can use to speed up the download process. Internet Download Manager tool that will help you enhance your downloading speed. You can download the full version below.
- A USB Drive (Pen-Drive or External Disk). Your USB device must be of sufficient memory for the installation.
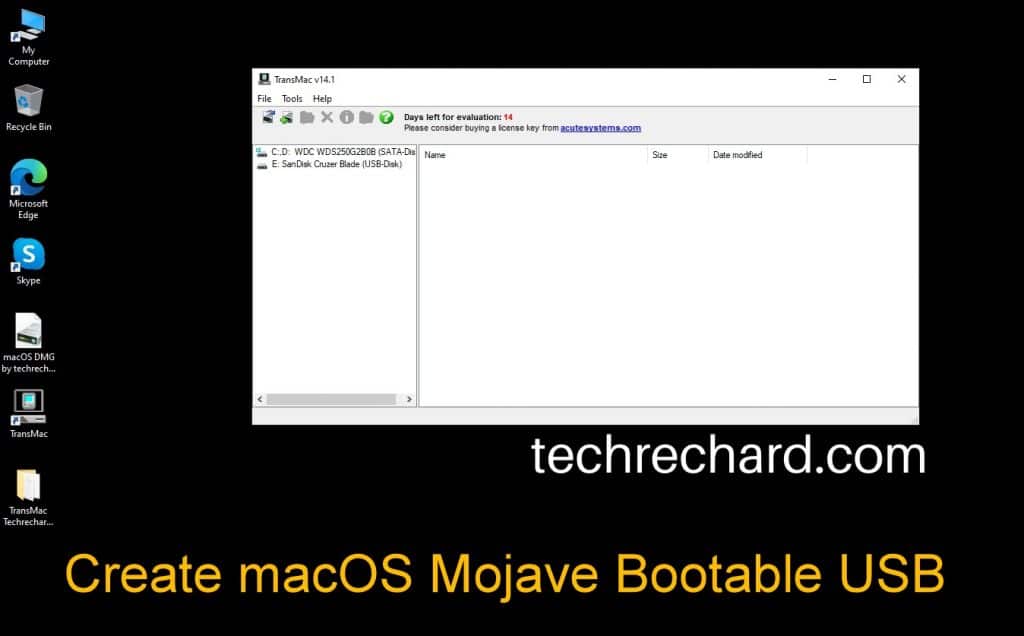
- TransMac tool from Acute Systems: This Windows application tool may replicate and manage folders and files around Apple drives and apparatus, such as Mac-formatted hard drives, flash drives, and other memory devices, to open and burn disk imaged .dmg along with .sparseimage documents.
How To Create macOS Mojave Bootable USB on Windows: Step by Step
This is a 4 step simple process. I have also shared a complete video tutorial on How To Create macOS Mojave Bootable USB on Windows, you can find the video at the end of this post.
NOTE: Kindly do not skip any step; the process will fail, and you might corrupt your USB device. I crashed mine once!
Step 1: Downloading necessary files to Create macOS Mojave Bootable USB on Windows
- macOS Mojave DMG by techrechard (Google Drive + MediaFire)
- TransMac tool from Acute Systems- This file is password-protected, and the password is www.techrechard.com. You can extract this file using WinRAR download free and support: WinRAR (win-rar.com).
- IDM 6.27 Build 2 Registered (32bit + 64bit Patch) [Techrechard.com] – This file is password-protected, and the password is www.techrechard.com. You can extract this file using WinRAR download free and support: WinRAR (win-rar.com).
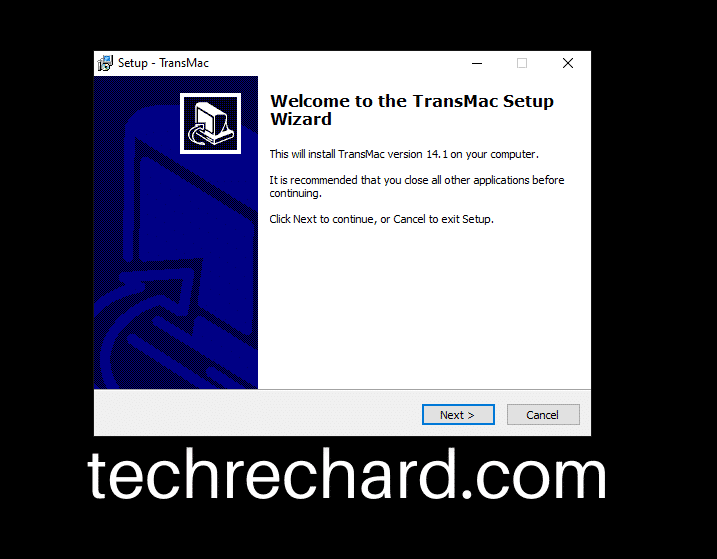
Step 2: Install TransMac Tool on your Windows
After downloading the TransMac tool from the above links, proceed with the installation. The process is very similar to installing any other tool on your Windows. Once you have downloaded and extracted the contents from the RAR file, you will see the following contents:


Open the TransMac Techrechard.com folder, and click SETUP.
And click, Next.

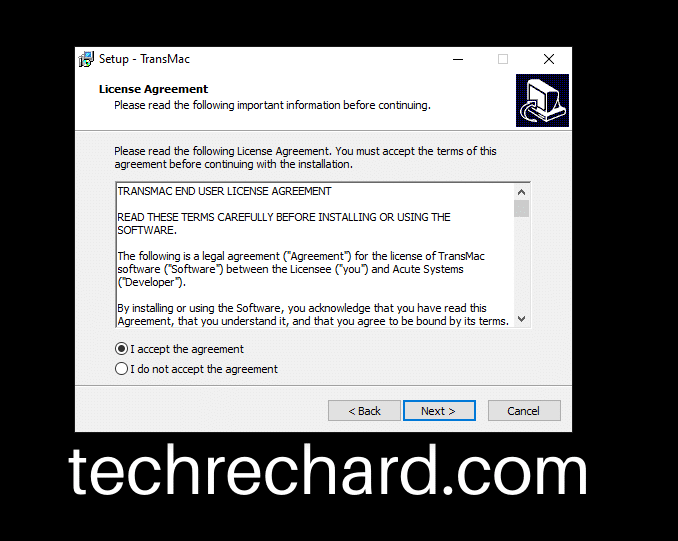
Accept the terms and conditions.

Choose the directory for installation. You can keep it default.


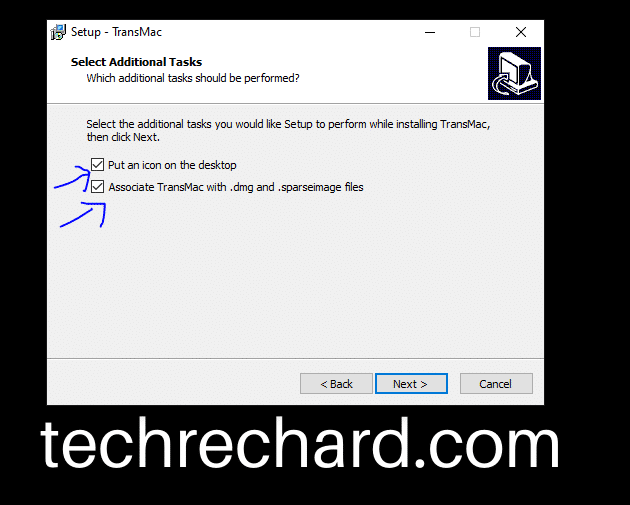
Leave the default ticks and click Next.

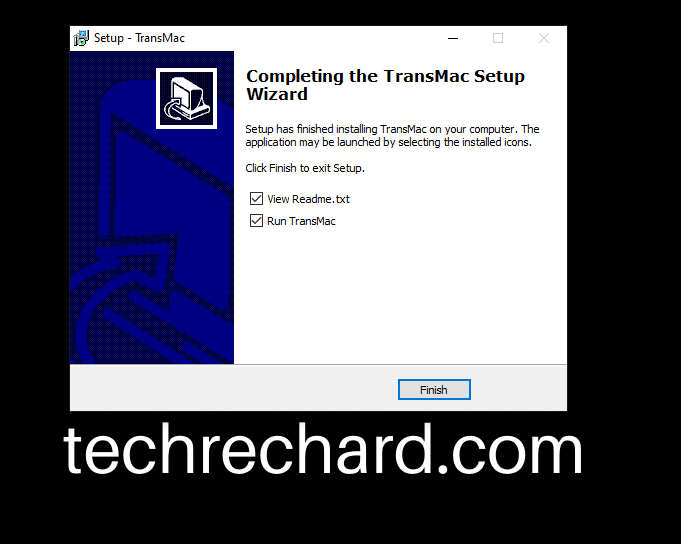
And you see that within no time the setup is complete.

Step 3: Open TransMac Tool
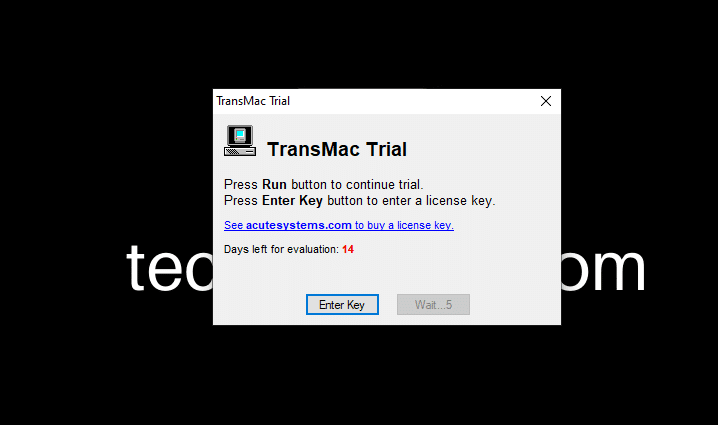
Once the installation is over, the transmac tool will open itself. And you will see the following message.

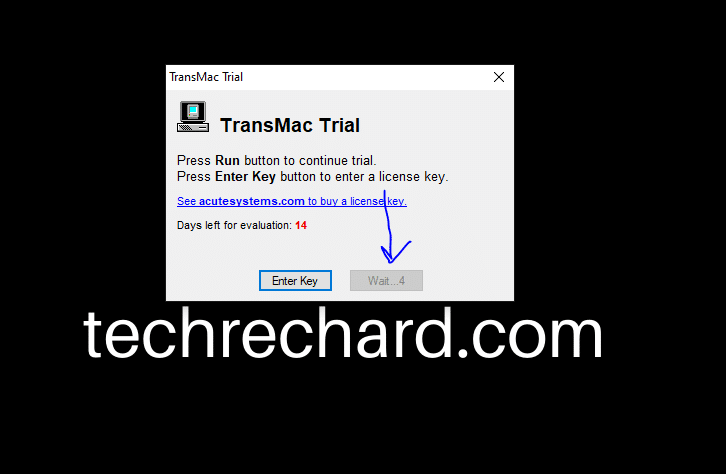
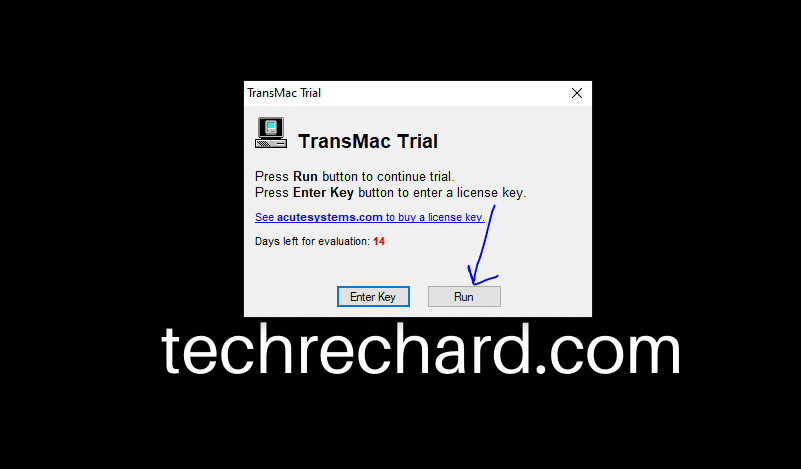
Since we are running the trial version of TransMac, you need to wait for 10 seconds, and it will open up automatically. After 10 seconds, you can click, Run.

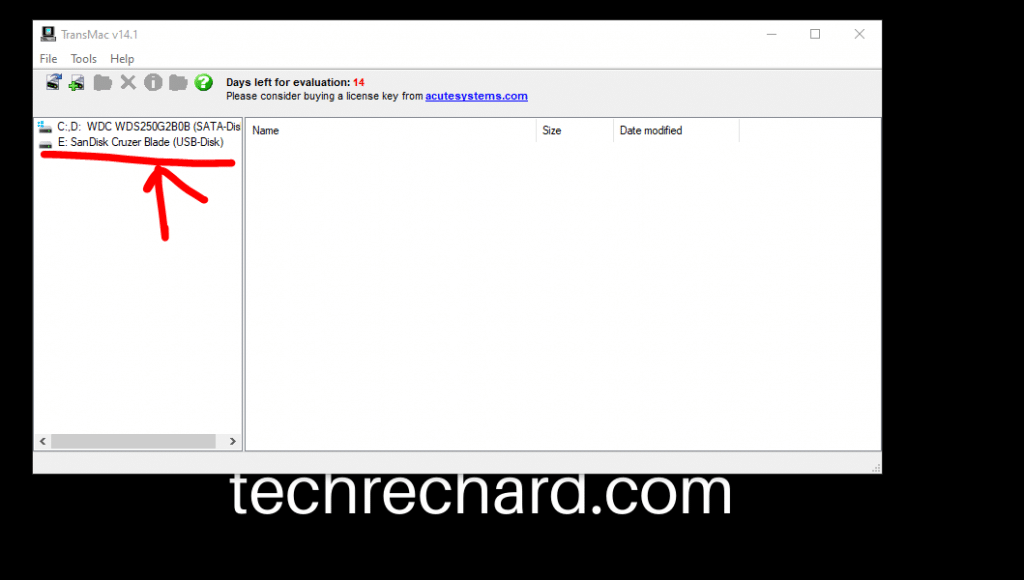
Now insert your pendrive, usb drive or any external disk.

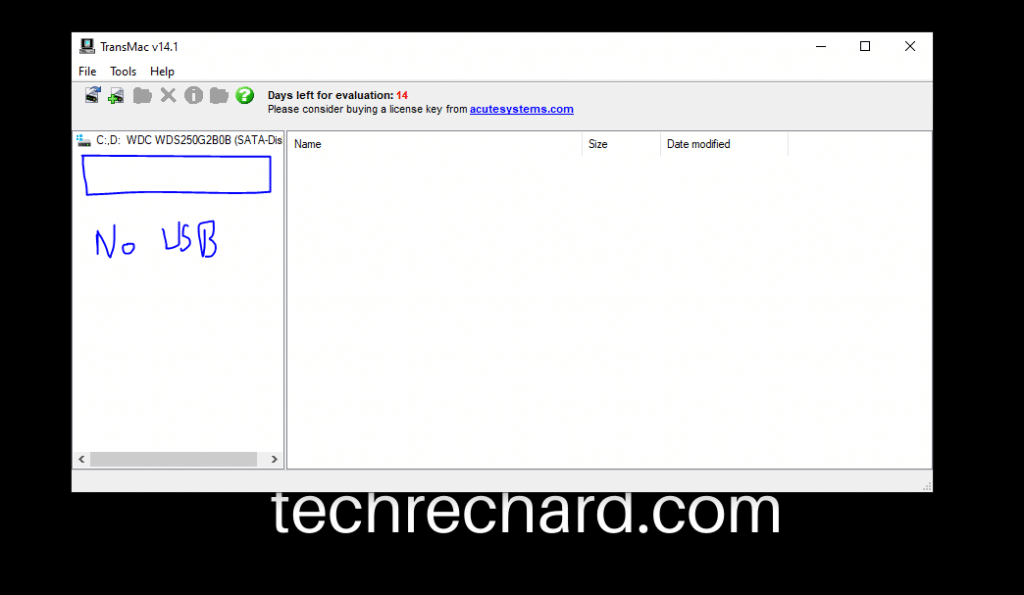
And click Tools, followed by Refresh drive list.


Once you click refresh drive list, you will see your USD device attached.

Step 4: Complete the installation
Now, right click your USB and click Restore with Disk Image.

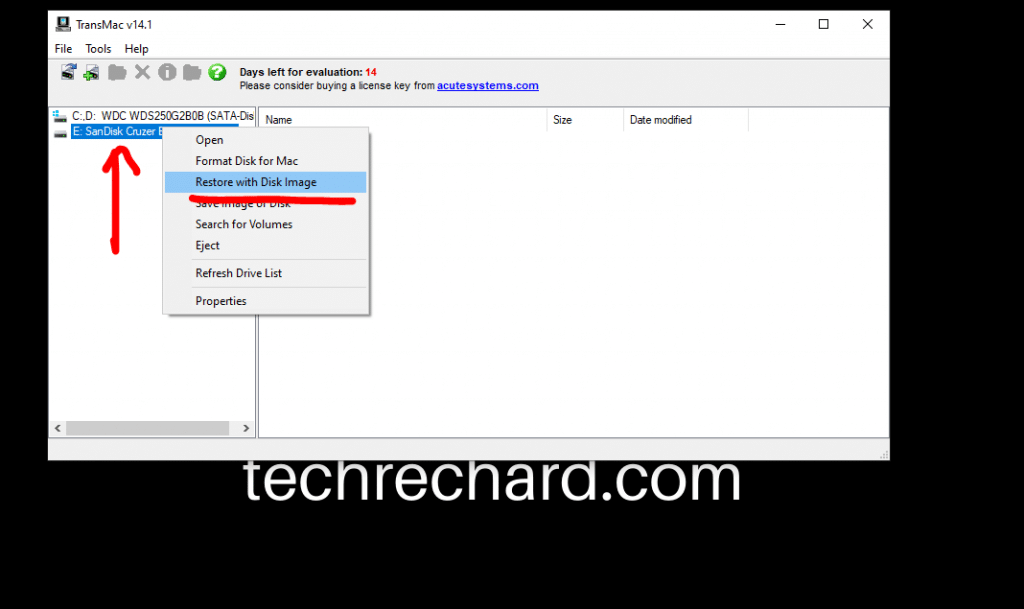
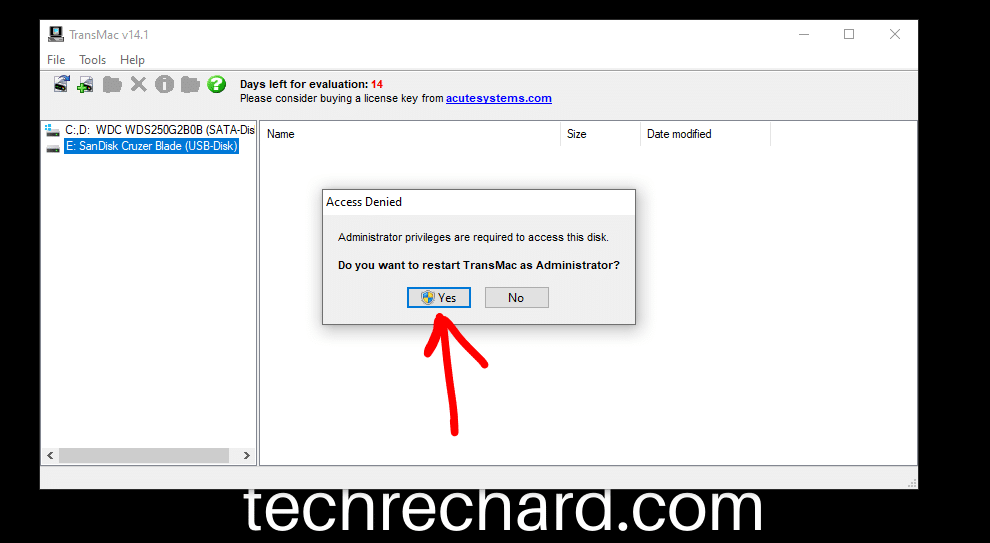
Now, you will be prompted an error that you need to run TransMac using administrator access. So you simply click YES.

Now, wait again for 10 seconds.

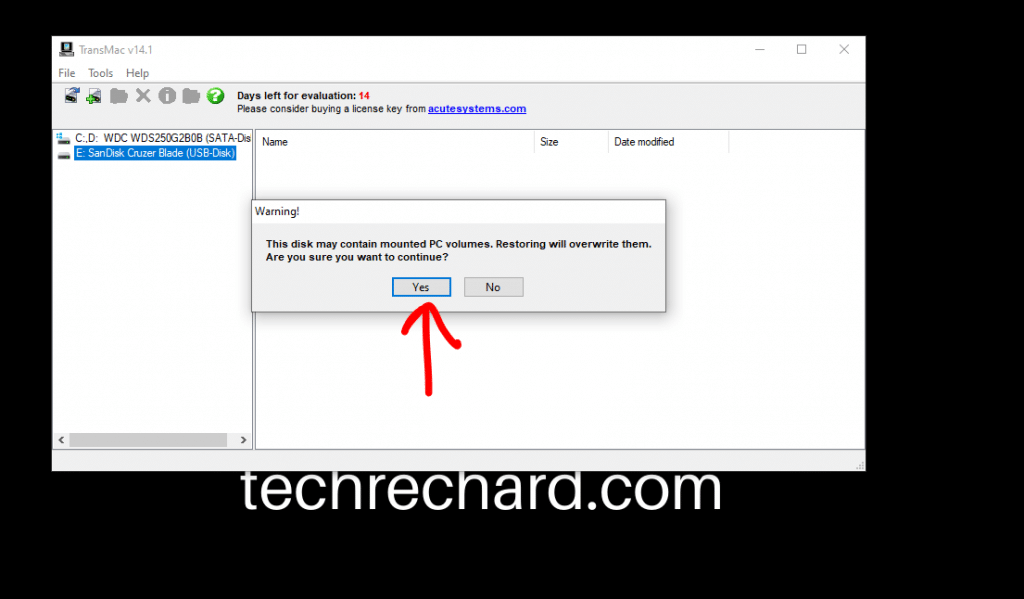
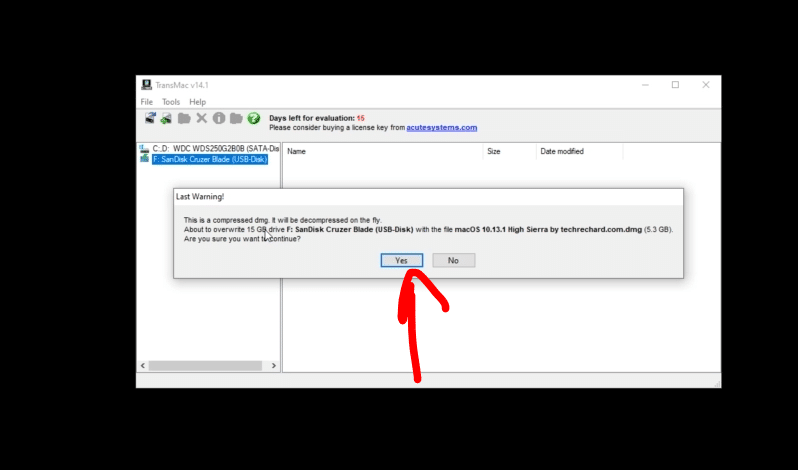
Now, right-click on your USB device and click Restore from Disk Image again. You will be prompted with a warning, and you can click Yes.

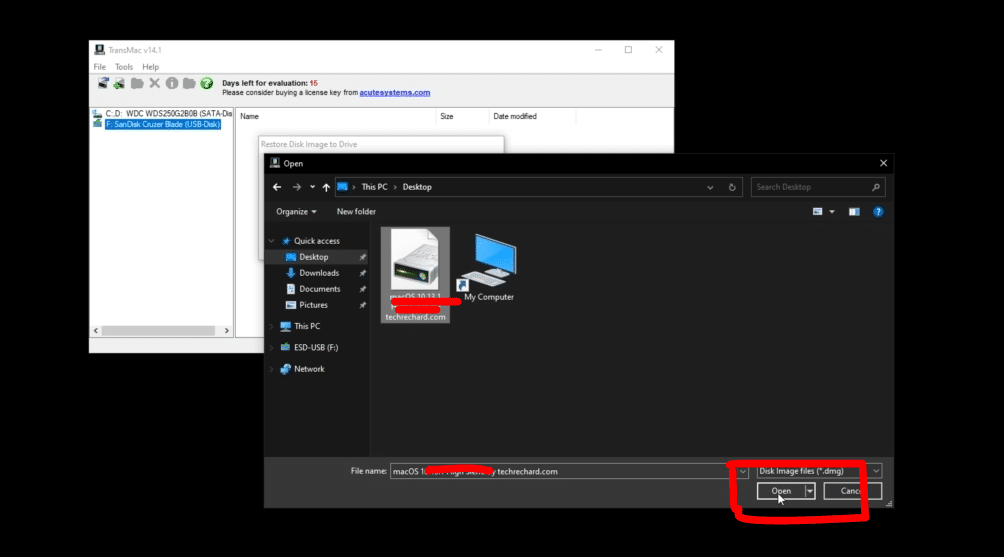
Now you select the Mojave DMG file that you have downloaded and upload it.

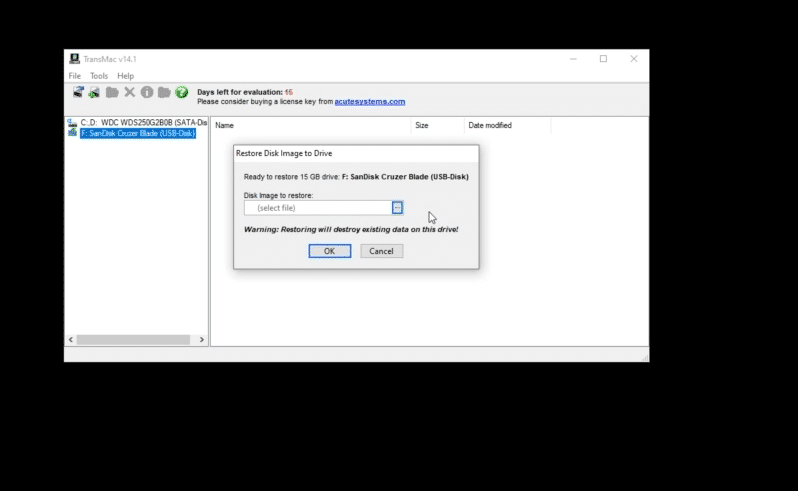
Now click OK,

Now you will get your last warning that the USD device will be formatted. You can click YES.

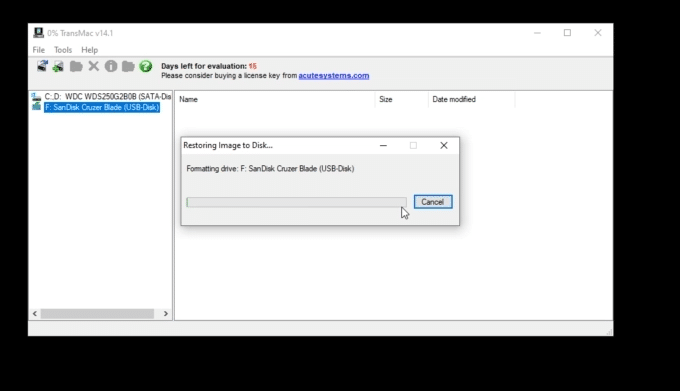
The restoration process will begin, and it will take around 20-30 minutes, depending upon your USB device’s speed. For me, it took around 17 minutes.

Once complete, you will see the following snapshot.

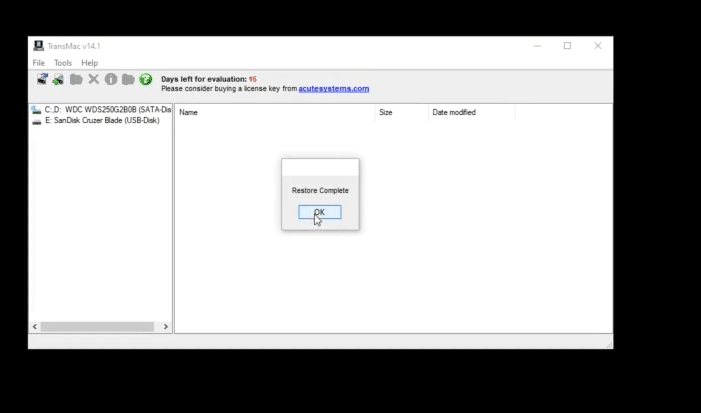
Now the Restore process is complete, and you can use this USB as macOS Mojave Bootable USB. To check the contents of this USB, you will need a MAC system. If you do not have a spare MAC, no need to worry. I will show you the contents of this USB created.
NOTE: This USB will not work on Windows anymore. If you plug it again on your desktop, it will ask you to format the drive. So do not worry. The contents of this USB will be visible only on a MAC system.

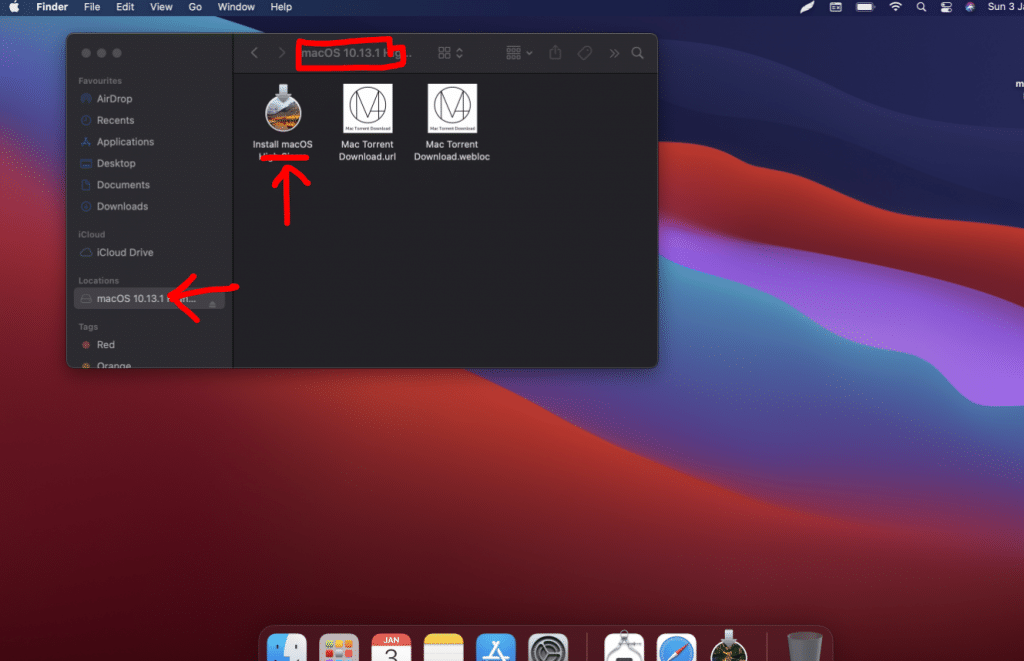
As you can see, the contents of the USB device. Now, you can use this as a macOS Mojave Bootable USB.
After this process is complete, you can use this USB to install macOS Mojave on your MAC system using the BIOS mode. You need to boot your MAC using this USB device at startup.
Final Words
I hope you have enjoyed this article and have successfully created macOS Mojave Bootable USB on Windows. If you find any issues, you can leave your comments below. I have also created a complete video tutorial that you use and learn How To Create macOS Mojave Bootable USB on Windows below.
