

In this article, we will discuss How to Perform a Clean Installation of Windows 11 Using a USB drive. We will also discuss some other methods to clean install Windows 11.
For advanced Windows users, a clean installation is a good tradition that will help get rid of accumulated garbage and return the computer to a new life.
A clean installation of Windows 11 is the process of installing a new copy of the OS without the ability to transfer user settings, drivers, applications, or old files, respectively.
For example, suppose a device has had the same installation for a long time. In that case, a clean installation of Windows 11 can solve problems with the boot, performance, updates, memory, and operation of individual applications. Also, this type of installation is the best way to upgrade to an older version, such as Windows 10, 7, or 8. Alternatively, you can use a clean installation to remove malware that has been downloaded to your device.
Microsoft recommends using several methods for a clean Windows 11, including a USB flash drive and Media Creation Tool. You can also use the “Reset Your Computer” feature to quickly clean your hard drive and reinstall the system without additional tools. If the device does not start, you can use advanced startup options to complete the installation.
Important: The installation process will delete all files on your device. Before continuing, it is recommended that you back up the files you need to removable media or the cloud. It’s important to understand that these instructions are designed to help you install Windows 11 when it’s officially available, not before.
Clean installation of Windows 11 using a USB Drive
Using a USB drive is the most common way to perform a clean installation of Windows 11. You can create a bootable flash drive using the Media Creation Tool (available later), command line, Rufus, etc. You can read this guide- How to Create Windows 11 Insider Preview Bootable USB Drive using Rufus.
If you choose this method, you should make sure that your device can boot from USB, which means that you will have to change the BIOS or UEFI settings.
To perform a clean installation of Windows 11 from USB, follow these steps:
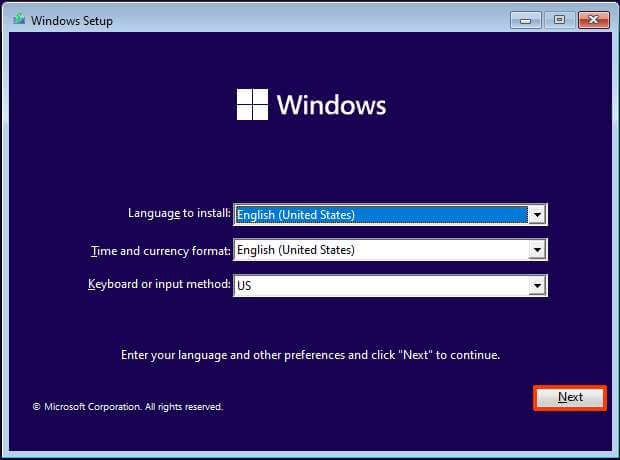
Step 1: Boot your COMPUTER from the prepared Windows 11 USB drive.
Step 2: In the Install Windows 11 window, click Next.
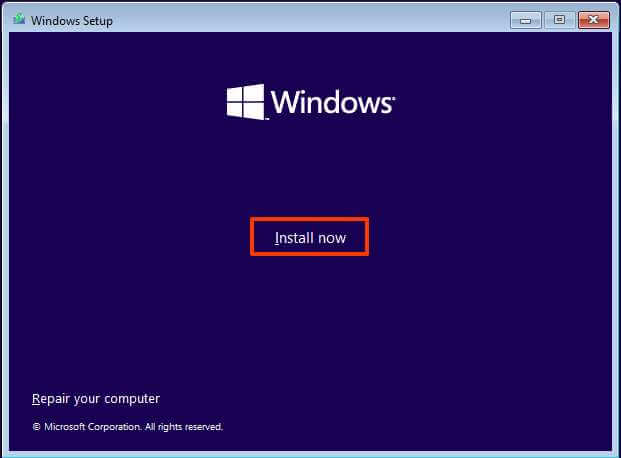
Step 3: Click the “Install” button.
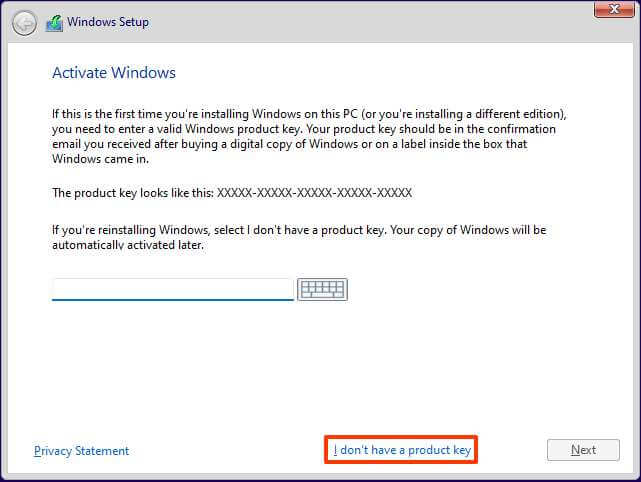
Step 4: Select the “I don’t have a product key” option. If your Windows has already been activated after installation, reactivation will occur automatically.
Step 5: Select the “Windows 11” edition that will be able to activate your license key (if applicable).
Step 6: Select the “I accept the terms of the license agreement” checkbox and click “Next.”
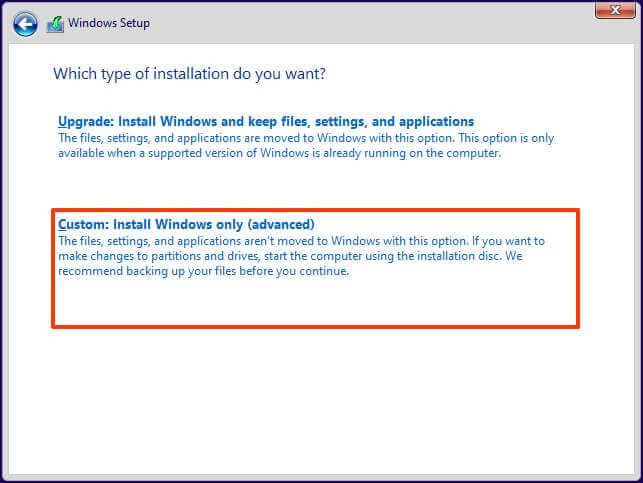
Step 7: Select the installation type “Custom: Windows Installation Only (for Advanced Users).”
If there are old partitions on the drive that you want to install Windows 11 on, select them one at a time, and click the “Remove” button. (Typically, Disc 0 is the disc that contains all the installation files.) After that, all the partitions “Disk 0” will be combined into one.
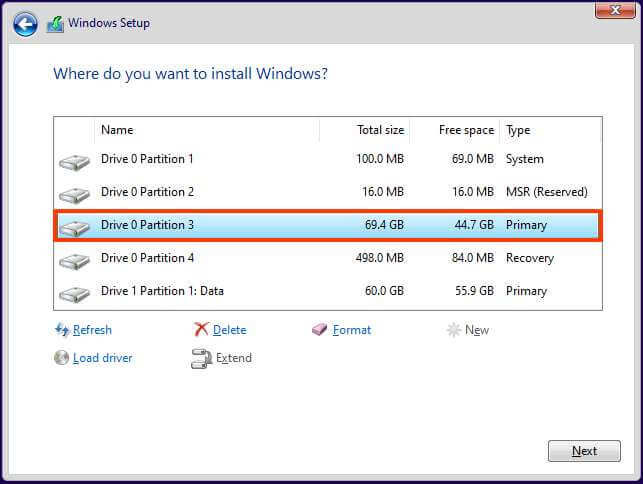
Warning: When you delete a partition, it also deletes all data on the disk. You also do not need to delete partitions from the second hard drive.
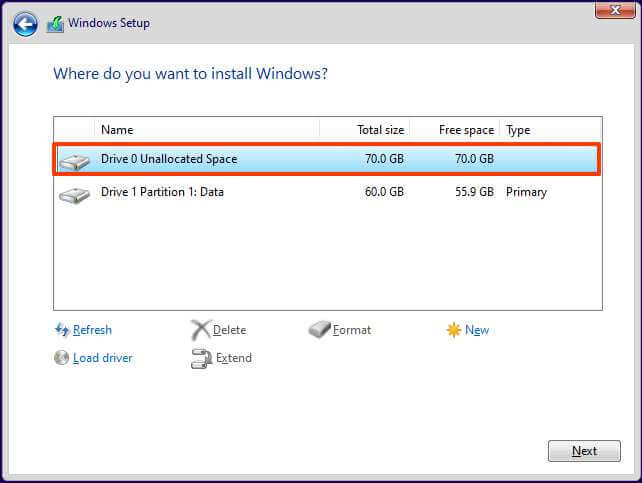
Step 8: Select the hard drive (unused disk space 0) to install Windows 11 and click “Next.”
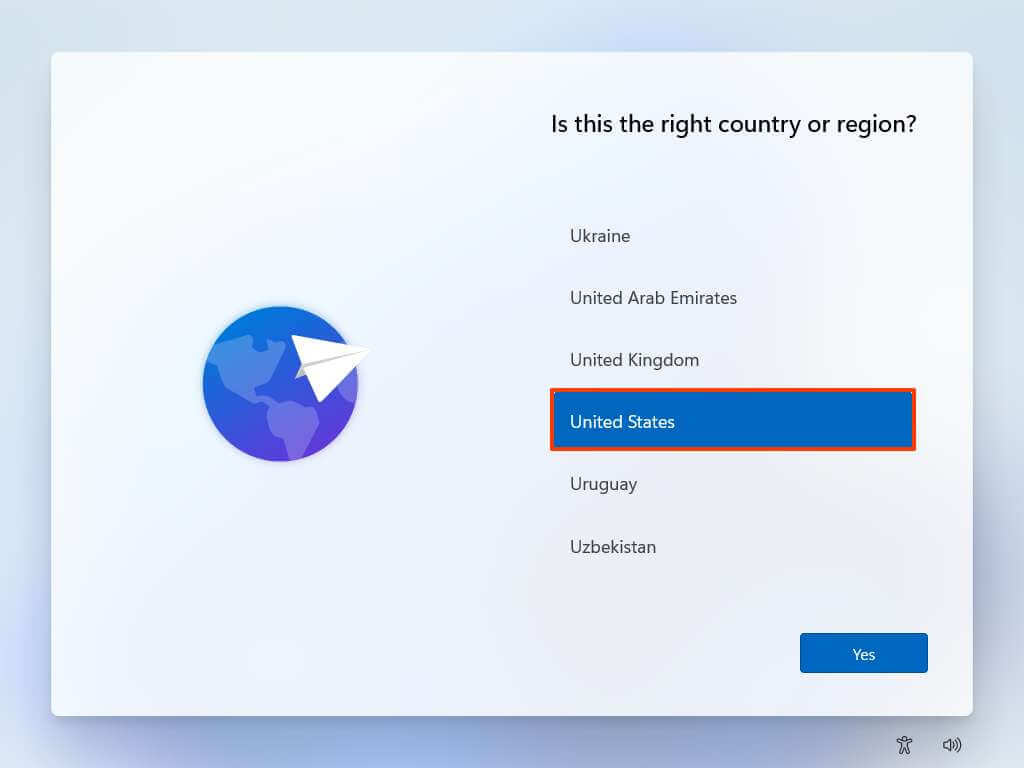
Step 9: After provisioning and installing, select your country/region on the first page of the new app (OOBE).
Click Yes.
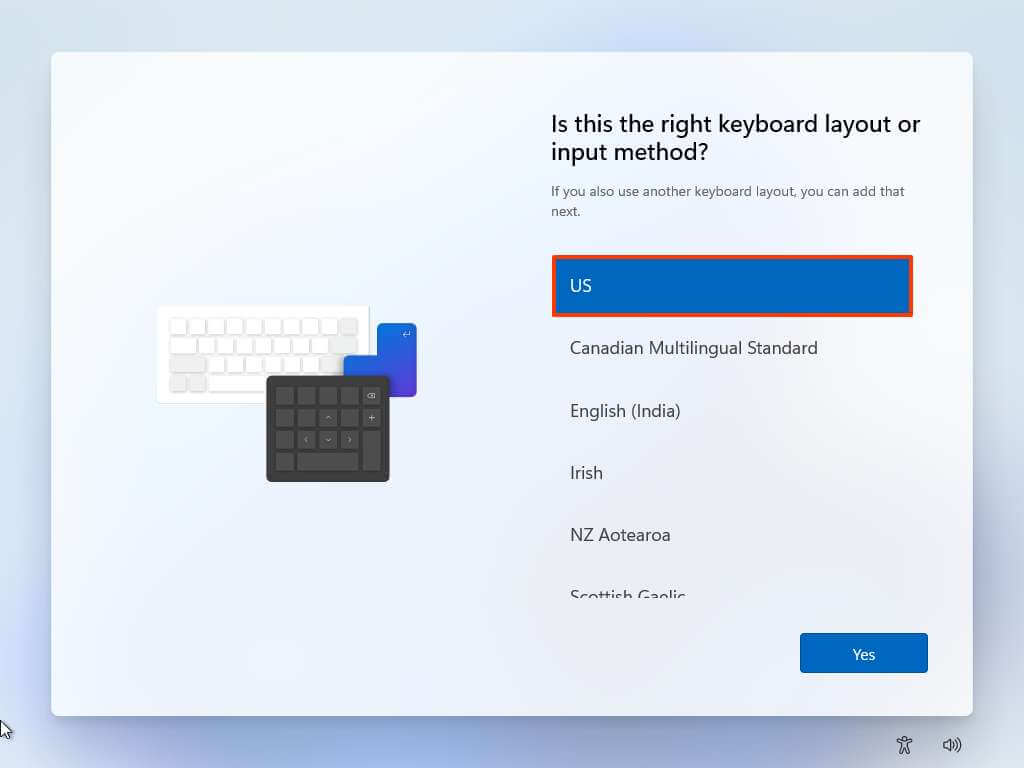
Step 10: Choose your preferred keyboard layout or input method setting. Click Yes
Step 11: Click the “Skip” button if you don’t need to customize the second layout (the English layout will be added automatically).
Step 12: If the computer uses an “Ethernet” connection, it will automatically connect to the network. If you have a wireless connection, you’ll need to set up the connection manually (a security key may be required).
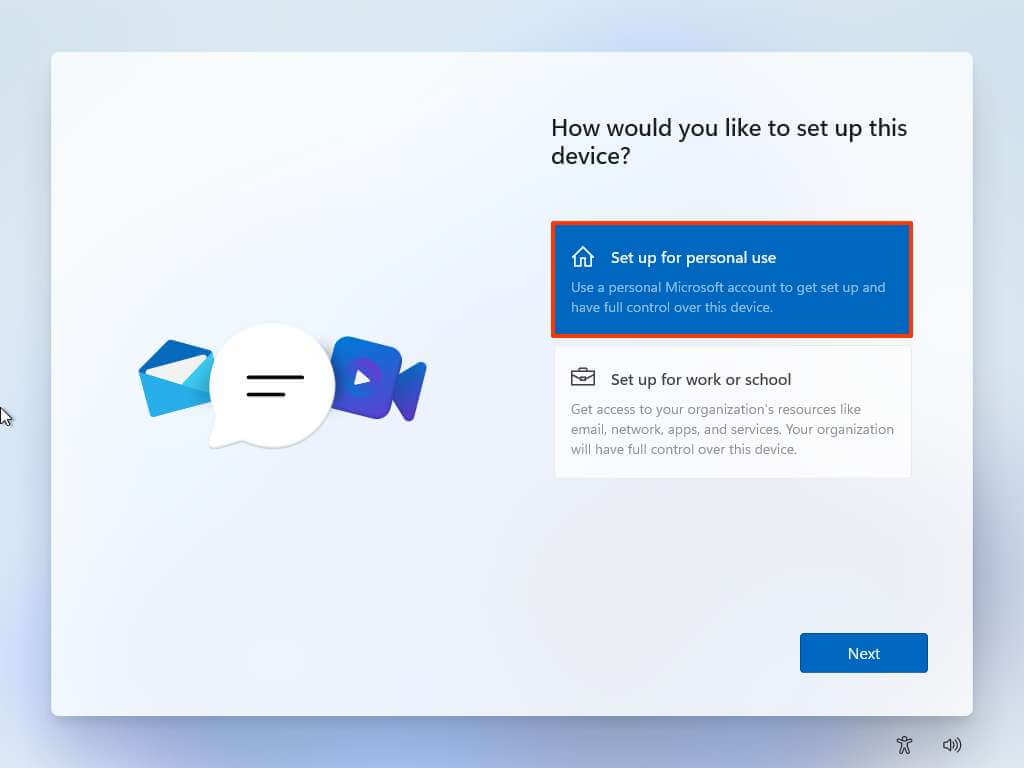
Step 13: Select the “Set up for personal use” option if installing Windows 11 Pro. In the “Home” version, there is no such possibility.
Click Next.
Step 14: Enter your Microsoft account email address, phone number, or Skype ID to create an account and click Next.
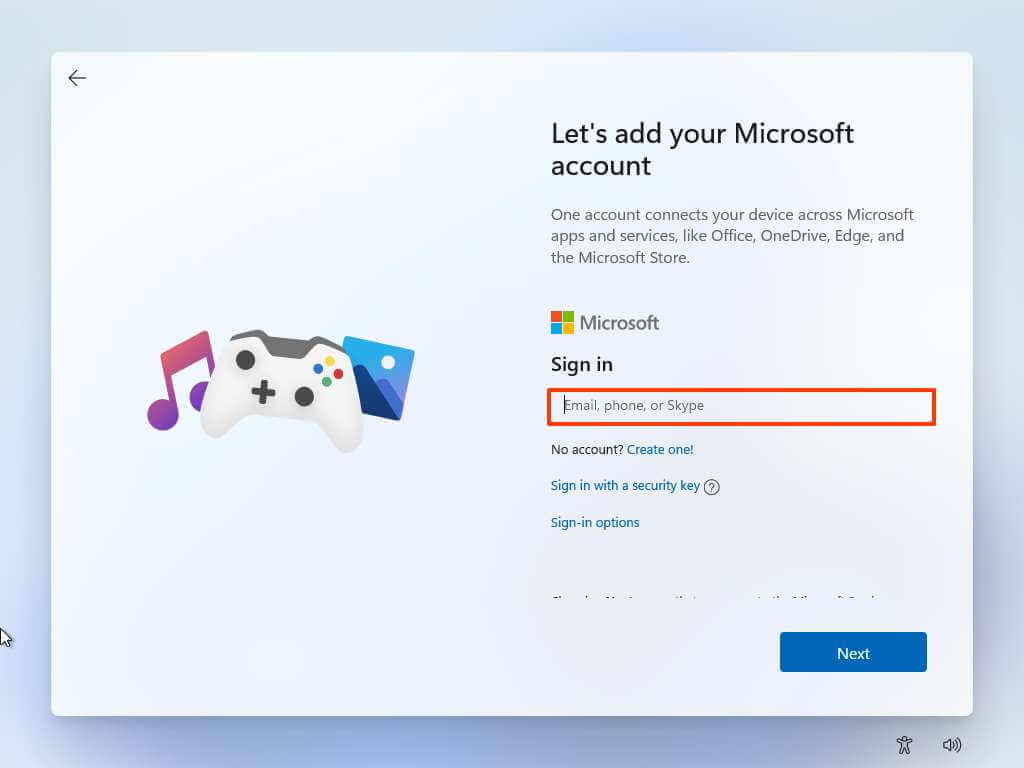
Step 15: Enter your Microsoft account password and click Sign In.
If you want to use “Local Account,” select the “Input Options” option.
In the next window, select “Standalone Account” and enter the desired username and password.
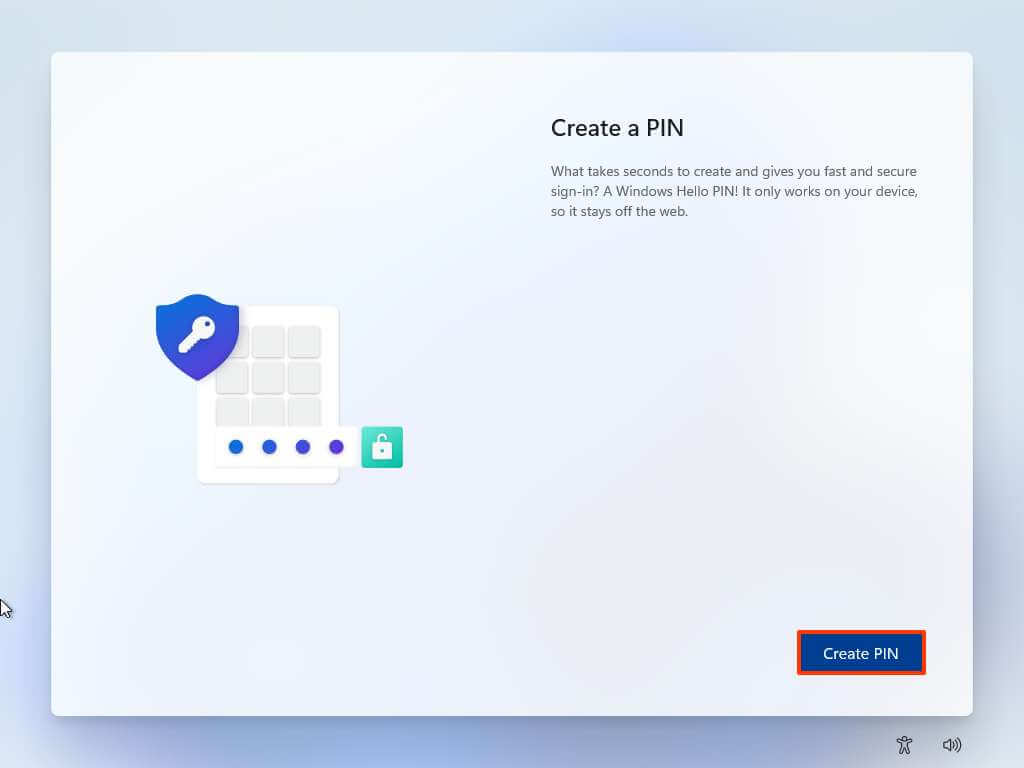
Step 16: Click the “Create PIN” button.
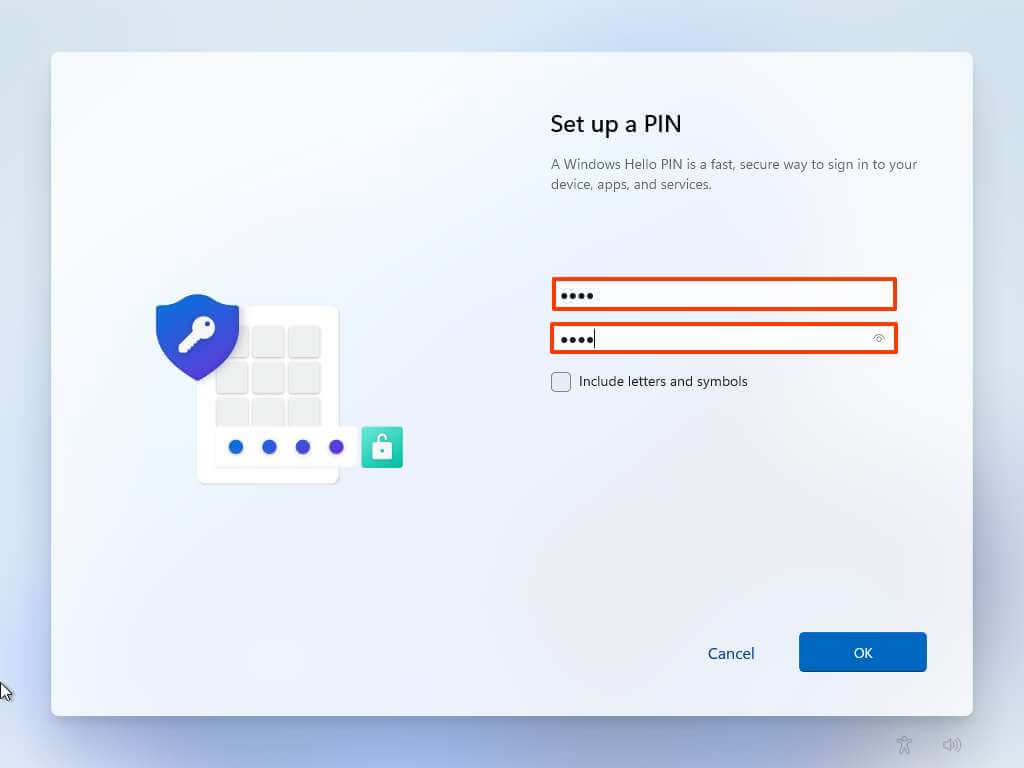
Step 17: Create a new four-digit PIN and click “OK.”
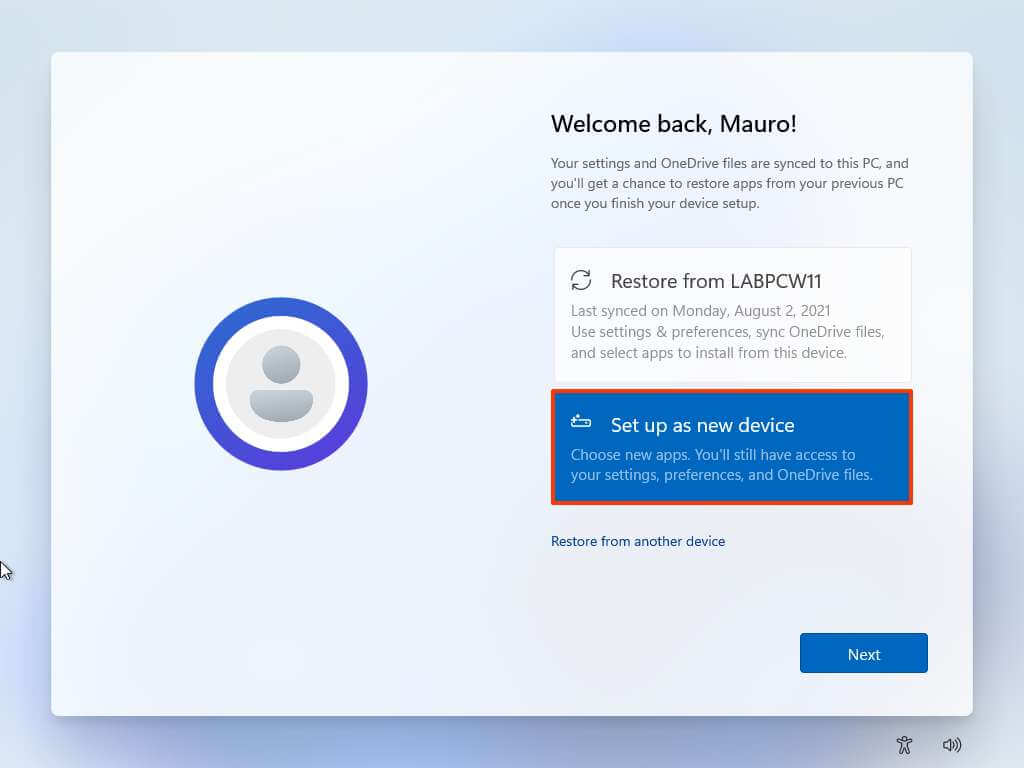
Step 18: Select the “Set up as new device” option. Or choose to restore settings from a previous installation. Click Next.
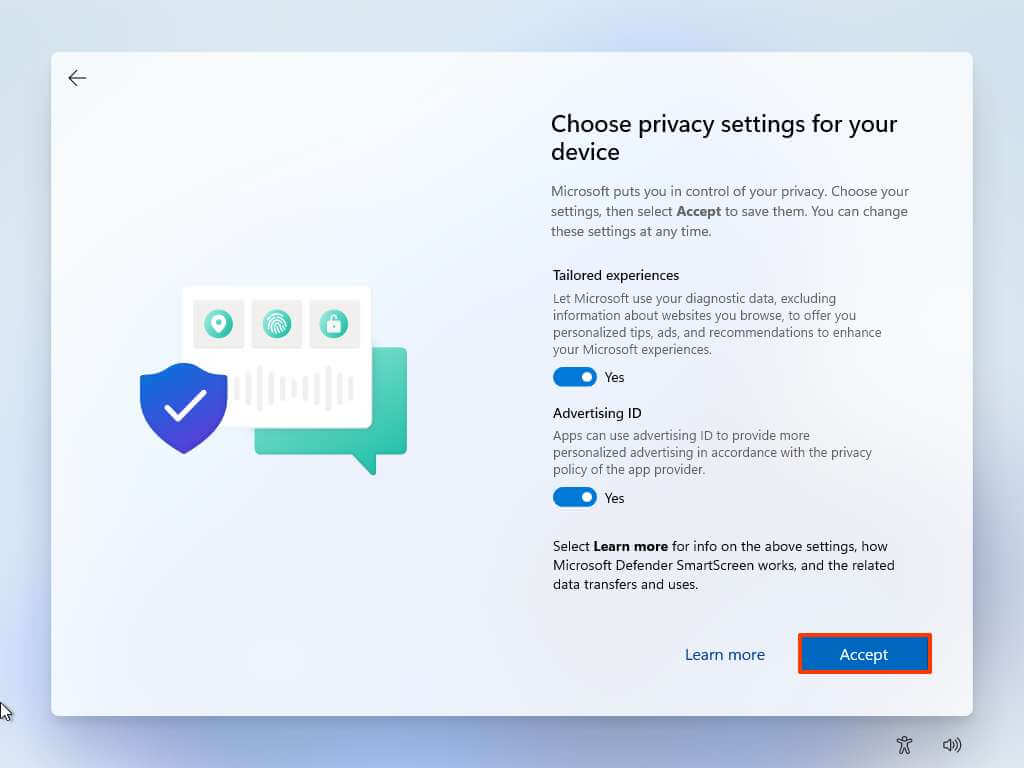
Step 19: Confirm the privacy settings that work best for your situation by turning individual settings on or off with a switch.
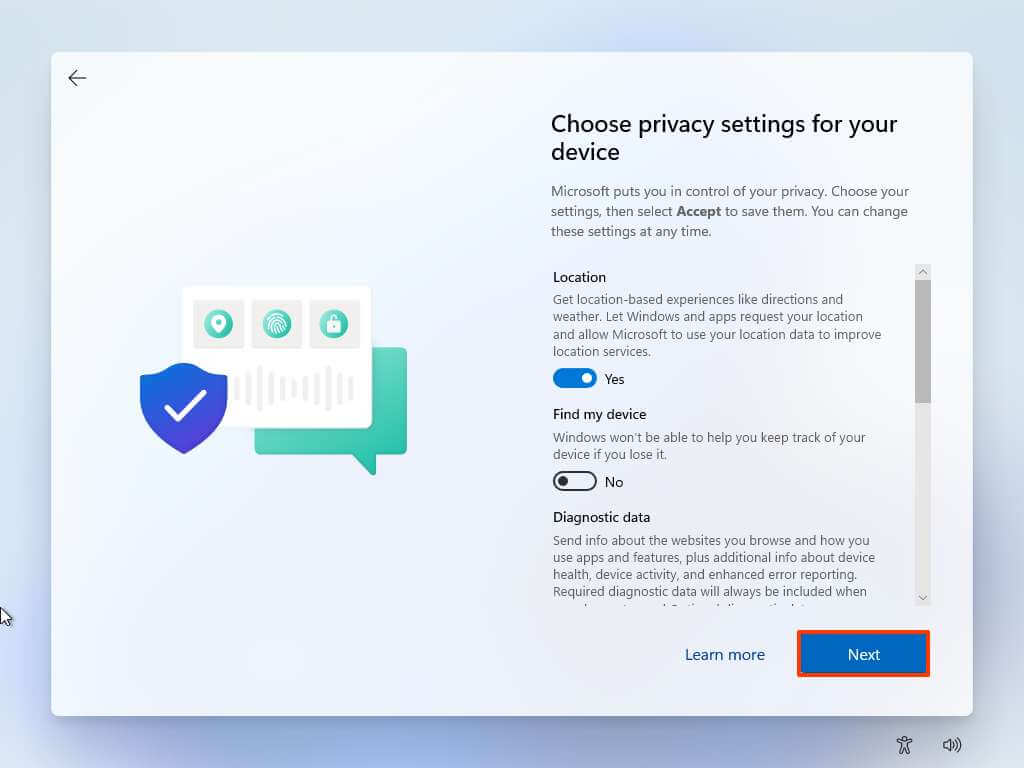
Click Next (several times), and then click Accept.
Step 20: (Optional) On the Experience Setup page, select one or more ways you plan to use the device so that Setup prompts you to configure tools and services during this process.
Click Accept to continue. Or click the Skip button to skip this part of the setup.

Step 21: Select “Back up my files with OneDrive” to automatically upload your Desktop, Pictures, and Documents folders to the cloud. Or select “Don’t back up my files.”
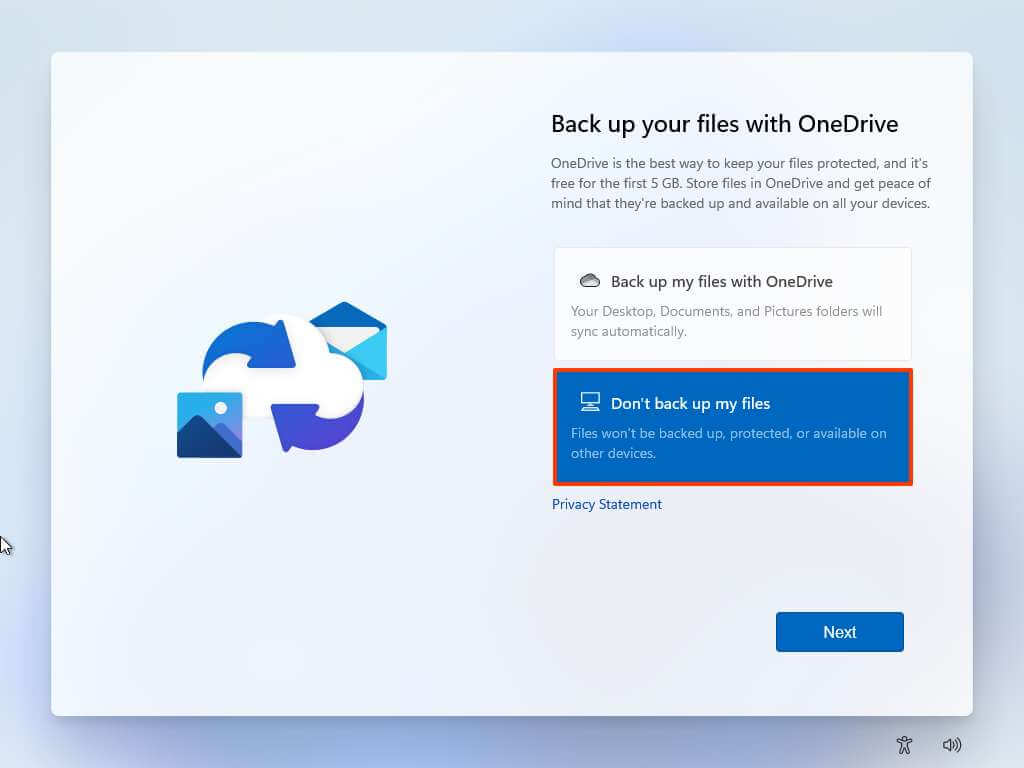
Click Next.
That’s it! After you complete these steps, Windows 11 will install on your PC. You can take the help of this guide and Activate Windows 11 for free.
If you’re not satisfied with Windows 11, it is always best to move to a more stable version of Windows. Here is How to roll back from Windows 11 to Windows 10: Complete Guide.
Conclusion: Clean installation of Windows 11 using a USB Drive
I hope this article was easy enough for you to install Windows 11 Using a USB drive. Suppose you are looking for other methods to install Windows 11. You can see the following methods.
- How to Perform a Clean Installation of Windows 11 Using a USB drive
- How to Perform a Clean Installation of Windows 11 with the media creation tool
- How to Clean install Windows 11 using Reset this PC local image
- How to Clean install Windows 11 using Reset this PC Cloud download
- How to Clean Install Windows 11 from Advanced startup options
- How to Clean install Windows 11 using File Explorer and an ISO file.


